Kubernetes: ดีพลอยแอปพลิเคชันแรก
คู่มือเชิงปฏิบัติสำหรับการดีพลอยแอปพลิเคชันบน Kubernetes ตั้งแต่การติดตั้ง minikube ไปจนถึง Deployments, Services และ ConfigMaps พร้อมตัวอย่างที่เป็นรูปธรรม
Kubernetes (K8s) ได้กลายเป็นมาตรฐานโดยพฤตินัยสำหรับการจัดการคอนเทนเนอร์ ออกแบบโดย Google และปัจจุบันดูแลโดย CNCF ระบบ Kubernetes ทำให้การดีพลอย การปรับขนาด และการจัดการแอปพลิเคชันที่ทำงานในคอนเทนเนอร์เป็นไปโดยอัตโนมัติ คู่มือนี้จะนำท่านผ่านการตั้งค่าคลัสเตอร์ในเครื่องและการดีพลอยแอปพลิเคชันแรก
แนะนำให้มีความรู้พื้นฐานเกี่ยวกับ Docker ก่อนที่จะเจาะลึกเรื่อง Kubernetes คอนเทนเนอร์เป็นองค์ประกอบพื้นฐานที่ Kubernetes จัดการ การอ่านคู่มือ Docker ก่อนจะทำให้เข้าใจแนวคิดที่นำเสนอที่นี่ได้ง่ายขึ้นมาก
ทำความเข้าใจสถาปัตยกรรม Kubernetes
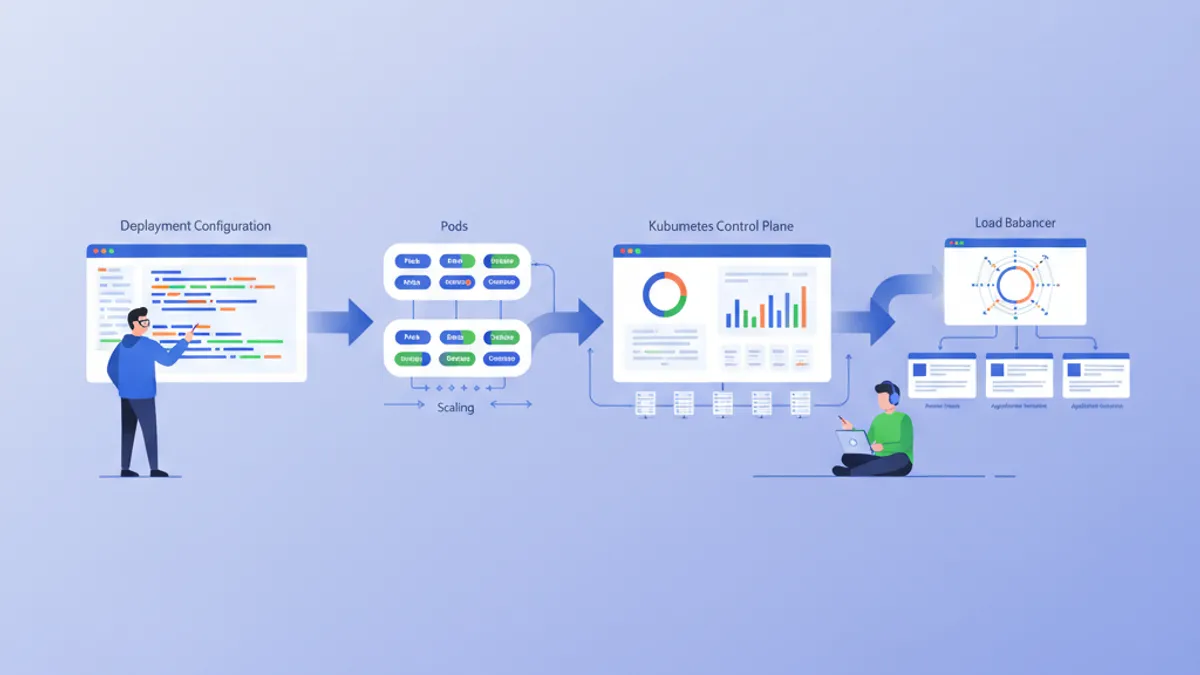
Kubernetes อาศัยสถาปัตยกรรมแบบ master-worker โดย Control Plane จะตัดสินใจระดับโลกเกี่ยวกับคลัสเตอร์ ขณะที่ Nodes จะรันเวิร์กโหลด
# Simplified Kubernetes Architecture

┌─────────────────────────────────────────────────────────────┐
│                      CONTROL PLANE                          │
│  ┌─────────────┐  ┌─────────────┐  ┌─────────────────────┐ │
│  │ API Server  │  │ Scheduler   │  │ Controller Manager  │ │
│  └─────────────┘  └─────────────┘  └─────────────────────┘ │
│  ┌─────────────────────────────────────────────────────────┐│
│  │                        etcd                             ││
│  └─────────────────────────────────────────────────────────┘│
└─────────────────────────────────────────────────────────────┘
                              │
         ┌────────────────────┼────────────────────┐
         ▼                    ▼                    ▼
┌─────────────────┐  ┌─────────────────┐  ┌─────────────────┐
│     NODE 1      │  │     NODE 2      │  │     NODE 3      │
│  ┌───────────┐  │  │  ┌───────────┐  │  │  ┌───────────┐  │
│  │  kubelet  │  │  │  │  kubelet  │  │  │  │  kubelet  │  │
│  ├───────────┤  │  │  ├───────────┤  │  │  ├───────────┤  │
│  │ kube-proxy│  │  │  │ kube-proxy│  │  │  │ kube-proxy│  │
│  ├───────────┤  │  │  ├───────────┤  │  │  ├───────────┤  │
│  │   Pods    │  │  │  │   Pods    │  │  │  │   Pods    │  │
│  └───────────┘  │  │  └───────────┘  │  │  └───────────┘  │
└─────────────────┘  └─────────────────┘  └─────────────────┘
API Server เป็นจุดเริ่มต้นสำหรับคำสั่งทั้งหมด etcd จัดเก็บสถานะของคลัสเตอร์ Scheduler มอบหมาย Pods ให้กับ Nodes Controllers รักษาสถานะที่ต้องการของระบบ
การตั้งค่าสภาพแวดล้อมในเครื่อง
มีหลายตัวเลือกสำหรับการทดลอง Kubernetes ในเครื่อง: minikube, kind, k3d หรือ Docker Desktop minikube ยังคงเป็นโซลูชันที่ได้รับความนิยมมากที่สุดสำหรับการเรียนรู้
# terminal
# Install kubectl (Kubernetes client)
curl -LO "https://dl.k8s.io/release/$(curl -L -s https://dl.k8s.io/release/stable.txt)/bin/linux/amd64/kubectl"
chmod +x kubectl
sudo mv kubectl /usr/local/bin/

# Verify installation
kubectl version --client
# Client Version: v1.31.0

# Install minikube
curl -LO https://storage.googleapis.com/minikube/releases/latest/minikube-linux-amd64
sudo install minikube-linux-amd64 /usr/local/bin/minikube

# Start the local cluster
minikube start --driver=docker --cpus=2 --memory=4096

# Check status
minikube status
# minikube: Running
# cluster: Running
# kubectl: Configured
minikube สร้างคลัสเตอร์ Kubernetes แบบโหนดเดียวภายในเครื่องเสมือนหรือคอนเทนเนอร์ Docker ทรัพยากรที่จัดสรร (CPU หน่วยความจำ) สามารถปรับเปลี่ยนได้ตามความต้องการ
# terminal
# Access the Kubernetes dashboard (web interface)
minikube dashboard

# Check cluster nodes
kubectl get nodes
# NAME       STATUS   ROLES           AGE   VERSION
# minikube   Ready    control-plane   5m    v1.31.0

# Detailed cluster information
kubectl cluster-infoKind (Kubernetes in Docker) เริ่มต้นได้เร็วกว่าและเหมาะกับการทดสอบ CI/CD มากกว่า K3d ใช้ k3s ซึ่งเป็น Kubernetes รุ่นเบา Docker Desktop รวม Kubernetes ไว้โดยตรงแต่ใช้ทรัพยากรมากกว่า
Pods: หน่วยพื้นฐาน
Pod คือหน่วยที่ดีพลอยได้ขนาดเล็กที่สุดใน Kubernetes Pod ห่อหุ้มคอนเทนเนอร์หนึ่งตัวหรือมากกว่าที่ใช้เครือข่ายและที่จัดเก็บข้อมูลร่วมกัน
# pod-simple.yaml
apiVersion: v1
kind: Pod
metadata:
  # Unique Pod name within the namespace
  name: nginx-pod
  # Labels for organization and selection
  labels:
    app: nginx
    environment: development
spec:
  containers:
    # Main container definition
    - name: nginx
      # Docker image to use
      image: nginx:1.25-alpine
      # Ports exposed by the container
      ports:
        - containerPort: 80
      # Container resource allocation
      resources:
        requests:
          memory: "64Mi"
          cpu: "100m"
        limits:
          memory: "128Mi"
          cpu: "200m"
ไฟล์ YAML manifest นี้ประกาศ Pod ที่มีคอนเทนเนอร์ nginx เพียงตัวเดียว Labels ช่วยในการระบุและเลือก Pods ส่วน resources กำหนดการรับประกันขั้นต่ำ (requests) และขีดจำกัดสูงสุด (limits)
# terminal
# Create the Pod
kubectl apply -f pod-simple.yaml
# pod/nginx-pod created

# List Pods
kubectl get pods
# NAME        READY   STATUS    RESTARTS   AGE
# nginx-pod   1/1     Running   0          30s

# Full Pod details
kubectl describe pod nginx-pod

# Container logs
kubectl logs nginx-pod

# Execute a command inside the Pod
kubectl exec -it nginx-pod -- /bin/sh

# Delete the Pod
kubectl delete pod nginx-pod
Pods มีลักษณะเป็นชั่วคราวโดยธรรมชาติ ในกรณีที่เกิดข้อผิดพลาดหรือถูกลบ Kubernetes จะไม่สร้างใหม่โดยอัตโนมัติ Deployments แก้ไขข้อจำกัดนี้
Deployments: การจัดการแบบประกาศ
Deployment กำหนดสถานะที่ต้องการสำหรับชุดของ Pods ที่เหมือนกัน Kubernetes รักษาสถานะนี้โดยอัตโนมัติด้วยการสร้าง อัปเดต หรือลบ Pods ตามความจำเป็น
# deployment.yaml
apiVersion: apps/v1
kind: Deployment
metadata:
  # Deployment name
  name: webapp-deployment
  labels:
    app: webapp
spec:
  # Desired number of replicas
  replicas: 3
  # Selector to identify managed Pods
  selector:
    matchLabels:
      app: webapp
  # Template for Pod creation
  template:
    metadata:
      labels:
        app: webapp
    spec:
      containers:
        - name: webapp
          image: nginx:1.25-alpine
          ports:
            - containerPort: 80
          resources:
            requests:
              memory: "64Mi"
              cpu: "100m"
            limits:
              memory: "128Mi"
              cpu: "200m"
          # Liveness probe: restarts container on failure
          livenessProbe:
            httpGet:
              path: /
              port: 80
            initialDelaySeconds: 10
            periodSeconds: 10
          # Readiness probe: removes Pod from Service on failure
          readinessProbe:
            httpGet:
              path: /
              port: 80
            initialDelaySeconds: 5
            periodSeconds: 5
Deployment สร้าง ReplicaSet ที่รักษา Pods ที่เหมือนกัน 3 ตัว Probes ตรวจสอบสถานะของคอนเทนเนอร์และอนุญาตให้ Kubernetes ตอบสนองต่อปัญหาโดยอัตโนมัติ
# terminal
# Create the Deployment
kubectl apply -f deployment.yaml
# deployment.apps/webapp-deployment created

# Verify the Deployment
kubectl get deployments
# NAME                READY   UP-TO-DATE   AVAILABLE   AGE
# webapp-deployment   3/3     3            3           1m

# List Pods created by the Deployment
kubectl get pods -l app=webapp
# NAME                                READY   STATUS    RESTARTS   AGE
# webapp-deployment-7d9f8b6c4-abc12   1/1     Running   0          1m
# webapp-deployment-7d9f8b6c4-def34   1/1     Running   0          1m
# webapp-deployment-7d9f8b6c4-ghi56   1/1     Running   0          1m

# Manual scaling
kubectl scale deployment webapp-deployment --replicas=5

# Deployment history
kubectl rollout history deployment webapp-deployment
การลบ Pod จะกระตุ้นการสร้าง Pod ใหม่โดยอัตโนมัติเพื่อรักษาจำนวนเรพลิคาที่ต้องการ
พร้อมที่จะพิชิตการสัมภาษณ์ DevOps แล้วหรือยังครับ?
ฝึกฝนด้วยตัวจำลองแบบโต้ตอบ, flashcards และแบบทดสอบเทคนิคครับ
Services: การเปิดเผยเครือข่าย
Pods มีที่อยู่ IP ที่เป็นชั่วคราว Services จัดเตรียมที่อยู่ที่เสถียรเพื่อเข้าถึงชุดของ Pods พร้อมการกระจายโหลดในตัว
# service.yaml
apiVersion: v1
kind: Service
metadata:
  name: webapp-service
spec:
  # Service type: ClusterIP (internal), NodePort, LoadBalancer
  type: ClusterIP
  # Selector to identify target Pods
  selector:
    app: webapp
  ports:
    # Port exposed by the Service
    - port: 80
      # Target container port
      targetPort: 80
      # Protocol (TCP by default)
      protocol: TCP
Service ClusterIP นี้เข้าถึงได้จากภายในคลัสเตอร์เท่านั้น คำขอไปยัง webapp-service:80 จะถูกกระจายไประหว่าง Pods ที่มี label app: webapp
# terminal
# Create the Service
kubectl apply -f service.yaml
# service/webapp-service created

# List Services
kubectl get services
# NAME             TYPE        CLUSTER-IP      EXTERNAL-IP   PORT(S)   AGE
# webapp-service   ClusterIP   10.96.123.456   <none>        80/TCP    30s

# Test from a temporary Pod
kubectl run curl-test --rm -it --image=curlimages/curl -- curl webapp-service

# Detailed Service description
kubectl describe service webapp-service
เพื่อเปิดเผยแอปพลิเคชันออกนอกคลัสเตอร์ จำเป็นต้องใช้ประเภท NodePort หรือ LoadBalancer
# service-nodeport.yaml
apiVersion: v1
kind: Service
metadata:
  name: webapp-nodeport
spec:
  type: NodePort
  selector:
    app: webapp
  ports:
    - port: 80
      targetPort: 80
      # Port on each Node (30000-32767)
      nodePort: 30080
เมื่อใช้ minikube คำสั่ง minikube service webapp-nodeport จะเปิดเบราว์เซอร์ไปยัง URL ที่ถูกต้องโดยอัตโนมัติ
ConfigMaps: การกำหนดค่าภายนอก
ConfigMaps แยกการกำหนดค่าออกจากโค้ด ค่าต่างๆ จะถูกฉีดเป็นตัวแปรสภาพแวดล้อมหรือถูกเมาท์เป็นไฟล์
# configmap.yaml
apiVersion: v1
kind: ConfigMap
metadata:
  name: webapp-config
data:
  # Simple key-value pairs
  APP_ENV: "production"
  LOG_LEVEL: "info"
  MAX_CONNECTIONS: "100"
  # Multiline configuration (complete file)
  nginx.conf: |
    server {
        listen 80;
        server_name localhost;

        location / {
            root /usr/share/nginx/html;
            index index.html;
        }

        location /health {
            return 200 'OK';
            add_header Content-Type text/plain;
        }
    }
ConfigMaps จัดเก็บข้อมูลที่ไม่ละเอียดอ่อน สำหรับข้อมูลลับ (รหัสผ่าน โทเค็น) Secrets ของ Kubernetes เหมาะสมกว่า
# deployment-with-config.yaml
apiVersion: apps/v1
kind: Deployment
metadata:
  name: webapp-configured
spec:
  replicas: 2
  selector:
    matchLabels:
      app: webapp-configured
  template:
    metadata:
      labels:
        app: webapp-configured
    spec:
      containers:
        - name: webapp
          image: nginx:1.25-alpine
          ports:
            - containerPort: 80
          # Inject environment variables
          envFrom:
            - configMapRef:
                name: webapp-config
          # Or individual variables
          env:
            - name: SPECIFIC_VAR
              valueFrom:
                configMapKeyRef:
                  name: webapp-config
                  key: LOG_LEVEL
          # Mount configuration file
          volumeMounts:
            - name: nginx-config
              mountPath: /etc/nginx/conf.d/default.conf
              subPath: nginx.conf
      volumes:
        - name: nginx-config
          configMap:
            name: webapp-config
การกำหนดค่านี้ฉีดตัวแปรสภาพแวดล้อมและเมาท์ไฟล์ nginx.conf ภายในคอนเทนเนอร์
# terminal
# Apply resources
kubectl apply -f configmap.yaml
kubectl apply -f deployment-with-config.yaml

# Verify environment variables
kubectl exec deployment/webapp-configured -- printenv | grep APP_ENV
# APP_ENV=production

# Verify mounted file
kubectl exec deployment/webapp-configured -- cat /etc/nginx/conf.d/default.confการแก้ไข ConfigMap ไม่ได้รีสตาร์ท Pods โดยอัตโนมัติ เพื่อใช้การเปลี่ยนแปลง จำเป็นต้องรีสตาร์ทด้วยตนเอง: kubectl rollout restart deployment webapp-configured เครื่องมืออย่าง Reloader ทำให้กระบวนการนี้เป็นอัตโนมัติ
Secrets: ข้อมูลที่ละเอียดอ่อน
Secrets จัดเก็บข้อมูลที่ละเอียดอ่อน เช่น รหัสผ่าน โทเค็น หรือคีย์ SSH แม้ว่าจะถูกเข้ารหัสแบบ base64 แต่โดยค่าเริ่มต้นจะไม่ถูกเข้ารหัสในขณะพักอยู่
# secret.yaml
apiVersion: v1
kind: Secret
metadata:
  name: webapp-secrets
type: Opaque
# Values must be base64-encoded
data:
  # echo -n 'admin' | base64
  username: YWRtaW4=
  # echo -n 'supersecretpassword' | base64
  password: c3VwZXJzZWNyZXRwYXNzd29yZA==
---
# Alternative: stringData accepts plain text values
apiVersion: v1
kind: Secret
metadata:
  name: webapp-secrets-plain
type: Opaque
stringData:
  username: admin
  password: supersecretpassword
Secrets ถูกฉีดในลักษณะเดียวกับ ConfigMaps
# deployment-with-secrets.yaml
apiVersion: apps/v1
kind: Deployment
metadata:
  name: webapp-secure
spec:
  replicas: 1
  selector:
    matchLabels:
      app: webapp-secure
  template:
    metadata:
      labels:
        app: webapp-secure
    spec:
      containers:
        - name: webapp
          image: nginx:1.25-alpine
          env:
            - name: DB_USERNAME
              valueFrom:
                secretKeyRef:
                  name: webapp-secrets
                  key: username
            - name: DB_PASSWORD
              valueFrom:
                secretKeyRef:
                  name: webapp-secrets
key: password# terminal
# Create the Secret
kubectl apply -f secret.yaml
# List Secrets (values are not displayed)
kubectl get secrets
# NAME TYPE DATA AGE
# webapp-secrets Opaque 2 10s
# Decode a value
kubectl get secret webapp-secrets -o jsonpath='{.data.password}' | base64 -d
# supersecretpasswordNamespaces: การแยกเชิงตรรกะ
Namespaces แบ่งคลัสเตอร์ออกเป็นสภาพแวดล้อมเสมือนที่แยกออกจากกัน การแบ่งนี้ช่วยให้สามารถจัดการหลายทีมหรือสภาพแวดล้อมบนคลัสเตอร์เดียวกันได้
# namespace.yaml
apiVersion: v1
kind: Namespace
metadata:
  name: development
  labels:
    environment: development
---
apiVersion: v1
kind: Namespace
metadata:
  name: staging
  labels:
    environment: staging
ทรัพยากรแต่ละชนิดสามารถสร้างใน namespace เฉพาะได้
# terminal
# Create namespaces
kubectl apply -f namespace.yaml

# List namespaces
kubectl get namespaces
# NAME          STATUS   AGE
# default       Active   1d
# development   Active   10s
# staging       Active   10s

# Create a resource in a specific namespace
kubectl apply -f deployment.yaml -n development

# List Pods in a namespace
kubectl get pods -n development

# Change default namespace
kubectl config set-context --current --namespace=development
ทรัพยากรในต่าง namespace ถูกแยกออกจากกันโดยค่าเริ่มต้น การสื่อสารข้าม namespace ทำผ่าน DNS ภายใน: service-name.namespace.svc.cluster.local
แอปพลิเคชันสมบูรณ์: การประกอบทรัพยากร
ต่อไปนี้คือแอปพลิเคชันที่สมบูรณ์ซึ่งรวมแนวคิดทั้งหมดที่นำเสนอ
# complete-app.yaml
---
# Dedicated Namespace
apiVersion: v1
kind: Namespace
metadata:
  name: myapp
---
# ConfigMap for configuration
apiVersion: v1
kind: ConfigMap
metadata:
  name: myapp-config
  namespace: myapp
data:
  APP_NAME: "MyApp"
  LOG_LEVEL: "info"
---
# Secret for sensitive data
apiVersion: v1
kind: Secret
metadata:
  name: myapp-secrets
  namespace: myapp
type: Opaque
stringData:
  api-key: "sk-1234567890abcdef"
---
# Deployment with 3 replicas
apiVersion: apps/v1
kind: Deployment
metadata:
  name: myapp
  namespace: myapp
spec:
  replicas: 3
  selector:
    matchLabels:
      app: myapp
  template:
    metadata:
      labels:
        app: myapp
    spec:
      containers:
        - name: myapp
          image: nginx:1.25-alpine
          ports:
            - containerPort: 80
          envFrom:
            - configMapRef:
                name: myapp-config
          env:
            - name: API_KEY
              valueFrom:
                secretKeyRef:
                  name: myapp-secrets
                  key: api-key
          resources:
            requests:
              memory: "64Mi"
              cpu: "100m"
            limits:
              memory: "128Mi"
              cpu: "200m"
          livenessProbe:
            httpGet:
              path: /
              port: 80
            initialDelaySeconds: 10
            periodSeconds: 10
          readinessProbe:
            httpGet:
              path: /
              port: 80
            initialDelaySeconds: 5
            periodSeconds: 5
---
# Service for internal exposure
apiVersion: v1
kind: Service
metadata:
  name: myapp-service
  namespace: myapp
spec:
  type: ClusterIP
  selector:
    app: myapp
  ports:
    - port: 80
      targetPort: 80
---
# NodePort Service for external access (development)
apiVersion: v1
kind: Service
metadata:
  name: myapp-nodeport
  namespace: myapp
spec:
  type: NodePort
  selector:
    app: myapp
  ports:
    - port: 80
      targetPort: 80
      nodePort: 30100
ไฟล์เดียวนี้ดีพลอยแอปพลิเคชันที่สมบูรณ์ด้วยการกำหนดค่าภายนอก ข้อมูลลับ ความพร้อมใช้งานสูง และการเปิดเผยเครือข่าย
# terminal
# Deploy the complete application
kubectl apply -f complete-app.yaml

# Verify all resources
kubectl get all -n myapp
# NAME                         READY   STATUS    RESTARTS   AGE
# pod/myapp-7d9f8b6c4-abc12    1/1     Running   0          30s
# pod/myapp-7d9f8b6c4-def34    1/1     Running   0          30s
# pod/myapp-7d9f8b6c4-ghi56    1/1     Running   0          30s
#
# NAME                    TYPE        CLUSTER-IP      PORT(S)        AGE
# service/myapp-service   ClusterIP   10.96.123.456   80/TCP         30s
# service/myapp-nodeport  NodePort    10.96.123.789   80:30100/TCP   30s
#
# NAME                    READY   UP-TO-DATE   AVAILABLE   AGE
# deployment.apps/myapp   3/3     3            3           30s

# Access the application with minikube
minikube service myapp-nodeport -n myapp
การอัปเดตและรอลล์แบ็ก
Kubernetes ทำให้การอัปเดตแบบค่อยเป็นค่อยไปและการรอลล์แบ็กง่ายขึ้น
# terminal
# Update the Deployment image
kubectl set image deployment/myapp myapp=nginx:1.26-alpine -n myapp

# Track deployment in real-time
kubectl rollout status deployment/myapp -n myapp
# Waiting for deployment "myapp" rollout to finish: 1 out of 3 new replicas updated
# Waiting for deployment "myapp" rollout to finish: 2 out of 3 new replicas updated
# deployment "myapp" successfully rolled out

# Revision history
kubectl rollout history deployment/myapp -n myapp
# REVISION  CHANGE-CAUSE
# 1         <none>
# 2         <none>

# Rollback to previous revision
kubectl rollout undo deployment/myapp -n myapp

# Rollback to a specific revision
kubectl rollout undo deployment/myapp --to-revision=1 -n myapp
กลยุทธ์การอัปเดตเริ่มต้น (RollingUpdate) ค่อยๆ แทนที่ Pods เก่าด้วย Pods ใหม่เพื่อรับประกันความพร้อมใช้งานอย่างต่อเนื่อง
คำสั่ง kubectl ที่จำเป็น
# terminal
# ========================================
# General Information
# ========================================
kubectl cluster-info                    # Cluster info
kubectl get nodes -o wide               # Nodes with details
kubectl api-resources                   # List resource types

# ========================================
# Resource Management
# ========================================
kubectl get all                         # All namespace resources
kubectl get pods -A                     # Pods from all namespaces
kubectl get pods -o wide                # Pods with IP and Node
kubectl get pods -w                     # Watch mode (real-time)

# ========================================
# Inspection and Debugging
# ========================================
kubectl describe pod <name>             # Full details
kubectl logs <pod> -f                   # Streaming logs
kubectl logs <pod> -c <container>       # Specific container logs
kubectl exec -it <pod> -- /bin/sh       # Interactive shell
kubectl port-forward <pod> 8080:80      # Local tunnel to Pod

# ========================================
# Editing and Deletion
# ========================================
kubectl edit deployment <name>          # Live editing (vi)
kubectl delete -f manifest.yaml         # Delete via file
kubectl delete pod <name> --force       # Force deletion
บทสรุป
Kubernetes เปลี่ยนแปลงการจัดการแอปพลิเคชันที่ทำงานในคอนเทนเนอร์โดยจัดเตรียมเฟรมเวิร์กที่ประกาศ ทนทาน และขยายได้ แนวคิดพื้นฐานที่นำเสนอที่นี่เป็นรากฐานสำหรับการดีพลอยที่พร้อมสำหรับการใช้งานจริง
รายการตรวจสอบสำหรับการดีพลอย Kubernetes ครั้งแรก
- ✅ คลัสเตอร์ในเครื่องที่ทำงานได้ (minikube, kind หรือ k3d)
- ✅ ติดตั้งและกำหนดค่า kubectl แล้ว
- ✅ Deployment พร้อมเรพลิคาและ health probes
- ✅ Service สำหรับการเปิดเผยเครือข่าย
- ✅ ConfigMap สำหรับการกำหนดค่าภายนอก
- ✅ Secret สำหรับข้อมูลที่ละเอียดอ่อน
- ✅ Namespace สำหรับการแยก
- ✅ กำหนดขีดจำกัดทรัพยากรแล้ว (requests/limits)
- ✅ เชี่ยวชาญกลยุทธ์การอัปเดตและรอลล์แบ็ก
เริ่มฝึกซ้อมเลย!
ทดสอบความรู้ของคุณด้วยตัวจำลองสัมภาษณ์และแบบทดสอบเทคนิคครับ
การเชี่ยวชาญ Kubernetes เปิดประตูสู่สถาปัตยกรรม cloud-native ที่ขยายได้ ขั้นตอนต่อไปรวมถึงการสำรวจ Ingress Controllers สำหรับการกำหนดเส้นทาง HTTP, PersistentVolumes สำหรับการจัดเก็บ และ Helm สำหรับการจัดการแพ็กเกจ Kubernetes กลายเป็นทรัพย์สินที่สำคัญในการสัมภาษณ์ DevOps และ SRE
แท็ก
แชร์
บทความที่เกี่ยวข้อง
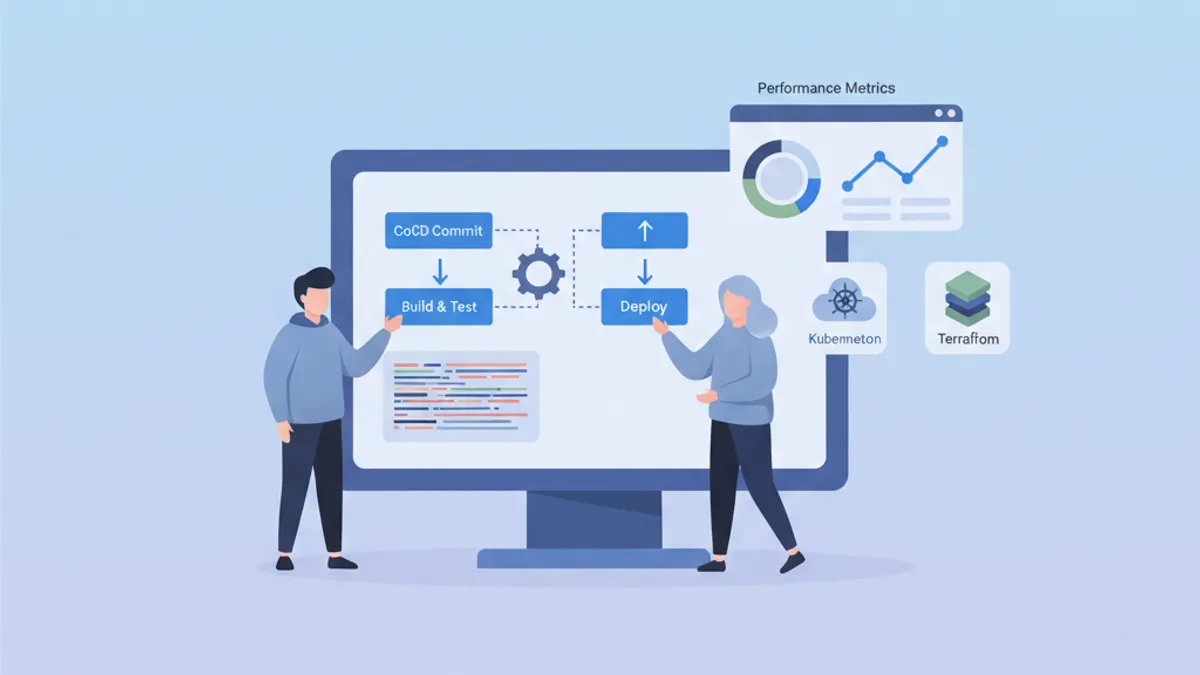
คำถามสัมภาษณ์ DevOps ที่จำเป็น: คู่มือฉบับสมบูรณ์ 2026
เตรียมตัวสัมภาษณ์ DevOps ด้วยคำถามที่ต้องรู้เกี่ยวกับ CI/CD, Kubernetes, Docker, Terraform และแนวปฏิบัติ SRE พร้อมคำตอบละเอียด
Docker: จากการพัฒนาสู่การใช้งานจริง
คู่มือ Docker ฉบับสมบูรณ์สำหรับการ containerize แอปพลิเคชัน Dockerfile, Docker Compose, multi-stage build และการ deploy สู่ production พร้อมตัวอย่างจริง
ArgoCD และ GitOps สำหรับ Kubernetes: คู่มือฉบับสมบูรณ์และคำถามสัมภาษณ์งาน 2026
เรียนรู้การใช้งาน ArgoCD สำหรับ GitOps บน Kubernetes ครอบคลุมตั้งแต่พื้นฐานไปจนถึงเทคนิคขั้นสูง พร้อมคำถามสัมภาษณ์งานที่พบบ่อยในปี 2026