Angular 18: Signals และฟีเจอร์ใหม่
เรียนรู้ Angular 18 Signals, การตรวจจับการเปลี่ยนแปลงแบบ zoneless และ API ใหม่ที่ใช้ signal สำหรับสร้างแอปพลิเคชันที่มีประสิทธิภาพสูงขึ้น

Angular 18 ถือเป็นจุดเปลี่ยนสำคัญในวิวัฒนาการของ framework นี้ ด้วยการทำให้ Signals เสถียร reactive primitive ใหม่นี้เปลี่ยนแปลงวิธีการสร้าง component ใน Angular อย่างพื้นฐาน โดยนำเสนอทางเลือกที่ทันสมัยแทน decorator แบบดั้งเดิม พร้อมทั้งปูทางสู่การตรวจจับการเปลี่ยนแปลงโดยไม่ต้องใช้ Zone.js
API ที่ใช้ signal ของ Angular 18: input(), model(), viewChild() และการตั้งค่า zoneless เพื่อสร้างแอปพลิเคชันที่เบาลงและมีประสิทธิภาพสูงขึ้น
ทำความเข้าใจ Signals ใน Angular 18
Signals เป็นตัวแทนของแนวทางใหม่สำหรับ reactivity ใน Angular ต่างจาก decorator แบบคลาสสิกอย่าง @Input() ที่พึ่งพาการตรวจจับการเปลี่ยนแปลงของ Zone.js นั้น Signals มอบ reactivity ที่แม่นยำและชัดเจน Signal แต่ละตัวห่อหุ้มค่าไว้และแจ้งเตือน consumer โดยอัตโนมัติเมื่อค่านั้นเปลี่ยนแปลง
แนวทางนี้มีข้อดีหลายประการ: ประสิทธิภาพที่ดีขึ้นจากการอัปเดตแบบเจาะจง, การทำงานร่วมกับฟังก์ชัน computed() และ effect() อย่างเป็นธรรมชาติ, และการเตรียมพร้อมสำหรับอนาคตแบบ zoneless ของ Angular
// สาธิตแนวคิดพื้นฐานของ Signals
import { Component, signal, computed, effect } from '@angular/core';

@Component({
  selector: 'app-counter',
  standalone: true,
  template: `
    <div class="counter-container">
      <h2>Counter: {{ count() }}</h2>
      <p>Double: {{ doubleCount() }}</p>

      <button (click)="increment()">+1</button>
      <button (click)="decrement()">-1</button>
      <button (click)="reset()">Reset</button>
    </div>
  `
})
export class CounterComponent {
  // Signal ที่เขียนได้ - สามารถเปลี่ยนค่าได้
  count = signal(0);

  // Signal computed - คำนวณจาก count โดยอัตโนมัติ
  // คำนวณใหม่เฉพาะเมื่อ count เปลี่ยนแปลง
  doubleCount = computed(() => this.count() * 2);

  constructor() {
    // Effect - ทำงานทุกครั้งที่ count เปลี่ยนแปลง
    // เหมาะสำหรับ side effects (log, เรียก API เป็นต้น)
    effect(() => {
      console.log(`ค่า counter ใหม่: ${this.count()}`);
    });
  }

  increment() {
    // update() อนุญาตให้เปลี่ยนแปลงจากค่าก่อนหน้า
    this.count.update(value => value + 1);
  }

  decrement() {
    this.count.update(value => value - 1);
  }

  reset() {
    // set() แทนที่ค่าโดยตรง
    this.count.set(0);
  }
}
Signals ทำงานเหมือน container ที่มี reactivity: signal() สร้าง Signal ที่เขียนได้, computed() คำนวณค่าที่สืบทอดมา, และ effect() อนุญาตให้ทำงานเพื่อตอบสนองต่อการเปลี่ยนแปลง
Signal Inputs ด้วย input()
ฟังก์ชัน input() ใช้แทน decorator @Input() แบบดั้งเดิม ฟังก์ชันนี้คืนค่า InputSignal แบบอ่านอย่างเดียว รับประกันว่าข้อมูลไหลจาก parent ไป child เสมอโดยไม่ถูกแก้ไขโดยไม่ตั้งใจ
// Component ที่ใช้ signal inputs
import { Component, input, computed } from '@angular/core';

interface Book {
  id: string;
  title: string;
  author: string;
  price: number;
  discountPercent?: number;
}

@Component({
  selector: 'app-book-card',
  standalone: true,
  template: `
    <article class="book-card">
      <h3>{{ book().title }}</h3>
      <p class="author">By {{ book().author }}</p>

      @if (hasDiscount()) {
        <p class="price">
          <span class="original">\${{ book().price }}</span>
          <span class="discounted">\${{ discountedPrice() }}</span>
        </p>
      } @else {
        <p class="price">\${{ book().price }}</p>
      }

      @if (featured()) {
        <span class="badge">Featured</span>
      }
    </article>
  `
})
export class BookCardComponent {
  // Input ที่จำเป็น - template ไม่สามารถ compile ได้หากไม่มี prop นี้
  book = input.required<Book>();

  // Input ที่เลือกได้พร้อมค่าเริ่มต้น
  featured = input(false);

  // Computed จาก input - คำนวณใหม่โดยอัตโนมัติ
  hasDiscount = computed(() => {
    const discount = this.book().discountPercent;
    return discount !== undefined && discount > 0;
  });

  // คำนวณราคาส่วนลด
  discountedPrice = computed(() => {
    const { price, discountPercent } = this.book();
    if (!discountPercent) return price;
    return (price * (100 - discountPercent) / 100).toFixed(2);
  });
}
การใช้งานใน template ของ parent ยังคงคล้ายคลึง แต่มีความปลอดภัยด้านชนิดข้อมูลและ reactivity ของ Signal:
// Component parent ที่ใช้ book-card
import { Component, signal } from '@angular/core';
import { BookCardComponent } from './book-card.component';

@Component({
  selector: 'app-book-list',
  standalone: true,
  imports: [BookCardComponent],
  template: `
    <div class="book-grid">
      @for (book of books(); track book.id) {
        <app-book-card
          [book]="book"
          [featured]="book.id === featuredBookId()"
        />
      }
    </div>
  `
})
export class BookListComponent {
  books = signal<Book[]>([
    { id: '1', title: 'Clean Code', author: 'Robert C. Martin', price: 35 },
    { id: '2', title: 'The Pragmatic Programmer', author: 'David Thomas', price: 42, discountPercent: 15 }
  ]);

  featuredBookId = signal('1');
}
ความแตกต่างหลักจาก @Input(): signal inputs เป็นแบบอ่านอย่างเดียว การเรียก this.book.set() จาก component child ทำไม่ได้ ซึ่งเสริมความแข็งแกร่งของการไหลของข้อมูลแบบทิศทางเดียว
Two-Way Binding ด้วย model()
สำหรับกรณีที่ต้องการการซิงค์แบบสองทิศทาง Angular 18 นำเสนอ model() ฟังก์ชันนี้สร้าง Signal ที่เขียนได้และส่งต่อการเปลี่ยนแปลงไปยัง component parent โดยอัตโนมัติ
// Component ที่มี binding สองทิศทางผ่าน model()
import { Component, model, output, computed } from '@angular/core';

@Component({
  selector: 'app-search-input',
  standalone: true,
  template: `
    <div class="search-container">
      <input
        type="text"
        [value]="query()"
        (input)="onInput($event)"
        [placeholder]="placeholder()"
        class="search-input"
      />

      @if (query().length > 0) {
        <button (click)="clear()" class="clear-btn">×</button>
      }

      <span class="char-count">{{ charCount() }} characters</span>
    </div>
  `
})
export class SearchInputComponent {
  // model() สร้าง Signal สองทิศทาง
  // การเปลี่ยนแปลงจะส่งต่อไป parent
  query = model('');

  // Input แบบคลาสสิกสำหรับการตั้งค่า
  placeholder = model('Search...');

  // Output สำหรับ event เพิ่มเติม
  searchSubmitted = output<string>();

  // Computed จาก model
  charCount = computed(() => this.query().length);

  onInput(event: Event) {
    const value = (event.target as HTMLInputElement).value;
    // อัปเดต model - ส่งต่อไป parent
    this.query.set(value);
  }

  clear() {
    this.query.set('');
  }

  submit() {
    if (this.query().length > 0) {
      this.searchSubmitted.emit(this.query());
    }
  }
}
Parent ใช้ไวยากรณ์ banana-in-a-box [()] สำหรับ binding สองทิศทาง:
// ใช้ two-way binding กับ model()
import { Component, signal, effect } from '@angular/core';
import { SearchInputComponent } from './search-input.component';

@Component({
  selector: 'app-root',
  standalone: true,
  imports: [SearchInputComponent],
  template: `
    <div class="app-container">
      <app-search-input [(query)]="searchTerm" />

      <p>Current search: {{ searchTerm() }}</p>

      <div class="results">
        @for (result of filteredResults(); track result.id) {
          <div class="result-item">{{ result.name }}</div>
        }
      </div>
    </div>
  `
})
export class AppComponent {
  // Signal ที่ซิงค์กับ component child
  searchTerm = signal('');

  results = signal([
    { id: 1, name: 'Angular 18' },
    { id: 2, name: 'React 19' },
    { id: 3, name: 'Vue 3' }
  ]);

  // กรองแบบ reactive จาก searchTerm
  filteredResults = computed(() => {
    const term = this.searchTerm().toLowerCase();
    if (!term) return this.results();
    return this.results().filter(r =>
      r.name.toLowerCase().includes(term)
    );
  });
}ใช้ input() สำหรับข้อมูลแบบอ่านอย่างเดียว (parent ไป child) ใช้ model() เมื่อ component child ต้องการเปลี่ยนค่า (สองทิศทาง)
Signal Queries ด้วย viewChild() และ contentChild()
ฟังก์ชัน viewChild(), viewChildren(), contentChild() และ contentChildren() ใช้แทน decorator ที่สอดคล้องกัน คืนค่าเป็น Signals ซึ่งไม่ต้องใช้ lifecycle hooks อย่าง ngAfterViewInit อีกต่อไป
// สาธิต signal queries
import {
  Component,
  viewChild,
  viewChildren,
  ElementRef,
  effect,
  signal
} from '@angular/core';
import { FormFieldComponent } from './form-field.component';

@Component({
  selector: 'app-form-container',
  standalone: true,
  imports: [FormFieldComponent],
  template: `
    <form #formElement (submit)="onSubmit($event)">
      <input #firstInput type="text" placeholder="Name" />

      <app-form-field label="Email" />
      <app-form-field label="Phone" />

      <div class="actions">
        <button type="submit">Submit</button>
        <button type="button" (click)="focusFirst()">Focus first field</button>
      </div>
    </form>
  `
})
export class FormContainerComponent {
  // viewChild คืนค่า Signal<ElementRef | undefined>
  formElement = viewChild<ElementRef>('formElement');

  // viewChild.required รับประกันว่า element มีอยู่
  firstInput = viewChild.required<ElementRef<HTMLInputElement>>('firstInput');

  // Query บน component - คืนค่าตัว component เอง
  firstFormField = viewChild(FormFieldComponent);

  // viewChildren สำหรับหลาย element
  allFormFields = viewChildren(FormFieldComponent);

  constructor() {
    // Effect ใช้แทน ngAfterViewInit สำหรับ queries
    effect(() => {
      // Signal ถูก resolve โดยอัตโนมัติ
      const input = this.firstInput();
      console.log('First input available:', input.nativeElement);
    });

    // ตอบสนองต่อการเปลี่ยนแปลงของรายการ
    effect(() => {
      const fields = this.allFormFields();
      console.log(`${fields.length} form fields found`);
    });
  }

  focusFirst() {
    // เข้าถึงโดยตรงผ่าน Signal
    this.firstInput().nativeElement.focus();
  }

  onSubmit(event: Event) {
    event.preventDefault();
    // เข้าถึงฟอร์ม
    const form = this.formElement();
    if (form) {
      console.log('Form submitted');
    }
  }
}
สำหรับการฉายเนื้อหาและเข้าถึงเนื้อหานั้น contentChild() ทำงานในลักษณะเดียวกัน:
// ใช้ contentChild สำหรับเนื้อหาที่ฉายเข้ามา
import { Component, contentChild, contentChildren, TemplateRef } from '@angular/core';

@Component({
  selector: 'app-card',
  standalone: true,
  template: `
    <div class="card">
      <header class="card-header">
        <ng-content select="[card-title]" />
      </header>

      <div class="card-body">
        <ng-content />
      </div>

      @if (hasFooter()) {
        <footer class="card-footer">
          <ng-content select="[card-footer]" />
        </footer>
      }
    </div>
  `
})
export class CardComponent {
  // ตรวจสอบว่ามี footer ถูกฉายเข้ามาหรือไม่
  footerContent = contentChild<ElementRef>('[card-footer]');

  // Computed เพื่อตรวจสอบการมีอยู่ของ footer
  hasFooter = computed(() => this.footerContent() !== undefined);
}
พร้อมที่จะพิชิตการสัมภาษณ์ Angular แล้วหรือยังครับ?
ฝึกฝนด้วยตัวจำลองแบบโต้ตอบ, flashcards และแบบทดสอบเทคนิคครับ
การตรวจจับการเปลี่ยนแปลงแบบ Zoneless
Angular 18 นำเสนอการตรวจจับการเปลี่ยนแปลงโดยไม่ต้องใช้ Zone.js ในโหมดทดลอง ฟีเจอร์นี้ลดขนาด bundle ลงประมาณ 13 KB และเพิ่มประสิทธิภาพโดยการกำจัด monkey-patch บน API แบบอะซิงโครนัสของเบราว์เซอร์
// ตั้งค่าแอปพลิเคชันในโหมด zoneless
import { bootstrapApplication } from '@angular/platform-browser';
import { provideExperimentalZonelessChangeDetection } from '@angular/core';
import { AppComponent } from './app/app.component';

bootstrapApplication(AppComponent, {
  providers: [
    // เปิดใช้งานการตรวจจับ zoneless แบบทดลอง
    provideExperimentalZonelessChangeDetection()
  ]
});
การตั้งค่าใน angular.json ต้องอัปเดตเพื่อเอา Zone.js ออก:
{
  "projects": {
    "my-app": {
      "architect": {
        "build": {
          "options": {
            "polyfills": []
          }
        }
      }
    }
  }
}
ในโหมด zoneless การตรวจจับการเปลี่ยนแปลงจะทำงานอัตโนมัติในกรณีเหล่านี้: อัปเดต Signal, เรียก markForCheck(), รับค่าใหม่ผ่าน AsyncPipe, หรือการ attach/detach component
// Component ที่ปรับแต่งสำหรับโหมด zoneless
import {
  Component,
  signal,
  ChangeDetectionStrategy,
  inject
} from '@angular/core';
import { HttpClient } from '@angular/common/http';
import { toSignal } from '@angular/core/rxjs-interop';

@Component({
  selector: 'app-zoneless-counter',
  standalone: true,
  // แนะนำให้ใช้ OnPush สำหรับ zoneless
  changeDetection: ChangeDetectionStrategy.OnPush,
  template: `
    <div class="counter">
      <p>Counter: {{ count() }}</p>
      <button (click)="increment()">Increment</button>

      @if (loading()) {
        <p>Loading...</p>
      }

      @if (data()) {
        <pre>{{ data() | json }}</pre>
      }
    </div>
  `
})
export class ZonelessCounterComponent {
  private http = inject(HttpClient);

  count = signal(0);
  loading = signal(false);
  data = signal<any>(null);

  increment() {
    // การอัปเดต Signal ทำให้เกิดการตรวจจับ
    this.count.update(c => c + 1);
  }

  async fetchData() {
    this.loading.set(true);

    try {
      // Signals รับประกันการอัปเดตหน้าจอ
      const response = await fetch('/api/data');
      const json = await response.json();
      this.data.set(json);
    } finally {
      this.loading.set(false);
    }
  }
}Component ที่ใช้ ChangeDetectionStrategy.OnPush และ Signals โดยทั่วไปเข้ากันได้กับโหมด zoneless หลีกเลี่ยงการเปลี่ยนแปลงคุณสมบัติโดยตรงที่ไม่ใช่ Signal
การย้าย component ที่มีอยู่
การย้ายไปยัง API ที่ใช้ signal สามารถทำได้ทีละน้อย ตัวอย่างต่อไปนี้แสดงการ refactoring component แบบดั้งเดิม:
// ก่อน: Component ที่ใช้ decorator แบบคลาสสิก
// user-profile-legacy.component.ts
import { Component, Input, ViewChild, ElementRef, AfterViewInit } from '@angular/core';

@Component({
  selector: 'app-user-profile-legacy',
  template: `
    <div #container>
      <h2>{{ user.name }}</h2>
      <p>{{ user.email }}</p>
    </div>
  `
})
export class UserProfileLegacyComponent implements AfterViewInit {
  @Input() user!: { name: string; email: string };
  @ViewChild('container') container!: ElementRef;

  ngAfterViewInit() {
    console.log('Container ready:', this.container.nativeElement);
  }
}// หลัง: Component ที่ย้ายไป Signals แล้ว
// user-profile.component.ts
import { Component, input, viewChild, ElementRef, effect } from '@angular/core';
interface User {
name: string;
email: string;
}
@Component({
selector: 'app-user-profile',
standalone: true,
template: `
<div #container>
<h2>{{ user().name }}</h2>
<p>{{ user().email }}</p>
</div>
`
})
export class UserProfileComponent {
// input.required ใช้แทน @Input() ที่มี !
user = input.required<User>();
// viewChild.required ใช้แทน @ViewChild ที่มี !
container = viewChild.required<ElementRef>('container');
constructor() {
// effect ใช้แทน ngAfterViewInit สำหรับ queries
effect(() => {
console.log('Container ready:', this.container().nativeElement);
});
}
}ประโยชน์ของการย้ายนี้: typing ที่เข้มงวดขึ้น, reactivity อัตโนมัติ, โค้ด boilerplate น้อยลง, และเข้ากันได้กับโหมด zoneless
แนวปฏิบัติที่ดีกับ Signals
คำแนะนำหลักเพื่อใช้งาน Signals ใน Angular 18 ได้อย่างเต็มประสิทธิภาพ:
// ตัวอย่างแนวปฏิบัติที่ดีกับ Signals
import {
  Component,
  signal,
  computed,
  effect,
  untracked,
  ChangeDetectionStrategy
} from '@angular/core';

interface Product {
  id: string;
  name: string;
  price: number;
  quantity: number;
}

@Component({
  selector: 'app-cart',
  standalone: true,
  changeDetection: ChangeDetectionStrategy.OnPush,
  template: `
    <div class="cart">
      <h2>Cart ({{ itemCount() }} items)</h2>

      @for (item of items(); track item.id) {
        <div class="cart-item">
          <span>{{ item.name }}</span>
          <span>{{ item.quantity }} × \${{ item.price }}</span>
          <button (click)="removeItem(item.id)">Remove</button>
        </div>
      }

      <div class="cart-total">
        <strong>Total: \${{ total() }}</strong>
      </div>
    </div>
  `
})
export class CartComponent {
  // Signal สำหรับข้อมูลที่เปลี่ยนแปลงได้
  items = signal<Product[]>([]);

  // Computed สำหรับค่าที่สืบทอดมา - หลีกเลี่ยงการคำนวณซ้ำ
  itemCount = computed(() => this.items().length);

  total = computed(() =>
    this.items().reduce((sum, item) => sum + item.price * item.quantity, 0)
  );

  constructor() {
    // Effect สำหรับ side effects (analytics, การเก็บข้อมูล)
    effect(() => {
      const currentItems = this.items();
      // untracked หลีกเลี่ยงการสร้าง dependency
      untracked(() => {
        localStorage.setItem('cart', JSON.stringify(currentItems));
      });
    });
  }

  addItem(product: Product) {
    // update() สำหรับการเปลี่ยนแปลงจากสถานะก่อนหน้า
    this.items.update(current => {
      const existing = current.find(i => i.id === product.id);
      if (existing) {
        return current.map(i =>
          i.id === product.id
            ? { ...i, quantity: i.quantity + 1 }
            : i
        );
      }
      return [...current, { ...product, quantity: 1 }];
    });
  }

  removeItem(id: string) {
    this.items.update(current => current.filter(i => i.id !== id));
  }
}
ประเด็นสำคัญที่ควรจดจำ:
- ใช้
computed()สำหรับค่าที่สืบทอดมาแทนการคำนวณซ้ำใน template - เลือกใช้
update()แทนset()เมื่อค่าใหม่ขึ้นกับค่าเดิม - ใช้
untracked()ใน effects เพื่อหลีกเลี่ยง dependency แบบวน - ระบุ
trackในลูป@forเสมอเพื่อปรับแต่งการ rendering ให้เหมาะสม
สรุป
Angular 18 วางรากฐานสำหรับอนาคตที่ไม่ต้องใช้ Zone.js ผ่าน Signals ประเด็นสำคัญ:
- input() ใช้แทน
@Input()พร้อม typing ที่เข้มงวดขึ้นและการเข้าถึงแบบอ่านอย่างเดียวที่รับประกัน - model() เปิดใช้งาน two-way binding แบบ reactive ระหว่าง parent และ child
- viewChild() และ contentChild() ไม่ต้องใช้ lifecycle hooks อีกต่อไป
- Zoneless ลดขนาด bundle และเพิ่มประสิทธิภาพ
- computed() และ effect() ทำให้ระบบนิเวศ reactive สมบูรณ์
- ย้ายทีละน้อยได้ทีละ component
การนำ Signals มาใช้เตรียมแอปพลิเคชัน Angular สำหรับเวอร์ชันในอนาคตที่โหมด zoneless จะกลายเป็นมาตรฐาน การเปลี่ยนแปลงนี้เป็นการลงทุนที่คุ้มค่าสำหรับการดูแลรักษาและประสิทธิภาพในระยะยาว
เริ่มฝึกซ้อมเลย!
ทดสอบความรู้ของคุณด้วยตัวจำลองสัมภาษณ์และแบบทดสอบเทคนิคครับ
แท็ก
แชร์
บทความที่เกี่ยวข้อง

Angular 19 Zoneless: ประสิทธิภาพและ Change Detection โดยไม่ต้องใช้ Zone.js
Angular zoneless change detection ลบ Zone.js ออกเพื่อให้ได้ bundle ที่เล็กลง rendering ที่เร็วขึ้น และ reactivity ที่ชัดเจนผ่าน signals คู่มือเชิงลึกเกี่ยวกับการย้ายจาก Zone.js ไปยัง zoneless Angular ตั้งแต่ API experimental ใน Angular 19 จนถึง API stable ใน Angular 20+
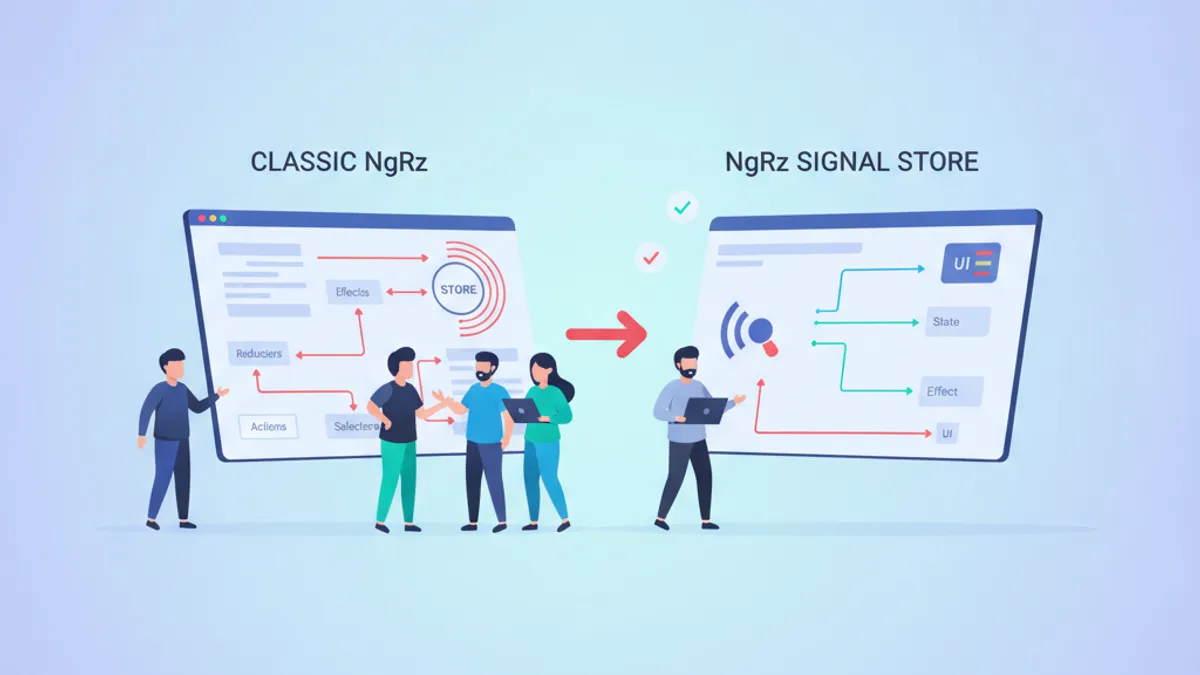
NgRx Signal Store vs Classic NgRx ในปี 2026: ควรเลือกแบบไหน?
เปรียบเทียบเชิงลึกระหว่าง NgRx Signal Store และ Classic NgRx สำหรับการจัดการ state ใน Angular ปี 2026 เรียนรู้ข้อดี ข้อเสีย และเวลาที่ควรใช้แต่ละวิธี

RxJS ใน Angular 2026: โอเปอเรเตอร์ Subject และ interop Signals
RxJS ใน Angular 2026: เชี่ยวชาญโอเปอเรเตอร์ Subject และรูปแบบ interop Signals ที่นักพัฒนา Angular ใช้จริงในโปรดักชัน พร้อมคำถามสัมภาษณ์ที่พบบ่อยที่สุด