Flutter Custom Render Objects in 2026: Custom Painting and Interview Questions
Master Flutter's rendering pipeline with custom RenderObjects, learn when to choose CustomPainter vs RenderBox, and prepare for senior-level interview questions on the Element-RenderObject lifecycle.
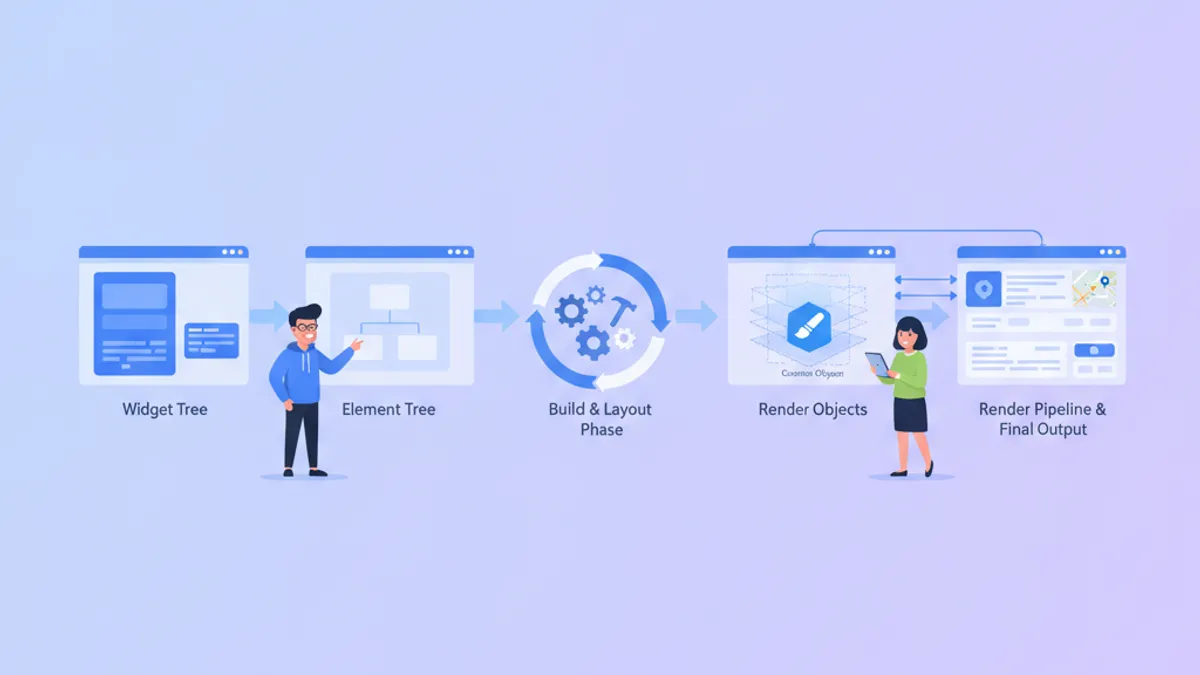
Flutter custom RenderObjects provide the lowest-level access to the framework's rendering pipeline, enabling pixel-perfect control over layout, painting, and hit testing that standard widgets cannot offer. Understanding this layer separates candidates who build Flutter apps from those who build Flutter itself.
Senior Flutter roles expect candidates to explain the three trees (Widget, Element, RenderObject), articulate when a custom RenderObject outperforms CustomPainter, and demonstrate a working implementation that handles constraints and hit testing correctly.
The three-tree architecture that drives Flutter rendering
Flutter renders frames through three interconnected trees, each with distinct responsibilities. The Widget tree contains immutable configuration objects that developers write. The Element tree acts as the persistent bridge that survives rebuilds and manages the lifecycle. The RenderObject tree performs the actual computation: layout, painting, and hit testing.
The distinction matters for performance. When setState triggers a rebuild, Flutter walks the Element tree and diffs the new Widget tree against the old one. Only the changed Elements create new RenderObjects or update existing ones. This reconciliation mechanism explains why Flutter can rebuild widgets 60 times per second without dropping frames.
// A minimal widget-element-renderobject structure
class GaugeWidget extends LeafRenderObjectWidget {
const GaugeWidget({super.key, required this.value});
final double value; // 0.0 to 1.0
RenderObject createRenderObject(BuildContext context) {
return RenderGauge(value: value);
}
void updateRenderObject(BuildContext context, RenderGauge renderObject) {
renderObject.value = value; // Update without recreating
}
}The LeafRenderObjectWidget base class signals that this widget has no children. When the value changes, updateRenderObject mutates the existing RenderGauge instance instead of replacing it, preserving any cached layout computations.
RenderBox vs RenderObject: choosing the right base class
Most custom rendering scenarios should extend RenderBox, not RenderObject directly. RenderBox implements the Cartesian box model with width and height constraints, which matches 99% of use cases in mobile and web applications. The RenderObject class documentation recommends subclassing RenderObject directly only when building a fundamentally different layout protocol, such as a polar coordinate system.
| Base Class | When to Use | Examples |
|---|---|---|
| RenderBox | Standard 2D layouts with box constraints | Custom charts, gauges, drawing surfaces |
| RenderSliver | Scrollable content with viewport-based lazy loading | Custom list headers, parallax effects |
| RenderObject | Non-Cartesian coordinate systems | Radial menus, polar charts |
The interview question "when would you subclass RenderObject directly?" tests whether a candidate understands that RenderBox is not the only option but is the right option for most problems.
Implementing a custom RenderBox: the gauge example
A practical gauge widget demonstrates the three methods every custom RenderBox must address: performLayout, paint, and hit testing. The gauge accepts a value from 0.0 to 1.0 and draws an arc representing that percentage.
class RenderGauge extends RenderBox {
RenderGauge({required double value}) : _value = value;
double _value;
double get value => _value;
set value(double newValue) {
if (_value == newValue) return;
_value = newValue;
markNeedsPaint(); // Repaint only, layout unchanged
}
void performLayout() {
// Accept whatever size the parent offers, or use a default
size = constraints.constrain(const Size(200, 200));
}
void paint(PaintingContext context, Offset offset) {
final canvas = context.canvas;
final rect = offset & size;
final center = rect.center;
final radius = size.shortestSide / 2 - 10;
// Background arc (gray)
final backgroundPaint = Paint()
..color = const Color(0xFFE0E0E0)
..style = PaintingStyle.stroke
..strokeWidth = 8
..strokeCap = StrokeCap.round;
canvas.drawArc(
Rect.fromCircle(center: center, radius: radius),
2.4, // Start angle (roughly 7 o'clock)
4.9, // Sweep angle (to 5 o'clock)
false,
backgroundPaint,
);
// Foreground arc (colored, proportional to value)
final foregroundPaint = Paint()
..color = const Color(0xFF2196F3)
..style = PaintingStyle.stroke
..strokeWidth = 8
..strokeCap = StrokeCap.round;
canvas.drawArc(
Rect.fromCircle(center: center, radius: radius),
2.4,
4.9 * _value, // Sweep proportional to value
false,
foregroundPaint,
);
}
bool hitTestSelf(Offset position) => true; // Accept taps anywhere in bounds
}The markNeedsPaint call when the value changes is deliberate. Calling markNeedsLayout would be wasteful because the gauge's size does not depend on the value. This distinction is a common interview question: "When do you call markNeedsLayout versus markNeedsPaint?"
Ready to ace your Flutter interviews?
Practice with our interactive simulators, flashcards, and technical tests.
CustomPainter vs custom RenderObject: the decision framework
CustomPainter wraps a canvas and delegates painting to a separate class. A custom RenderObject controls layout, painting, and hit testing as a unit. The trade-off is complexity versus control.
CustomPainter fits when:
- The layout is already handled by a parent widget (usually SizedBox or Container)
- No custom hit testing is required, or the entire painted area is tappable
- The painting logic is stateless or driven by a single value
A custom RenderObject fits when:
- Layout depends on internal calculations (intrinsic sizing, baseline alignment)
- Hit testing must be precise to painted shapes, not the bounding box
- Performance requires skipping unnecessary layout passes
- The widget needs to participate in animations at the render level
// Simpler, but layout and hit testing are external
class GaugePainter extends CustomPainter {
final double value;
GaugePainter(this.value);
void paint(Canvas canvas, Size size) {
// Same arc-drawing logic
}
bool shouldRepaint(GaugePainter old) => old.value != value;
}
// Usage requires explicit sizing
SizedBox(
width: 200,
height: 200,
child: CustomPaint(
painter: GaugePainter(0.75),
),
)The CustomPainter approach produces more widgets (SizedBox, CustomPaint) and pushes layout responsibility to the caller. For a reusable gauge component, the RenderBox version encapsulates behavior better.
Constraints propagation and intrinsic dimensions
Constraints flow down the render tree from parent to child. Sizes flow up from child to parent. This bidirectional protocol is the layout algorithm's backbone and a frequent interview topic.
A RenderBox receives BoxConstraints containing minimum and maximum widths and heights. The performLayout method must set size to a value within those constraints. Violating constraints produces debug assertions in development and undefined behavior in production.
class RenderGauge extends RenderBox {
// ... previous code ...
double computeMinIntrinsicWidth(double height) => 100;
double computeMaxIntrinsicWidth(double height) => 300;
double computeMinIntrinsicHeight(double width) => 100;
double computeMaxIntrinsicHeight(double width) => 300;
}Intrinsic dimensions answer the question: "How big would this render object like to be, ignoring constraints?" Widgets like IntrinsicWidth and IntrinsicHeight query these methods to size their children. Implementing them correctly enables the gauge to participate in flexible layouts without explicit sizing.
Hit testing with precision
Default hit testing for RenderBox checks whether the tap position falls within the bounding rectangle. For a gauge with an arc shape, precise hit testing requires overriding hitTest or hitTestSelf.
bool hitTestSelf(Offset position) {
final center = size.center(Offset.zero);
final radius = size.shortestSide / 2 - 10;
final distanceFromCenter = (position - center).distance;
// Only register hits on the arc stroke, not the center
return distanceFromCenter >= radius - 10 && distanceFromCenter <= radius + 10;
}This implementation rejects taps in the center of the gauge, accepting only those near the arc itself. The interview follow-up: "How would you make this gauge draggable to change the value?" Answer: implement handleEvent and convert the tap position to an angle, then to a value.
The Element lifecycle and RenderObject attachment
Elements create and own RenderObjects. The lifecycle methods mount, update, and unmount on Element correspond to attach, the render object existing, and detach on the RenderObject side. Understanding this lifecycle explains memory management and resource cleanup.
When an Element mounts, it calls createRenderObject on its Widget. The returned RenderObject is attached to the render tree via attach, which connects it to a PipelineOwner for scheduling layout and paint. When the Element unmounts, detach disconnects the RenderObject, and dispose releases resources.
class RenderGauge extends RenderBox {
// ... previous code ...
ui.Image? _cachedBackground;
void dispose() {
_cachedBackground?.dispose(); // Release GPU resources
_cachedBackground = null;
super.dispose();
}
}Failing to dispose GPU resources (Image, Picture, Layer) causes memory leaks that accumulate as widgets enter and leave the tree. This is a production-level concern that distinguishes polished implementations from tutorials.
Performance: when custom RenderObjects outperform widget composition
Flutter's widget composition model handles most UI patterns efficiently. Custom RenderObjects provide wins in specific scenarios:
-
Avoiding rebuild overhead: a RenderObject that updates via
markNeedsPaintskips the build phase entirely, while a widget-based approach must rebuild and diff. -
Batch painting: a single RenderObject painting many elements (a chart with 10,000 data points) outperforms 10,000 widgets each with its own RenderObject.
-
Custom layout protocols: layouts that break the single-pass constraint model (two-pass negotiation, overlapping elements) require RenderObject-level control.
The Flutter performance optimization guide covers the Impeller engine and rebuild patterns that complement custom rendering strategies.
Most apps do not need custom RenderObjects. Profile with DevTools before dropping to the render layer. A well-structured widget tree with const constructors often outperforms a poorly-implemented custom renderer.
Interview questions on Flutter rendering internals
Senior and staff-level interviews probe the rendering pipeline because it reveals depth of framework understanding. Common questions and expected answers:
Q: Explain the three trees in Flutter. A: Widget (immutable config), Element (persistent handle, manages lifecycle), RenderObject (layout, paint, hit test). Elements survive rebuilds and diff widgets to minimize RenderObject mutations.
Q: When would you choose a custom RenderObject over CustomPainter? A: When needing custom intrinsic sizing, precise hit testing beyond the bounding box, or direct participation in the layout protocol. CustomPainter delegates layout to ancestors.
Q: What does markNeedsLayout do differently from markNeedsPaint? A: markNeedsLayout schedules a layout pass (constraints, sizing) followed by paint. markNeedsPaint schedules paint only, skipping layout. Use the minimal option to avoid wasted computation.
Q: How do constraints flow in Flutter layout? A: Down from parent to child (constraints in), up from child to parent (size out). Single-pass, O(n) traversal. Parents can tighten constraints; children must respect them.
Q: What happens if a RenderObject violates its constraints? A: Debug mode throws an assertion. Release mode produces undefined behavior, typically clipping or overflow without warning.
Practice articulating these answers concisely. Interviewers value clarity over exhaustiveness.
Start practicing!
Test your knowledge with our interview simulators and technical tests.
Applying custom rendering to real interview scenarios
The knowledge of Flutter's rendering layer applies directly to Flutter interview preparation. Candidates who can whiteboard a RenderBox subclass, explain the constraint protocol, and discuss when to drop below the widget layer demonstrate the depth that senior roles require.
Key takeaways:
- The three-tree model (Widget, Element, RenderObject) enables efficient diffing and minimal GPU updates
- RenderBox handles Cartesian layouts; subclass RenderObject directly only for alternate coordinate systems
- CustomPainter suits painting-only tasks; custom RenderObjects encapsulate layout, painting, and hit testing
- Intrinsic dimensions enable flexible composition with sizing widgets like IntrinsicWidth
- dispose() must release GPU resources to prevent memory leaks
- markNeedsPaint is cheaper than markNeedsLayout; use the minimal option
- Profile before optimizing; widget composition is already efficient for most use cases
Can you spot the bug in Flutter?
One real snippet, one hidden bug, one attempt a day. No account needed to try.

Written by
Anthony Fillion-MailletFounder of SharpSkill
Full-stack developer for over 10 years. Runs SharpSkill and answers for everything published here.
Updated on September 11, 2026
Tags
Share
Related articles

Top 20 Flutter Interview Questions for Mobile Developers
Prepare for Flutter interviews with the 20 most common questions. Widgets, state management, Dart, architecture and best practices explained in detail.

Flutter Performance Optimization in 2026: Impeller, Rebuilds and Best Practices
How to keep Flutter apps at a steady 60 or 120fps in 2026 using Impeller, disciplined widget rebuilds, RepaintBoundary, and DevTools profiling.

Flutter Testing: Widget Tests, Integration Tests and Interview Best Practices 2026
Master Flutter testing with widget tests, integration tests, golden tests and mocking. Practical guide with code examples and interview-ready patterns for 2026.