Spring Security 6: การตั้งค่า OAuth2 Resource Server
คู่มือเชิงปฏิบัติสำหรับการกำหนดค่า OAuth2 Resource Server ด้วย Spring Security 6 การตรวจสอบ JWT การกำหนดค่า issuer การจัดการ scope และการรวมกับ Keycloak
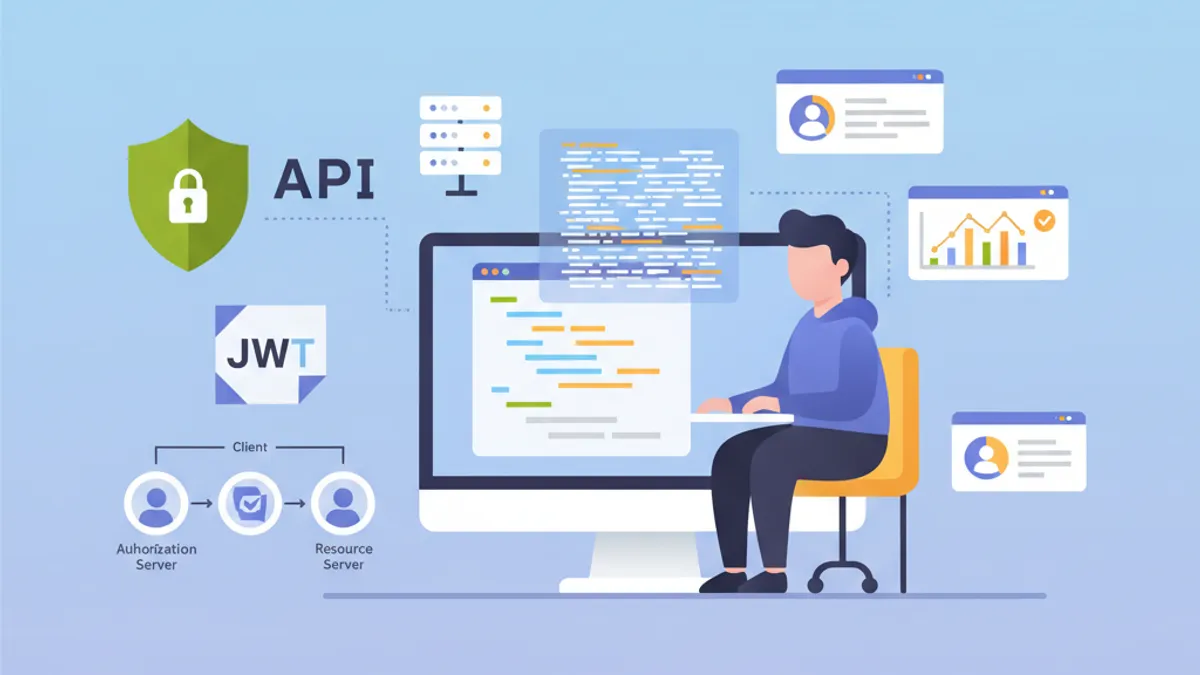
OAuth2 Resource Server ปกป้อง API โดยการตรวจสอบ JWT token ที่ออกโดย Authorization Server ภายนอก เช่น Keycloak, Auth0 หรือ Okta แตกต่างจากการยืนยันตัวตน JWT แบบกำหนดเองที่แอปพลิเคชันสร้าง token ของตัวเอง Resource Server มอบหมายการจัดการตัวตนทั้งหมดให้กับ Identity Provider (IdP) เฉพาะทาง
Resource Server ไม่เคยสร้าง token เพียงแค่ตรวจสอบความถูกต้องเท่านั้น การแยกความรับผิดชอบนี้เพิ่มความปลอดภัยและทำให้สถาปัตยกรรมเรียบง่ายขึ้นด้วยการรวมศูนย์การจัดการตัวตน
สถาปัตยกรรม OAuth2 Resource Server
กระบวนการ OAuth2 ประกอบด้วยผู้แสดงหลักสามคน Client (แอปพลิเคชัน frontend หรือ mobile) ขอ access token จาก Authorization Server จากนั้นจะรวม token นี้ในทุกคำขอที่ส่งไปยัง Resource Server Resource Server ตรวจสอบ token โดยการยืนยันลายเซ็นด้วย public key ของ Authorization Server
สถาปัตยกรรมนี้มีข้อได้เปรียบหลายประการ Resource Server ยังคงเป็น stateless เนื่องจากข้อมูลที่จำเป็นทั้งหมดอยู่ใน JWT token การตรวจสอบเกิดขึ้นโดยไม่มีการเรียกเครือข่ายไปยัง IdP ด้วยการยืนยันลายเซ็นแบบไม่สมมาตร API หลายตัวสามารถใช้ Authorization Server เดียวกันได้ ทำให้การจัดการผู้ใช้ง่ายขึ้น
┌──────────────┐     1. Login      ┌─────────────────────┐
│   Client     │ ───────────────►  │  Authorization      │
│   (SPA/App)  │                   │  Server (Keycloak)  │
│              │ ◄─────────────────│                     │
└──────────────┘   2. JWT Token    └─────────────────────┘
       │                                    │
       │ 3. Request + Bearer Token          │
       ▼                                    ▼
┌──────────────────────┐           ┌─────────────────────┐
│   Resource Server    │ ◄─────── │   JWKS Endpoint     │
│   (Spring Boot API)  │  4. Public Keys (cached)       │
└──────────────────────┘           └─────────────────────┘
Resource Server ดาวน์โหลด public keys เมื่อเริ่มต้นและเก็บไว้ใน cache เพื่อหลีกเลี่ยงการเรียกเครือข่ายในทุกคำขอ
Maven Dependencies สำหรับ OAuth2 Resource Server
การกำหนดค่า Resource Server ต้องการ dependencies เฉพาะสองตัว Starter oauth2-resource-server ให้โครงสร้างพื้นฐาน ในขณะที่ oauth2-jose มีคลาสสำหรับการถอดรหัสและตรวจสอบ JWT
<!-- pom.xml -->
<dependencies>
    <!-- OAuth2 Resource Server support -->
    <dependency>
        <groupId>org.springframework.boot</groupId>
        <artifactId>spring-boot-starter-oauth2-resource-server</artifactId>
    </dependency>

    <!-- Spring Web for REST endpoints -->
    <dependency>
        <groupId>org.springframework.boot</groupId>
        <artifactId>spring-boot-starter-web</artifactId>
    </dependency>

    <!-- DTO validation -->
    <dependency>
        <groupId>org.springframework.boot</groupId>
        <artifactId>spring-boot-starter-validation</artifactId>
    </dependency>
</dependencies>
ไม่จำเป็นต้องมี dependencies เพิ่มเติม เช่น JJWT Spring Security ใช้ไลบรารี Nimbus JOSE+JWT ที่รวมอยู่ใน spring-security-oauth2-jose สำหรับการจัดการ token
การกำหนดค่าพื้นฐานด้วย issuer-uri
การกำหนดค่า Resource Server ขั้นต่ำต้องการเพียงสองบรรทัด Spring Security ค้นพบ endpoints ของ IdP โดยอัตโนมัติผ่านโปรโตคอล OpenID Connect Discovery
# application.yml
spring:
  security:
    oauth2:
      resourceserver:
        jwt:
          # URI ของ Authorization Server
          # Spring ดึง public keys อัตโนมัติผ่าน /.well-known/openid-configuration
          issuer-uri: https://keycloak.example.com/realms/myrealm
จาก issuer-uri Spring Security ส่งคำขอไปยัง {issuer-uri}/.well-known/openid-configuration เพื่อรับ metadata ของ Authorization Server จากนั้นจะดึง URL ของ JWKS (JSON Web Key Set) ที่มี public keys ที่ใช้สำหรับการตรวจสอบลายเซ็น token
@Configuration
@EnableWebSecurity
@EnableMethodSecurity
public class SecurityConfig {

    @Bean
    public SecurityFilterChain securityFilterChain(HttpSecurity http) throws Exception {
        return http
            // Disable CSRF for stateless APIs
            .csrf(csrf -> csrf.disable())

            // Authorization rules
            .authorizeHttpRequests(auth -> auth
                // Public endpoints
                .requestMatchers("/api/public/**").permitAll()
                .requestMatchers("/actuator/health").permitAll()
                // All other requests require a valid token
                .anyRequest().authenticated()
            )

            // Enable OAuth2 JWT validation
            .oauth2ResourceServer(oauth2 -> oauth2
                .jwt(Customizer.withDefaults())
            )

            // Stateless mode required for Resource Servers
            .sessionManagement(session -> session
                .sessionCreationPolicy(SessionCreationPolicy.STATELESS)
            )

            .build();
    }
}
การกำหนดค่านี้เพียงพอสำหรับการปกป้อง API Spring Security ตรวจสอบลายเซ็น token โดยอัตโนมัติ ตรวจสอบ timestamps (exp, nbf, iat) และตรวจสอบให้แน่ใจว่า claim iss ตรงกับ issuer-uri ที่กำหนด
โดยค่าเริ่มต้น แอปพลิเคชันจะไม่เริ่มต้นหาก Authorization Server ไม่สามารถเข้าถึงได้ เพื่ออนุญาตการเริ่มต้นแบบอิสระ ต้องกำหนดค่า jwk-set-uri อย่างชัดเจนแทน issuer-uri
การกำหนดค่าขั้นสูงด้วย jwk-set-uri
เมื่อ Authorization Server ไม่รองรับ OpenID Connect Discovery หรือเมื่อแอปพลิเคชันต้องเริ่มต้นโดยไม่ต้องพึ่งพาเครือข่ายต่อ IdP การกำหนดค่า JWKS อย่างชัดเจนจะเป็นทางเลือกที่ดีกว่า
# application.yml
spring:
  security:
    oauth2:
      resourceserver:
        jwt:
          # Direct URL to JWKS (public keys)
          jwk-set-uri: https://keycloak.example.com/realms/myrealm/protocol/openid-connect/certs
          # Expected value of the "iss" claim in tokens
          issuer-uri: https://keycloak.example.com/realms/myrealm
          # Allowed audiences ("aud" claim)
          audiences:
            - my-api
            - account
วิธีการนี้ให้การควบคุมที่มากขึ้น การตรวจสอบ audience ป้องกันการใช้ token ที่ออกแบบมาสำหรับบริการอื่น token ที่ออกสำหรับแอปพลิเคชัน frontend-app จะถูกปฏิเสธหาก API รับเฉพาะ audiences my-api และ account เท่านั้น
@Configuration
@EnableWebSecurity
public class SecurityConfig {

    @Value("${spring.security.oauth2.resourceserver.jwt.issuer-uri}")
    private String issuerUri;

    @Bean
    public SecurityFilterChain securityFilterChain(HttpSecurity http) throws Exception {
        return http
            .csrf(csrf -> csrf.disable())

            .authorizeHttpRequests(auth -> auth
                .requestMatchers("/api/public/**").permitAll()
                .anyRequest().authenticated()
            )

            // Custom JWT configuration
            .oauth2ResourceServer(oauth2 -> oauth2
                .jwt(jwt -> jwt
                    .jwtAuthenticationConverter(jwtAuthenticationConverter())
                )
            )

            .sessionManagement(session -> session
                .sessionCreationPolicy(SessionCreationPolicy.STATELESS)
            )

            .build();
    }

    // Custom converter to extract authorities from the token
    @Bean
    public JwtAuthenticationConverter jwtAuthenticationConverter() {
        JwtGrantedAuthoritiesConverter grantedAuthoritiesConverter =
            new JwtGrantedAuthoritiesConverter();
        // SCOPE_ prefix for authorities (e.g., SCOPE_read, SCOPE_write)
        grantedAuthoritiesConverter.setAuthorityPrefix("SCOPE_");
        // Claim containing scopes (OAuth2 standard)
        grantedAuthoritiesConverter.setAuthoritiesClaimName("scope");

        JwtAuthenticationConverter jwtAuthenticationConverter =
            new JwtAuthenticationConverter();
        jwtAuthenticationConverter.setJwtGrantedAuthoritiesConverter(
            grantedAuthoritiesConverter
        );

        return jwtAuthenticationConverter;
    }
}
JwtAuthenticationConverter แปลง claims ของ token ให้เป็นออบเจ็กต์ GrantedAuthority ที่สามารถใช้ในนิพจน์ความปลอดภัยได้
พร้อมที่จะพิชิตการสัมภาษณ์ Spring Boot แล้วหรือยังครับ?
ฝึกฝนด้วยตัวจำลองแบบโต้ตอบ, flashcards และแบบทดสอบเทคนิคครับ
การดึง Roles ของ Keycloak
Keycloak จัดโครงสร้าง roles แตกต่างจากมาตรฐาน OAuth2 Roles อยู่ใน realm_access.roles (roles ของ realm) หรือ resource_access.{client}.roles (roles เฉพาะของ client) Custom converter ดึงข้อมูลนี้ออกมา
@Component
public class KeycloakJwtAuthenticationConverter
    implements Converter<Jwt, AbstractAuthenticationToken> {

    private static final String REALM_ACCESS_CLAIM = "realm_access";
    private static final String RESOURCE_ACCESS_CLAIM = "resource_access";
    private static final String ROLES_CLAIM = "roles";

    @Value("${keycloak.client-id}")
    private String clientId;

    @Override
    public AbstractAuthenticationToken convert(Jwt jwt) {
        // Combine realm and client roles
        Collection<GrantedAuthority> authorities = Stream.concat(
            extractRealmRoles(jwt).stream(),
            extractClientRoles(jwt).stream()
        ).collect(Collectors.toSet());

        // Return authentication token with extracted authorities
        return new JwtAuthenticationToken(jwt, authorities, extractUsername(jwt));
    }

    // Extract realm-level roles
    private Collection<GrantedAuthority> extractRealmRoles(Jwt jwt) {
        Map<String, Object> realmAccess = jwt.getClaim(REALM_ACCESS_CLAIM);
        if (realmAccess == null) {
            return Collections.emptyList();
        }

        @SuppressWarnings("unchecked")
        List<String> roles = (List<String>) realmAccess.get(ROLES_CLAIM);
        if (roles == null) {
            return Collections.emptyList();
        }

        // ROLE_ prefix for compatibility with hasRole()
        return roles.stream()
            .map(role -> new SimpleGrantedAuthority("ROLE_" + role.toUpperCase()))
            .collect(Collectors.toList());
    }

    // Extract client-specific roles
    private Collection<GrantedAuthority> extractClientRoles(Jwt jwt) {
        Map<String, Object> resourceAccess = jwt.getClaim(RESOURCE_ACCESS_CLAIM);
        if (resourceAccess == null) {
            return Collections.emptyList();
        }

        @SuppressWarnings("unchecked")
        Map<String, Object> clientAccess =
            (Map<String, Object>) resourceAccess.get(clientId);
        if (clientAccess == null) {
            return Collections.emptyList();
        }

        @SuppressWarnings("unchecked")
        List<String> roles = (List<String>) clientAccess.get(ROLES_CLAIM);
        if (roles == null) {
            return Collections.emptyList();
        }

        return roles.stream()
            .map(role -> new SimpleGrantedAuthority("ROLE_" + role.toUpperCase()))
            .collect(Collectors.toList());
    }

    // Extract username from token
    private String extractUsername(Jwt jwt) {
        // Keycloak uses "preferred_username" by default
        String username = jwt.getClaimAsString("preferred_username");
        if (username != null) {
            return username;
        }
        // Fallback to subject (usually the user UUID)
        return jwt.getSubject();
    }
}
การรวมเข้ากับการกำหนดค่าความปลอดภัยทำได้ผ่านพารามิเตอร์ jwtAuthenticationConverter
@Configuration
@EnableWebSecurity
@EnableMethodSecurity
@RequiredArgsConstructor
public class SecurityConfig {

    private final KeycloakJwtAuthenticationConverter keycloakConverter;

    @Bean
    public SecurityFilterChain securityFilterChain(HttpSecurity http) throws Exception {
        return http
            .csrf(csrf -> csrf.disable())

            .authorizeHttpRequests(auth -> auth
                .requestMatchers("/api/public/**").permitAll()
                // Protection by Keycloak role
                .requestMatchers("/api/admin/**").hasRole("ADMIN")
                .anyRequest().authenticated()
            )

            .oauth2ResourceServer(oauth2 -> oauth2
                .jwt(jwt -> jwt
                    // Use Keycloak converter
                    .jwtAuthenticationConverter(keycloakConverter)
                )
            )

            .sessionManagement(session -> session
                .sessionCreationPolicy(SessionCreationPolicy.STATELESS)
            )

            .build();
    }
}
Roles ที่ดึงออกมาแล้วสามารถใช้ได้กับ annotation @PreAuthorize("hasRole('ADMIN')") หรือในนิพจน์ requestMatchers().hasRole()
การตรวจสอบ Token แบบกำหนดเอง
การตรวจสอบเพิ่มเติมอาจจำเป็นขึ้นอยู่กับความต้องการทางธุรกิจ การตรวจสอบ claims แบบกำหนดเอง การตรวจสอบ audience หรือการควบคุมอายุการใช้งานสูงสุด
@Component
public class CustomJwtValidator implements OAuth2TokenValidator<Jwt> {

    private static final OAuth2Error AUDIENCE_ERROR =
        new OAuth2Error("invalid_token", "Token audience is not valid", null);

    private static final OAuth2Error CUSTOM_CLAIM_ERROR =
        new OAuth2Error("invalid_token", "Required custom claim missing", null);

    @Value("${app.jwt.required-audience}")
    private String requiredAudience;

    @Value("${app.jwt.required-tenant-claim:tenant_id}")
    private String tenantClaimName;

    @Override
    public OAuth2TokenValidatorResult validate(Jwt jwt) {
        List<OAuth2Error> errors = new ArrayList<>();

        // Audience validation
        if (!validateAudience(jwt)) {
            errors.add(AUDIENCE_ERROR);
        }

        // Custom business claim validation
        if (!validateTenantClaim(jwt)) {
            errors.add(CUSTOM_CLAIM_ERROR);
        }

        if (!errors.isEmpty()) {
            return OAuth2TokenValidatorResult.failure(errors);
        }

        return OAuth2TokenValidatorResult.success();
    }

    private boolean validateAudience(Jwt jwt) {
        List<String> audiences = jwt.getAudience();
        return audiences != null && audiences.contains(requiredAudience);
    }

    private boolean validateTenantClaim(Jwt jwt) {
        // Check for required business claim
        String tenantId = jwt.getClaimAsString(tenantClaimName);
        return tenantId != null && !tenantId.isBlank();
    }
}
Validator แบบกำหนดเองรวมเข้ากับการกำหนดค่า JwtDecoder
@Configuration
@RequiredArgsConstructor
public class JwtConfig {

    private final CustomJwtValidator customValidator;

    @Value("${spring.security.oauth2.resourceserver.jwt.issuer-uri}")
    private String issuerUri;

    @Value("${spring.security.oauth2.resourceserver.jwt.jwk-set-uri}")
    private String jwkSetUri;

    @Bean
    public JwtDecoder jwtDecoder() {
        // Create decoder with JWKS URL
        NimbusJwtDecoder jwtDecoder = NimbusJwtDecoder
            .withJwkSetUri(jwkSetUri)
            .build();

        // Combine default validators with custom validator
        OAuth2TokenValidator<Jwt> defaultValidators =
            JwtValidators.createDefaultWithIssuer(issuerUri);

        OAuth2TokenValidator<Jwt> combinedValidator =
            new DelegatingOAuth2TokenValidator<>(defaultValidators, customValidator);

        jwtDecoder.setJwtValidator(combinedValidator);

        return jwtDecoder;
    }
}การตรวจสอบแบบ synchronous บล็อก thread การประมวลผล สำหรับการตรวจสอบที่ต้องเรียกภายนอก (ฐานข้อมูล บริการของบุคคลที่สาม) ควรใช้ filter แบบ asynchronous หรือการตรวจสอบหลังจากนั้น
การเข้าถึงข้อมูล Token ใน Controllers
Spring Security มีหลายวิธีในการเข้าถึงข้อมูล JWT token ใน controllers
@RestController
@RequestMapping("/api/users")
public class UserController {

    // Direct JWT injection via @AuthenticationPrincipal
    @GetMapping("/me")
    public ResponseEntity<UserInfoResponse> getCurrentUser(
        @AuthenticationPrincipal Jwt jwt
    ) {
        String userId = jwt.getSubject();
        String email = jwt.getClaimAsString("email");
        String username = jwt.getClaimAsString("preferred_username");
        List<String> roles = extractRoles(jwt);

        return ResponseEntity.ok(new UserInfoResponse(
            userId, email, username, roles
        ));
    }

    // Alternative with JwtAuthenticationToken to access authorities
    @GetMapping("/profile")
    public ResponseEntity<ProfileResponse> getProfile(
        JwtAuthenticationToken authentication
    ) {
        Jwt jwt = authentication.getToken();
        Collection<String> authorities = authentication.getAuthorities()
            .stream()
            .map(GrantedAuthority::getAuthority)
            .toList();

        return ResponseEntity.ok(new ProfileResponse(
            jwt.getSubject(),
            jwt.getClaimAsString("name"),
            authorities
        ));
    }

    // Access scopes for conditional business logic
    @GetMapping("/data")
    @PreAuthorize("hasAuthority('SCOPE_read')")
    public ResponseEntity<DataResponse> getData(
        @AuthenticationPrincipal Jwt jwt
    ) {
        boolean canWrite = hasScope(jwt, "write");

        // Business logic adapted according to permissions
        DataResponse response = buildDataResponse(jwt.getSubject(), canWrite);
        return ResponseEntity.ok(response);
    }

    private List<String> extractRoles(Jwt jwt) {
        Map<String, Object> realmAccess = jwt.getClaim("realm_access");
        if (realmAccess == null) {
            return Collections.emptyList();
        }
        @SuppressWarnings("unchecked")
        List<String> roles = (List<String>) realmAccess.get("roles");
        return roles != null ? roles : Collections.emptyList();
    }

    private boolean hasScope(Jwt jwt, String scope) {
        String scopes = jwt.getClaimAsString("scope");
        return scopes != null && scopes.contains(scope);
    }
}public record UserInfoResponse(
String userId,
String email,
String username,
List<String> roles
) {}
// ProfileResponse.java
public record ProfileResponse(
String userId,
String name,
Collection<String> authorities
) {}Annotation @AuthenticationPrincipal ช่วยหลีกเลี่ยงการดึงการยืนยันตัวตนด้วยตนเองจาก SecurityContextHolder
การจัดการข้อผิดพลาดการยืนยันตัวตน OAuth2
การจัดการข้อผิดพลาดเฉพาะช่วยปรับปรุงประสบการณ์ของนักพัฒนาสำหรับผู้ใช้ API
@RestControllerAdvice
public class OAuth2SecurityExceptionHandler {

    private static final Logger log =
        LoggerFactory.getLogger(OAuth2SecurityExceptionHandler.class);

    // Missing token or invalid format
    @ExceptionHandler(AuthenticationException.class)
    @ResponseStatus(HttpStatus.UNAUTHORIZED)
    public ErrorResponse handleAuthenticationException(AuthenticationException ex) {
        log.warn("Authentication failed: {}", ex.getMessage());

        return new ErrorResponse(
            "UNAUTHORIZED",
            "Authentication required. Provide a valid Bearer token.",
            Map.of("error", ex.getMessage())
        );
    }

    // Access denied despite valid token
    @ExceptionHandler(AccessDeniedException.class)
    @ResponseStatus(HttpStatus.FORBIDDEN)
    public ErrorResponse handleAccessDeniedException(AccessDeniedException ex) {
        log.warn("Access denied: {}", ex.getMessage());

        return new ErrorResponse(
            "FORBIDDEN",
            "Insufficient permissions for this resource",
            null
        );
    }

    // OAuth2-specific error (expired token, invalid signature, etc.)
    @ExceptionHandler(OAuth2AuthenticationException.class)
    @ResponseStatus(HttpStatus.UNAUTHORIZED)
    public ErrorResponse handleOAuth2Exception(OAuth2AuthenticationException ex) {
        OAuth2Error error = ex.getError();
        log.warn("OAuth2 authentication error: {} - {}",
            error.getErrorCode(), error.getDescription());

        String message = switch (error.getErrorCode()) {
            case "invalid_token" -> "Token is invalid or expired";
            case "insufficient_scope" -> "Token does not have required scopes";
            default -> "Authentication failed";
        };

        return new ErrorResponse(
            error.getErrorCode().toUpperCase(),
            message,
            Map.of("details", error.getDescription())
        );
    }
}

// ErrorResponse.java
public record ErrorResponse(
    String code,
    String message,
    Map<String, String> details
) {}
รหัสข้อผิดพลาด OAuth2 ที่เป็นมาตรฐาน (invalid_token, insufficient_scope) ช่วยให้การประมวลผลฝั่ง client ง่ายขึ้น
การกำหนดค่าหลายสภาพแวดล้อม
การกำหนดค่าจะแตกต่างกันไปตามสภาพแวดล้อม ในการพัฒนา สามารถใช้ Keycloak server ในเครื่องได้ ในขณะที่ในการผลิต IdP ที่จัดการแล้วเช่น Auth0 จะเข้ามาแทนที่
# application.yml (common configuration)
app:
  jwt:
    required-audience: my-api

---
# application-dev.yml
spring:
  config:
    activate:
      on-profile: dev
  security:
    oauth2:
      resourceserver:
        jwt:
          issuer-uri: http://localhost:8180/realms/dev-realm

keycloak:
  client-id: my-api-dev

logging:
  level:
    org.springframework.security: DEBUG

---
# application-prod.yml
spring:
  config:
    activate:
      on-profile: prod
  security:
    oauth2:
      resourceserver:
        jwt:
          issuer-uri: ${OAUTH2_ISSUER_URI}
          audiences: ${OAUTH2_AUDIENCES:my-api}

keycloak:
  client-id: ${KEYCLOAK_CLIENT_ID}

logging:
  level:
    org.springframework.security: WARN
ในการผลิต ค่าที่ละเอียดอ่อนมาจากตัวแปรสภาพแวดล้อมหรือ secrets manager
การทดสอบการรวมระบบด้วย JWT จำลอง
การทดสอบการรวมระบบใช้ utilities ของ Spring Security Test เพื่อจำลอง JWT tokens ที่ถูกต้อง
@SpringBootTest(webEnvironment = WebEnvironment.RANDOM_PORT)
@AutoConfigureMockMvc
class ResourceServerIntegrationTest {

    @Autowired
    private MockMvc mockMvc;

    @Test
    void shouldRejectRequestWithoutToken() throws Exception {
        mockMvc.perform(get("/api/users/me"))
            .andExpect(status().isUnauthorized());
    }

    @Test
    @WithMockJwtAuth(
        claims = @OpenIdClaims(sub = "user-123", preferredUsername = "john.doe"),
        authorities = {"ROLE_USER"}
    )
    void shouldAllowAuthenticatedUser() throws Exception {
        mockMvc.perform(get("/api/users/me"))
            .andExpect(status().isOk())
            .andExpect(jsonPath("$.userId").value("user-123"))
            .andExpect(jsonPath("$.username").value("john.doe"));
    }

    @Test
    void shouldAllowAccessWithValidJwt() throws Exception {
        mockMvc.perform(get("/api/users/me")
                .with(jwt()
                    .jwt(jwt -> jwt
                        .subject("user-456")
                        .claim("preferred_username", "jane.doe")
                        .claim("email", "jane@example.com")
                    )
                    .authorities(new SimpleGrantedAuthority("ROLE_USER"))
                ))
            .andExpect(status().isOk())
            .andExpect(jsonPath("$.email").value("jane@example.com"));
    }

    @Test
    void shouldDenyAccessWithoutAdminRole() throws Exception {
        mockMvc.perform(get("/api/admin/users")
                .with(jwt()
                    .authorities(new SimpleGrantedAuthority("ROLE_USER"))
                ))
            .andExpect(status().isForbidden());
    }

    @Test
    void shouldAllowAdminAccess() throws Exception {
        mockMvc.perform(get("/api/admin/users")
                .with(jwt()
                    .authorities(new SimpleGrantedAuthority("ROLE_ADMIN"))
                ))
            .andExpect(status().isOk());
    }
}
Utility jwt() จาก spring-security-test สร้าง tokens จำลองโดยไม่ต้องมี Authorization Server
@TestConfiguration
public class SecurityTestConfig {

    // Mocked JwtDecoder for tests
    @Bean
    @Primary
    public JwtDecoder jwtDecoder() {
        return token -> {
            // Return a mocked JWT for tests
            return Jwt.withTokenValue(token)
                .header("alg", "RS256")
                .subject("test-user")
                .claim("scope", "read write")
                .build();
        };
    }
}
เริ่มฝึกซ้อมเลย!
ทดสอบความรู้ของคุณด้วยตัวจำลองสัมภาษณ์และแบบทดสอบเทคนิคครับ
บทสรุป
การกำหนดค่า OAuth2 Resource Server ด้วย Spring Security 6 รวมศูนย์การตรวจสอบ token และทำให้ความปลอดภัยของ API ง่ายขึ้น Authorization Server จัดการการยืนยันตัวตนและการออก token ในขณะที่ API มุ่งเน้นไปที่การตรวจสอบและการดึงข้อมูลตัวตน
เช็คลิสต์การปรับใช้:
- ✅ กำหนดค่า
issuer-uriหรือjwk-set-uriตามความต้องการ - ✅ ตรวจสอบ audience เพื่อป้องกันการใช้ token จากบริการอื่นในทางที่ผิด
- ✅ Custom converter เพื่อดึง roles ของ Keycloak
- ✅ การจัดการข้อผิดพลาด OAuth2 ด้วยรหัสมาตรฐาน
- ✅ การทดสอบการรวมระบบด้วย tokens จำลอง
- ✅ HTTPS บังคับระหว่าง client และ Resource Server
- ✅ การกำหนดค่าเฉพาะสำหรับแต่ละสภาพแวดล้อม
- ✅ การบันทึกความพยายามในการยืนยันตัวตนที่ล้มเหลว
สถาปัตยกรรมนี้รวมเข้ากับระบบนิเวศของ microservices ได้อย่างเป็นธรรมชาติ ที่ซึ่ง API หลายตัวใช้ Identity Provider เดียวกัน
แท็ก
แชร์
บทความที่เกี่ยวข้อง

Spring Security 6: การยืนยันตัวตนด้วย JWT แบบครบถ้วน
คู่มือเชิงปฏิบัติในการนำการยืนยันตัวตนด้วย JWT มาใช้กับ Spring Security 6: การตั้งค่า การสร้างโทเคน การตรวจสอบ และแนวทางปฏิบัติที่ดีด้านความปลอดภัย

Spring Modulith: สถาปัตยกรรม Monolith แบบโมดูลาร์
เรียนรู้ Spring Modulith เพื่อสร้าง monolith แบบโมดูลาร์ใน Java สถาปัตยกรรม โมดูล อีเวนต์อะซิงโครนัส และการทดสอบด้วย Spring Boot 3

สัมภาษณ์ Spring Batch 5: Partitioning, Chunk และ Fault Tolerance
เชี่ยวชาญการสัมภาษณ์ Spring Batch 5: 15 คำถามสำคัญเกี่ยวกับ partitioning การประมวลผลแบบ chunk และความทนทานต่อข้อผิดพลาด พร้อมตัวอย่างโค้ด Java 21