สัมภาษณ์ iOS Push Notifications 2026: APNs, โทเคน และ troubleshooting
คู่มือเตรียมสัมภาษณ์ iOS อย่างครบถ้วนเกี่ยวกับ Push Notifications, APNs, การจัดการโทเคน และ troubleshooting พร้อมคำถามยอดนิยมและคำตอบโดยละเอียด
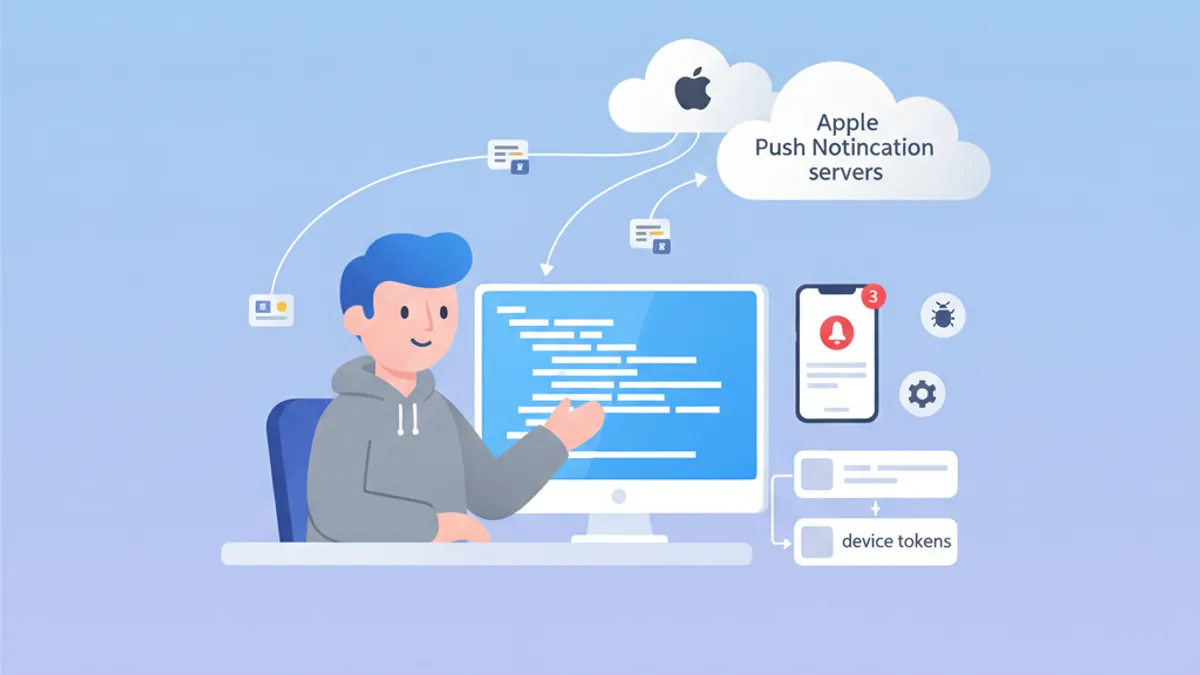
Push Notifications ยังเป็นหัวข้อสำคัญในสัมภาษณ์ iOS การเข้าใจการทำงานของ APNs การจัดการ device token และการแก้ปัญหาทั่วไปแสดงถึงความเข้าใจอย่างลึกซึ้งในระบบนิเวศของ Apple คู่มือนี้รวบรวมคำถามสัมภาษณ์ที่พบบ่อยที่สุด
ผู้สัมภาษณ์มองหาผู้สมัครที่เข้าใจวงจรชีวิตทั้งหมด: ตั้งแต่การลงทะเบียนอุปกรณ์จนถึงการส่งการแจ้งเตือน รวมถึงการจัดการข้อผิดพลาดอย่างเหมาะสมในแต่ละขั้นตอน
สถาปัตยกรรม APNs: รากฐานของการแจ้งเตือนบน iOS
Apple Push Notification service (APNs) คือบริการกลางที่จัดการการส่ง push notification ไปยังอุปกรณ์ของ Apple การเข้าใจสถาปัตยกรรมของมันจำเป็นต่อการตอบคำถามสัมภาษณ์ได้อย่างมีประสิทธิภาพ
APNs ทำงานอย่างไร?
การสื่อสารเกี่ยวข้องกับสามผู้เล่นหลัก: แอป iOS, APNs และเซิร์ฟเวอร์ backend ขั้นตอนทั้งหมดเป็นดังนี้:
import UIKit
import UserNotifications

@main
class AppDelegate: UIResponder, UIApplicationDelegate {

    func application(
        _ application: UIApplication,
        didFinishLaunchingWithOptions launchOptions: [UIApplication.LaunchOptionsKey: Any]?
    ) -> Bool {
        // Request notification authorization
        UNUserNotificationCenter.current().requestAuthorization(
            options: [.alert, .badge, .sound]
        ) { granted, error in
            guard granted else { return }
            // Register with APNs
            DispatchQueue.main.async {
                application.registerForRemoteNotifications()
            }
        }
        return true
    }
}
การลงทะเบียน APNs เกิดขึ้นในสองขั้น: ขออนุญาตจากผู้ใช้ จากนั้นเรียก registerForRemoteNotifications()
การจัดการ device token
Device token เป็นตัวระบุเฉพาะที่ APNs สร้างขึ้นเพื่อใช้กับอุปกรณ์เครื่องใดเครื่องหนึ่ง โทเคนนี้สามารถเปลี่ยนแปลงได้ และควรถูกส่งไปยังเซิร์ฟเวอร์ backend ทุกครั้งที่เปิดแอป
extension AppDelegate {

    // Callback when APNs provides the token
    func application(
        _ application: UIApplication,
        didRegisterForRemoteNotificationsWithDeviceToken deviceToken: Data
    ) {
        // Convert token to hexadecimal string
        let tokenString = deviceToken.map { String(format: "%02.2hhx", $0) }.joined()
        print("Device Token: \(tokenString)")

        // Send to backend server
        sendTokenToServer(tokenString)
    }

    // Callback on registration failure
    func application(
        _ application: UIApplication,
        didFailToRegisterForRemoteNotificationsWithError error: Error
    ) {
        print("Failed to register: \(error.localizedDescription)")
    }

    private func sendTokenToServer(_ token: String) {
        // Implement HTTP request to backend
    }
}
โทเคนถูกส่งกลับมาในรูปของ Data และต้องถูกแปลงเป็นสตริงเลขฐานสิบหกก่อนส่งไปยังเซิร์ฟเวอร์
คำถามสัมภาษณ์ APNs ที่พบบ่อย
สัมภาษณ์ iOS มักมีทั้งคำถามทฤษฎีและปฏิบัติเกี่ยวกับ APNs ต่อไปนี้คือคำถามที่พบบ่อยที่สุดพร้อมคำตอบโดยละเอียด
คำถามที่ 1: ความแตกต่างระหว่าง APNs sandbox กับ production คืออะไร?
APNs มีสองสภาพแวดล้อมแยกกันโดยมี endpoint ต่างกัน โทเคนที่สร้างในสภาพแวดล้อมหนึ่งจะใช้ในอีกสภาพแวดล้อมไม่ได้
| สภาพแวดล้อม | Endpoint | การใช้งาน |
|---|---|---|
| Sandbox | api.sandbox.push.apple.com | Debug, TestFlight |
| Production | api.push.apple.com | App Store |
คำถามที่ 2: จัดการกับโทเคนหมดอายุอย่างไร?
Device token อาจเปลี่ยนได้ด้วยหลายเหตุผล: การคืนค่าระบบ การติดตั้งบนอุปกรณ์ใหม่ หรือการรีเฟรชเป็นระยะโดย APNs เซิร์ฟเวอร์ต้องจัดการกับการตอบกลับข้อผิดพลาดของ APNs อย่างเหมาะสม
enum APNsError: Int {
    case badDeviceToken = 400
    case unregistered = 410
    case payloadTooLarge = 413
    case tooManyRequests = 429
    case internalServerError = 500

    var shouldRemoveToken: Bool {
        // Remove token only if device is no longer registered
        return self == .unregistered || self == .badDeviceToken
    }
}

struct APNsResponse {
    let statusCode: Int
    let deviceToken: String

    func handleError() {
        guard let error = APNsError(rawValue: statusCode) else { return }

        if error.shouldRemoveToken {
            // Remove token from database
            TokenRepository.shared.remove(deviceToken)
        }
    }
}
การจัดการข้อผิดพลาด APNs ฝั่งเซิร์ฟเวอร์มีความสำคัญอย่างยิ่งต่อการรักษาฐานข้อมูลโทเคนให้สะอาดและหลีกเลี่ยงคำขอที่ไม่จำเป็น
คำถามที่ 3: ใช้งาน silent notification อย่างไร?
Silent notification ช่วยปลุกแอปให้ทำงานพื้นหลังเพื่อดำเนินงานโดยไม่แสดงการแจ้งเตือนใด ๆ ต่อผู้ใช้
func application(
    _ application: UIApplication,
    didReceiveRemoteNotification userInfo: [AnyHashable: Any],
    fetchCompletionHandler completionHandler: @escaping (UIBackgroundFetchResult) -> Void
) {
    // Check if this is a silent notification
    guard let aps = userInfo["aps"] as? [String: Any],
          aps["content-available"] as? Int == 1 else {
        completionHandler(.noData)
        return
    }

    // Perform background task
    performBackgroundTask { result in
        switch result {
        case .success:
            completionHandler(.newData)
        case .failure:
            completionHandler(.failed)
        }
    }
}
Payload JSON ของ silent notification ต้องมี "content-available": 1 ภายในออบเจ็กต์ aps
พร้อมที่จะพิชิตการสัมภาษณ์ iOS แล้วหรือยังครับ?
ฝึกฝนด้วยตัวจำลองแบบโต้ตอบ, flashcards และแบบทดสอบเทคนิคครับ
Notification Service Extension: การปรับแต่งขั้นสูง
Notification Service Extension อนุญาตให้แก้ไขเนื้อหาของการแจ้งเตือนก่อนแสดงผล ฟีเจอร์นี้มักถูกถามในการสัมภาษณ์
สร้าง Service Extension
import UserNotifications

class NotificationService: UNNotificationServiceExtension {

    var contentHandler: ((UNNotificationContent) -> Void)?
    var bestAttemptContent: UNMutableNotificationContent?

    override func didReceive(
        _ request: UNNotificationRequest,
        withContentHandler contentHandler: @escaping (UNNotificationContent) -> Void
    ) {
        self.contentHandler = contentHandler
        bestAttemptContent = request.content.mutableCopy() as? UNMutableNotificationContent

        guard let bestAttemptContent = bestAttemptContent else {
            contentHandler(request.content)
            return
        }

        // Modify content
        if let imageURLString = bestAttemptContent.userInfo["image-url"] as? String,
           let imageURL = URL(string: imageURLString) {
            downloadImage(from: imageURL) { attachment in
                if let attachment = attachment {
                    bestAttemptContent.attachments = [attachment]
                }
                contentHandler(bestAttemptContent)
            }
        } else {
            contentHandler(bestAttemptContent)
        }
    }

    override func serviceExtensionTimeWillExpire() {
        // Called when time limit (30 seconds) is exceeded
        if let contentHandler = contentHandler,
           let bestAttemptContent = bestAttemptContent {
            contentHandler(bestAttemptContent)
        }
    }

    private func downloadImage(
        from url: URL,
        completion: @escaping (UNNotificationAttachment?) -> Void
    ) {
        URLSession.shared.downloadTask(with: url) { localURL, _, error in
            guard let localURL = localURL, error == nil else {
                completion(nil)
                return
            }

            let tempDirectory = FileManager.default.temporaryDirectory
            let fileName = url.lastPathComponent
            let destinationURL = tempDirectory.appendingPathComponent(fileName)

            try? FileManager.default.moveItem(at: localURL, to: destinationURL)

            let attachment = try? UNNotificationAttachment(
                identifier: fileName,
                url: destinationURL,
                options: nil
            )
            completion(attachment)
        }.resume()
    }
}
Extension มีเวลา 30 วินาทีในการแก้ไขเนื้อหา หากเกินขีดจำกัดนี้จะมีการเรียกเมธอด serviceExtensionTimeWillExpire()
Troubleshooting Push Notifications
การดีบัก push notification เป็นหัวข้อที่พบซ้ำในการสัมภาษณ์ ผู้สมัครควรรู้จักเครื่องมือและเทคนิคในการวินิจฉัย
ตรวจสอบสถานะการลงทะเบียน
struct PushNotificationDebugger {

    static func checkNotificationStatus() async {
        let center = UNUserNotificationCenter.current()
        let settings = await center.notificationSettings()

        print("=== Push Notification Status ===")
        print("Authorization: \(settings.authorizationStatus.description)")
        print("Alert: \(settings.alertSetting.description)")
        print("Badge: \(settings.badgeSetting.description)")
        print("Sound: \(settings.soundSetting.description)")
        print("Notification Center: \(settings.notificationCenterSetting.description)")
    }
}

extension UNAuthorizationStatus {
    var description: String {
        switch self {
        case .notDetermined: return "Not Determined"
        case .denied: return "Denied"
        case .authorized: return "Authorized"
        case .provisional: return "Provisional"
        case .ephemeral: return "Ephemeral"
        @unknown default: return "Unknown"
        }
    }
}
ฟังก์ชัน debug นี้ช่วยตรวจสอบสถานะสิทธิ์ของการแจ้งเตือนได้อย่างรวดเร็ว
ข้อผิดพลาดที่พบบ่อยและวิธีแก้
ผู้สัมภาษณ์มักถามเกี่ยวกับข้อผิดพลาดที่พบบ่อยและแนวทางแก้ไข ต่อไปนี้คือสิ่งสำคัญที่สุดที่ควรจดจำ
| ข้อผิดพลาด | สาเหตุ | วิธีแก้ |
|---|---|---|
| โทเคนไม่ถูกต้อง | สภาพแวดล้อมผิด (sandbox/prod) | ตรวจสอบ provisioning profile |
| ไม่ได้รับการแจ้งเตือน | เปิดโหมดประหยัดพลังงาน | ทดสอบขณะแบตเต็ม |
| Extension ไม่ถูกเรียก | Payload ไม่มี mutable-content | เพิ่ม "mutable-content": 1 |
| Background fetch ล้มเหลว | ผู้ใช้ปิดแอปเอง | แจ้งผู้ใช้เกี่ยวกับข้อจำกัด |
ทดสอบ APNs โดยตรง
สำหรับการทดสอบการแจ้งเตือนระหว่างพัฒนา เครื่องมือ curl ช่วยให้ส่งคำขอไปที่ APNs ได้โดยตรง:
struct APNsTestPayload {

    static let silentNotification = """
    {
        "aps": {
            "content-available": 1
        },
        "custom-data": "test"
    }
    """

    static let richNotification = """
    {
        "aps": {
            "alert": {
                "title": "New message",
                "body": "Message content"
            },
            "mutable-content": 1,
            "sound": "default"
        },
        "image-url": "https://example.com/image.jpg"
    }
    """
}
Payload ทดสอบเหล่านี้ช่วยตรวจสอบพฤติกรรมของแอปกับการแจ้งเตือนหลายประเภท
แนวปฏิบัติที่ดีในระดับ production
คำถามเกี่ยวกับแนวปฏิบัติที่ดีช่วยประเมินประสบการณ์ของผู้สมัครกับแอป production
การจัดการข้อผิดพลาดของเครือข่าย
actor PushTokenManager {

    private var pendingToken: String?
    private var retryCount = 0
    private let maxRetries = 3

    func registerToken(_ token: String) async {
        pendingToken = token
        await sendTokenWithRetry()
    }

    private func sendTokenWithRetry() async {
        guard let token = pendingToken else { return }

        do {
            try await APIClient.shared.registerPushToken(token)
            pendingToken = nil
            retryCount = 0
        } catch {
            retryCount += 1
            if retryCount < maxRetries {
                // Retry with exponential backoff
                let delay = UInt64(pow(2.0, Double(retryCount))) * 1_000_000_000
                try? await Task.sleep(nanoseconds: delay)
                await sendTokenWithRetry()
            }
        }
    }
}
การใช้ actor ช่วยให้การจัดการโทเคนปลอดภัยต่อการทำงานพร้อมกันในสภาพแวดล้อมแบบขนาน
การเก็บโทเคนแบบโลคัล
struct TokenStorage {

    private static let tokenKey = "com.app.pushToken"

    static func save(_ token: String) {
        UserDefaults.standard.set(token, forKey: tokenKey)
    }

    static func retrieve() -> String? {
        UserDefaults.standard.string(forKey: tokenKey)
    }

    static func hasTokenChanged(_ newToken: String) -> Bool {
        guard let savedToken = retrieve() else { return true }
        return savedToken != newToken
    }
}
การบันทึกโทเคนแบบโลคัลช่วยลดการเรียกเครือข่ายที่ไม่จำเป็นเมื่อโทเคนยังไม่เปลี่ยน
สรุป
ความเชี่ยวชาญใน iOS Push Notifications แสดงถึงความเข้าใจอย่างลึกซึ้งในระบบนิเวศของ Apple และการสื่อสารระหว่างไคลเอนต์-เซิร์ฟเวอร์ จุดสำคัญที่ควรจำสำหรับการสัมภาษณ์:
✅ สถาปัตยกรรม APNs: เข้าใจกระบวนการตั้งแต่ลงทะเบียนจนถึงส่งการแจ้งเตือน
✅ Device token: วงจรชีวิตและการจัดการเมื่อโทเคนเปลี่ยน
✅ Notification Service Extension: ปรับแต่งเนื้อหาภายในกรอบ 30 วินาที
✅ Troubleshooting: รู้จักข้อผิดพลาดทั่วไปและวิธีแก้
✅ Silent notifications: content-available สำหรับ background fetch
✅ แนวปฏิบัติที่ดี: ตรรกะ retry การเก็บโทเคนแบบโลคัล การจัดการข้อผิดพลาด
เริ่มฝึกซ้อมเลย!
ทดสอบความรู้ของคุณด้วยตัวจำลองสัมภาษณ์และแบบทดสอบเทคนิคครับ
คุณหาบั๊กใน iOS เจอไหม
โค้ดจริงหนึ่งชิ้น บั๊กที่ซ่อนอยู่หนึ่งจุด วันละหนึ่งครั้ง ลองได้โดยไม่ต้องมีบัญชี

เขียนโดย
Anthony Fillion-Mailletผู้ก่อตั้ง SharpSkill
เป็นนักพัฒนาฟูลสแตกมากว่า 10 ปี ดูแล SharpSkill และรับผิดชอบทุกสิ่งที่เผยแพร่ที่นี่
อัปเดตเมื่อ 29 เมษายน 2569
แท็ก
แชร์
บทความที่เกี่ยวข้อง
การสัมภาษณ์ StoreKit 2: การจัดการการสมัครสมาชิกและการตรวจสอบใบเสร็จ
เชี่ยวชาญคำถามสัมภาษณ์ iOS เกี่ยวกับ StoreKit 2 การจัดการการสมัครสมาชิก การตรวจสอบใบเสร็จ และการนำการซื้อในแอปไปใช้ พร้อมตัวอย่างโค้ด Swift ที่ใช้งานได้จริง
Swift Testing Framework สัมภาษณ์ 2026: มาโคร #expect และ #require เทียบกับ XCTest
เรียนรู้ Swift Testing Framework ใหม่สำหรับการสัมภาษณ์ iOS: มาโคร #expect และ #require การย้ายจาก XCTest แพทเทิร์นขั้นสูงและข้อผิดพลาดที่พบบ่อย
สัมภาษณ์ iOS Senior 2026: คำถามเรื่องสถาปัตยกรรมและ Design Pattern
เตรียมตัวสัมภาษณ์ iOS senior ด้วยคำถามสำคัญเกี่ยวกับ MVVM, VIPER, Clean Architecture และ design pattern คู่มือครบถ้วนพร้อมตัวอย่างโค้ด Swift