Flutter: สร้างแอปพลิเคชันข้ามแพลตฟอร์มตัวแรก
คู่มือฉบับสมบูรณ์สำหรับการสร้างแอปพลิเคชันมือถือข้ามแพลตฟอร์มด้วย Flutter และ Dart ครอบคลุม Widget การจัดการสถานะ การนำทาง และแนวทางปฏิบัติที่ดีสำหรับผู้เริ่มต้น

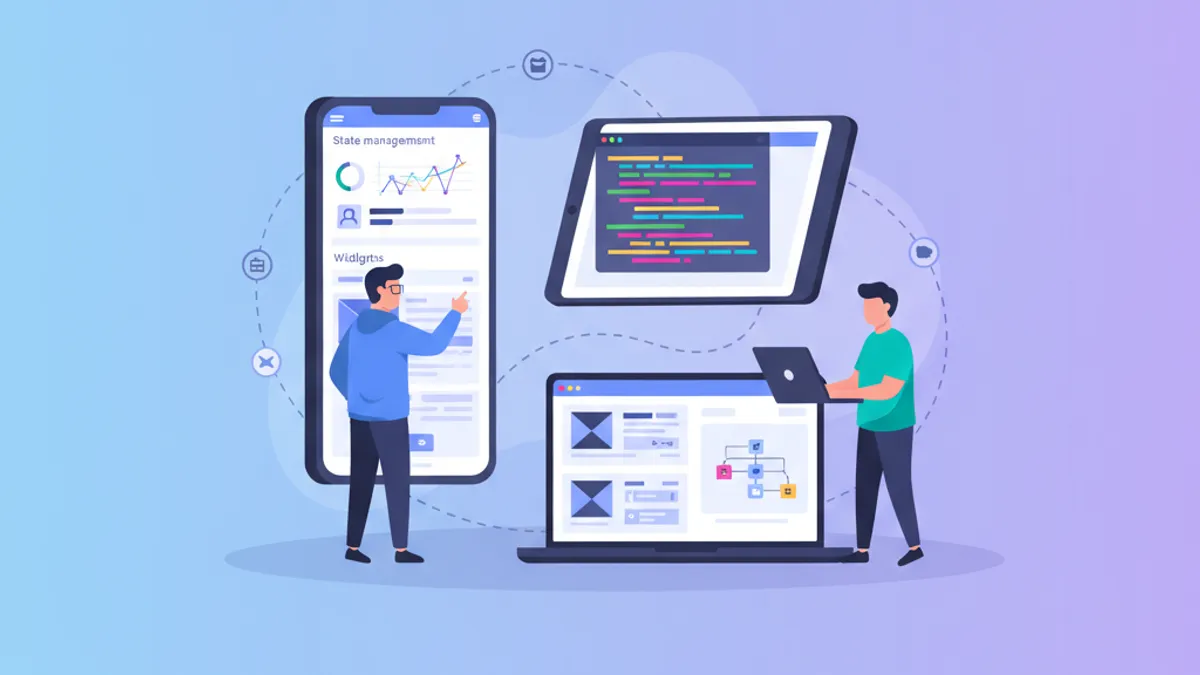
Flutter กำลังเปลี่ยนแปลงวงการพัฒนาแอปพลิเคชันมือถือด้วยการเปิดโอกาสให้สร้างแอปพลิเคชัน iOS และ Android จากฐานโค้ดเดียว เฟรมเวิร์กที่พัฒนาโดย Google รวมประสิทธิภาพระดับ Native เข้ากับความสามารถในการพัฒนาที่ยอดเยี่ยมผ่านเอนจิน Skia และระบบ Widget แบบ Declarative คู่มือนี้ครอบคลุมการสร้างแอปพลิเคชันตั้งแต่ขั้นตอนการติดตั้งไปจนถึงแนวทางปฏิบัติที่ดีสำหรับการใช้งานจริง
Flutter 3.27 นำการปรับปรุงที่สำคัญมาให้: รองรับ Material 3 แบบ Native เป็นค่าเริ่มต้น, แอนิเมชัน Impeller ที่ได้รับการปรับปรุงใหม่ และการรวมเข้ากับ Dart 3.6 พร้อม Macro แบบทดลอง เฟรมเวิร์กสามารถคอมไพล์เป็น ARM64 Native เพื่อประสิทธิภาพสูงสุด
การติดตั้งและตั้งค่าสภาพแวดล้อม
การตั้งค่า Flutter ต้องผ่านขั้นตอนการกำหนดค่าบางอย่าง Flutter SDK ประกอบด้วยทุกสิ่งที่จำเป็น ได้แก่ เฟรมเวิร์ก เครื่องมือในการคอมไพล์ และตัวจัดการแพ็กเกจ Dart
# terminal
# Download Flutter SDK (macOS/Linux)
git clone https://github.com/flutter/flutter.git -b stable
export PATH="$PATH:`pwd`/flutter/bin"

# Verify installation and dependencies
flutter doctor

# Create a new project
flutter create --org com.example my_app
cd my_app

# Run in development mode
flutter run
คำสั่ง flutter doctor ตรวจสอบว่า Dependencies ทั้งหมดได้รับการติดตั้ง ได้แก่ Android Studio, Xcode (macOS) และ Emulator ที่กำหนดค่าแล้ว
# pubspec.yaml
name: my_app
description: Cross-platform Flutter application
publish_to: 'none'
version: 1.0.0+1

environment:
  sdk: '>=3.6.0 <4.0.0'

dependencies:
  flutter:
    sdk: flutter
  # UI and design
  cupertino_icons: ^1.0.8
  google_fonts: ^6.2.1
  # State management
  flutter_riverpod: ^2.6.1
  # Navigation
  go_router: ^14.6.2
  # HTTP and API
  dio: ^5.7.0
  # Local storage
  shared_preferences: ^2.3.4

dev_dependencies:
  flutter_test:
    sdk: flutter
  flutter_lints: ^5.0.0

flutter:
  uses-material-design: true
ไฟล์ pubspec.yaml นี้กำหนดค่า Dependencies ที่จำเป็นสำหรับแอปพลิเคชัน Flutter สมัยใหม่
สถาปัตยกรรมโปรเจกต์ Flutter
โครงสร้างโปรเจกต์ที่ชัดเจนช่วยให้การบำรุงรักษาและการพัฒนาต่อยอดของแอปพลิเคชันเป็นไปได้ง่ายขึ้น การจัดระเบียบนี้แยกความรับผิดชอบออกจากกันอย่างชัดเจน
lib/
├── main.dart                 # Entry point
├── app.dart                  # App configuration
├── core/
│   ├── constants/           # Colors, dimensions, strings
│   ├── theme/               # Material 3 theme
│   └── utils/               # Utility functions
├── features/
│   ├── auth/                # Authentication feature
│   │   ├── data/           # Repositories, data sources
│   │   ├── domain/         # Models, use cases
│   │   └── presentation/   # Screens, widgets, providers
│   └── home/               # Home feature
│       ├── data/
│       ├── domain/
│       └── presentation/
├── shared/
│   ├── widgets/            # Reusable widgets
│   └── providers/          # Shared providers
└── routing/
    └── app_router.dart     # Route configuration
สถาปัตยกรรม "Feature-First" จัดกลุ่มโค้ดทั้งหมดที่เกี่ยวข้องกับฟีเจอร์หนึ่งไว้ในโฟลเดอร์เดียวกัน ช่วยให้การนำทางและการปรับโครงสร้างโค้ดทำได้สะดวก
แนวทาง Feature-First จัดระเบียบโค้ดตามฟังก์ชันทางธุรกิจแทนที่จะเป็นประเภททางเทคนิค แต่ละ Feature มีโมเดล Widget และลอจิกของตัวเอง ทำให้โค้ดเป็นโมดูลมากขึ้นและทดสอบได้ง่ายขึ้น
ทำความเข้าใจ Widget ของ Flutter
Widget เป็นส่วนประกอบพื้นฐานของ Flutter ทุกอย่างเป็น Widget ไม่ว่าจะเป็นปุ่ม ข้อความ Layout หรือแม้แต่ตัวแอปพลิเคชันเอง Flutter มี Widget สองประเภท: StatelessWidget (ไม่มีสถานะ) และ StatefulWidget (มีสถานะภายใน)
import 'package:flutter/material.dart';
/// Custom reusable button widget throughout the application.
/// Automatically handles loading and disabled states.
class CustomButton extends StatelessWidget {
// Required and optional widget parameters
final String label;
final VoidCallback? onPressed;
final bool isLoading;
final bool isOutlined;
// Constructor with named parameters for clarity
const CustomButton({
super.key,
required this.label,
this.onPressed,
this.isLoading = false,
this.isOutlined = false,
});
Widget build(BuildContext context) {
// Access theme for consistent styles
final theme = Theme.of(context);
// Conditional build based on button type
if (isOutlined) {
return OutlinedButton(
// Disable button during loading
onPressed: isLoading ? null : onPressed,
style: OutlinedButton.styleFrom(
padding: const EdgeInsets.symmetric(
horizontal: 24,
vertical: 16,
),
shape: RoundedRectangleBorder(
borderRadius: BorderRadius.circular(12),
),
),
child: _buildChild(theme),
);
}
return FilledButton(
onPressed: isLoading ? null : onPressed,
style: FilledButton.styleFrom(
padding: const EdgeInsets.symmetric(
horizontal: 24,
vertical: 16,
),
shape: RoundedRectangleBorder(
borderRadius: BorderRadius.circular(12),
),
),
child: _buildChild(theme),
);
}
/// Builds button content with loading state handling.
Widget _buildChild(ThemeData theme) {
if (isLoading) {
return const SizedBox(
height: 20,
width: 20,
child: CircularProgressIndicator(
strokeWidth: 2,
color: Colors.white,
),
);
}
return Text(label);
}
}Widget นี้ห่อหุ้มลอจิกการแสดงผลปุ่มพร้อมจัดการสถานะการโหลดโดยอัตโนมัติ
import 'package:flutter/material.dart';
import '../../features/auth/domain/models/user.dart';
/// Card displaying user information.
/// Uses Material 3 with consistent elevation and shape.
class UserCard extends StatelessWidget {
final User user;
final VoidCallback? onTap;
const UserCard({
super.key,
required this.user,
this.onTap,
});
Widget build(BuildContext context) {
final theme = Theme.of(context);
// Material 3 Card with InkWell for ripple effect
return Card(
// Adaptive elevation based on theme
elevation: 2,
// Consistent rounded shape
shape: RoundedRectangleBorder(
borderRadius: BorderRadius.circular(16),
),
// Clipping so ripple respects borders
clipBehavior: Clip.antiAlias,
child: InkWell(
onTap: onTap,
child: Padding(
padding: const EdgeInsets.all(16),
child: Row(
children: [
// Avatar with image or initials
CircleAvatar(
radius: 28,
backgroundImage: user.avatarUrl != null
? NetworkImage(user.avatarUrl!)
: null,
child: user.avatarUrl == null
? Text(user.initials)
: null,
),
const SizedBox(width: 16),
// User information
Expanded(
child: Column(
crossAxisAlignment: CrossAxisAlignment.start,
children: [
Text(
user.displayName,
style: theme.textTheme.titleMedium?.copyWith(
fontWeight: FontWeight.w600,
),
),
const SizedBox(height: 4),
Text(
user.email,
style: theme.textTheme.bodyMedium?.copyWith(
color: theme.colorScheme.onSurfaceVariant,
),
),
],
),
),
// Navigation icon
Icon(
Icons.chevron_right,
color: theme.colorScheme.onSurfaceVariant,
),
],
),
),
),
);
}
}การประกอบ Widget ช่วยให้สามารถสร้างอินเทอร์เฟซที่ซับซ้อนจากบล็อกที่เรียบง่ายและนำกลับมาใช้ซ้ำได้
การจัดการสถานะด้วย Riverpod
Riverpod เป็นโซลูชันที่ทันสมัยสำหรับการจัดการสถานะใน Flutter ไลบรารีนี้นำเสนอแนวทาง Declarative แบบมี Type Safety และสามารถทดสอบได้สำหรับการแชร์สถานะระหว่าง Widget
/// Immutable user model with fromJson factory.
class User {
  final String id;
  final String email;
  final String displayName;
  final String? avatarUrl;
  final DateTime createdAt;

  const User({
    required this.id,
    required this.email,
    required this.displayName,
    this.avatarUrl,
    required this.createdAt,
  });

  /// Generates initials from display name.
  String get initials {
    final parts = displayName.split(' ');
    if (parts.length >= 2) {
      return '${parts[0][0]}${parts[1][0]}'.toUpperCase();
    }
    return displayName.substring(0, 2).toUpperCase();
  }

  /// Creates instance from JSON (API response).
  factory User.fromJson(Map<String, dynamic> json) {
    return User(
      id: json['id'] as String,
      email: json['email'] as String,
      displayName: json['display_name'] as String,
      avatarUrl: json['avatar_url'] as String?,
      createdAt: DateTime.parse(json['created_at'] as String),
    );
  }

  /// Converts to JSON for API submission.
  Map<String, dynamic> toJson() {
    return {
      'id': id,
      'email': email,
      'display_name': displayName,
      'avatar_url': avatarUrl,
      'created_at': createdAt.toIso8601String(),
    };
  }
}import 'package:flutter_riverpod/flutter_riverpod.dart';
import '../../data/repositories/auth_repository.dart';
import '../../domain/models/user.dart';
/// Authentication state representing different possible cases.
sealed class AuthState {
const AuthState();
}
class AuthInitial extends AuthState {
const AuthInitial();
}
class AuthLoading extends AuthState {
const AuthLoading();
}
class AuthAuthenticated extends AuthState {
final User user;
const AuthAuthenticated(this.user);
}
class AuthUnauthenticated extends AuthState {
const AuthUnauthenticated();
}
class AuthError extends AuthState {
final String message;
const AuthError(this.message);
}
/// Provider for authentication repository.
final authRepositoryProvider = Provider<AuthRepository>((ref) {
return AuthRepository();
});
/// Main provider managing authentication state.
final authProvider = StateNotifierProvider<AuthNotifier, AuthState>((ref) {
final repository = ref.watch(authRepositoryProvider);
return AuthNotifier(repository);
});
/// Notifier handling authentication logic.
class AuthNotifier extends StateNotifier<AuthState> {
final AuthRepository _repository;
AuthNotifier(this._repository) : super(const AuthInitial()) {
// Check initial state on startup
checkAuthStatus();
}
/// Checks if a user is already logged in.
Future<void> checkAuthStatus() async {
state = const AuthLoading();
try {
final user = await _repository.getCurrentUser();
if (user != null) {
state = AuthAuthenticated(user);
} else {
state = const AuthUnauthenticated();
}
} catch (e) {
state = const AuthUnauthenticated();
}
}
/// Signs in user with email and password.
Future<void> signIn(String email, String password) async {
state = const AuthLoading();
try {
final user = await _repository.signIn(email, password);
state = AuthAuthenticated(user);
} catch (e) {
state = AuthError(e.toString());
}
}
/// Creates a new user account.
Future<void> signUp(String email, String password, String displayName) async {
state = const AuthLoading();
try {
final user = await _repository.signUp(email, password, displayName);
state = AuthAuthenticated(user);
} catch (e) {
state = AuthError(e.toString());
}
}
/// Signs out the user.
Future<void> signOut() async {
state = const AuthLoading();
await _repository.signOut();
state = const AuthUnauthenticated();
}
}รูปแบบ Sealed Class (Dart 3.0+) รับประกันว่าทุกกรณีของสถานะจะถูกจัดการเมื่อใช้ Switch Expression
พร้อมที่จะพิชิตการสัมภาษณ์ Flutter แล้วหรือยังครับ?
ฝึกฝนด้วยตัวจำลองแบบโต้ตอบ, flashcards และแบบทดสอบเทคนิคครับ
การนำทางด้วย GoRouter
GoRouter ทำให้การนำทางแบบ Declarative ใน Flutter ง่ายขึ้น ไลบรารีนี้จัดการเส้นทาง พารามิเตอร์ การเปลี่ยนเส้นทาง และการนำทางแบบซ้อน
import 'package:flutter/material.dart';
import 'package:flutter_riverpod/flutter_riverpod.dart';
import 'package:go_router/go_router.dart';
import '../features/auth/presentation/providers/auth_provider.dart';
import '../features/auth/presentation/screens/login_screen.dart';
import '../features/auth/presentation/screens/register_screen.dart';
import '../features/home/presentation/screens/home_screen.dart';
import '../features/home/presentation/screens/profile_screen.dart';
import '../shared/widgets/shell_scaffold.dart';

/// Provider for router with authentication handling.
final routerProvider = Provider<GoRouter>((ref) {
  // Listen to authentication state changes
  final authState = ref.watch(authProvider);

  return GoRouter(
    // Initial route
    initialLocation: '/',
    // Refresh router when auth changes
    refreshListenable: GoRouterRefreshStream(ref, authProvider),
    // Handle redirects based on authentication
    redirect: (context, state) {
      final isAuthenticated = authState is AuthAuthenticated;
      final isAuthRoute = state.matchedLocation.startsWith('/auth');

      // Not authenticated on protected route → login
      if (!isAuthenticated && !isAuthRoute) {
        return '/auth/login';
      }

      // Authenticated on auth route → home
      if (isAuthenticated && isAuthRoute) {
        return '/';
      }

      return null; // No redirect
    },
    routes: [
      // Auth routes (without shell)
      GoRoute(
        path: '/auth/login',
        name: 'login',
        builder: (context, state) => const LoginScreen(),
      ),
      GoRoute(
        path: '/auth/register',
        name: 'register',
        builder: (context, state) => const RegisterScreen(),
      ),
      // Protected routes with shell (bottom navigation)
      ShellRoute(
        builder: (context, state, child) {
          return ShellScaffold(child: child);
        },
        routes: [
          GoRoute(
            path: '/',
            name: 'home',
            builder: (context, state) => const HomeScreen(),
          ),
          GoRoute(
            path: '/profile',
            name: 'profile',
            builder: (context, state) => const ProfileScreen(),
          ),
          GoRoute(
            path: '/profile/:userId',
            name: 'userProfile',
            builder: (context, state) {
              // Extract route parameter
              final userId = state.pathParameters['userId']!;
              return ProfileScreen(userId: userId);
            },
          ),
        ],
      ),
    ],
    // Custom error page
    errorBuilder: (context, state) => Scaffold(
      body: Center(
        child: Text('Page not found: ${state.error}'),
      ),
    ),
  );
});

/// Stream to trigger router refresh.
class GoRouterRefreshStream extends ChangeNotifier {
  GoRouterRefreshStream(Ref ref, StateNotifierProvider provider) {
    ref.listen(provider, (previous, next) {
      notifyListeners();
    });
  }
}
การเปลี่ยนเส้นทางอัตโนมัติตามสถานะการยืนยันตัวตนช่วยให้มั่นใจว่าเส้นทางที่ได้รับการป้องกันไม่สามารถเข้าถึงได้โดยผู้ใช้ที่ยังไม่ได้ยืนยันตัวตน
import 'package:flutter/material.dart';
import 'package:go_router/go_router.dart';
/// Scaffold with bottom navigation bar for protected routes.
class ShellScaffold extends StatelessWidget {
final Widget child;
const ShellScaffold({
super.key,
required this.child,
});
Widget build(BuildContext context) {
return Scaffold(
body: child,
bottomNavigationBar: NavigationBar(
// Determine active index based on route
selectedIndex: _calculateSelectedIndex(context),
onDestinationSelected: (index) => _onItemTapped(index, context),
destinations: const [
NavigationDestination(
icon: Icon(Icons.home_outlined),
selectedIcon: Icon(Icons.home),
label: 'Home',
),
NavigationDestination(
icon: Icon(Icons.person_outline),
selectedIcon: Icon(Icons.person),
label: 'Profile',
),
],
),
);
}
/// Calculates navigation index based on current route.
int _calculateSelectedIndex(BuildContext context) {
final location = GoRouterState.of(context).matchedLocation;
if (location.startsWith('/profile')) return 1;
return 0;
}
/// Navigates to route corresponding to index.
void _onItemTapped(int index, BuildContext context) {
switch (index) {
case 0:
context.goNamed('home');
case 1:
context.goNamed('profile');
}
}
}NavigationBar ของ Material 3 ปรับตัวตามธีมสว่างและธีมมืดโดยอัตโนมัติ
หน้าจอและฟอร์ม
การสร้างหน้าจอแบบโต้ตอบรวม Widget การจัดการสถานะ และการตรวจสอบฟอร์มเข้าด้วยกัน
import 'package:flutter/material.dart';
import 'package:flutter_riverpod/flutter_riverpod.dart';
import 'package:go_router/go_router.dart';
import '../providers/auth_provider.dart';
import '../../../../shared/widgets/custom_button.dart';
/// Login screen with validated form.
class LoginScreen extends ConsumerStatefulWidget {
const LoginScreen({super.key});
ConsumerState<LoginScreen> createState() => _LoginScreenState();
}
class _LoginScreenState extends ConsumerState<LoginScreen> {
// Global key for the form
final _formKey = GlobalKey<FormState>();
// Controllers for text fields
final _emailController = TextEditingController();
final _passwordController = TextEditingController();
// Local state for password visibility
bool _obscurePassword = true;
void dispose() {
// Resource cleanup
_emailController.dispose();
_passwordController.dispose();
super.dispose();
}
/// Submits the login form.
Future<void> _submit() async {
// Validate all fields
if (_formKey.currentState!.validate()) {
await ref.read(authProvider.notifier).signIn(
_emailController.text.trim(),
_passwordController.text,
);
}
}
Widget build(BuildContext context) {
final theme = Theme.of(context);
final authState = ref.watch(authProvider);
final isLoading = authState is AuthLoading;
// Listen for errors to display snackbar
ref.listen<AuthState>(authProvider, (previous, next) {
if (next is AuthError) {
ScaffoldMessenger.of(context).showSnackBar(
SnackBar(
content: Text(next.message),
backgroundColor: theme.colorScheme.error,
),
);
}
});
return Scaffold(
body: SafeArea(
child: Center(
child: SingleChildScrollView(
padding: const EdgeInsets.all(24),
child: Form(
key: _formKey,
child: Column(
mainAxisAlignment: MainAxisAlignment.center,
crossAxisAlignment: CrossAxisAlignment.stretch,
children: [
// Logo or title
Icon(
Icons.flutter_dash,
size: 80,
color: theme.colorScheme.primary,
),
const SizedBox(height: 16),
Text(
'Sign In',
style: theme.textTheme.headlineMedium?.copyWith(
fontWeight: FontWeight.bold,
),
textAlign: TextAlign.center,
),
const SizedBox(height: 32),
// Email field with validation
TextFormField(
controller: _emailController,
keyboardType: TextInputType.emailAddress,
textInputAction: TextInputAction.next,
decoration: const InputDecoration(
labelText: 'Email',
hintText: 'example@email.com',
prefixIcon: Icon(Icons.email_outlined),
),
validator: (value) {
if (value == null || value.isEmpty) {
return 'Email is required';
}
// Basic email format validation
if (!RegExp(r'^[\w-\.]+@([\w-]+\.)+[\w-]{2,4}$')
.hasMatch(value)) {
return 'Invalid email format';
}
return null;
},
),
const SizedBox(height: 16),
// Password field with visibility toggle
TextFormField(
controller: _passwordController,
obscureText: _obscurePassword,
textInputAction: TextInputAction.done,
onFieldSubmitted: (_) => _submit(),
decoration: InputDecoration(
labelText: 'Password',
prefixIcon: const Icon(Icons.lock_outlined),
suffixIcon: IconButton(
icon: Icon(
_obscurePassword
? Icons.visibility_outlined
: Icons.visibility_off_outlined,
),
onPressed: () {
setState(() {
_obscurePassword = !_obscurePassword;
});
},
),
),
validator: (value) {
if (value == null || value.isEmpty) {
return 'Password is required';
}
if (value.length < 8) {
return 'Minimum 8 characters';
}
return null;
},
),
const SizedBox(height: 24),
// Sign in button
CustomButton(
label: 'Sign In',
isLoading: isLoading,
onPressed: _submit,
),
const SizedBox(height: 16),
// Link to registration
TextButton(
onPressed: () => context.goNamed('register'),
child: const Text('No account? Create one'),
),
],
),
),
),
),
),
);
}
}การใช้ ConsumerStatefulWidget รวมสถานะภายใน (ตัวควบคุมฟอร์ม) เข้ากับสถานะ Global (Riverpod)
Instance ของ TextEditingController ต้องถูกปล่อยในเมธอด dispose() เพื่อป้องกัน Memory Leak กฎนี้ใช้กับ Controller และ Listener ทั้งหมดที่สร้างด้วยตนเอง
การสื่อสาร HTTP ด้วย Dio
Dio มี API สำหรับ HTTP ที่ทรงพลังพร้อม Interceptor การจัดการข้อผิดพลาด และการแปลง Response โดยอัตโนมัติ
import 'package:dio/dio.dart';
import 'package:flutter_riverpod/flutter_riverpod.dart';
import '../constants/api_constants.dart';
/// Provider for Dio HTTP client.
final apiClientProvider = Provider<ApiClient>((ref) {
return ApiClient();
});
/// HTTP client configured with interceptors.
class ApiClient {
late final Dio _dio;
ApiClient() {
_dio = Dio(
BaseOptions(
baseUrl: ApiConstants.baseUrl,
connectTimeout: const Duration(seconds: 10),
receiveTimeout: const Duration(seconds: 10),
headers: {
'Content-Type': 'application/json',
'Accept': 'application/json',
},
),
);
// Add interceptors
_dio.interceptors.addAll([
_AuthInterceptor(),
_LoggingInterceptor(),
]);
}
/// Generic GET request.
Future<T> get<T>(
String path, {
Map<String, dynamic>? queryParameters,
T Function(dynamic)? fromJson,
}) async {
try {
final response = await _dio.get(
path,
queryParameters: queryParameters,
);
if (fromJson != null) {
return fromJson(response.data);
}
return response.data as T;
} on DioException catch (e) {
throw _handleError(e);
}
}
/// Generic POST request.
Future<T> post<T>(
String path, {
dynamic data,
T Function(dynamic)? fromJson,
}) async {
try {
final response = await _dio.post(path, data: data);
if (fromJson != null) {
return fromJson(response.data);
}
return response.data as T;
} on DioException catch (e) {
throw _handleError(e);
}
}
/// Sets the authentication token.
void setAuthToken(String token) {
_dio.options.headers['Authorization'] = 'Bearer $token';
}
/// Clears the authentication token.
void clearAuthToken() {
_dio.options.headers.remove('Authorization');
}
/// Converts Dio errors to readable exceptions.
Exception _handleError(DioException error) {
switch (error.type) {
case DioExceptionType.connectionTimeout:
case DioExceptionType.sendTimeout:
case DioExceptionType.receiveTimeout:
return Exception('Connection timeout. Check your connection.');
case DioExceptionType.badResponse:
final statusCode = error.response?.statusCode;
final message = error.response?.data['message'] ?? 'Server error';
return Exception('Error $statusCode: $message');
case DioExceptionType.cancel:
return Exception('Request cancelled');
default:
return Exception('Network error: ${error.message}');
}
}
}
/// Interceptor to automatically add token.
class _AuthInterceptor extends Interceptor {
void onRequest(
RequestOptions options,
RequestInterceptorHandler handler,
) {
// Token is added via setAuthToken()
handler.next(options);
}
void onError(
DioException err,
ErrorInterceptorHandler handler,
) {
// Handle 401 for token refresh
if (err.response?.statusCode == 401) {
// TODO: Implement token refresh
}
handler.next(err);
}
}
/// Logging interceptor for development.
class _LoggingInterceptor extends Interceptor {
void onRequest(
RequestOptions options,
RequestInterceptorHandler handler,
) {
print('→ ${options.method} ${options.path}');
handler.next(options);
}
void onResponse(
Response response,
ResponseInterceptorHandler handler,
) {
print('← ${response.statusCode} ${response.requestOptions.path}');
handler.next(response);
}
void onError(
DioException err,
ErrorInterceptorHandler handler,
) {
print('✗ ${err.response?.statusCode} ${err.requestOptions.path}');
handler.next(err);
}
}Interceptor รวมศูนย์ลอจิกการยืนยันตัวตนและการบันทึกโดยไม่รบกวนแต่ละ Request
ธีมที่กำหนดเองด้วย Material 3
ธีมที่สม่ำเสมอรับประกันประสบการณ์ผู้ใช้ที่เป็นเอกภาพ Material 3 (Material You) ปรับตัวตามการตั้งค่าของระบบ
import 'package:flutter/material.dart';
import 'package:google_fonts/google_fonts.dart';

/// Application theme configuration.
class AppTheme {
  // Brand primary color
  static const _primaryColor = Color(0xFF6750A4);

  /// Material 3 light theme.
  static ThemeData get lightTheme {
    // Generate color scheme from primary color
    final colorScheme = ColorScheme.fromSeed(
      seedColor: _primaryColor,
      brightness: Brightness.light,
    );

    return ThemeData(
      useMaterial3: true,
      colorScheme: colorScheme,
      // Custom typography
      textTheme: GoogleFonts.interTextTheme(),
      // AppBar configuration
      appBarTheme: AppBarTheme(
        centerTitle: true,
        elevation: 0,
        backgroundColor: colorScheme.surface,
        foregroundColor: colorScheme.onSurface,
      ),
      // Form field configuration
      inputDecorationTheme: InputDecorationTheme(
        filled: true,
        fillColor: colorScheme.surfaceContainerHighest.withOpacity(0.5),
        border: OutlineInputBorder(
          borderRadius: BorderRadius.circular(12),
          borderSide: BorderSide.none,
        ),
        enabledBorder: OutlineInputBorder(
          borderRadius: BorderRadius.circular(12),
          borderSide: BorderSide.none,
        ),
        focusedBorder: OutlineInputBorder(
          borderRadius: BorderRadius.circular(12),
          borderSide: BorderSide(color: colorScheme.primary, width: 2),
        ),
        errorBorder: OutlineInputBorder(
          borderRadius: BorderRadius.circular(12),
          borderSide: BorderSide(color: colorScheme.error),
        ),
        contentPadding: const EdgeInsets.symmetric(
          horizontal: 16,
          vertical: 16,
        ),
      ),
      // Button configuration
      filledButtonTheme: FilledButtonThemeData(
        style: FilledButton.styleFrom(
          minimumSize: const Size(double.infinity, 52),
          shape: RoundedRectangleBorder(
            borderRadius: BorderRadius.circular(12),
          ),
        ),
      ),
      outlinedButtonTheme: OutlinedButtonThemeData(
        style: OutlinedButton.styleFrom(
          minimumSize: const Size(double.infinity, 52),
          shape: RoundedRectangleBorder(
            borderRadius: BorderRadius.circular(12),
          ),
        ),
      ),
      // Card configuration
      cardTheme: CardTheme(
        elevation: 2,
        shape: RoundedRectangleBorder(
          borderRadius: BorderRadius.circular(16),
        ),
      ),
    );
  }

  /// Material 3 dark theme.
  static ThemeData get darkTheme {
    final colorScheme = ColorScheme.fromSeed(
      seedColor: _primaryColor,
      brightness: Brightness.dark,
    );

    return ThemeData(
      useMaterial3: true,
      colorScheme: colorScheme,
      textTheme: GoogleFonts.interTextTheme(
        ThemeData.dark().textTheme,
      ),
      appBarTheme: AppBarTheme(
        centerTitle: true,
        elevation: 0,
        backgroundColor: colorScheme.surface,
        foregroundColor: colorScheme.onSurface,
      ),
      inputDecorationTheme: InputDecorationTheme(
        filled: true,
        fillColor: colorScheme.surfaceContainerHighest.withOpacity(0.5),
        border: OutlineInputBorder(
          borderRadius: BorderRadius.circular(12),
          borderSide: BorderSide.none,
        ),
        enabledBorder: OutlineInputBorder(
          borderRadius: BorderRadius.circular(12),
          borderSide: BorderSide.none,
        ),
        focusedBorder: OutlineInputBorder(
          borderRadius: BorderRadius.circular(12),
          borderSide: BorderSide(color: colorScheme.primary, width: 2),
        ),
        errorBorder: OutlineInputBorder(
          borderRadius: BorderRadius.circular(12),
          borderSide: BorderSide(color: colorScheme.error),
        ),
        contentPadding: const EdgeInsets.symmetric(
          horizontal: 16,
          vertical: 16,
        ),
      ),
      filledButtonTheme: FilledButtonThemeData(
        style: FilledButton.styleFrom(
          minimumSize: const Size(double.infinity, 52),
          shape: RoundedRectangleBorder(
            borderRadius: BorderRadius.circular(12),
          ),
        ),
      ),
      outlinedButtonTheme: OutlinedButtonThemeData(
        style: OutlinedButton.styleFrom(
          minimumSize: const Size(double.infinity, 52),
          shape: RoundedRectangleBorder(
            borderRadius: BorderRadius.circular(12),
          ),
        ),
      ),
      cardTheme: CardTheme(
        elevation: 2,
        shape: RoundedRectangleBorder(
          borderRadius: BorderRadius.circular(16),
        ),
      ),
    );
  }
}
ColorScheme.fromSeed สร้างจานสีที่ครบถ้วนและเข้าถึงได้โดยอัตโนมัติจากสีเดียว
การกำหนดค่าแอปพลิเคชัน
จุดเริ่มต้นของแอปพลิเคชันเริ่มต้น Riverpod และกำหนดค่าธีม
import 'package:flutter/material.dart';
import 'package:flutter_riverpod/flutter_riverpod.dart';
import 'app.dart';

void main() {
  // Ensure Flutter bindings are initialized
  WidgetsFlutterBinding.ensureInitialized();

  // Launch application with Riverpod scope
  runApp(
    const ProviderScope(
      child: App(),
    ),
  );
}import 'package:flutter/material.dart';
import 'package:flutter_riverpod/flutter_riverpod.dart';
import 'core/theme/app_theme.dart';
import 'routing/app_router.dart';
/// Root application widget.
class App extends ConsumerWidget {
const App({super.key});
Widget build(BuildContext context, WidgetRef ref) {
// Get configured router
final router = ref.watch(routerProvider);
return MaterialApp.router(
title: 'My Flutter App',
debugShowCheckedModeBanner: false,
// Theme configuration
theme: AppTheme.lightTheme,
darkTheme: AppTheme.darkTheme,
themeMode: ThemeMode.system,
// Router configuration
routerConfig: router,
);
}
}ThemeMode.system ปรับธีมให้ตรงกับการตั้งค่าของผู้ใช้โดยอัตโนมัติ
สรุป
Flutter มีระบบนิเวศที่ครบถ้วนสำหรับสร้างแอปพลิเคชันข้ามแพลตฟอร์มที่มีประสิทธิภาพสูง การผสมผสาน Widget แบบ Declarative, Riverpod สำหรับจัดการสถานะ และ GoRouter สำหรับการนำทาง ช่วยให้สร้างแอปพลิเคชันที่บำรุงรักษาได้ง่ายและขยายขนาดได้
รายการตรวจสอบสำหรับเริ่มต้นกับ Flutter
- ✅ ติดตั้ง Flutter SDK และตั้งค่าสภาพแวดล้อมด้วย
flutter doctor - ✅ จัดโครงสร้างโปรเจกต์ตาม Feature เพื่อการจัดระเบียบที่ดีขึ้น
- ✅ ใช้ Riverpod สำหรับจัดการสถานะแบบมี Type Safety
- ✅ กำหนดค่า GoRouter พร้อมการเปลี่ยนเส้นทางการยืนยันตัวตน
- ✅ สร้าง Widget ที่นำกลับมาใช้ซ้ำได้และประกอบกันได้
- ✅ ใช้ธีม Material 3 ที่สม่ำเสมอ
- ✅ รวมศูนย์การเรียก HTTP ด้วย Dio และ Interceptor
เริ่มฝึกซ้อมเลย!
ทดสอบความรู้ของคุณด้วยตัวจำลองสัมภาษณ์และแบบทดสอบเทคนิคครับ
แนวทาง Declarative ของ Flutter ส่งเสริมการประกอบและการนำกลับมาใช้ซ้ำ แต่ละ Widget สามารถทดสอบได้อย่างอิสระ และ Hot Reload ช่วยเร่งรอบการพัฒนาอย่างมาก พื้นฐานที่แข็งแกร่งนี้ช่วยให้ขยายแอปพลิเคชันไปสู่ฟีเจอร์ขั้นสูง เช่น แอนิเมชันที่ซับซ้อน การทดสอบอัตโนมัติ และการเผยแพร่บน Store
แท็ก
แชร์
บทความที่เกี่ยวข้อง
20 คำถามสัมภาษณ์งาน Flutter ที่พบบ่อยที่สุดสำหรับนักพัฒนาแอปมือถือ
เตรียมตัวสัมภาษณ์งาน Flutter ด้วยคำถาม 20 ข้อที่ถูกถามบ่อยที่สุด ครอบคลุม Widget, State Management, Dart, สถาปัตยกรรม และแนวทางปฏิบัติที่ดีที่สุด พร้อมคำอธิบายอย่างละเอียดและตัวอย่างโค้ด

Flutter และ Firebase ในปี 2026: การยืนยันตัวตน, Firestore และคำถามสัมภาษณ์
เจาะลึก Flutter Firebase: การยืนยันตัวตนด้วย firebase_auth, CRUD ของ Firestore และสตรีมแบบเรียลไทม์, กฎความปลอดภัย และคำถามสัมภาษณ์ที่พบบ่อยพร้อมตัวอย่างโค้ด
การจัดการ State ใน Flutter: Riverpod vs BLoC - คู่มือเปรียบเทียบฉบับสมบูรณ์
การเปรียบเทียบเชิงลึกระหว่าง Riverpod และ BLoC สำหรับการจัดการ state ใน Flutter สถาปัตยกรรม ประสิทธิภาพ ความสามารถในการทดสอบ และกรณีการใช้งานเพื่อเลือกโซลูชันที่ดีที่สุด