Angular 18 Signals 완전 가이드: 새로운 리액티브 API와 Zoneless 변경 감지
Angular 18의 Signals, Zoneless 변경 감지, signal 기반 API를 해설합니다. input(), model(), viewChild()의 실전 사용법을 코드 예제와 함께 소개합니다.

Angular 18은 Signals의 안정화를 통해 프레임워크 진화의 전환점을 맞이했습니다. 이 새로운 리액티브 프리미티브는 Angular 컴포넌트 구축 방식을 근본적으로 바꾸며, 기존 데코레이터의 모던한 대안을 제공하는 동시에 Zone.js 없는 변경 감지로 가는 길을 열어줍니다.
Angular 18의 signal 기반 API: input(), model(), viewChild(), 그리고 더 가볍고 성능 좋은 애플리케이션을 위한 Zoneless 설정을 다룹니다.
Angular 18에서의 Signals 기본 개념
Signals는 Angular에서 리액티비티에 대한 새로운 접근법입니다. Zone.js 변경 감지에 의존하는 @Input() 같은 기존 데코레이터와 달리, Signals는 세밀하고 명시적인 리액티비티를 제공합니다. 각 Signal은 값을 캡슐화하고, 해당 값이 변경될 때 소비자에게 자동으로 알림을 보냅니다.
이 접근법의 장점은 다음과 같습니다: 타깃 업데이트를 통한 성능 향상, computed()와 effect() 함수와의 네이티브 통합, 그리고 Angular의 Zoneless 미래를 위한 준비입니다.
// Demonstration of fundamental Signal concepts
import { Component, signal, computed, effect } from '@angular/core';

@Component({
  selector: 'app-counter',
  standalone: true,
  template: `
    <div class="counter-container">
      <h2>Counter: {{ count() }}</h2>
      <p>Double: {{ doubleCount() }}</p>

      <button (click)="increment()">+1</button>
      <button (click)="decrement()">-1</button>
      <button (click)="reset()">Reset</button>
    </div>
  `
})
export class CounterComponent {
  // Writable signal - value can be modified
  count = signal(0);

  // Computed signal - automatically derived from count
  // Only recalculates when count changes
  doubleCount = computed(() => this.count() * 2);

  constructor() {
    // Effect - executed on every count change
    // Useful for side effects (logs, API calls, etc.)
    effect(() => {
      console.log(`New counter value: ${this.count()}`);
    });
  }

  increment() {
    // update() allows modification based on previous value
    this.count.update(value => value + 1);
  }

  decrement() {
    this.count.update(value => value - 1);
  }

  reset() {
    // set() directly replaces the value
    this.count.set(0);
  }
}
Signals는 리액티브 컨테이너로 작동합니다. signal()은 쓰기 가능한 Signal을 생성하고, computed()는 파생된 계산 값을 만들며, effect()는 변경에 따른 액션 실행을 가능하게 합니다.
input()을 사용한 Signal Inputs
input() 함수는 기존의 @Input() 데코레이터를 대체합니다. 읽기 전용 InputSignal을 반환하므로 데이터가 항상 부모에서 자식으로 단방향으로 흐르며, 실수로 변경될 일이 없습니다.
// Component using signal inputs
import { Component, input, computed } from '@angular/core';

interface Book {
  id: string;
  title: string;
  author: string;
  price: number;
  discountPercent?: number;
}

@Component({
  selector: 'app-book-card',
  standalone: true,
  template: `
    <article class="book-card">
      <h3>{{ book().title }}</h3>
      <p class="author">By {{ book().author }}</p>

      @if (hasDiscount()) {
        <p class="price">
          <span class="original">\${{ book().price }}</span>
          <span class="discounted">\${{ discountedPrice() }}</span>
        </p>
      } @else {
        <p class="price">\${{ book().price }}</p>
      }

      @if (featured()) {
        <span class="badge">Featured</span>
      }
    </article>
  `
})
export class BookCardComponent {
  // Required input - template won't compile without this prop
  book = input.required<Book>();

  // Optional input with default value
  featured = input(false);

  // Computed based on input - automatically recalculated
  hasDiscount = computed(() => {
    const discount = this.book().discountPercent;
    return discount !== undefined && discount > 0;
  });

  // Discounted price calculation
  discountedPrice = computed(() => {
    const { price, discountPercent } = this.book();
    if (!discountPercent) return price;
    return (price * (100 - discountPercent) / 100).toFixed(2);
  });
}
부모 템플릿에서의 사용법은 기존과 유사하지만, 타입 안전성과 Signal 리액티비티가 추가됩니다.
// Parent component using book-card
import { Component, signal } from '@angular/core';
import { BookCardComponent } from './book-card.component';

@Component({
  selector: 'app-book-list',
  standalone: true,
  imports: [BookCardComponent],
  template: `
    <div class="book-grid">
      @for (book of books(); track book.id) {
        <app-book-card
          [book]="book"
          [featured]="book.id === featuredBookId()"
        />
      }
    </div>
  `
})
export class BookListComponent {
  books = signal<Book[]>([
    { id: '1', title: 'Clean Code', author: 'Robert C. Martin', price: 35 },
    { id: '2', title: 'The Pragmatic Programmer', author: 'David Thomas', price: 42, discountPercent: 15 }
  ]);

  featuredBookId = signal('1');
}@Input()과의 가장 큰 차이점은 signal inputs가 읽기 전용이라는 것입니다. 자식 컴포넌트에서 this.book.set()을 호출하는 것이 불가능하며, 이를 통해 단방향 데이터 흐름이 강화됩니다.
model()을 사용한 양방향 바인딩
양방향 동기화가 필요한 경우를 위해 Angular 18은 model()을 도입했습니다. 이 함수는 쓰기 가능한 Signal을 생성하며, 변경 사항을 부모 컴포넌트에 자동으로 전파합니다.
// Component with bidirectional binding via model()
import { Component, model, output, computed } from '@angular/core';

@Component({
  selector: 'app-search-input',
  standalone: true,
  template: `
    <div class="search-container">
      <input
        type="text"
        [value]="query()"
        (input)="onInput($event)"
        [placeholder]="placeholder()"
        class="search-input"
      />

      @if (query().length > 0) {
        <button (click)="clear()" class="clear-btn">×</button>
      }

      <span class="char-count">{{ charCount() }} characters</span>
    </div>
  `
})
export class SearchInputComponent {
  // model() creates a bidirectional Signal
  // Modifications propagate to parent
  query = model('');

  // Classic input for configuration
  placeholder = model('Search...');

  // Output for additional events
  searchSubmitted = output<string>();

  // Computed based on model
  charCount = computed(() => this.query().length);

  onInput(event: Event) {
    const value = (event.target as HTMLInputElement).value;
    // Update model - propagates to parent
    this.query.set(value);
  }

  clear() {
    this.query.set('');
  }

  submit() {
    if (this.query().length > 0) {
      this.searchSubmitted.emit(this.query());
    }
  }
}
부모 컴포넌트에서는 바나나 인 어 박스 구문 [()]을 사용하여 양방향 바인딩을 구현합니다.
// Using two-way binding with model()
import { Component, signal, effect } from '@angular/core';
import { SearchInputComponent } from './search-input.component';

@Component({
  selector: 'app-root',
  standalone: true,
  imports: [SearchInputComponent],
  template: `
    <div class="app-container">
      <app-search-input [(query)]="searchTerm" />

      <p>Current search: {{ searchTerm() }}</p>

      <div class="results">
        @for (result of filteredResults(); track result.id) {
          <div class="result-item">{{ result.name }}</div>
        }
      </div>
    </div>
  `
})
export class AppComponent {
  // Local signal synchronized with child component
  searchTerm = signal('');

  results = signal([
    { id: 1, name: 'Angular 18' },
    { id: 2, name: 'React 19' },
    { id: 3, name: 'Vue 3' }
  ]);

  // Reactive filtering based on searchTerm
  filteredResults = computed(() => {
    const term = this.searchTerm().toLowerCase();
    if (!term) return this.results();
    return this.results().filter(r =>
      r.name.toLowerCase().includes(term)
    );
  });
}읽기 전용 데이터(부모에서 자식으로의 단방향)에는 input()을 사용합니다. 자식 컴포넌트가 값을 변경해야 하는 경우(양방향)에는 model()을 사용합니다.
viewChild()와 contentChild()를 사용한 Signal 쿼리
viewChild(), viewChildren(), contentChild(), contentChildren() 함수는 대응하는 데코레이터를 대체합니다. Signal을 반환하기 때문에 ngAfterViewInit과 같은 라이프사이클 훅이 더 이상 필요하지 않습니다.
// Demonstration of signal queries
import {
  Component,
  viewChild,
  viewChildren,
  ElementRef,
  effect,
  signal
} from '@angular/core';
import { FormFieldComponent } from './form-field.component';

@Component({
  selector: 'app-form-container',
  standalone: true,
  imports: [FormFieldComponent],
  template: `
    <form #formElement (submit)="onSubmit($event)">
      <input #firstInput type="text" placeholder="Name" />

      <app-form-field label="Email" />
      <app-form-field label="Phone" />

      <div class="actions">
        <button type="submit">Submit</button>
        <button type="button" (click)="focusFirst()">Focus first field</button>
      </div>
    </form>
  `
})
export class FormContainerComponent {
  // viewChild returns Signal<ElementRef | undefined>
  formElement = viewChild<ElementRef>('formElement');

  // viewChild.required guarantees element exists
  firstInput = viewChild.required<ElementRef<HTMLInputElement>>('firstInput');

  // Query on a component - returns the component itself
  firstFormField = viewChild(FormFieldComponent);

  // viewChildren for multiple elements
  allFormFields = viewChildren(FormFieldComponent);

  constructor() {
    // Effect replaces ngAfterViewInit for queries
    effect(() => {
      // Signal is automatically resolved
      const input = this.firstInput();
      console.log('First input available:', input.nativeElement);
    });

    // React to list changes
    effect(() => {
      const fields = this.allFormFields();
      console.log(`${fields.length} form fields found`);
    });
  }

  focusFirst() {
    // Direct access via Signal
    this.firstInput().nativeElement.focus();
  }

  onSubmit(event: Event) {
    event.preventDefault();
    // Access the form
    const form = this.formElement();
    if (form) {
      console.log('Form submitted');
    }
  }
}
콘텐츠 프로젝션과 그 접근에는 contentChild()가 동일한 방식으로 작동합니다.
// Using contentChild for projected content
import { Component, contentChild, contentChildren, TemplateRef } from '@angular/core';

@Component({
  selector: 'app-card',
  standalone: true,
  template: `
    <div class="card">
      <header class="card-header">
        <ng-content select="[card-title]" />
      </header>

      <div class="card-body">
        <ng-content />
      </div>

      @if (hasFooter()) {
        <footer class="card-footer">
          <ng-content select="[card-footer]" />
        </footer>
      }
    </div>
  `
})
export class CardComponent {
  // Detect if footer was projected
  footerContent = contentChild<ElementRef>('[card-footer]');

  // Computed to check footer presence
  hasFooter = computed(() => this.footerContent() !== undefined);
}
Angular 면접 준비가 되셨나요?
인터랙티브 시뮬레이터, flashcards, 기술 테스트로 연습하세요.
Zoneless 변경 감지
Angular 18은 실험적 모드로 Zone.js 없는 변경 감지를 도입했습니다. 이 기능은 번들 크기를 약 13KB 줄이고, 브라우저 비동기 API에 대한 몽키 패칭을 제거하여 성능을 향상시킵니다.
// Configuring the application in zoneless mode
import { bootstrapApplication } from '@angular/platform-browser';
import { provideExperimentalZonelessChangeDetection } from '@angular/core';
import { AppComponent } from './app/app.component';

bootstrapApplication(AppComponent, {
  providers: [
    // Enable experimental zoneless detection
    provideExperimentalZonelessChangeDetection()
  ]
});
angular.json 설정도 Zone.js를 제거하도록 업데이트해야 합니다.
{
  "projects": {
    "my-app": {
      "architect": {
        "build": {
          "options": {
            "polyfills": []
          }
        }
      }
    }
  }
}
Zoneless 모드에서는 다음 경우에 변경 감지가 자동으로 트리거됩니다: Signal 업데이트, markForCheck() 호출, AsyncPipe를 통한 새 값 수신, 컴포넌트 attach/detach.
// Component optimized for zoneless mode
import {
  Component,
  signal,
  ChangeDetectionStrategy,
  inject
} from '@angular/core';
import { HttpClient } from '@angular/common/http';
import { toSignal } from '@angular/core/rxjs-interop';

@Component({
  selector: 'app-zoneless-counter',
  standalone: true,
  // OnPush recommended for zoneless
  changeDetection: ChangeDetectionStrategy.OnPush,
  template: `
    <div class="counter">
      <p>Counter: {{ count() }}</p>
      <button (click)="increment()">Increment</button>

      @if (loading()) {
        <p>Loading...</p>
      }

      @if (data()) {
        <pre>{{ data() | json }}</pre>
      }
    </div>
  `
})
export class ZonelessCounterComponent {
  private http = inject(HttpClient);

  count = signal(0);
  loading = signal(false);
  data = signal<any>(null);

  increment() {
    // Signal update triggers detection
    this.count.update(c => c + 1);
  }

  async fetchData() {
    this.loading.set(true);

    try {
      // Signals guarantee view updates
      const response = await fetch('/api/data');
      const json = await response.json();
      this.data.set(json);
    } finally {
      this.loading.set(false);
    }
  }
}ChangeDetectionStrategy.OnPush와 Signals를 사용하는 컴포넌트는 일반적으로 Zoneless 모드와 호환됩니다. Signal이 아닌 프로퍼티를 직접 변경하는 것은 피해야 합니다.
기존 컴포넌트 마이그레이션
signal 기반 API로의 마이그레이션은 점진적으로 진행할 수 있습니다. 기존 컴포넌트를 리팩터링하는 예시를 살펴봅니다.
// BEFORE: Component with classic decorators
// user-profile-legacy.component.ts
import { Component, Input, ViewChild, ElementRef, AfterViewInit } from '@angular/core';

@Component({
  selector: 'app-user-profile-legacy',
  template: `
    <div #container>
      <h2>{{ user.name }}</h2>
      <p>{{ user.email }}</p>
    </div>
  `
})
export class UserProfileLegacyComponent implements AfterViewInit {
  @Input() user!: { name: string; email: string };
  @ViewChild('container') container!: ElementRef;

  ngAfterViewInit() {
    console.log('Container ready:', this.container.nativeElement);
  }
}// AFTER: Component migrated to Signals
// user-profile.component.ts
import { Component, input, viewChild, ElementRef, effect } from '@angular/core';
interface User {
name: string;
email: string;
}
@Component({
selector: 'app-user-profile',
standalone: true,
template: `
<div #container>
<h2>{{ user().name }}</h2>
<p>{{ user().email }}</p>
</div>
`
})
export class UserProfileComponent {
// input.required replaces @Input() with !
user = input.required<User>();
// viewChild.required replaces @ViewChild with !
container = viewChild.required<ElementRef>('container');
constructor() {
// effect replaces ngAfterViewInit for queries
effect(() => {
console.log('Container ready:', this.container().nativeElement);
});
}
}이 마이그레이션의 장점은 더 엄격한 타입 지정, 자동 리액티비티, 보일러플레이트 코드 감소, 그리고 Zoneless 모드와의 호환성입니다.
Signals 베스트 프랙티스
Angular 18에서 Signals를 최대한 활용하기 위한 핵심 권장 사항을 소개합니다.
// Example of best practices with Signals
import {
  Component,
  signal,
  computed,
  effect,
  untracked,
  ChangeDetectionStrategy
} from '@angular/core';

interface Product {
  id: string;
  name: string;
  price: number;
  quantity: number;
}

@Component({
  selector: 'app-cart',
  standalone: true,
  changeDetection: ChangeDetectionStrategy.OnPush,
  template: `
    <div class="cart">
      <h2>Cart ({{ itemCount() }} items)</h2>

      @for (item of items(); track item.id) {
        <div class="cart-item">
          <span>{{ item.name }}</span>
          <span>{{ item.quantity }} × \${{ item.price }}</span>
          <button (click)="removeItem(item.id)">Remove</button>
        </div>
      }

      <div class="cart-total">
        <strong>Total: \${{ total() }}</strong>
      </div>
    </div>
  `
})
export class CartComponent {
  // Signal for mutable data
  items = signal<Product[]>([]);

  // Computed for derived values - avoids unnecessary recalculations
  itemCount = computed(() => this.items().length);

  total = computed(() =>
    this.items().reduce((sum, item) => sum + item.price * item.quantity, 0)
  );

  constructor() {
    // Effect for side effects (analytics, persistence)
    effect(() => {
      const currentItems = this.items();
      // untracked avoids creating a dependency
      untracked(() => {
        localStorage.setItem('cart', JSON.stringify(currentItems));
      });
    });
  }

  addItem(product: Product) {
    // update() for modifications based on previous state
    this.items.update(current => {
      const existing = current.find(i => i.id === product.id);
      if (existing) {
        return current.map(i =>
          i.id === product.id
            ? { ...i, quantity: i.quantity + 1 }
            : i
        );
      }
      return [...current, { ...product, quantity: 1 }];
    });
  }

  removeItem(id: string) {
    this.items.update(current => current.filter(i => i.id !== id));
  }
}
기억해야 할 핵심 사항은 다음과 같습니다.
- 템플릿에서 재계산하는 대신 파생 값에는
computed()를 사용할 것 - 새 값이 이전 값에 의존하는 경우
set()보다update()를 우선 사용할 것 - effect 내에서 순환 의존성을 피하기 위해
untracked()를 사용할 것 - 렌더링 최적화를 위해
@for루프에서 반드시track을 지정할 것
결론
Angular 18은 Signals를 통해 Zone.js 없는 미래의 기반을 마련했습니다. 주요 요점은 다음과 같습니다.
- input() 은
@Input()을 대체하며, 더 엄격한 타입 지정과 읽기 전용 접근을 보장합니다 - model() 은 부모-자식 간 리액티브 양방향 바인딩을 구현합니다
- viewChild() 와 contentChild() 는 라이프사이클 훅의 필요성을 제거합니다
- Zoneless 는 번들 크기를 줄이고 성능을 향상시킵니다
- computed() 와 effect() 가 리액티브 에코시스템을 완성합니다
- 컴포넌트 단위의 점진적 마이그레이션이 가능합니다
Signals 도입은 Zoneless 모드가 표준이 될 미래의 Angular 버전을 위한 준비입니다. 이 전환은 장기적인 유지보수성과 성능을 위한 현명한 투자라 할 수 있습니다.
연습을 시작하세요!
면접 시뮬레이터와 기술 테스트로 지식을 테스트하세요.
태그
공유
관련 기사

Angular 19 Zoneless: Zone.js 없이 구현하는 성능과 변경 감지
Angular의 zoneless 변경 감지는 Zone.js를 완전히 제거하여 더 작은 번들 크기, 빠른 렌더링, 그리고 시그널을 통한 명시적 반응성을 제공합니다. 이 심층 가이드는 Angular 19의 provideExperimentalZonelessChangeDetection부터 Angular 20+ 안정화 API까지 Zone.js에서 zoneless Angular로의 마이그레이션 경로를 다룹니다.
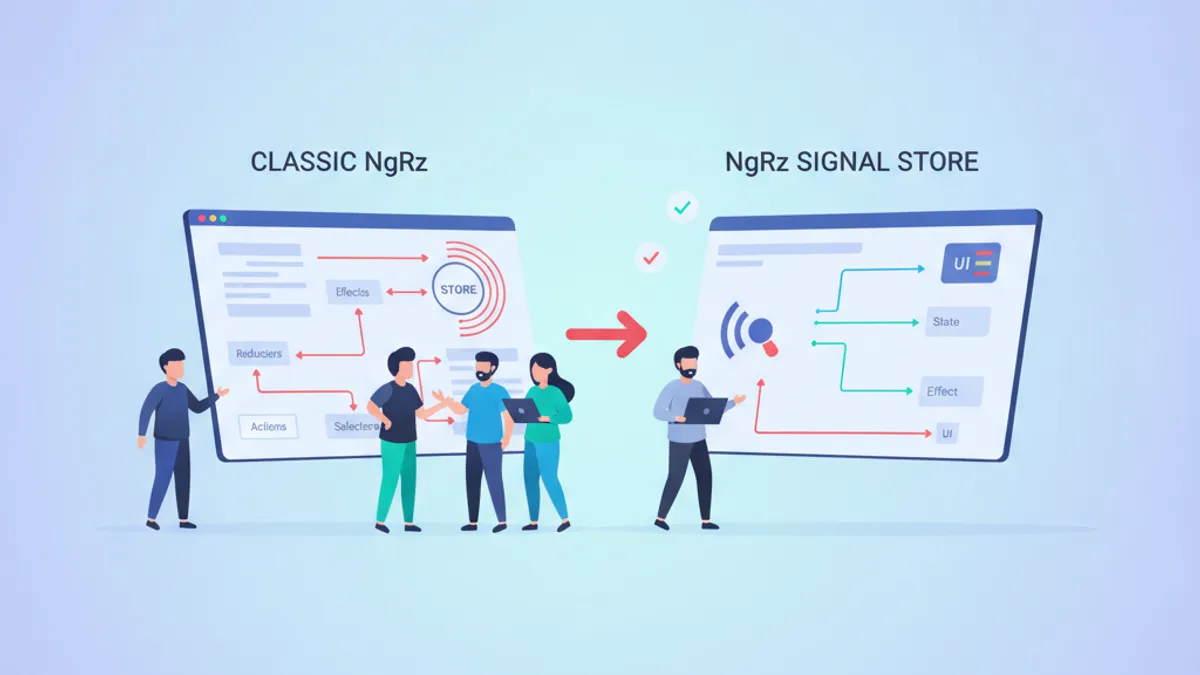
NgRx Signal Store vs 기존 NgRx: 2026년 어떤 것을 선택해야 할까요?
NgRx Signal Store와 기존 NgRx를 비교 분석하여 2026년 Angular 프로젝트에 최적의 상태 관리 솔루션을 선택하는 방법을 안내합니다.

Angular 2026의 RxJS: 연산자, Subject, Signals 상호 운용
Angular 2026의 RxJS: 실무에서 쓰이는 연산자, Subject, Signals 상호 운용 패턴을 가장 자주 나오는 면접 질문과 함께 익힙니다.