Kubernetes: Deploying Your First Application
Hands-on guide to deploying an application on Kubernetes. From minikube installation to Deployments, Services, and ConfigMaps with practical examples.
Kubernetes (K8s) has become the de facto standard for container orchestration. Designed by Google and now maintained by the CNCF, Kubernetes automates deployment, scaling, and management of containerized applications. This guide walks through setting up a local cluster and deploying a first application.
Basic Docker knowledge is recommended before diving into Kubernetes. Containers are the fundamental building blocks that Kubernetes orchestrates. Reading the Docker guide beforehand makes understanding the concepts presented here much easier.
Understanding Kubernetes Architecture
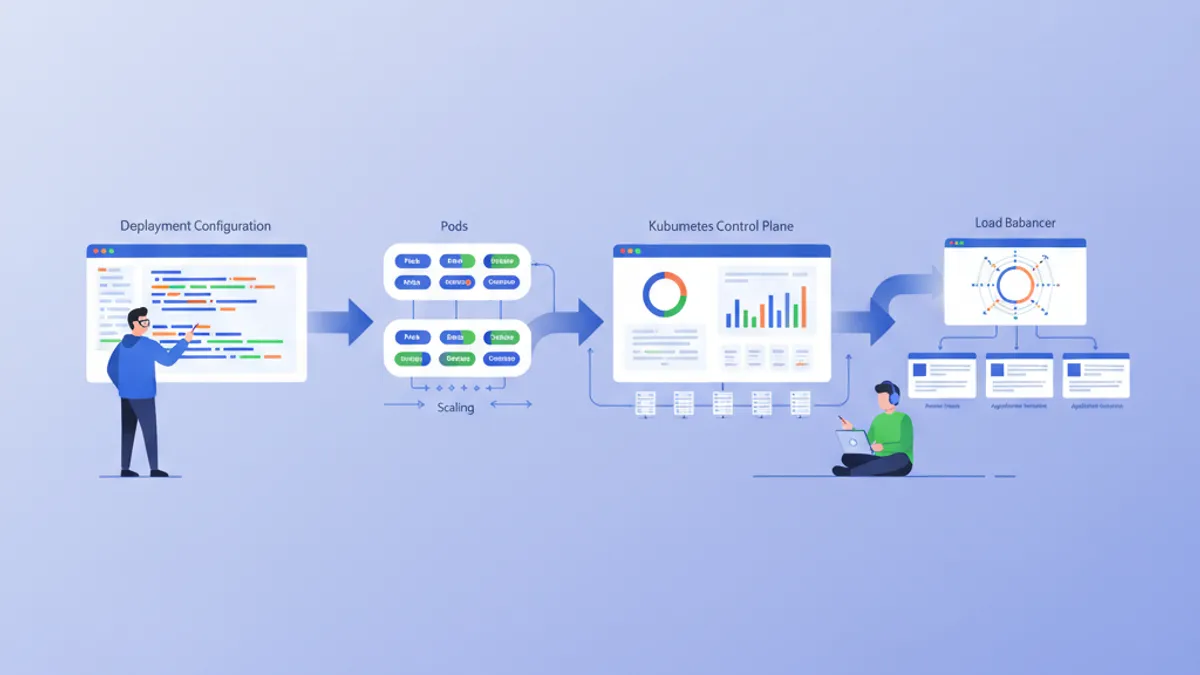
Kubernetes relies on a master-worker architecture. The Control Plane makes global decisions about the cluster, while Nodes run the workloads.
# Simplified Kubernetes Architecture

┌─────────────────────────────────────────────────────────────┐
│                      CONTROL PLANE                          │
│  ┌─────────────┐  ┌─────────────┐  ┌─────────────────────┐ │
│  │ API Server  │  │ Scheduler   │  │ Controller Manager  │ │
│  └─────────────┘  └─────────────┘  └─────────────────────┘ │
│  ┌─────────────────────────────────────────────────────────┐│
│  │                        etcd                             ││
│  └─────────────────────────────────────────────────────────┘│
└─────────────────────────────────────────────────────────────┘
                              │
         ┌────────────────────┼────────────────────┐
         ▼                    ▼                    ▼
┌─────────────────┐  ┌─────────────────┐  ┌─────────────────┐
│     NODE 1      │  │     NODE 2      │  │     NODE 3      │
│  ┌───────────┐  │  │  ┌───────────┐  │  │  ┌───────────┐  │
│  │  kubelet  │  │  │  │  kubelet  │  │  │  │  kubelet  │  │
│  ├───────────┤  │  │  ├───────────┤  │  │  ├───────────┤  │
│  │ kube-proxy│  │  │  │ kube-proxy│  │  │  │ kube-proxy│  │
│  ├───────────┤  │  │  ├───────────┤  │  │  ├───────────┤  │
│  │   Pods    │  │  │  │   Pods    │  │  │  │   Pods    │  │
│  └───────────┘  │  │  └───────────┘  │  │  └───────────┘  │
└─────────────────┘  └─────────────────┘  └─────────────────┘
The API Server is the entry point for all commands. etcd stores the cluster state. The Scheduler assigns Pods to Nodes. Controllers maintain the desired system state.
Setting Up the Local Environment
Several options exist for experimenting with Kubernetes locally: minikube, kind, k3d, or Docker Desktop. Minikube remains the most popular solution for learning.
# terminal
# Install kubectl (Kubernetes client)
curl -LO "https://dl.k8s.io/release/$(curl -L -s https://dl.k8s.io/release/stable.txt)/bin/linux/amd64/kubectl"
chmod +x kubectl
sudo mv kubectl /usr/local/bin/

# Verify installation
kubectl version --client
# Client Version: v1.31.0

# Install minikube
curl -LO https://storage.googleapis.com/minikube/releases/latest/minikube-linux-amd64
sudo install minikube-linux-amd64 /usr/local/bin/minikube

# Start the local cluster
minikube start --driver=docker --cpus=2 --memory=4096

# Check status
minikube status
# minikube: Running
# cluster: Running
# kubectl: Configured
Minikube creates a single-node Kubernetes cluster in a virtual machine or Docker container. Allocated resources (CPU, memory) can be adjusted as needed.
# terminal
# Access the Kubernetes dashboard (web interface)
minikube dashboard

# Check cluster nodes
kubectl get nodes
# NAME       STATUS   ROLES           AGE   VERSION
# minikube   Ready    control-plane   5m    v1.31.0

# Detailed cluster information
kubectl cluster-infoKind (Kubernetes in Docker) starts faster and suits CI/CD testing better. K3d uses k3s, a lightweight Kubernetes distribution. Docker Desktop integrates Kubernetes directly but consumes more resources.
Pods: The Basic Unit
A Pod is the smallest deployable unit in Kubernetes. A Pod encapsulates one or more containers that share the same network and storage.
# pod-simple.yaml
apiVersion: v1
kind: Pod
metadata:
  # Unique Pod name within the namespace
  name: nginx-pod
  # Labels for organization and selection
  labels:
    app: nginx
    environment: development
spec:
  containers:
    # Main container definition
    - name: nginx
      # Docker image to use
      image: nginx:1.25-alpine
      # Ports exposed by the container
      ports:
        - containerPort: 80
      # Container resource allocation
      resources:
        requests:
          memory: "64Mi"
          cpu: "100m"
        limits:
          memory: "128Mi"
          cpu: "200m"
This YAML manifest declares a Pod containing a single nginx container. Labels enable identifying and selecting Pods. Resources define minimum guarantees (requests) and maximum limits (limits).
# terminal
# Create the Pod
kubectl apply -f pod-simple.yaml
# pod/nginx-pod created

# List Pods
kubectl get pods
# NAME        READY   STATUS    RESTARTS   AGE
# nginx-pod   1/1     Running   0          30s

# Full Pod details
kubectl describe pod nginx-pod

# Container logs
kubectl logs nginx-pod

# Execute a command inside the Pod
kubectl exec -it nginx-pod -- /bin/sh

# Delete the Pod
kubectl delete pod nginx-pod
Pods are ephemeral by nature. In case of crash or deletion, Kubernetes does not automatically recreate them. Deployments solve this limitation.
Deployments: Declarative Management
A Deployment defines the desired state for a set of identical Pods. Kubernetes automatically maintains this state by creating, updating, or deleting Pods as needed.
# deployment.yaml
apiVersion: apps/v1
kind: Deployment
metadata:
  # Deployment name
  name: webapp-deployment
  labels:
    app: webapp
spec:
  # Desired number of replicas
  replicas: 3
  # Selector to identify managed Pods
  selector:
    matchLabels:
      app: webapp
  # Template for Pod creation
  template:
    metadata:
      labels:
        app: webapp
    spec:
      containers:
        - name: webapp
          image: nginx:1.25-alpine
          ports:
            - containerPort: 80
          resources:
            requests:
              memory: "64Mi"
              cpu: "100m"
            limits:
              memory: "128Mi"
              cpu: "200m"
          # Liveness probe: restarts container on failure
          livenessProbe:
            httpGet:
              path: /
              port: 80
            initialDelaySeconds: 10
            periodSeconds: 10
          # Readiness probe: removes Pod from Service on failure
          readinessProbe:
            httpGet:
              path: /
              port: 80
            initialDelaySeconds: 5
            periodSeconds: 5
The Deployment creates a ReplicaSet that maintains 3 identical Pods. Probes check container health and enable Kubernetes to react automatically to issues.
# terminal
# Create the Deployment
kubectl apply -f deployment.yaml
# deployment.apps/webapp-deployment created

# Verify the Deployment
kubectl get deployments
# NAME                READY   UP-TO-DATE   AVAILABLE   AGE
# webapp-deployment   3/3     3            3           1m

# List Pods created by the Deployment
kubectl get pods -l app=webapp
# NAME                                READY   STATUS    RESTARTS   AGE
# webapp-deployment-7d9f8b6c4-abc12   1/1     Running   0          1m
# webapp-deployment-7d9f8b6c4-def34   1/1     Running   0          1m
# webapp-deployment-7d9f8b6c4-ghi56   1/1     Running   0          1m

# Manual scaling
kubectl scale deployment webapp-deployment --replicas=5

# Deployment history
kubectl rollout history deployment webapp-deployment
Deleting a Pod automatically triggers the creation of a new Pod to maintain the desired replica count.
Ready to ace your DevOps interviews?
Practice with our interactive simulators, flashcards, and technical tests.
Services: Network Exposure
Pods have ephemeral IP addresses. Services provide a stable address to access a set of Pods, with built-in load balancing.
# service.yaml
apiVersion: v1
kind: Service
metadata:
  name: webapp-service
spec:
  # Service type: ClusterIP (internal), NodePort, LoadBalancer
  type: ClusterIP
  # Selector to identify target Pods
  selector:
    app: webapp
  ports:
    # Port exposed by the Service
    - port: 80
      # Target container port
      targetPort: 80
      # Protocol (TCP by default)
      protocol: TCP
This ClusterIP Service is accessible only from within the cluster. Requests to webapp-service:80 are distributed among Pods with the app: webapp label.
# terminal
# Create the Service
kubectl apply -f service.yaml
# service/webapp-service created

# List Services
kubectl get services
# NAME             TYPE        CLUSTER-IP      EXTERNAL-IP   PORT(S)   AGE
# webapp-service   ClusterIP   10.96.123.456   <none>        80/TCP    30s

# Test from a temporary Pod
kubectl run curl-test --rm -it --image=curlimages/curl -- curl webapp-service

# Detailed Service description
kubectl describe service webapp-service
To expose the application outside the cluster, NodePort or LoadBalancer type is required.
# service-nodeport.yaml
apiVersion: v1
kind: Service
metadata:
  name: webapp-nodeport
spec:
  type: NodePort
  selector:
    app: webapp
  ports:
    - port: 80
      targetPort: 80
      # Port on each Node (30000-32767)
      nodePort: 30080
With minikube, the command minikube service webapp-nodeport automatically opens the browser to the correct URL.
ConfigMaps: Externalized Configuration
ConfigMaps separate configuration from code. Values can be injected as environment variables or mounted files.
# configmap.yaml
apiVersion: v1
kind: ConfigMap
metadata:
  name: webapp-config
data:
  # Simple key-value pairs
  APP_ENV: "production"
  LOG_LEVEL: "info"
  MAX_CONNECTIONS: "100"
  # Multiline configuration (complete file)
  nginx.conf: |
    server {
        listen 80;
        server_name localhost;

        location / {
            root /usr/share/nginx/html;
            index index.html;
        }

        location /health {
            return 200 'OK';
            add_header Content-Type text/plain;
        }
    }
ConfigMaps store non-sensitive data. For secrets (passwords, tokens), Kubernetes Secrets are more appropriate.
# deployment-with-config.yaml
apiVersion: apps/v1
kind: Deployment
metadata:
  name: webapp-configured
spec:
  replicas: 2
  selector:
    matchLabels:
      app: webapp-configured
  template:
    metadata:
      labels:
        app: webapp-configured
    spec:
      containers:
        - name: webapp
          image: nginx:1.25-alpine
          ports:
            - containerPort: 80
          # Inject environment variables
          envFrom:
            - configMapRef:
                name: webapp-config
          # Or individual variables
          env:
            - name: SPECIFIC_VAR
              valueFrom:
                configMapKeyRef:
                  name: webapp-config
                  key: LOG_LEVEL
          # Mount configuration file
          volumeMounts:
            - name: nginx-config
              mountPath: /etc/nginx/conf.d/default.conf
              subPath: nginx.conf
      volumes:
        - name: nginx-config
          configMap:
            name: webapp-config
This configuration injects environment variables and mounts the nginx.conf file into the container.
# terminal
# Apply resources
kubectl apply -f configmap.yaml
kubectl apply -f deployment-with-config.yaml

# Verify environment variables
kubectl exec deployment/webapp-configured -- printenv | grep APP_ENV
# APP_ENV=production

# Verify mounted file
kubectl exec deployment/webapp-configured -- cat /etc/nginx/conf.d/default.confModifying a ConfigMap does not automatically restart Pods. To apply changes, a manual restart is required: kubectl rollout restart deployment webapp-configured. Tools like Reloader automate this process.
Secrets: Sensitive Data
Secrets store sensitive information like passwords, tokens, or SSH keys. Although base64-encoded, they are not encrypted by default at rest.
# secret.yaml
apiVersion: v1
kind: Secret
metadata:
  name: webapp-secrets
type: Opaque
# Values must be base64-encoded
data:
  # echo -n 'admin' | base64
  username: YWRtaW4=
  # echo -n 'supersecretpassword' | base64
  password: c3VwZXJzZWNyZXRwYXNzd29yZA==
---
# Alternative: stringData accepts plain text values
apiVersion: v1
kind: Secret
metadata:
  name: webapp-secrets-plain
type: Opaque
stringData:
  username: admin
  password: supersecretpassword
Secrets can be injected the same way as ConfigMaps.
# deployment-with-secrets.yaml
apiVersion: apps/v1
kind: Deployment
metadata:
  name: webapp-secure
spec:
  replicas: 1
  selector:
    matchLabels:
      app: webapp-secure
  template:
    metadata:
      labels:
        app: webapp-secure
    spec:
      containers:
        - name: webapp
          image: nginx:1.25-alpine
          env:
            - name: DB_USERNAME
              valueFrom:
                secretKeyRef:
                  name: webapp-secrets
                  key: username
            - name: DB_PASSWORD
              valueFrom:
                secretKeyRef:
                  name: webapp-secrets
key: password# terminal
# Create the Secret
kubectl apply -f secret.yaml
# List Secrets (values are not displayed)
kubectl get secrets
# NAME TYPE DATA AGE
# webapp-secrets Opaque 2 10s
# Decode a value
kubectl get secret webapp-secrets -o jsonpath='{.data.password}' | base64 -d
# supersecretpasswordNamespaces: Logical Isolation
Namespaces partition a cluster into isolated virtual environments. This separation enables managing multiple teams or environments on the same cluster.
# namespace.yaml
apiVersion: v1
kind: Namespace
metadata:
  name: development
  labels:
    environment: development
---
apiVersion: v1
kind: Namespace
metadata:
  name: staging
  labels:
    environment: staging
Each resource can be created in a specific namespace.
# terminal
# Create namespaces
kubectl apply -f namespace.yaml

# List namespaces
kubectl get namespaces
# NAME          STATUS   AGE
# default       Active   1d
# development   Active   10s
# staging       Active   10s

# Create a resource in a specific namespace
kubectl apply -f deployment.yaml -n development

# List Pods in a namespace
kubectl get pods -n development

# Change default namespace
kubectl config set-context --current --namespace=development
Resources in different namespaces are isolated by default. Cross-namespace communication is possible via internal DNS: service-name.namespace.svc.cluster.local.
Complete Application: Assembling Resources
Here is a complete application combining all presented concepts.
# complete-app.yaml
---
# Dedicated Namespace
apiVersion: v1
kind: Namespace
metadata:
  name: myapp
---
# ConfigMap for configuration
apiVersion: v1
kind: ConfigMap
metadata:
  name: myapp-config
  namespace: myapp
data:
  APP_NAME: "MyApp"
  LOG_LEVEL: "info"
---
# Secret for sensitive data
apiVersion: v1
kind: Secret
metadata:
  name: myapp-secrets
  namespace: myapp
type: Opaque
stringData:
  api-key: "sk-1234567890abcdef"
---
# Deployment with 3 replicas
apiVersion: apps/v1
kind: Deployment
metadata:
  name: myapp
  namespace: myapp
spec:
  replicas: 3
  selector:
    matchLabels:
      app: myapp
  template:
    metadata:
      labels:
        app: myapp
    spec:
      containers:
        - name: myapp
          image: nginx:1.25-alpine
          ports:
            - containerPort: 80
          envFrom:
            - configMapRef:
                name: myapp-config
          env:
            - name: API_KEY
              valueFrom:
                secretKeyRef:
                  name: myapp-secrets
                  key: api-key
          resources:
            requests:
              memory: "64Mi"
              cpu: "100m"
            limits:
              memory: "128Mi"
              cpu: "200m"
          livenessProbe:
            httpGet:
              path: /
              port: 80
            initialDelaySeconds: 10
            periodSeconds: 10
          readinessProbe:
            httpGet:
              path: /
              port: 80
            initialDelaySeconds: 5
            periodSeconds: 5
---
# Service for internal exposure
apiVersion: v1
kind: Service
metadata:
  name: myapp-service
  namespace: myapp
spec:
  type: ClusterIP
  selector:
    app: myapp
  ports:
    - port: 80
      targetPort: 80
---
# NodePort Service for external access (development)
apiVersion: v1
kind: Service
metadata:
  name: myapp-nodeport
  namespace: myapp
spec:
  type: NodePort
  selector:
    app: myapp
  ports:
    - port: 80
      targetPort: 80
      nodePort: 30100
This single file deploys a complete application with externalized configuration, secrets, high availability, and network exposure.
# terminal
# Deploy the complete application
kubectl apply -f complete-app.yaml

# Verify all resources
kubectl get all -n myapp
# NAME                         READY   STATUS    RESTARTS   AGE
# pod/myapp-7d9f8b6c4-abc12    1/1     Running   0          30s
# pod/myapp-7d9f8b6c4-def34    1/1     Running   0          30s
# pod/myapp-7d9f8b6c4-ghi56    1/1     Running   0          30s
#
# NAME                    TYPE        CLUSTER-IP      PORT(S)        AGE
# service/myapp-service   ClusterIP   10.96.123.456   80/TCP         30s
# service/myapp-nodeport  NodePort    10.96.123.789   80:30100/TCP   30s
#
# NAME                    READY   UP-TO-DATE   AVAILABLE   AGE
# deployment.apps/myapp   3/3     3            3           30s

# Access the application with minikube
minikube service myapp-nodeport -n myapp
Updates and Rollbacks
Kubernetes facilitates rolling updates and rollbacks.
# terminal
# Update the Deployment image
kubectl set image deployment/myapp myapp=nginx:1.26-alpine -n myapp

# Track deployment in real-time
kubectl rollout status deployment/myapp -n myapp
# Waiting for deployment "myapp" rollout to finish: 1 out of 3 new replicas updated
# Waiting for deployment "myapp" rollout to finish: 2 out of 3 new replicas updated
# deployment "myapp" successfully rolled out

# Revision history
kubectl rollout history deployment/myapp -n myapp
# REVISION  CHANGE-CAUSE
# 1         <none>
# 2         <none>

# Rollback to previous revision
kubectl rollout undo deployment/myapp -n myapp

# Rollback to a specific revision
kubectl rollout undo deployment/myapp --to-revision=1 -n myapp
The default update strategy (RollingUpdate) progressively replaces old Pods with new ones, ensuring continuous availability.
Essential kubectl Commands
# terminal
# ========================================
# General Information
# ========================================
kubectl cluster-info                    # Cluster info
kubectl get nodes -o wide               # Nodes with details
kubectl api-resources                   # List resource types

# ========================================
# Resource Management
# ========================================
kubectl get all                         # All namespace resources
kubectl get pods -A                     # Pods from all namespaces
kubectl get pods -o wide                # Pods with IP and Node
kubectl get pods -w                     # Watch mode (real-time)

# ========================================
# Inspection and Debugging
# ========================================
kubectl describe pod <name>             # Full details
kubectl logs <pod> -f                   # Streaming logs
kubectl logs <pod> -c <container>       # Specific container logs
kubectl exec -it <pod> -- /bin/sh       # Interactive shell
kubectl port-forward <pod> 8080:80      # Local tunnel to Pod

# ========================================
# Editing and Deletion
# ========================================
kubectl edit deployment <name>          # Live editing (vi)
kubectl delete -f manifest.yaml         # Delete via file
kubectl delete pod <name> --force       # Force deletion
Conclusion
Kubernetes transforms containerized application management by providing a declarative, resilient, and extensible framework. The fundamental concepts presented here form the foundation for production-ready deployments.
Checklist for a First Kubernetes Deployment
- ✅ Working local cluster (minikube, kind, or k3d)
- ✅ kubectl installed and configured
- ✅ Deployment with replicas and health probes
- ✅ Service for network exposure
- ✅ ConfigMap for externalized configuration
- ✅ Secret for sensitive data
- ✅ Namespace for isolation
- ✅ Resource limits defined (requests/limits)
- ✅ Update strategy and rollback mastered
Start practicing!
Test your knowledge with our interview simulators and technical tests.
Mastering Kubernetes opens the door to scalable cloud-native architectures. Next steps include exploring Ingress Controllers for HTTP routing, PersistentVolumes for storage, and Helm for package management. Kubernetes becomes a major asset during DevOps and SRE interviews.
Tags
Share
Related articles

Kubernetes Interview: Pods, Services and Deployments Explained
Master the three core Kubernetes building blocks — Pods, Services, and Deployments — with production-ready YAML manifests, networking internals, and common interview questions.
Essential DevOps Interview Questions: Complete Guide 2026
Prepare for DevOps interviews with must-know questions on CI/CD, Kubernetes, Docker, Terraform, and SRE practices. Detailed answers included.
Docker: From Development to Production
Complete Docker guide for containerizing applications. Dockerfile, Docker Compose, multi-stage builds and production deployment explained with practical examples.