Django 5.2: Middleware Tùy Chỉnh và Xử Lý Signal trong Phỏng Vấn Kỹ Thuật Python
Hướng dẫn chi tiết về custom middleware và signal handling trong Django 5.2 cho phỏng vấn kỹ thuật. Bao gồm request pipeline, async middleware, post_save, pre_save và custom signals với mã mẫu thực tế.
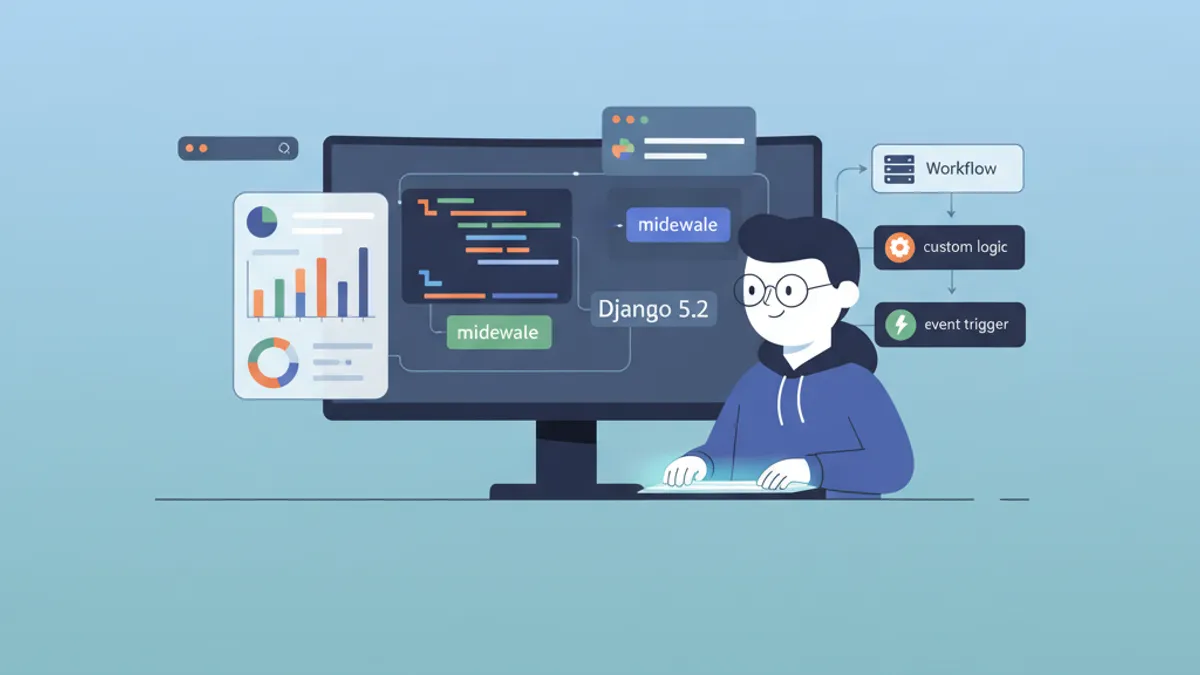
Custom middleware và signal handling trong Django 5.2 là hai chủ đề nền tảng xuất hiện trong hầu hết các buổi phỏng vấn kỹ thuật về Django. Việc nắm vững cách request di chuyển qua middleware stack và cách signal tách biệt logic ứng dụng chính là điều phân biệt giữa ứng viên chỉ học lý thuyết với ứng viên có khả năng xây dựng ứng dụng Django cấp production. Bài viết này trình bày chi tiết về cơ chế hoạt động của middleware pipeline, kỹ thuật xây dựng middleware tùy chỉnh, và phương pháp tận dụng signal để xử lý các sự kiện trong vòng đời model -- tất cả đều hướng tới việc chuẩn bị tối ưu cho phỏng vấn kỹ thuật Django 5.2.
Django middleware xử lý request theo thứ tự từ trên xuống trong danh sách MIDDLEWARE và xử lý response theo chiều ngược lại từ dưới lên trên. Signal hoạt động theo mô hình publish-subscribe, trong đó sender phát đi sự kiện và receiver phản hồi mà không cần kết nối trực tiếp. Cả hai khái niệm này thường xuất hiện trong vòng phỏng vấn cấp senior vì chúng kiểm tra tư duy kiến trúc, không chỉ là kiến thức về cú pháp.
Cơ Chế Hoạt Động Của Django Middleware
Middleware pipeline nằm giữa web server và Django views. Mỗi middleware component sẽ bọc lấy component tiếp theo, tạo nên cấu trúc hình củ hành (onion-like structure). Khi request đến, Django gọi từng middleware theo thứ tự được định nghĩa trong settings.MIDDLEWARE. Sau khi view trả về response, middleware stack xử lý response theo chiều ngược lại.
Django 5.2 sử dụng mô hình middleware hiện đại được giới thiệu từ Django 1.10. Mỗi middleware là một callable nhận get_response trong quá trình khởi tạo và xử lý chu kỳ request/response trong phương thức __call__.
# middleware.py - Basic middleware structure
class SimpleMiddleware:
    def __init__(self, get_response):
        self.get_response = get_response
        # One-time configuration happens here at server start

    def __call__(self, request):
        # Code executed BEFORE the view (and later middleware)
        response = self.get_response(request)
        # Code executed AFTER the view (on the way back)
        return response
Phương thức __init__ chỉ chạy một lần duy nhất khi server khởi động, do đó đây là vị trí phù hợp để thực hiện các thiết lập tốn nhiều tài nguyên như nạp cấu hình hoặc khởi tạo connection. Phương thức __call__ được thực thi mỗi khi có request mới đến server.
Xây Dựng Request Logging Middleware
Request logging middleware là ví dụ minh họa toàn bộ vòng đời của middleware một cách rõ ràng nhất. Phiên bản cài đặt này ghi nhận thông tin về thời gian xử lý, metadata của request và status code của response -- đây là loại ví dụ thực tế mà nhà tuyển dụng thường muốn ứng viên trình bày.
# apps/core/middleware.py
import logging
import time

logger = logging.getLogger('django.request')


class RequestLoggingMiddleware:
    def __init__(self, get_response):
        self.get_response = get_response

    def __call__(self, request):
        start_time = time.monotonic()
        # Attach metadata before view processing
        request.start_time = start_time

        response = self.get_response(request)

        duration = time.monotonic() - start_time
        logger.info(
            'method=%s path=%s status=%d duration=%.3fs ip=%s',
            request.method,
            request.get_full_path(),
            response.status_code,
            duration,
            request.META.get('REMOTE_ADDR'),
        )
        return response

    def process_exception(self, request, exception):
        # Called only when the view raises an exception
        duration = time.monotonic() - getattr(request, 'start_time', 0)
        logger.error(
            'method=%s path=%s exception=%s duration=%.3fs',
            request.method,
            request.get_full_path(),
            str(exception),
            duration,
        )
        return None  # Let Django's default exception handling continue
Hook process_exception là phương thức đặc biệt của middleware mà Django chỉ gọi khi view phát sinh exception không được xử lý. Việc trả về None cho phép exception tiếp tục đi đến bộ xử lý mặc định của Django, trong khi trả về HttpResponse sẽ cắt đứt quá trình xử lý exception ngay lập tức.
Thứ Tự Middleware và Cấu Hình MIDDLEWARE
Thứ tự của middleware trong settings.py ảnh hưởng trực tiếp đến hành vi của ứng dụng. SecurityMiddleware cần đứng đầu tiên để thiết lập security headers cho mọi response. SessionMiddleware phải đặt trước AuthenticationMiddleware vì xác thực phụ thuộc vào dữ liệu session.
# settings.py - Middleware ordering matters
MIDDLEWARE = [
    'django.middleware.security.SecurityMiddleware',
    'django.contrib.sessions.middleware.SessionMiddleware',
    'django.middleware.common.CommonMiddleware',
    'django.middleware.csrf.CsrfViewMiddleware',
    'django.contrib.auth.middleware.AuthenticationMiddleware',
    'django.contrib.messages.middleware.MessageMiddleware',
    # Custom middleware placed after Django's core stack
    'apps.core.middleware.RequestLoggingMiddleware',
]
Một câu hỏi phỏng vấn phổ biến là tại sao CsrfViewMiddleware phải đặt sau SessionMiddleware. Câu trả lời là cơ chế bảo vệ CSRF trong Django có thể sử dụng session-based tokens, do đó session phải được nạp trước khi CSRF middleware hoạt động.
Async Middleware trong Django 5.2
Django 5.2 hỗ trợ đầy đủ asynchronous middleware, điều này đặc biệt quan trọng đối với các thao tác I/O-bound như gọi external API hoặc cache lookups. Async middleware tự khai báo bằng cách implement phương thức __acall__ hoặc sử dụng async __call__.
# apps/core/middleware.py
import asyncio
import time


class AsyncTimingMiddleware:
    # Mark this middleware as async-capable
    async_capable = True
    sync_capable = False

    def __init__(self, get_response):
        self.get_response = get_response

    async def __call__(self, request):
        start = time.monotonic()
        # get_response is awaitable in async context
        response = await self.get_response(request)
        duration = time.monotonic() - start
        response['X-Request-Duration'] = f'{duration:.4f}s'
        return response
Việc thiết lập async_capable = True và sync_capable = False thông báo cho Django rằng middleware này chỉ hoạt động trong chế độ async. Nếu ứng dụng có cả sync và async views, nên đặt cả hai flag thành True để Django tự động gọi phương thức phù hợp tùy theo loại view.
Sẵn sàng chinh phục phỏng vấn Django?
Luyện tập với mô phỏng tương tác, flashcards và bài kiểm tra kỹ thuật.
Django Signals: Mô Hình Publish-Subscribe
Django signals là cơ chế cho phép các component độc lập trong ứng dụng giao tiếp với nhau. Khi model được lưu, xóa, hoặc khi request bắt đầu hay kết thúc, Django phát đi signal cho các receiver đã đăng ký xử lý. Ưu điểm chính của việc tách biệt này là sender không cần biết có những receiver nào đang tồn tại trong hệ thống.
Các signal thường gặp nhất trong phỏng vấn bao gồm pre_save, post_save, pre_delete và post_delete từ django.db.models.signals.
Sử Dụng post_save để Tạo Profile Tự Động
Pattern kinh điển của post_save là tạo đối tượng liên quan khi model instance được lưu lần đầu tiên. Cách tiếp cận này giữ cho User model sạch sẽ và ủy thác việc tạo profile cho signal layer.
# apps/accounts/signals.py
from django.db.models.signals import post_save
from django.dispatch import receiver
from django.contrib.auth import get_user_model
from apps.accounts.models import UserProfile

User = get_user_model()


@receiver(post_save, sender=User)
def create_user_profile(sender, instance, created, **kwargs):
    # 'created' is True only on INSERT, False on UPDATE
    if created:
        UserProfile.objects.create(
            user=instance,
            display_name=instance.get_full_name() or instance.username,
        )
Tham số boolean created giúp phân biệt giữa bản ghi mới (INSERT) và cập nhật (UPDATE). Việc kiểm tra flag này mỗi lần giúp ngăn chặn việc tạo profile trùng lặp khi model được save. Tham số **kwargs là bắt buộc đối với mọi signal receiver vì Django có thể gửi thêm keyword arguments mới trong các phiên bản tương lai.
Sử Dụng pre_save để Xác Thực và Chuyển Đổi Dữ Liệu
Signal pre_save chạy trước khi Django ghi dữ liệu vào cơ sở dữ liệu, do đó rất phù hợp cho việc chuyển đổi dữ liệu, tạo slug, hoặc validate chéo giữa các trường vượt ngoài phạm vi của model-level clean methods.
# apps/blog/signals.py
from django.db.models.signals import pre_save
from django.dispatch import receiver
from django.utils.text import slugify
from apps.blog.models import Article


@receiver(pre_save, sender=Article)
def auto_generate_slug(sender, instance, **kwargs):
    if not instance.slug:
        base_slug = slugify(instance.title)
        slug = base_slug
        counter = 1
        # Ensure slug uniqueness
        while Article.objects.filter(slug=slug).exclude(pk=instance.pk).exists():
            slug = f'{base_slug}-{counter}'
            counter += 1
        instance.slug = slug
Đăng Ký Signal trong AppConfig.ready()
Phương pháp được Django khuyến nghị để đăng ký signal là sử dụng phương thức AppConfig.ready(). Cách này đảm bảo signal chỉ được kết nối một lần duy nhất, sau khi tất cả các model đã được nạp hoàn tất.
# apps/accounts/apps.py
from django.apps import AppConfig


class AccountsConfig(AppConfig):
    default_auto_field = 'django.db.models.BigAutoField'
    name = 'apps.accounts'

    def ready(self):
        # Import signals module to register receivers
        import apps.accounts.signals  # noqa: F401
Tạo Custom Signals cho Các Sự Kiện Nghiệp Vụ
Ngoài các built-in model signals, custom signals cho phép xử lý các sự kiện đặc thù của domain như thanh toán thành công, thay đổi trạng thái subscription, hoặc gửi thông báo.
# apps/orders/signals.py
from django.dispatch import Signal

# Define custom signals with documentation
order_completed = Signal()  # Sent after payment confirmation
order_refunded = Signal()   # Sent after refund processing


# apps/orders/services.py
from apps.orders.signals import order_completed


def complete_order(order):
    order.status = 'completed'
    order.save()
    # Dispatch signal with relevant context
    order_completed.send(
        sender=order.__class__,
        order=order,
        total=order.total_amount,
    )


# apps/notifications/receivers.py
from django.dispatch import receiver
from apps.orders.signals import order_completed


@receiver(order_completed)
def send_order_confirmation_email(sender, order, **kwargs):
    # Email logic decoupled from order processing
    from apps.notifications.services import send_email
    send_email(
        to=order.customer.email,
        template='order_confirmation',
        context={'order': order},
    )
Các Lỗi Thường Gặp trong Phỏng Vấn về Middleware và Signals
Phương thức QuerySet.update() và bulk_create() của Django bỏ qua hoàn toàn phương thức save() của model. Điều này có nghĩa là signal pre_save và post_save sẽ không được kích hoạt. Tương tự với delete() trên QuerySet so với gọi delete() trên từng model instance riêng lẻ. Đây là một trong những câu hỏi về Django signal được hỏi nhiều nhất trong phỏng vấn.
Các lỗi phổ biến khác bao gồm:
- Circular imports trong signals: Việc import model ở cấp module trong signal files có thể gây ra lỗi
AppRegistryNotReady. Nên import bên trong receiver function hoặc sử dụngAppConfig.ready(). - Thiếu
**kwargs: Bỏ qua**kwargstrong signature của receiver sẽ gây lỗi khi Django thêm tham số mới vào signal trong các phiên bản tương lai. - Logic nặng trong signals: Signal mặc định chạy đồng bộ trong cùng một database transaction. Đối với các thao tác mất nhiều thời gian, nên chuyển sang task queue như Celery.
- Middleware thay đổi response content: Việc sửa đổi
response.contentsau khi view đã thiết lập có thể làm hỏng streaming responses và khiếnContent-Lengthheaders không chính xác.
Django 5.2 là phiên bản Long-Term Support được hỗ trợ cập nhật bảo mật đến tháng 4 năm 2028. Các cải tiến về async middleware và signal được giới thiệu từ Django 5.0 đến 5.2 đã ổn định và sẵn sàng cho môi trường production.
So Sánh Middleware và Signals: Khi Nào Nên Sử Dụng
| Tiêu chí | Middleware | Signals | |---|---|---| | Chỉnh sửa request/response | Có | Không | | Authentication và authorization | Có | Không | | Model lifecycle hooks | Không | Có | | Cross-cutting concerns (logging, timing) | Có | Có thể nhưng không lý tưởng | | Business logic tách biệt | Không | Có | | Hỗ trợ async trong Django 5.2 | Đầy đủ | Đầy đủ (asend/asend_robust) | | Phạm vi hoạt động | Mọi HTTP request | Sự kiện cụ thể (save, delete, custom) |
Kết Luận
- Django middleware tạo nên pipeline hình củ hành xử lý request từ trên xuống và response từ dưới lên, trong đó
get_responsebên trong__call__là điểm phân chia giữa giai đoạn trước và sau view. - Custom middleware phù hợp cho các cross-cutting concerns như logging, timing, security headers và rate limiting cần hoạt động với mọi HTTP request.
- Django 5.2 hỗ trợ đầy đủ async middleware, giúp xử lý các thao tác I/O-bound mà không chặn request pipeline trên các ứng dụng chạy ASGI server.
- Signal
post_savevàpre_savexử lý các sự kiện trong vòng đời model.pre_savephù hợp để chuyển đổi dữ liệu trước khi ghi vào cơ sở dữ liệu, cònpost_savephù hợp để tạo đối tượng liên quan và gửi thông báo. QuerySet.update()vàbulk_create()bỏ qua toàn bộ signal -- đây là lỗi phổ biến nhất trong các câu hỏi phỏng vấn về Django signals.- Nên đăng ký signal trong
AppConfig.ready()để đảm bảo chỉ kết nối một lần sau khi tất cả model đã được nạp. - Custom signals giúp tách biệt các sự kiện domain như thanh toán thành công hoặc thay đổi subscription khỏi business logic chính, giúp hệ thống dễ mở rộng theo nguyên tắc Open-Closed Principle.
Bắt đầu luyện tập!
Kiểm tra kiến thức với mô phỏng phỏng vấn và bài kiểm tra kỹ thuật.
Thẻ
Chia sẻ
Bài viết liên quan

Câu hỏi phỏng vấn Django: ORM, Middleware và DRF chi tiết
Câu hỏi phỏng vấn Django bao gồm tối ưu hóa ORM với select_related và prefetch_related, kiến trúc middleware, hiệu suất serializer Django REST Framework, permissions và các pattern pagination.
Django 6.0 năm 2026: Composite Primary Key, Background Task và Câu hỏi phỏng vấn
Hướng dẫn toàn diện về Django 6.0 bao gồm composite primary key, framework background task tích hợp, template partial, CSP middleware cùng ví dụ code thực tế và chuẩn bị phỏng vấn.
Django va Celery: Xu ly Tac vu Bat dong bo va Cau hoi Phong van 2026
Huong dan Django Celery day du voi ma code thuc te, task routing, lap lich Celery Beat, cau hinh production va cau hoi phong van ky thuat 2026.