Angular 18: Signals và các tính năng mới
Tìm hiểu Angular 18 Signals, phát hiện thay đổi zoneless và các API dựa trên signal mới để xây dựng ứng dụng hiệu suất cao hơn.

Angular 18 đánh dấu bước ngoặt trong quá trình phát triển của framework này với việc ổn định hóa Signals. Primitive phản ứng mới này thay đổi căn bản cách xây dựng các component Angular, mang đến giải pháp thay thế hiện đại cho các decorator truyền thống đồng thời mở đường cho việc phát hiện thay đổi không cần Zone.js.
Các API dựa trên signal của Angular 18: input(), model(), viewChild(), và cấu hình zoneless để xây dựng ứng dụng nhẹ hơn và hiệu suất cao hơn.
Tìm hiểu Signals trong Angular 18
Signals đại diện cho cách tiếp cận mới về tính phản ứng trong Angular. Khác với các decorator cổ điển như @Input() phụ thuộc vào cơ chế phát hiện thay đổi của Zone.js, Signals mang đến tính phản ứng chính xác và rõ ràng. Mỗi Signal đóng gói một giá trị và tự động thông báo cho các consumer khi giá trị đó thay đổi.
Cách tiếp cận này mang lại nhiều lợi thế: hiệu suất tốt hơn nhờ cập nhật có mục tiêu, tích hợp tự nhiên với các hàm computed() và effect(), và chuẩn bị cho tương lai zoneless của Angular.
// Trình bày các khái niệm cơ bản của Signals
import { Component, signal, computed, effect } from '@angular/core';

@Component({
  selector: 'app-counter',
  standalone: true,
  template: `
    <div class="counter-container">
      <h2>Counter: {{ count() }}</h2>
      <p>Double: {{ doubleCount() }}</p>

      <button (click)="increment()">+1</button>
      <button (click)="decrement()">-1</button>
      <button (click)="reset()">Reset</button>
    </div>
  `
})
export class CounterComponent {
  // Signal có thể ghi - giá trị có thể thay đổi
  count = signal(0);

  // Signal computed - tự động tính toán từ count
  // Chỉ tính lại khi count thay đổi
  doubleCount = computed(() => this.count() * 2);

  constructor() {
    // Effect - thực thi mỗi khi count thay đổi
    // Hữu ích cho các side effects (log, gọi API, v.v.)
    effect(() => {
      console.log(`Giá trị counter mới: ${this.count()}`);
    });
  }

  increment() {
    // update() cho phép thay đổi dựa trên giá trị trước đó
    this.count.update(value => value + 1);
  }

  decrement() {
    this.count.update(value => value - 1);
  }

  reset() {
    // set() thay thế trực tiếp giá trị
    this.count.set(0);
  }
}
Signals hoạt động như các container phản ứng: signal() tạo Signal có thể ghi, computed() suy ra các giá trị tính toán, và effect() cho phép thực thi hành động để phản hồi lại các thay đổi.
Signal Inputs với input()
Hàm input() thay thế decorator @Input() truyền thống. Hàm này trả về InputSignal chỉ đọc, đảm bảo dữ liệu luôn chảy từ parent đến child mà không bị thay đổi ngoài ý muốn.
// Component sử dụng signal inputs
import { Component, input, computed } from '@angular/core';

interface Book {
  id: string;
  title: string;
  author: string;
  price: number;
  discountPercent?: number;
}

@Component({
  selector: 'app-book-card',
  standalone: true,
  template: `
    <article class="book-card">
      <h3>{{ book().title }}</h3>
      <p class="author">By {{ book().author }}</p>

      @if (hasDiscount()) {
        <p class="price">
          <span class="original">\${{ book().price }}</span>
          <span class="discounted">\${{ discountedPrice() }}</span>
        </p>
      } @else {
        <p class="price">\${{ book().price }}</p>
      }

      @if (featured()) {
        <span class="badge">Featured</span>
      }
    </article>
  `
})
export class BookCardComponent {
  // Input bắt buộc - template không thể compile thiếu prop này
  book = input.required<Book>();

  // Input tùy chọn với giá trị mặc định
  featured = input(false);

  // Computed dựa trên input - tự động tính lại
  hasDiscount = computed(() => {
    const discount = this.book().discountPercent;
    return discount !== undefined && discount > 0;
  });

  // Tính giá giảm
  discountedPrice = computed(() => {
    const { price, discountPercent } = this.book();
    if (!discountPercent) return price;
    return (price * (100 - discountPercent) / 100).toFixed(2);
  });
}
Cách sử dụng trong template parent vẫn tương tự, nhưng với đảm bảo kiểu dữ liệu và tính phản ứng của Signal:
// Component parent sử dụng book-card
import { Component, signal } from '@angular/core';
import { BookCardComponent } from './book-card.component';

@Component({
  selector: 'app-book-list',
  standalone: true,
  imports: [BookCardComponent],
  template: `
    <div class="book-grid">
      @for (book of books(); track book.id) {
        <app-book-card
          [book]="book"
          [featured]="book.id === featuredBookId()"
        />
      }
    </div>
  `
})
export class BookListComponent {
  books = signal<Book[]>([
    { id: '1', title: 'Clean Code', author: 'Robert C. Martin', price: 35 },
    { id: '2', title: 'The Pragmatic Programmer', author: 'David Thomas', price: 42, discountPercent: 15 }
  ]);

  featuredBookId = signal('1');
}
Điểm khác biệt chính với @Input(): signal inputs là chỉ đọc. Không thể gọi this.book.set() từ component child, điều này củng cố luồng dữ liệu một chiều.
Two-Way Binding với model()
Với các trường hợp cần đồng bộ hai chiều, Angular 18 giới thiệu model(). Hàm này tạo một Signal có thể ghi và tự động truyền các thay đổi lên component parent.
// Component với binding hai chiều qua model()
import { Component, model, output, computed } from '@angular/core';

@Component({
  selector: 'app-search-input',
  standalone: true,
  template: `
    <div class="search-container">
      <input
        type="text"
        [value]="query()"
        (input)="onInput($event)"
        [placeholder]="placeholder()"
        class="search-input"
      />

      @if (query().length > 0) {
        <button (click)="clear()" class="clear-btn">×</button>
      }

      <span class="char-count">{{ charCount() }} characters</span>
    </div>
  `
})
export class SearchInputComponent {
  // model() tạo Signal hai chiều
  // Các thay đổi được truyền lên parent
  query = model('');

  // Input cổ điển cho cấu hình
  placeholder = model('Search...');

  // Output cho các sự kiện bổ sung
  searchSubmitted = output<string>();

  // Computed dựa trên model
  charCount = computed(() => this.query().length);

  onInput(event: Event) {
    const value = (event.target as HTMLInputElement).value;
    // Cập nhật model - truyền lên parent
    this.query.set(value);
  }

  clear() {
    this.query.set('');
  }

  submit() {
    if (this.query().length > 0) {
      this.searchSubmitted.emit(this.query());
    }
  }
}
Parent sử dụng cú pháp banana-in-a-box [()] cho binding hai chiều:
// Sử dụng two-way binding với model()
import { Component, signal, effect } from '@angular/core';
import { SearchInputComponent } from './search-input.component';

@Component({
  selector: 'app-root',
  standalone: true,
  imports: [SearchInputComponent],
  template: `
    <div class="app-container">
      <app-search-input [(query)]="searchTerm" />

      <p>Current search: {{ searchTerm() }}</p>

      <div class="results">
        @for (result of filteredResults(); track result.id) {
          <div class="result-item">{{ result.name }}</div>
        }
      </div>
    </div>
  `
})
export class AppComponent {
  // Signal cục bộ được đồng bộ với component child
  searchTerm = signal('');

  results = signal([
    { id: 1, name: 'Angular 18' },
    { id: 2, name: 'React 19' },
    { id: 3, name: 'Vue 3' }
  ]);

  // Lọc phản ứng dựa trên searchTerm
  filteredResults = computed(() => {
    const term = this.searchTerm().toLowerCase();
    if (!term) return this.results();
    return this.results().filter(r =>
      r.name.toLowerCase().includes(term)
    );
  });
}Sử dụng input() cho dữ liệu chỉ đọc (parent đến child). Sử dụng model() khi component child cần thay đổi giá trị (hai chiều).
Signal Queries với viewChild() và contentChild()
Các hàm viewChild(), viewChildren(), contentChild() và contentChildren() thay thế các decorator tương ứng. Chúng trả về Signals, loại bỏ nhu cầu sử dụng lifecycle hooks như ngAfterViewInit.
// Trình bày signal queries
import {
  Component,
  viewChild,
  viewChildren,
  ElementRef,
  effect,
  signal
} from '@angular/core';
import { FormFieldComponent } from './form-field.component';

@Component({
  selector: 'app-form-container',
  standalone: true,
  imports: [FormFieldComponent],
  template: `
    <form #formElement (submit)="onSubmit($event)">
      <input #firstInput type="text" placeholder="Name" />

      <app-form-field label="Email" />
      <app-form-field label="Phone" />

      <div class="actions">
        <button type="submit">Submit</button>
        <button type="button" (click)="focusFirst()">Focus first field</button>
      </div>
    </form>
  `
})
export class FormContainerComponent {
  // viewChild trả về Signal<ElementRef | undefined>
  formElement = viewChild<ElementRef>('formElement');

  // viewChild.required đảm bảo phần tử tồn tại
  firstInput = viewChild.required<ElementRef<HTMLInputElement>>('firstInput');

  // Query trên component - trả về chính component đó
  firstFormField = viewChild(FormFieldComponent);

  // viewChildren cho nhiều phần tử
  allFormFields = viewChildren(FormFieldComponent);

  constructor() {
    // Effect thay thế ngAfterViewInit cho queries
    effect(() => {
      // Signal tự động được resolve
      const input = this.firstInput();
      console.log('First input available:', input.nativeElement);
    });

    // Phản ứng với các thay đổi của danh sách
    effect(() => {
      const fields = this.allFormFields();
      console.log(`${fields.length} form fields found`);
    });
  }

  focusFirst() {
    // Truy cập trực tiếp qua Signal
    this.firstInput().nativeElement.focus();
  }

  onSubmit(event: Event) {
    event.preventDefault();
    // Truy cập form
    const form = this.formElement();
    if (form) {
      console.log('Form submitted');
    }
  }
}
Để chiếu nội dung và truy cập nó, contentChild() hoạt động tương tự:
// Sử dụng contentChild cho nội dung được chiếu
import { Component, contentChild, contentChildren, TemplateRef } from '@angular/core';

@Component({
  selector: 'app-card',
  standalone: true,
  template: `
    <div class="card">
      <header class="card-header">
        <ng-content select="[card-title]" />
      </header>

      <div class="card-body">
        <ng-content />
      </div>

      @if (hasFooter()) {
        <footer class="card-footer">
          <ng-content select="[card-footer]" />
        </footer>
      }
    </div>
  `
})
export class CardComponent {
  // Phát hiện footer có được chiếu hay không
  footerContent = contentChild<ElementRef>('[card-footer]');

  // Computed để kiểm tra sự hiện diện của footer
  hasFooter = computed(() => this.footerContent() !== undefined);
}
Sẵn sàng chinh phục phỏng vấn Angular?
Luyện tập với mô phỏng tương tác, flashcards và bài kiểm tra kỹ thuật.
Phát hiện thay đổi Zoneless
Angular 18 giới thiệu phát hiện thay đổi không cần Zone.js trong chế độ thử nghiệm. Tính năng này giảm kích thước bundle khoảng 13 KB và cải thiện hiệu suất bằng cách loại bỏ các monkey-patch trên các API bất đồng bộ của trình duyệt.
// Cấu hình ứng dụng ở chế độ zoneless
import { bootstrapApplication } from '@angular/platform-browser';
import { provideExperimentalZonelessChangeDetection } from '@angular/core';
import { AppComponent } from './app/app.component';

bootstrapApplication(AppComponent, {
  providers: [
    // Kích hoạt phát hiện zoneless thử nghiệm
    provideExperimentalZonelessChangeDetection()
  ]
});
Cấu hình angular.json cũng cần được cập nhật để gỡ bỏ Zone.js:
{
  "projects": {
    "my-app": {
      "architect": {
        "build": {
          "options": {
            "polyfills": []
          }
        }
      }
    }
  }
}
Trong chế độ zoneless, phát hiện thay đổi được kích hoạt tự động trong các trường hợp sau: cập nhật Signal, gọi markForCheck(), nhận giá trị mới qua AsyncPipe, hoặc gắn/gỡ component.
// Component tối ưu cho chế độ zoneless
import {
  Component,
  signal,
  ChangeDetectionStrategy,
  inject
} from '@angular/core';
import { HttpClient } from '@angular/common/http';
import { toSignal } from '@angular/core/rxjs-interop';

@Component({
  selector: 'app-zoneless-counter',
  standalone: true,
  // OnPush được khuyến nghị cho zoneless
  changeDetection: ChangeDetectionStrategy.OnPush,
  template: `
    <div class="counter">
      <p>Counter: {{ count() }}</p>
      <button (click)="increment()">Increment</button>

      @if (loading()) {
        <p>Loading...</p>
      }

      @if (data()) {
        <pre>{{ data() | json }}</pre>
      }
    </div>
  `
})
export class ZonelessCounterComponent {
  private http = inject(HttpClient);

  count = signal(0);
  loading = signal(false);
  data = signal<any>(null);

  increment() {
    // Cập nhật Signal kích hoạt phát hiện
    this.count.update(c => c + 1);
  }

  async fetchData() {
    this.loading.set(true);

    try {
      // Signals đảm bảo cập nhật giao diện
      const response = await fetch('/api/data');
      const json = await response.json();
      this.data.set(json);
    } finally {
      this.loading.set(false);
    }
  }
}Các component sử dụng ChangeDetectionStrategy.OnPush và Signals nhìn chung tương thích với chế độ zoneless. Tránh thay đổi trực tiếp các thuộc tính không phải là Signal.
Di chuyển các component hiện có
Việc di chuyển sang các API dựa trên signal có thể thực hiện dần dần. Dưới đây là ví dụ refactoring một component truyền thống:
// TRƯỚC: Component với decorator cổ điển
// user-profile-legacy.component.ts
import { Component, Input, ViewChild, ElementRef, AfterViewInit } from '@angular/core';

@Component({
  selector: 'app-user-profile-legacy',
  template: `
    <div #container>
      <h2>{{ user.name }}</h2>
      <p>{{ user.email }}</p>
    </div>
  `
})
export class UserProfileLegacyComponent implements AfterViewInit {
  @Input() user!: { name: string; email: string };
  @ViewChild('container') container!: ElementRef;

  ngAfterViewInit() {
    console.log('Container ready:', this.container.nativeElement);
  }
}// SAU: Component đã di chuyển sang Signals
// user-profile.component.ts
import { Component, input, viewChild, ElementRef, effect } from '@angular/core';
interface User {
name: string;
email: string;
}
@Component({
selector: 'app-user-profile',
standalone: true,
template: `
<div #container>
<h2>{{ user().name }}</h2>
<p>{{ user().email }}</p>
</div>
`
})
export class UserProfileComponent {
// input.required thay thế @Input() với !
user = input.required<User>();
// viewChild.required thay thế @ViewChild với !
container = viewChild.required<ElementRef>('container');
constructor() {
// effect thay thế ngAfterViewInit cho queries
effect(() => {
console.log('Container ready:', this.container().nativeElement);
});
}
}Lợi ích của việc di chuyển này: typing chặt chẽ hơn, tính phản ứng tự động, ít mã boilerplate hơn, và tương thích với chế độ zoneless.
Các thực hành tốt nhất với Signals
Dưới đây là các khuyến nghị chính để tận dụng tối đa Signals trong Angular 18:
// Ví dụ về các thực hành tốt nhất với Signals
import {
  Component,
  signal,
  computed,
  effect,
  untracked,
  ChangeDetectionStrategy
} from '@angular/core';

interface Product {
  id: string;
  name: string;
  price: number;
  quantity: number;
}

@Component({
  selector: 'app-cart',
  standalone: true,
  changeDetection: ChangeDetectionStrategy.OnPush,
  template: `
    <div class="cart">
      <h2>Cart ({{ itemCount() }} items)</h2>

      @for (item of items(); track item.id) {
        <div class="cart-item">
          <span>{{ item.name }}</span>
          <span>{{ item.quantity }} × \${{ item.price }}</span>
          <button (click)="removeItem(item.id)">Remove</button>
        </div>
      }

      <div class="cart-total">
        <strong>Total: \${{ total() }}</strong>
      </div>
    </div>
  `
})
export class CartComponent {
  // Signal cho dữ liệu có thể thay đổi
  items = signal<Product[]>([]);

  // Computed cho giá trị dẫn xuất - tránh tính toán lại không cần thiết
  itemCount = computed(() => this.items().length);

  total = computed(() =>
    this.items().reduce((sum, item) => sum + item.price * item.quantity, 0)
  );

  constructor() {
    // Effect cho side effects (analytics, lưu trữ)
    effect(() => {
      const currentItems = this.items();
      // untracked tránh tạo phụ thuộc
      untracked(() => {
        localStorage.setItem('cart', JSON.stringify(currentItems));
      });
    });
  }

  addItem(product: Product) {
    // update() cho các thay đổi dựa trên trạng thái trước
    this.items.update(current => {
      const existing = current.find(i => i.id === product.id);
      if (existing) {
        return current.map(i =>
          i.id === product.id
            ? { ...i, quantity: i.quantity + 1 }
            : i
        );
      }
      return [...current, { ...product, quantity: 1 }];
    });
  }

  removeItem(id: string) {
    this.items.update(current => current.filter(i => i.id !== id));
  }
}
Các điểm chính cần nhớ:
- Sử dụng
computed()cho các giá trị dẫn xuất thay vì tính toán lại trong template - Ưu tiên
update()hơnset()khi giá trị mới phụ thuộc vào giá trị cũ - Sử dụng
untracked()trong effects để tránh phụ thuộc vòng - Luôn chỉ định
tracktrong các vòng lặp@forđể tối ưu hóa rendering
Kết luận
Angular 18 đặt nền móng cho tương lai không cần Zone.js thông qua Signals. Các điểm chính:
- input() thay thế
@Input()với typing chặt chẽ hơn và quyền truy cập chỉ đọc đảm bảo - model() cho phép two-way binding phản ứng giữa parent và child
- viewChild() và contentChild() loại bỏ nhu cầu sử dụng lifecycle hooks
- Zoneless giảm kích thước bundle và cải thiện hiệu suất
- computed() và effect() hoàn thiện hệ sinh thái phản ứng
- Di chuyển dần dần có thể thực hiện từng component một
Việc áp dụng Signals chuẩn bị cho các ứng dụng Angular hướng đến các phiên bản tương lai nơi chế độ zoneless sẽ trở thành chuẩn. Đây là khoản đầu tư sáng suốt cho khả năng bảo trì và hiệu suất dài hạn.
Bắt đầu luyện tập!
Kiểm tra kiến thức với mô phỏng phỏng vấn và bài kiểm tra kỹ thuật.
Thẻ
Chia sẻ
Bài viết liên quan

Angular 19 Zoneless: Hiệu năng và Change Detection không cần Zone.js
Angular zoneless change detection loại bỏ Zone.js để mang lại bundle nhỏ hơn, rendering nhanh hơn và mô hình reactivity tường minh thông qua signals. Hướng dẫn chuyên sâu về quá trình chuyển đổi từ Zone.js sang zoneless Angular, từ API experimental trong Angular 19 đến API stable trong Angular 20+.
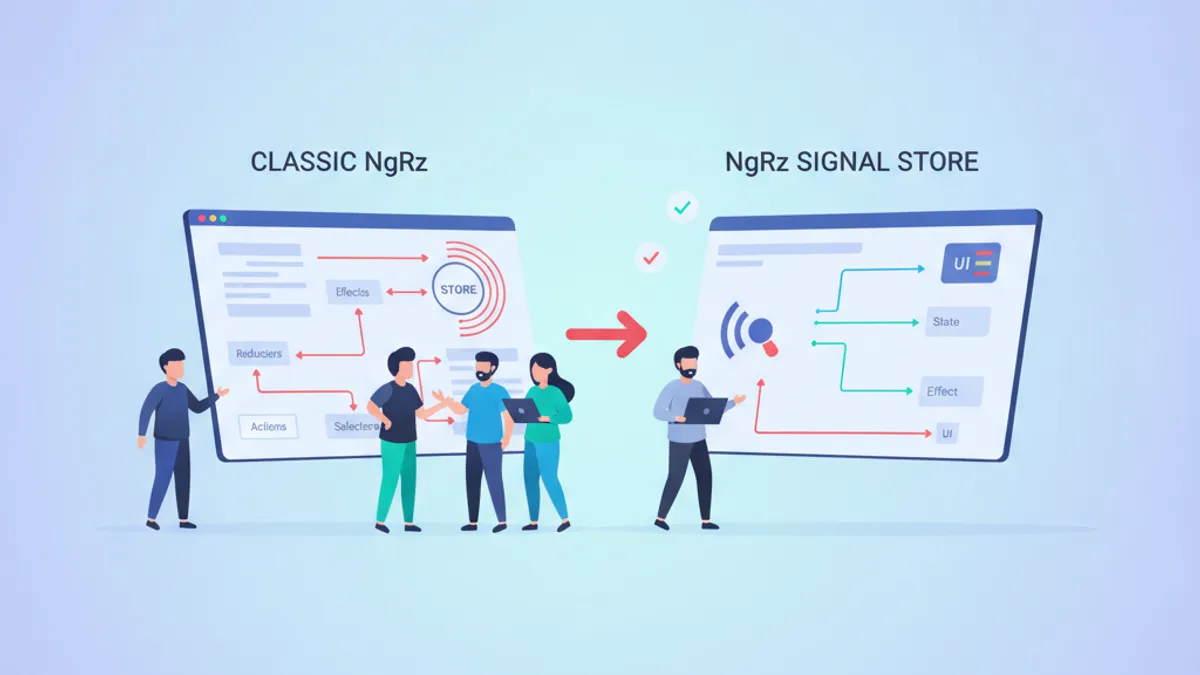
NgRx Signal Store vs Classic NgRx trong 2026: Nên Chọn Giải Pháp Nào?
So sánh chi tiết NgRx Signal Store và Classic NgRx cho quản lý state Angular trong 2026. Tìm hiểu ưu điểm, nhược điểm và khi nào nên sử dụng mỗi cách tiếp cận.

RxJS trong Angular 2026: Operator, Subject và Interop Signals
RxJS trong Angular 2026: nắm vững các operator, Subject và mẫu interop Signals mà lập trình viên Angular dùng trong production, cùng những câu hỏi phỏng vấn hay gặp nhất.