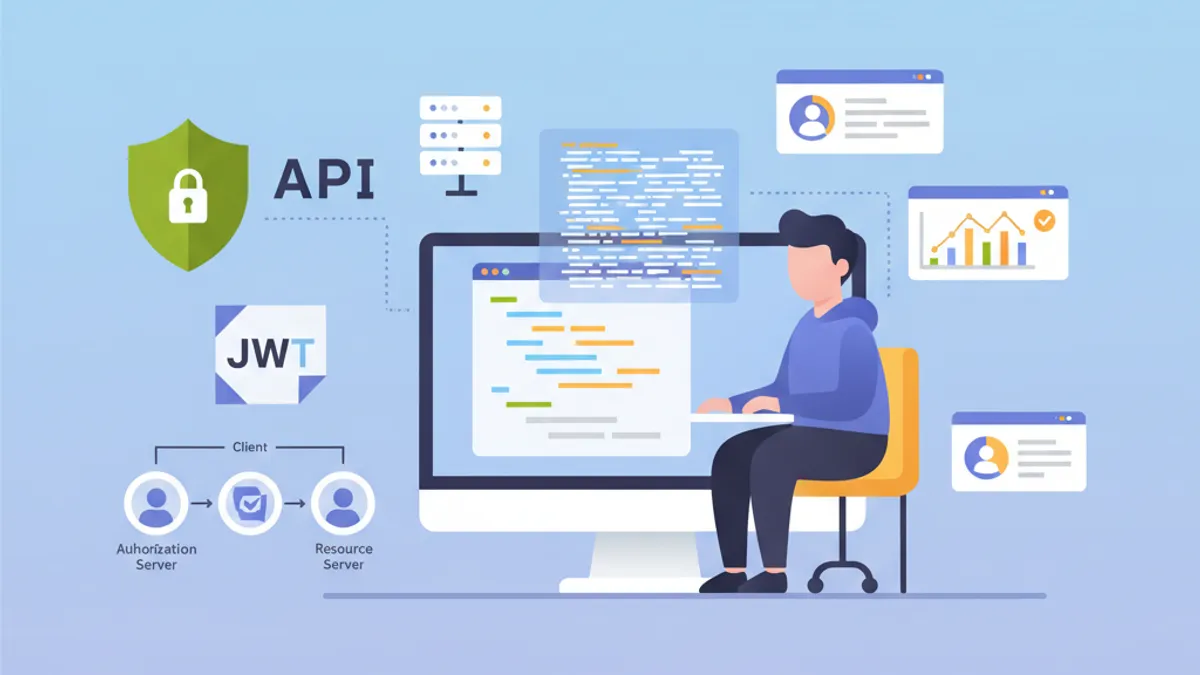
Spring Security 6: OAuth2 리소스 서버 설정
Spring Security 6으로 OAuth2 리소스 서버를 구성하는 실전 가이드입니다. JWT 검증, issuer 설정, 스코프 관리 및 Keycloak 통합을 다룹니다.
OAuth2 리소스 서버는 Keycloak, Auth0, Okta와 같은 외부 인증 서버에서 발급한 JWT 토큰을 검증하여 API를 보호합니다. 애플리케이션이 자체 토큰을 생성하는 사용자 정의 JWT 인증과 달리, 리소스 서버는 신원 관리를 전담하는 Identity Provider(IdP)에 완전히 위임합니다.
리소스 서버는 토큰을 생성하지 않습니다. 검증만 수행합니다. 이러한 책임 분리는 보안을 강화하고 신원 관리를 중앙 집중화하여 아키텍처를 단순화합니다.
OAuth2 리소스 서버 아키텍처
OAuth2 흐름은 세 가지 주요 행위자를 포함합니다. 클라이언트(프론트엔드 또는 모바일 애플리케이션)는 인증 서버에서 액세스 토큰을 획득합니다. 그 후 리소스 서버에 보내는 모든 요청에 이 토큰을 포함시킵니다. 리소스 서버는 인증 서버의 공개 키를 사용하여 토큰의 서명을 검증합니다.
이 아키텍처는 여러 이점을 제공합니다. 필요한 모든 정보가 JWT 토큰 내에 포함되어 있어 리소스 서버는 무상태(stateless)를 유지합니다. 비대칭 서명 검증 덕분에 IdP에 대한 네트워크 호출 없이 검증이 이루어집니다. 여러 API가 동일한 인증 서버를 공유할 수 있어 사용자 관리가 단순화됩니다.
┌──────────────┐     1. Login      ┌─────────────────────┐
│   Client     │ ───────────────►  │  Authorization      │
│   (SPA/App)  │                   │  Server (Keycloak)  │
│              │ ◄─────────────────│                     │
└──────────────┘   2. JWT Token    └─────────────────────┘
       │                                    │
       │ 3. Request + Bearer Token          │
       ▼                                    ▼
┌──────────────────────┐           ┌─────────────────────┐
│   Resource Server    │ ◄─────── │   JWKS Endpoint     │
│   (Spring Boot API)  │  4. Public Keys (cached)       │
└──────────────────────┘           └─────────────────────┘
리소스 서버는 시작 시 공개 키를 다운로드하여 캐시에 저장하므로 각 요청마다 네트워크 호출을 피할 수 있습니다.
OAuth2 리소스 서버용 Maven 의존성
리소스 서버 구성에는 두 가지 특정 의존성이 필요합니다. oauth2-resource-server 스타터는 기본 인프라를 제공하고, oauth2-jose는 JWT를 디코딩하고 검증하는 데 필요한 클래스를 포함합니다.
<!-- pom.xml -->
<dependencies>
    <!-- OAuth2 Resource Server support -->
    <dependency>
        <groupId>org.springframework.boot</groupId>
        <artifactId>spring-boot-starter-oauth2-resource-server</artifactId>
    </dependency>

    <!-- Spring Web for REST endpoints -->
    <dependency>
        <groupId>org.springframework.boot</groupId>
        <artifactId>spring-boot-starter-web</artifactId>
    </dependency>

    <!-- DTO validation -->
    <dependency>
        <groupId>org.springframework.boot</groupId>
        <artifactId>spring-boot-starter-validation</artifactId>
    </dependency>
</dependencies>
JJWT와 같은 추가 의존성은 필요하지 않습니다. Spring Security는 토큰 처리를 위해 spring-security-oauth2-jose에 포함된 Nimbus JOSE+JWT 라이브러리를 사용합니다.
issuer-uri를 통한 기본 구성
리소스 서버의 최소 구성은 단 두 줄만 필요합니다. Spring Security는 OpenID Connect Discovery 프로토콜을 통해 IdP의 엔드포인트를 자동으로 검색합니다.
# application.yml
spring:
  security:
    oauth2:
      resourceserver:
        jwt:
          # 인증 서버의 URI
          # Spring은 /.well-known/openid-configuration을 통해 공개 키를 자동으로 가져옵니다
issuer-uri: https://keycloak.example.com/realms/myrealmissuer-uri로부터 Spring Security는 {issuer-uri}/.well-known/openid-configuration에 요청을 보내 인증 서버의 메타데이터를 가져옵니다. 그런 다음 토큰 서명을 검증하는 데 사용되는 공개 키를 포함하는 JWKS(JSON Web Key Set)의 URL을 추출합니다.
@Configuration
@EnableWebSecurity
@EnableMethodSecurity
public class SecurityConfig {

    @Bean
    public SecurityFilterChain securityFilterChain(HttpSecurity http) throws Exception {
        return http
            // Disable CSRF for stateless APIs
            .csrf(csrf -> csrf.disable())

            // Authorization rules
            .authorizeHttpRequests(auth -> auth
                // Public endpoints
                .requestMatchers("/api/public/**").permitAll()
                .requestMatchers("/actuator/health").permitAll()
                // All other requests require a valid token
                .anyRequest().authenticated()
            )

            // Enable OAuth2 JWT validation
            .oauth2ResourceServer(oauth2 -> oauth2
                .jwt(Customizer.withDefaults())
            )

            // Stateless mode required for Resource Servers
            .sessionManagement(session -> session
                .sessionCreationPolicy(SessionCreationPolicy.STATELESS)
            )

            .build();
    }
}
이 구성은 API를 보호하기에 충분합니다. Spring Security는 토큰 서명을 자동으로 검증하고, 타임스탬프(exp, nbf, iat)를 확인하며, iss 클레임이 구성된 issuer-uri와 일치하는지 보장합니다.
기본적으로 인증 서버에 접근할 수 없으면 애플리케이션이 시작되지 않습니다. 독립적인 시작을 허용하려면 issuer-uri 대신 jwk-set-uri를 명시적으로 구성해야 합니다.
jwk-set-uri를 통한 고급 구성
인증 서버가 OpenID Connect Discovery를 지원하지 않거나 애플리케이션이 IdP에 대한 네트워크 의존성 없이 시작해야 할 때는 명시적인 JWKS 구성이 더 적합합니다.
# application.yml
spring:
  security:
    oauth2:
      resourceserver:
        jwt:
          # Direct URL to JWKS (public keys)
          jwk-set-uri: https://keycloak.example.com/realms/myrealm/protocol/openid-connect/certs
          # Expected value of the "iss" claim in tokens
          issuer-uri: https://keycloak.example.com/realms/myrealm
          # Allowed audiences ("aud" claim)
          audiences:
            - my-api
            - account
이 접근 방식은 더 많은 제어를 제공합니다. 오디언스 검증은 다른 서비스를 위한 토큰의 사용을 방지합니다. frontend-app 애플리케이션을 위해 발급된 토큰은 API가 my-api와 account 오디언스만 받아들이는 경우 거부됩니다.
@Configuration
@EnableWebSecurity
public class SecurityConfig {

    @Value("${spring.security.oauth2.resourceserver.jwt.issuer-uri}")
    private String issuerUri;

    @Bean
    public SecurityFilterChain securityFilterChain(HttpSecurity http) throws Exception {
        return http
            .csrf(csrf -> csrf.disable())

            .authorizeHttpRequests(auth -> auth
                .requestMatchers("/api/public/**").permitAll()
                .anyRequest().authenticated()
            )

            // Custom JWT configuration
            .oauth2ResourceServer(oauth2 -> oauth2
                .jwt(jwt -> jwt
                    .jwtAuthenticationConverter(jwtAuthenticationConverter())
                )
            )

            .sessionManagement(session -> session
                .sessionCreationPolicy(SessionCreationPolicy.STATELESS)
            )

            .build();
    }

    // Custom converter to extract authorities from the token
    @Bean
    public JwtAuthenticationConverter jwtAuthenticationConverter() {
        JwtGrantedAuthoritiesConverter grantedAuthoritiesConverter =
            new JwtGrantedAuthoritiesConverter();
        // SCOPE_ prefix for authorities (e.g., SCOPE_read, SCOPE_write)
        grantedAuthoritiesConverter.setAuthorityPrefix("SCOPE_");
        // Claim containing scopes (OAuth2 standard)
        grantedAuthoritiesConverter.setAuthoritiesClaimName("scope");

        JwtAuthenticationConverter jwtAuthenticationConverter =
            new JwtAuthenticationConverter();
        jwtAuthenticationConverter.setJwtGrantedAuthoritiesConverter(
            grantedAuthoritiesConverter
        );

        return jwtAuthenticationConverter;
    }
}JwtAuthenticationConverter는 토큰 클레임을 보안 표현식에서 사용할 수 있는 GrantedAuthority 객체로 변환합니다.
Spring Boot 면접 준비가 되셨나요?
인터랙티브 시뮬레이터, flashcards, 기술 테스트로 연습하세요.
Keycloak 역할 추출
Keycloak은 OAuth2 표준과 다른 방식으로 역할을 구조화합니다. 역할은 realm_access.roles(렐름 역할) 또는 resource_access.{client}.roles(클라이언트 특정 역할)에 위치합니다. 사용자 정의 컨버터가 이 정보를 추출합니다.
@Component
public class KeycloakJwtAuthenticationConverter
    implements Converter<Jwt, AbstractAuthenticationToken> {

    private static final String REALM_ACCESS_CLAIM = "realm_access";
    private static final String RESOURCE_ACCESS_CLAIM = "resource_access";
    private static final String ROLES_CLAIM = "roles";

    @Value("${keycloak.client-id}")
    private String clientId;

    @Override
    public AbstractAuthenticationToken convert(Jwt jwt) {
        // Combine realm and client roles
        Collection<GrantedAuthority> authorities = Stream.concat(
            extractRealmRoles(jwt).stream(),
            extractClientRoles(jwt).stream()
        ).collect(Collectors.toSet());

        // Return authentication token with extracted authorities
        return new JwtAuthenticationToken(jwt, authorities, extractUsername(jwt));
    }

    // Extract realm-level roles
    private Collection<GrantedAuthority> extractRealmRoles(Jwt jwt) {
        Map<String, Object> realmAccess = jwt.getClaim(REALM_ACCESS_CLAIM);
        if (realmAccess == null) {
            return Collections.emptyList();
        }

        @SuppressWarnings("unchecked")
        List<String> roles = (List<String>) realmAccess.get(ROLES_CLAIM);
        if (roles == null) {
            return Collections.emptyList();
        }

        // ROLE_ prefix for compatibility with hasRole()
        return roles.stream()
            .map(role -> new SimpleGrantedAuthority("ROLE_" + role.toUpperCase()))
            .collect(Collectors.toList());
    }

    // Extract client-specific roles
    private Collection<GrantedAuthority> extractClientRoles(Jwt jwt) {
        Map<String, Object> resourceAccess = jwt.getClaim(RESOURCE_ACCESS_CLAIM);
        if (resourceAccess == null) {
            return Collections.emptyList();
        }

        @SuppressWarnings("unchecked")
        Map<String, Object> clientAccess =
            (Map<String, Object>) resourceAccess.get(clientId);
        if (clientAccess == null) {
            return Collections.emptyList();
        }

        @SuppressWarnings("unchecked")
        List<String> roles = (List<String>) clientAccess.get(ROLES_CLAIM);
        if (roles == null) {
            return Collections.emptyList();
        }

        return roles.stream()
            .map(role -> new SimpleGrantedAuthority("ROLE_" + role.toUpperCase()))
            .collect(Collectors.toList());
    }

    // Extract username from token
    private String extractUsername(Jwt jwt) {
        // Keycloak uses "preferred_username" by default
        String username = jwt.getClaimAsString("preferred_username");
        if (username != null) {
            return username;
        }
        // Fallback to subject (usually the user UUID)
        return jwt.getSubject();
    }
}
보안 구성으로의 통합은 jwtAuthenticationConverter 매개변수를 통해 이루어집니다.
@Configuration
@EnableWebSecurity
@EnableMethodSecurity
@RequiredArgsConstructor
public class SecurityConfig {

    private final KeycloakJwtAuthenticationConverter keycloakConverter;

    @Bean
    public SecurityFilterChain securityFilterChain(HttpSecurity http) throws Exception {
        return http
            .csrf(csrf -> csrf.disable())

            .authorizeHttpRequests(auth -> auth
                .requestMatchers("/api/public/**").permitAll()
                // Protection by Keycloak role
                .requestMatchers("/api/admin/**").hasRole("ADMIN")
                .anyRequest().authenticated()
            )

            .oauth2ResourceServer(oauth2 -> oauth2
                .jwt(jwt -> jwt
                    // Use Keycloak converter
                    .jwtAuthenticationConverter(keycloakConverter)
                )
            )

            .sessionManagement(session -> session
                .sessionCreationPolicy(SessionCreationPolicy.STATELESS)
            )

            .build();
    }
}
추출된 역할은 이제 @PreAuthorize("hasRole('ADMIN')") 어노테이션이나 requestMatchers().hasRole() 표현식에서 사용할 수 있습니다.
사용자 정의 토큰 검증
비즈니스 요구 사항에 따라 추가 검증이 필요할 수 있습니다. 사용자 정의 클레임 확인, 오디언스 검증 또는 최대 수명 제어 등이 있습니다.
@Component
public class CustomJwtValidator implements OAuth2TokenValidator<Jwt> {

    private static final OAuth2Error AUDIENCE_ERROR =
        new OAuth2Error("invalid_token", "Token audience is not valid", null);

    private static final OAuth2Error CUSTOM_CLAIM_ERROR =
        new OAuth2Error("invalid_token", "Required custom claim missing", null);

    @Value("${app.jwt.required-audience}")
    private String requiredAudience;

    @Value("${app.jwt.required-tenant-claim:tenant_id}")
    private String tenantClaimName;

    @Override
    public OAuth2TokenValidatorResult validate(Jwt jwt) {
        List<OAuth2Error> errors = new ArrayList<>();

        // Audience validation
        if (!validateAudience(jwt)) {
            errors.add(AUDIENCE_ERROR);
        }

        // Custom business claim validation
        if (!validateTenantClaim(jwt)) {
            errors.add(CUSTOM_CLAIM_ERROR);
        }

        if (!errors.isEmpty()) {
            return OAuth2TokenValidatorResult.failure(errors);
        }

        return OAuth2TokenValidatorResult.success();
    }

    private boolean validateAudience(Jwt jwt) {
        List<String> audiences = jwt.getAudience();
        return audiences != null && audiences.contains(requiredAudience);
    }

    private boolean validateTenantClaim(Jwt jwt) {
        // Check for required business claim
        String tenantId = jwt.getClaimAsString(tenantClaimName);
        return tenantId != null && !tenantId.isBlank();
    }
}
사용자 정의 검증기는 JwtDecoder 구성에 통합됩니다.
@Configuration
@RequiredArgsConstructor
public class JwtConfig {

    private final CustomJwtValidator customValidator;

    @Value("${spring.security.oauth2.resourceserver.jwt.issuer-uri}")
    private String issuerUri;

    @Value("${spring.security.oauth2.resourceserver.jwt.jwk-set-uri}")
    private String jwkSetUri;

    @Bean
    public JwtDecoder jwtDecoder() {
        // Create decoder with JWKS URL
        NimbusJwtDecoder jwtDecoder = NimbusJwtDecoder
            .withJwkSetUri(jwkSetUri)
            .build();

        // Combine default validators with custom validator
        OAuth2TokenValidator<Jwt> defaultValidators =
            JwtValidators.createDefaultWithIssuer(issuerUri);

        OAuth2TokenValidator<Jwt> combinedValidator =
            new DelegatingOAuth2TokenValidator<>(defaultValidators, customValidator);

        jwtDecoder.setJwtValidator(combinedValidator);

        return jwtDecoder;
    }
}동기 검증은 처리 스레드를 차단합니다. 외부 호출(데이터베이스, 서드파티 서비스)이 필요한 검증의 경우 비동기 필터나 후속 검증이 더 적합합니다.
컨트롤러에서 토큰 정보에 접근
Spring Security는 컨트롤러에서 JWT 토큰 정보에 접근하는 여러 방법을 제공합니다.
@RestController
@RequestMapping("/api/users")
public class UserController {

    // Direct JWT injection via @AuthenticationPrincipal
    @GetMapping("/me")
    public ResponseEntity<UserInfoResponse> getCurrentUser(
        @AuthenticationPrincipal Jwt jwt
    ) {
        String userId = jwt.getSubject();
        String email = jwt.getClaimAsString("email");
        String username = jwt.getClaimAsString("preferred_username");
        List<String> roles = extractRoles(jwt);

        return ResponseEntity.ok(new UserInfoResponse(
            userId, email, username, roles
        ));
    }

    // Alternative with JwtAuthenticationToken to access authorities
    @GetMapping("/profile")
    public ResponseEntity<ProfileResponse> getProfile(
        JwtAuthenticationToken authentication
    ) {
        Jwt jwt = authentication.getToken();
        Collection<String> authorities = authentication.getAuthorities()
            .stream()
            .map(GrantedAuthority::getAuthority)
            .toList();

        return ResponseEntity.ok(new ProfileResponse(
            jwt.getSubject(),
            jwt.getClaimAsString("name"),
            authorities
        ));
    }

    // Access scopes for conditional business logic
    @GetMapping("/data")
    @PreAuthorize("hasAuthority('SCOPE_read')")
    public ResponseEntity<DataResponse> getData(
        @AuthenticationPrincipal Jwt jwt
    ) {
        boolean canWrite = hasScope(jwt, "write");

        // Business logic adapted according to permissions
        DataResponse response = buildDataResponse(jwt.getSubject(), canWrite);
        return ResponseEntity.ok(response);
    }

    private List<String> extractRoles(Jwt jwt) {
        Map<String, Object> realmAccess = jwt.getClaim("realm_access");
        if (realmAccess == null) {
            return Collections.emptyList();
        }
        @SuppressWarnings("unchecked")
        List<String> roles = (List<String>) realmAccess.get("roles");
        return roles != null ? roles : Collections.emptyList();
    }

    private boolean hasScope(Jwt jwt, String scope) {
        String scopes = jwt.getClaimAsString("scope");
        return scopes != null && scopes.contains(scope);
    }
}public record UserInfoResponse(
String userId,
String email,
String username,
List<String> roles
) {}
// ProfileResponse.java
public record ProfileResponse(
String userId,
String name,
Collection<String> authorities
) {}@AuthenticationPrincipal 어노테이션은 SecurityContextHolder에서 인증 정보를 수동으로 가져오는 작업을 피할 수 있게 해줍니다.
OAuth2 인증 오류 처리
특정 오류 처리는 API 소비자를 위한 개발자 경험을 개선합니다.
@RestControllerAdvice
public class OAuth2SecurityExceptionHandler {

    private static final Logger log =
        LoggerFactory.getLogger(OAuth2SecurityExceptionHandler.class);

    // Missing token or invalid format
    @ExceptionHandler(AuthenticationException.class)
    @ResponseStatus(HttpStatus.UNAUTHORIZED)
    public ErrorResponse handleAuthenticationException(AuthenticationException ex) {
        log.warn("Authentication failed: {}", ex.getMessage());

        return new ErrorResponse(
            "UNAUTHORIZED",
            "Authentication required. Provide a valid Bearer token.",
            Map.of("error", ex.getMessage())
        );
    }

    // Access denied despite valid token
    @ExceptionHandler(AccessDeniedException.class)
    @ResponseStatus(HttpStatus.FORBIDDEN)
    public ErrorResponse handleAccessDeniedException(AccessDeniedException ex) {
        log.warn("Access denied: {}", ex.getMessage());

        return new ErrorResponse(
            "FORBIDDEN",
            "Insufficient permissions for this resource",
            null
        );
    }

    // OAuth2-specific error (expired token, invalid signature, etc.)
    @ExceptionHandler(OAuth2AuthenticationException.class)
    @ResponseStatus(HttpStatus.UNAUTHORIZED)
    public ErrorResponse handleOAuth2Exception(OAuth2AuthenticationException ex) {
        OAuth2Error error = ex.getError();
        log.warn("OAuth2 authentication error: {} - {}",
            error.getErrorCode(), error.getDescription());

        String message = switch (error.getErrorCode()) {
            case "invalid_token" -> "Token is invalid or expired";
            case "insufficient_scope" -> "Token does not have required scopes";
            default -> "Authentication failed";
        };

        return new ErrorResponse(
            error.getErrorCode().toUpperCase(),
            message,
            Map.of("details", error.getDescription())
        );
    }
}

// ErrorResponse.java
public record ErrorResponse(
    String code,
    String message,
    Map<String, String> details
) {}
표준화된 OAuth2 오류 코드(invalid_token, insufficient_scope)는 클라이언트 측 처리를 용이하게 합니다.
멀티 환경 구성
구성은 환경에 따라 달라집니다. 개발 환경에서는 로컬 Keycloak 서버를 사용할 수 있으며, 운영 환경에서는 Auth0와 같은 관리형 IdP가 그 역할을 대신합니다.
# application.yml (common configuration)
app:
  jwt:
    required-audience: my-api

---
# application-dev.yml
spring:
  config:
    activate:
      on-profile: dev
  security:
    oauth2:
      resourceserver:
        jwt:
          issuer-uri: http://localhost:8180/realms/dev-realm

keycloak:
  client-id: my-api-dev

logging:
  level:
    org.springframework.security: DEBUG

---
# application-prod.yml
spring:
  config:
    activate:
      on-profile: prod
  security:
    oauth2:
      resourceserver:
        jwt:
          issuer-uri: ${OAUTH2_ISSUER_URI}
          audiences: ${OAUTH2_AUDIENCES:my-api}

keycloak:
  client-id: ${KEYCLOAK_CLIENT_ID}

logging:
  level:
    org.springframework.security: WARN
운영 환경에서는 민감한 값이 환경 변수나 시크릿 매니저에서 가져옵니다.
모킹된 JWT를 사용한 통합 테스트
통합 테스트는 Spring Security Test 유틸리티를 사용하여 유효한 JWT 토큰을 시뮬레이션합니다.
@SpringBootTest(webEnvironment = WebEnvironment.RANDOM_PORT)
@AutoConfigureMockMvc
class ResourceServerIntegrationTest {

    @Autowired
    private MockMvc mockMvc;

    @Test
    void shouldRejectRequestWithoutToken() throws Exception {
        mockMvc.perform(get("/api/users/me"))
            .andExpect(status().isUnauthorized());
    }

    @Test
    @WithMockJwtAuth(
        claims = @OpenIdClaims(sub = "user-123", preferredUsername = "john.doe"),
        authorities = {"ROLE_USER"}
    )
    void shouldAllowAuthenticatedUser() throws Exception {
        mockMvc.perform(get("/api/users/me"))
            .andExpect(status().isOk())
            .andExpect(jsonPath("$.userId").value("user-123"))
            .andExpect(jsonPath("$.username").value("john.doe"));
    }

    @Test
    void shouldAllowAccessWithValidJwt() throws Exception {
        mockMvc.perform(get("/api/users/me")
                .with(jwt()
                    .jwt(jwt -> jwt
                        .subject("user-456")
                        .claim("preferred_username", "jane.doe")
                        .claim("email", "jane@example.com")
                    )
                    .authorities(new SimpleGrantedAuthority("ROLE_USER"))
                ))
            .andExpect(status().isOk())
            .andExpect(jsonPath("$.email").value("jane@example.com"));
    }

    @Test
    void shouldDenyAccessWithoutAdminRole() throws Exception {
        mockMvc.perform(get("/api/admin/users")
                .with(jwt()
                    .authorities(new SimpleGrantedAuthority("ROLE_USER"))
                ))
            .andExpect(status().isForbidden());
    }

    @Test
    void shouldAllowAdminAccess() throws Exception {
        mockMvc.perform(get("/api/admin/users")
                .with(jwt()
                    .authorities(new SimpleGrantedAuthority("ROLE_ADMIN"))
                ))
            .andExpect(status().isOk());
    }
}spring-security-test의 jwt() 유틸리티는 인증 서버 없이 모킹된 토큰을 생성합니다.
@TestConfiguration
public class SecurityTestConfig {

    // Mocked JwtDecoder for tests
    @Bean
    @Primary
    public JwtDecoder jwtDecoder() {
        return token -> {
            // Return a mocked JWT for tests
            return Jwt.withTokenValue(token)
                .header("alg", "RS256")
                .subject("test-user")
                .claim("scope", "read write")
                .build();
        };
    }
}
연습을 시작하세요!
면접 시뮬레이터와 기술 테스트로 지식을 테스트하세요.
결론
Spring Security 6으로 OAuth2 리소스 서버를 구성하면 토큰 검증을 중앙 집중화하고 API 보안을 단순화할 수 있습니다. 인증 서버는 인증과 토큰 발급을 처리하고, API는 검증과 신원 정보 추출에 집중합니다.
배포 체크리스트:
- ✅ 요구 사항에 따라
issuer-uri또는jwk-set-uri구성 - ✅ 다른 서비스 토큰의 오용을 방지하기 위한 오디언스 검증
- ✅ Keycloak 역할 추출을 위한 사용자 정의 컨버터
- ✅ 표준화된 코드를 사용한 OAuth2 오류 처리
- ✅ 모킹된 토큰을 사용한 통합 테스트
- ✅ 클라이언트와 리소스 서버 간 HTTPS 필수
- ✅ 환경별 구성
- ✅ 인증 실패 시도에 대한 로깅
이 아키텍처는 여러 API가 동일한 Identity Provider를 공유하는 마이크로서비스 생태계에 자연스럽게 통합됩니다.
태그
공유
관련 기사

Spring Security 6: 완벽한 JWT 인증 가이드
Spring Security 6로 JWT 인증을 구현하는 실용 가이드. 구성, 토큰 생성, 검증, 보안 모범 사례를 다룹니다.

Spring Modulith: 모듈러 모놀리스 아키텍처 해설
Spring Modulith로 자바 모듈러 모놀리스를 구축하는 방법을 배웁니다. 아키텍처, 모듈, 비동기 이벤트, Spring Boot 3 예제로 살펴보는 테스트.

Spring Batch 5 면접: 파티셔닝, 청크, 장애 허용
Spring Batch 5 면접을 정복하세요. 파티셔닝, 청크 처리, 장애 허용에 관한 15가지 핵심 질문과 Java 21 예제를 제공합니다.