Swift에서 Combine vs async/await: 점진적 마이그레이션 패턴
Swift에서 Combine에서 async/await로 마이그레이션하는 완전한 가이드: 점진적 전략, 브리징 패턴, iOS 코드베이스의 패러다임 공존.
async/await를 갖춘 Swift Concurrency의 등장은 iOS의 비동기 프로그래밍 관행을 변화시켰습니다. Combine을 사용하는 프로젝트에서는 마이그레이션 문제가 자연스럽게 제기됩니다. 모든 것을 다시 작성해야 합니까? 두 접근 방식이 공존할 수 있습니까? 어떤 패턴이 매끄러운 전환을 가능하게 합니까? 본 가이드는 점진적인 마이그레이션 전략을 탐구하여, Combine을 갑자기 포기하지 않고 async/await를 채택할 수 있도록 합니다.
본 가이드는 Combine에서 async/await로의 점진적 마이그레이션을 위한 구체적인 패턴을 제시하며, 양방향 브리징 예제와 기존 코드베이스에 적합한 공존 전략을 함께 제공합니다.
근본적인 차이 이해하기
마이그레이션을 시작하기 전에 Combine과 async/await를 구별하는 것이 무엇인지 이해하는 것이 필수적입니다. 이 두 접근 방식은 서로 다른 요구에 부응하며, 일부 사용 사례는 Combine에 의해 더 잘 처리됩니다.
Combine의 정신적 모델
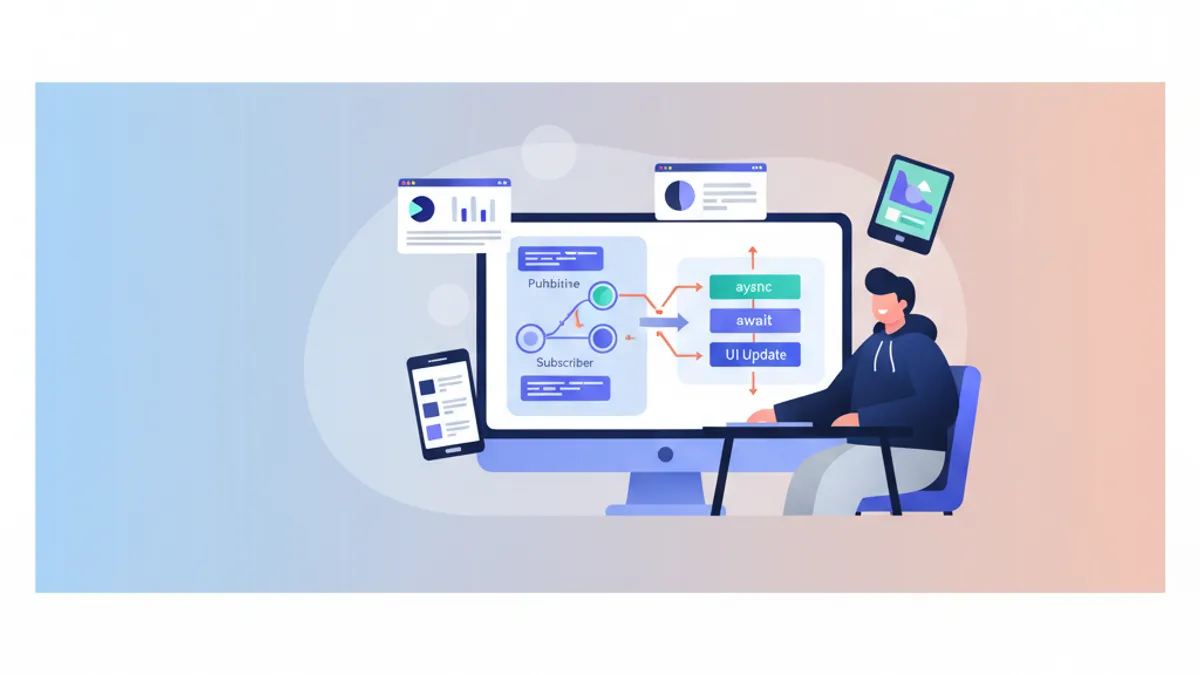
Combine은 데이터 스트림 모델에 기반합니다. Publisher가 시간이 지남에 따라 값을 방출하고, 연산자가 그 값을 변환하며, Subscriber가 최종 결과를 받습니다. 이 모델은 UI 이벤트, 알림 또는 WebSocket과 같은 연속적인 스트림에 뛰어납니다.
// Event stream with Combine - stream-based model
import Combine

class SearchViewModel {
    @Published var searchText = ""
    private var cancellables = Set<AnyCancellable>()

    // Combine excels for continuous streams with transformations
    func setupSearch() {
        $searchText
            // Wait 300ms pause in typing
            .debounce(for: .milliseconds(300), scheduler: RunLoop.main)
            // Ignore consecutive duplicates
            .removeDuplicates()
            // Filter searches that are too short
            .filter { $0.count >= 3 }
            // Transform text into network request
            .flatMap { query in
                self.searchAPI(query: query)
                    // Local error handling
                    .catch { _ in Just([]) }
            }
            // Final subscription
            .sink { results in
                self.updateUI(with: results)
            }
            .store(in: &cancellables)
    }

    private func searchAPI(query: String) -> AnyPublisher<[SearchResult], Error> {
        // Network implementation
    }
}
이 코드는 Combine의 강점을 보여줍니다: 연속적인 이벤트 스트림을 처리하기 위해 선언적 연산자를 연결하는 것입니다.
async/await의 정신적 모델
Async/await는 순차적인 모델을 채택합니다: 작업이 시작되고, 코드가 그 결과를 기다린 후 계속됩니다. 이 모델은 격리된 네트워크 요청이나 파일 읽기와 같은 일회성 작업에 더 직관적입니다.
// One-off operations with async/await - sequential model
import Foundation

actor SearchService {
    // async/await excels for sequential operations
    func performSearch(query: String) async throws -> [SearchResult] {
        // Pre-validation - clear sequential reading
        guard query.count >= 3 else {
            return []
        }

        // Network request with await
        let url = URL(string: "https://api.example.com/search?q=\(query)")!
        let (data, response) = try await URLSession.shared.data(from: url)

        // Response verification
        guard let httpResponse = response as? HTTPURLResponse,
              httpResponse.statusCode == 200 else {
            throw SearchError.invalidResponse
        }

        // Result decoding
        let results = try JSONDecoder().decode([SearchResult].self, from: data)
        return results
    }
}
읽기는 선형적이며, 오류는 try로 자연스럽게 전파되고, 실행 흐름은 즉시 이해할 수 있게 됩니다.
Combine은 연속적인 스트림(UI 이벤트, 타이머, WebSocket)에 대해 여전히 적합합니다. Async/await는 일회성 작업(API 요청, 파일 읽기, 격리된 계산)에 더 적합합니다.
Combine에서 async/await로의 브리징
마이그레이션의 첫 번째 단계는 종종 기존 Publisher를 async/await 코드에서 소비하는 것으로 구성됩니다. Swift는 이 브리징을 위한 네이티브 도구를 제공합니다.
Publisher.values와 함께 AsyncSequence 사용하기
Swift 5.5부터 모든 Publisher는 AsyncPublisher를 반환하는 .values 프로퍼티를 노출합니다. 이 비동기 시퀀스는 for await 루프로 방출된 값을 반복할 수 있게 해줍니다.
// Publisher → AsyncSequence conversion via .values
import Combine

class NotificationObserver {
    private let notificationPublisher: AnyPublisher<Notification, Never>

    init() {
        // Existing Combine Publisher
        notificationPublisher = NotificationCenter.default
            .publisher(for: UIApplication.didBecomeActiveNotification)
            .eraseToAnyPublisher()
    }

    // Consuming the Publisher with async/await
    func observeNotifications() async {
        // .values converts the Publisher to AsyncSequence
        for await notification in notificationPublisher.values {
            // Process each notification
            await handleAppBecameActive(notification)
        }
        // This line is never reached for an infinite Publisher
    }

    private func handleAppBecameActive(_ notification: Notification) async {
        // Async processing logic
    }
}
이 접근 방식은 원본 Publisher를 보존하면서 비동기 컨텍스트에서 그것을 소비할 수 있게 해줍니다.
firstValue로 단일 값 얻기
단일 값을 방출하는 Publisher(네트워크 요청과 같은)에 대해서는 .values.first(where:) 프로퍼티나 사용자 정의 익스텐션이 브리징을 단순화합니다.
// Extension to extract a single value from a Publisher
import Combine

extension Publisher where Failure == Never {
    // Awaits and returns the first emitted value
    var firstValue: Output {
        get async {
            await withCheckedContinuation { continuation in
                var cancellable: AnyCancellable?
                cancellable = self.first()
                    .sink { value in
                        continuation.resume(returning: value)
                        cancellable?.cancel()
                    }
            }
        }
    }
}

extension Publisher {
    // Throwing version for Publishers with errors
    var firstValueThrowing: Output {
        get async throws {
            try await withCheckedThrowingContinuation { continuation in
                var cancellable: AnyCancellable?
                cancellable = self.first()
                    .sink(
                        receiveCompletion: { completion in
                            if case .failure(let error) = completion {
                                continuation.resume(throwing: error)
                            }
                            cancellable?.cancel()
                        },
                        receiveValue: { value in
                            continuation.resume(returning: value)
                        }
                    )
            }
        }
    }
}

// Usage in async code
class UserRepository {
    private let apiClient: APIClient

    func fetchCurrentUser() async throws -> User {
        // Consume an existing Publisher asynchronously
        try await apiClient.userPublisher().firstValueThrowing
    }
}
이 익스텐션은 브리징의 복잡성을 캡슐화하고 깨끗한 API를 제공합니다.
iOS 면접 준비가 되셨나요?
인터랙티브 시뮬레이터, flashcards, 기술 테스트로 연습하세요.
async/await에서 Combine으로의 브리징
반대 방향의 마이그레이션도 마찬가지로 필요합니다: 기존 Combine 파이프라인에서 async 코드를 소비하는 것입니다.
async 함수에서 Publisher 만들기
가장 직접적인 접근 방식은 async 호출을 캡슐화하기 위해 Future와 Task를 결합하여 사용합니다.
// async → Publisher conversion via Future
import Combine

extension Publisher {
    // async flatMap operator for Combine pipelines
    func asyncMap<T>(
        _ transform: @escaping (Output) async throws -> T
    ) -> AnyPublisher<T, Error> {
        flatMap { value in
            Future { promise in
                Task {
                    do {
                        // Execute the async transformation
                        let result = try await transform(value)
                        promise(.success(result))
                    } catch {
                        promise(.failure(error))
                    }
                }
            }
        }
        .eraseToAnyPublisher()
    }
}

// Usage in a Combine pipeline
class ImageProcessor {
    @Published var selectedImageURL: URL?
    private var cancellables = Set<AnyCancellable>()

    func setupProcessingPipeline() {
        $selectedImageURL
            .compactMap { $0 }
            // Use an async function in the Combine pipeline
            .asyncMap { url in
                // downloadImage is an async function
                try await self.downloadImage(from: url)
            }
            .asyncMap { imageData in
                // processImage is also async
                try await self.processImage(imageData)
            }
            .receive(on: DispatchQueue.main)
            .sink(
                receiveCompletion: { completion in
                    if case .failure(let error) = completion {
                        print("Error: \(error)")
                    }
                },
                receiveValue: { processedImage in
                    self.displayImage(processedImage)
                }
            )
            .store(in: &cancellables)
    }

    private func downloadImage(from url: URL) async throws -> Data {
        let (data, _) = try await URLSession.shared.data(from: url)
        return data
    }

    private func processImage(_ data: Data) async throws -> UIImage {
        // Async image processing
    }
}
비동기 스트림을 위한 사용자 정의 Publisher
더 고급 요구 사항에는 사용자 정의 Publisher가 완전한 AsyncSequence 스트림을 캡슐화할 수 있습니다.
// Publisher wrapper for AsyncSequence
import Combine

struct AsyncSequencePublisher<S: AsyncSequence>: Publisher {
    typealias Output = S.Element
    typealias Failure = Error

    private let sequence: S

    init(_ sequence: S) {
        self.sequence = sequence
    }

    func receive<Sub>(subscriber: Sub) where Sub: Subscriber,
                                              Failure == Sub.Failure,
                                              Output == Sub.Input {
        let subscription = AsyncSubscription(
            sequence: sequence,
            subscriber: subscriber
        )
        subscriber.receive(subscription: subscription)
    }
}

private final class AsyncSubscription<S: AsyncSequence, Sub: Subscriber>: Subscription
where Sub.Input == S.Element, Sub.Failure == Error {

    private var task: Task<Void, Never>?
    private var subscriber: Sub?
    private let sequence: S

    init(sequence: S, subscriber: Sub) {
        self.sequence = sequence
        self.subscriber = subscriber
    }

    func request(_ demand: Subscribers.Demand) {
        // Start asynchronous iteration
        task = Task {
            do {
                for try await element in sequence {
                    // Check subscription is still active
                    guard subscriber != nil else { break }
                    _ = subscriber?.receive(element)
                }
                subscriber?.receive(completion: .finished)
            } catch {
                subscriber?.receive(completion: .failure(error))
            }
        }
    }

    func cancel() {
        task?.cancel()
        subscriber = nil
    }
}

// Convenience extension for any AsyncSequence
extension AsyncSequence {
    var publisher: AsyncSequencePublisher<Self> {
        AsyncSequencePublisher(self)
    }
}
코드베이스에서의 공존 전략
대규모 코드베이스의 완전한 마이그레이션에는 시간이 걸립니다. 다음은 Combine과 async/await가 조화롭게 공존할 수 있도록 하는 패턴입니다.
추상화를 갖춘 계층화된 아키텍처
구현을 추상화하는 프로토콜을 정의하면 호출 코드를 수정하지 않고도 점진적인 마이그레이션이 가능합니다.
// Abstraction enabling two implementations
import Combine

// Protocol defining the contract
protocol UserRepositoryProtocol {
    // Modern async interface
    func fetchUser(id: String) async throws -> User

    // Legacy Combine interface (optional with default implementation)
    func fetchUserPublisher(id: String) -> AnyPublisher<User, Error>
}

// Default Publisher implementation based on async
extension UserRepositoryProtocol {
    func fetchUserPublisher(id: String) -> AnyPublisher<User, Error> {
        Future { promise in
            Task {
                do {
                    let user = try await self.fetchUser(id: id)
                    promise(.success(user))
                } catch {
                    promise(.failure(error))
                }
            }
        }
        .eraseToAnyPublisher()
    }
}

// Modern implementation - async first
class UserRepository: UserRepositoryProtocol {
    private let apiClient: APIClient

    init(apiClient: APIClient) {
        self.apiClient = apiClient
    }

    func fetchUser(id: String) async throws -> User {
        // Native async implementation
        let url = URL(string: "https://api.example.com/users/\(id)")!
        let (data, _) = try await URLSession.shared.data(from: url)
        return try JSONDecoder().decode(User.self, from: data)
    }

    // fetchUserPublisher is provided by the default extension
}
이 접근 방식은 새로운 호출자가 async/await를 사용할 수 있도록 하면서 레거시 코드는 계속 Publisher를 사용할 수 있게 해줍니다.
브리징 시 생성된 Task가 그것을 만든 객체보다 오래 살아남을 수 있습니다. 메모리 누수를 피하기 위해 항상 [weak self]를 사용하거나 작업을 명시적으로 취소하는 것이 바람직합니다.
하이브리드 ViewModel
ViewModel은 전환 기간 동안 두 인터페이스를 모두 노출할 수 있습니다.
// ViewModel supporting both Combine and async/await
import Combine
import SwiftUI

@MainActor
class ProfileViewModel: ObservableObject {
    // Published state for SwiftUI (Combine)
    @Published private(set) var user: User?
    @Published private(set) var isLoading = false
    @Published private(set) var errorMessage: String?

    private let repository: UserRepositoryProtocol
    private var cancellables = Set<AnyCancellable>()
    private var loadTask: Task<Void, Never>?

    init(repository: UserRepositoryProtocol) {
        self.repository = repository
    }

    // Async interface for modern UIKit or SwiftUI with .task
    func loadUser(id: String) async {
        isLoading = true
        errorMessage = nil

        do {
            user = try await repository.fetchUser(id: id)
        } catch {
            errorMessage = error.localizedDescription
        }

        isLoading = false
    }

    // Combine interface for legacy code
    func loadUserPublisher(id: String) {
        isLoading = true
        errorMessage = nil

        repository.fetchUserPublisher(id: id)
            .receive(on: DispatchQueue.main)
            .sink(
                receiveCompletion: { [weak self] completion in
                    self?.isLoading = false
                    if case .failure(let error) = completion {
                        self?.errorMessage = error.localizedDescription
                    }
                },
                receiveValue: { [weak self] user in
                    self?.user = user
                }
            )
            .store(in: &cancellables)
    }

    // Clean cancellation
    func cancelLoading() {
        loadTask?.cancel()
        cancellables.removeAll()
        isLoading = false
    }
}
일반적인 Combine 연산자 마이그레이션
일부 Combine 연산자는 async/await에 직접적인 대응물이 없습니다. 다음은 이를 재현하는 방법입니다.
async를 사용한 Debounce 등가물
// Debounce implementation with async/await
import Foundation

actor Debouncer {
    private var task: Task<Void, Never>?
    private let duration: Duration

    init(duration: Duration) {
        self.duration = duration
    }

    // Cancels previous execution and schedules a new one
    func debounce(_ operation: @escaping @Sendable () async -> Void) {
        task?.cancel()

        task = Task {
            do {
                // Wait for the specified duration
                try await Task.sleep(for: duration)
                // Execute operation if not cancelled
                await operation()
            } catch {
                // Task cancelled - expected behavior
            }
        }
    }
}

// Usage in a ViewModel
@MainActor
class SearchViewModel: ObservableObject {
    @Published var searchText = ""
    @Published private(set) var results: [SearchResult] = []

    private let debouncer = Debouncer(duration: .milliseconds(300))
    private let searchService: SearchService

    init(searchService: SearchService) {
        self.searchService = searchService
    }

    func onSearchTextChanged(_ text: String) {
        Task {
            await debouncer.debounce { [weak self] in
                guard let self else { return }
                await self.performSearch(text)
            }
        }
    }

    private func performSearch(_ query: String) async {
        guard query.count >= 3 else {
            results = []
            return
        }

        do {
            results = try await searchService.search(query: query)
        } catch {
            // Error handling
        }
    }
}
TaskGroup을 사용한 Merge 등가물
// Combining multiple async streams with TaskGroup
import Foundation

struct AsyncMerge {
    // Executes multiple async operations in parallel and returns all results
    static func merge<T>(
        _ operations: [@Sendable () async throws -> T]
    ) async throws -> [T] {
        try await withThrowingTaskGroup(of: T.self) { group in
            // Launch all operations in parallel
            for operation in operations {
                group.addTask {
                    try await operation()
                }
            }

            // Collect results
            var results: [T] = []
            for try await result in group {
                results.append(result)
            }
            return results
        }
    }

    // Streaming version that emits results as they arrive
    static func mergeStream<T: Sendable>(
        _ operations: [@Sendable () async throws -> T]
    ) -> AsyncThrowingStream<T, Error> {
        AsyncThrowingStream { continuation in
            Task {
                await withThrowingTaskGroup(of: T.self) { group in
                    for operation in operations {
                        group.addTask {
                            try await operation()
                        }
                    }

                    do {
                        for try await result in group {
                            continuation.yield(result)
                        }
                        continuation.finish()
                    } catch {
                        continuation.finish(throwing: error)
                    }
                }
            }
        }
    }
}

// Usage
class DataAggregator {
    func fetchAllData() async throws -> AggregatedData {
        // Execute three requests in parallel
        let results = try await AsyncMerge.merge([
            { try await self.fetchUsers() },
            { try await self.fetchPosts() },
            { try await self.fetchComments() }
        ])

        return AggregatedData(
            users: results[0] as! [User],
            posts: results[1] as! [Post],
            comments: results[2] as! [Comment]
        )
    }
}
iOS 면접 준비가 되셨나요?
인터랙티브 시뮬레이터, flashcards, 기술 테스트로 연습하세요.
Combine이 여전히 선호되는 사용 사례
async/await의 장점에도 불구하고, 일부 시나리오는 여전히 Combine에 의해 더 잘 처리됩니다.
반응형 UI 이벤트 스트림
SwiftUI와 UIKit은 Combine 연산자(debounce, throttle, combineLatest)가 빛을 발하는 연속적인 이벤트 스트림을 생성합니다.
// Combine remains optimal for reactive UI events
import Combine
import SwiftUI

class FormViewModel: ObservableObject {
    @Published var email = ""
    @Published var password = ""
    @Published var confirmPassword = ""

    // Derived states computed via Combine
    @Published private(set) var isEmailValid = false
    @Published private(set) var isPasswordStrong = false
    @Published private(set) var passwordsMatch = false
    @Published private(set) var canSubmit = false

    private var cancellables = Set<AnyCancellable>()

    init() {
        setupValidation()
    }

    private func setupValidation() {
        // Email validation with debounce
        $email
            .debounce(for: .milliseconds(300), scheduler: RunLoop.main)
            .map { email in
                let regex = /^[\w-\.]+@([\w-]+\.)+[\w-]{2,4}$/
                return email.wholeMatch(of: regex) != nil
            }
            .assign(to: &$isEmailValid)

        // Password strength validation
        $password
            .map { password in
                password.count >= 8 &&
                password.rangeOfCharacter(from: .uppercaseLetters) != nil &&
                password.rangeOfCharacter(from: .decimalDigits) != nil
            }
            .assign(to: &$isPasswordStrong)

        // Password matching
        Publishers.CombineLatest($password, $confirmPassword)
            .map { password, confirm in
                !password.isEmpty && password == confirm
            }
            .assign(to: &$passwordsMatch)

        // Final combination to enable submit button
        Publishers.CombineLatest3($isEmailValid, $isPasswordStrong, $passwordsMatch)
            .map { $0 && $1 && $2 }
            .assign(to: &$canSubmit)
    }
}
이 선언적 패턴은 async/await로는 훨씬 더 장황해질 것입니다.
WebSocket 연결 관리
WebSocket은 메시지를 지속적으로 방출하므로 Combine에 자연스러운 사용 사례입니다.
// WebSocket with Combine for continuous stream
import Combine
import Foundation

class WebSocketManager: ObservableObject {
    @Published private(set) var messages: [ChatMessage] = []
    @Published private(set) var connectionState: ConnectionState = .disconnected

    private var webSocketTask: URLSessionWebSocketTask?
    private let messageSubject = PassthroughSubject<ChatMessage, Never>()
    private var cancellables = Set<AnyCancellable>()

    // Exposed Publisher for consumers
    var messagePublisher: AnyPublisher<ChatMessage, Never> {
        messageSubject.eraseToAnyPublisher()
    }

    func connect(to url: URL) {
        webSocketTask = URLSession.shared.webSocketTask(with: url)
        webSocketTask?.resume()
        connectionState = .connected

        // Start reception loop
        receiveMessages()

        // Message processing pipeline
        messageSubject
            // Buffer messages to avoid too frequent UI updates
            .collect(.byTime(RunLoop.main, .milliseconds(100)))
            // Accumulate in history
            .scan([ChatMessage]()) { accumulated, new in
                accumulated + new
            }
            .assign(to: &$messages)
    }

    private func receiveMessages() {
        webSocketTask?.receive { [weak self] result in
            switch result {
            case .success(let message):
                if case .string(let text) = message,
                   let data = text.data(using: .utf8),
                   let chatMessage = try? JSONDecoder().decode(ChatMessage.self, from: data) {
                    self?.messageSubject.send(chatMessage)
                }
                // Continue reception
                self?.receiveMessages()

            case .failure(let error):
                self?.connectionState = .error(error.localizedDescription)
            }
        }
    }
}
점진적 마이그레이션 체크리스트
성공적인 마이그레이션은 체계적인 접근 방식을 따릅니다. 다음은 권장되는 단계입니다.
1단계: 준비
- ✅ 코드베이스에서 사용되는 Publisher를 식별합니다
- ✅ 분류합니다: 연속 스트림 vs 일회성 작업
- ✅ 브리징 익스텐션을 만듭니다(firstValue, asyncMap)
- ✅ 리포지토리를 위한 추상 프로토콜을 정의합니다
2단계: 일회성 작업의 마이그레이션
- ✅ 단순한 네트워크 요청을 async/await로 변환합니다
- ✅ 파일 읽기를 마이그레이션합니다
- ✅ 데이터베이스 작업을 변환합니다
- ✅ 기본 구현을 통해 Publisher를 보존합니다
3단계: ViewModel 적응
- ✅ 기존 ViewModel에 async 메서드를 추가합니다
- ✅ 새 화면에는 SwiftUI에서
.task를 사용합니다 - ✅ 호환성을 위해 @Published 바인딩을 유지합니다
4단계: 정리
- ✅ 쓸모없게 된 Combine 메서드를 제거합니다
- ✅ 사용되지 않는 브리징 익스텐션을 삭제합니다
- ✅ 의도적으로 보존된 Combine 패턴을 문서화합니다
결론
Combine에서 async/await로의 마이그레이션은 현대 Swift 프로젝트의 자연스러운 진화를 나타냅니다. 양방향 브리징 패턴을 사용하는 점진적인 접근 방식은 갑작스러운 단절 없이 async/await의 장점을 채택할 수 있게 해줍니다.
기억해야 할 핵심 사항:
- ✅ Combine과 async/await는 서로 다른 요구에 부응합니다
- ✅
.values는 Publisher를 AsyncSequence로 변환합니다 - ✅
Future+Task는 async 코드를 Publisher에 캡슐화합니다 - ✅ 추상 프로토콜은 공존을 용이하게 합니다
- ✅ Combine은 반응형 UI 스트림에 대해 여전히 적합합니다
- ✅ debounce와 같은 연산자는 async에서 재구성될 수 있습니다
- ✅ 점진적 마이그레이션은 회귀 위험을 줄입니다
목표는 Combine을 제거하는 것이 아니라 각 컨텍스트에 적합한 도구를 선택하는 것입니다: 일회성 작업에는 async/await, 연속적인 이벤트 스트림에는 Combine.
연습을 시작하세요!
면접 시뮬레이터와 기술 테스트로 지식을 테스트하세요.
태그
공유
관련 기사
Core Data에서 SwiftData로의 마이그레이션: 단계별 가이드 2026
iOS 앱을 Core Data에서 SwiftData로 마이그레이션하기 위한 완전 가이드입니다. 실무 예제, 공존 전략 및 모범 사례를 다룹니다.

Combine Framework: Swift에서의 반응형 프로그래밍
Swift에서 비동기 데이터 스트림을 다루기 위한 Combine을 마스터합니다. Publishers, Subscribers, Operators와 iOS 앱을 위한 고급 패턴을 다룹니다.

2026년 iOS 접근성 면접 질문: VoiceOver와 Dynamic Type
iOS 면접 대비를 위한 핵심 접근성 질문: VoiceOver, Dynamic Type, 시맨틱 traits, 접근성 감사.