Django와 Python 면접 질문: 2026년 핵심 25선
Django와 Python 면접에서 가장 자주 출제되는 25가지 질문을 상세히 다룹니다. ORM, 뷰, 미들웨어, Django REST Framework, 시그널, 성능 최적화에 대한 상세한 답변과 코드 예제를 제공합니다.

Django 면접에서는 Python의 대표적인 웹 프레임워크에 대한 숙련도, ORM의 이해, MVT 아키텍처에 대한 지식, 그리고 견고한 REST API를 구축하는 능력이 평가됩니다. 본 가이드에서는 Django 기초부터 Django REST Framework의 고급 패턴까지, 가장 빈출되는 25가지 질문을 다룹니다.
Django의 아키텍처적 설계 결정을 설명할 수 있는 지원자는 면접관으로부터 높은 평가를 받습니다. 프레임워크가 특정 규칙을 채택한 이유(설정보다 규칙)를 이해하는 것이 면접에서 큰 차별화 요소가 됩니다.
Django 기초
질문 1: Django의 MVT 아키텍처를 설명하십시오
Model-View-Template(MVT) 아키텍처는 Django의 MVC 패턴 변형입니다. 프레임워크가 컨트롤러 부분을 자동으로 처리하여 개발을 단순화합니다.
# models.py
# The Model represents data structure and business logic
from django.db import models

class Article(models.Model):
    title = models.CharField(max_length=200)
    content = models.TextField()
    published_at = models.DateTimeField(auto_now_add=True)
    author = models.ForeignKey(
        "auth.User",
        on_delete=models.CASCADE,  # Deletes articles when author is deleted
        related_name="articles"     # Reverse access: user.articles.all()
    )

    class Meta:
        ordering = ["-published_at"]  # Default ordering

    def __str__(self):
return self.title# views.py
# The View contains request processing logic
from django.shortcuts import render, get_object_or_404
def article_detail(request, pk):
# get_object_or_404 raises Http404 if the object doesn't exist
article = get_object_or_404(Article, pk=pk)
return render(request, "blog/article_detail.html", {"article": article})MVT에서 Django는 urls.py를 통해 URL을 적절한 뷰로 라우팅함으로써 컨트롤러의 역할을 수행합니다. Template은 HTML 프레젠테이션을 담당합니다.
질문 2: Django 프로젝트와 App의 차이점은 무엇입니까?
프로젝트는 전체 설정(settings, 루트 URL, WSGI/ASGI)을 의미합니다. App은 단일 책임을 가진 재사용 가능한 모듈입니다. 하나의 프로젝트에 여러 App이 포함됩니다.
# Creating a project and an app
# django-admin startproject myproject
# python manage.py startapp blog

# settings.py
# Registering apps in the project
INSTALLED_APPS = [
    "django.contrib.admin",       # Admin interface
    "django.contrib.auth",        # Authentication
    "django.contrib.contenttypes",
    "django.contrib.sessions",
    "django.contrib.messages",
    "django.contrib.staticfiles",
    # Custom apps
    "blog.apps.BlogConfig",       # Blog app
    "users.apps.UsersConfig",     # Users app
]
각 App은 단일 책임 원칙을 따르며, 서로 다른 프로젝트에서 재사용할 수 있습니다.
질문 3: Django의 요청 라이프사이클을 설명하십시오
요청은 뷰에 도달하기 전에 여러 레이어를 통과합니다. 이 사이클을 이해하는 것은 디버깅과 최적화에 필수적입니다.
# middleware.py
# Middlewares intercept every request/response
class RequestTimingMiddleware:
    """Middleware that measures processing time."""

    def __init__(self, get_response):
        self.get_response = get_response  # Reference to the next middleware

    def __call__(self, request):
        import time
        start = time.time()

        # Request phase: before the view
        response = self.get_response(request)

        # Response phase: after the view
        duration = time.time() - start
        response["X-Request-Duration"] = f"{duration:.3f}s"
        return response
전체 사이클은 다음과 같습니다: HTTP 요청 → WSGI/ASGI → 미들웨어(process_request) → URL 리졸버 → 뷰 → 미들웨어(process_response) → HTTP 응답.
ORM과 데이터베이스
질문 4: Django QuerySet의 동작 원리와 지연 평가에 대해 설명하십시오
QuerySet은 지연 평가됩니다. 데이터가 실제로 사용될 때까지 SQL 쿼리가 실행되지 않습니다.
# queryset_lazy.py
# Demonstrating QuerySet lazy loading

# No SQL query executed here
qs = Article.objects.filter(published=True)  # No query
qs = qs.exclude(title="Draft")               # Still none
qs = qs.order_by("-created_at")              # Still none

# The SQL query runs ONLY here
for article in qs:  # ONE combined SQL query
    print(article.title)

# Other evaluation triggers
list(qs)        # Converting to list
qs[0]           # Index access
len(qs)         # Counting (prefer qs.count())
bool(qs)        # Existence check (prefer qs.exists())
이러한 지연 평가 덕분에 오버헤드 없이 필터를 체이닝할 수 있으며, 최종적으로 하나의 최적화된 쿼리만 실행됩니다.
질문 5: N+1 문제와 해결 방법에 대해 설명하십시오
N+1 문제는 메인 쿼리가 관계 로딩을 위해 N개의 추가 쿼리를 생성할 때 발생합니다. Django 애플리케이션에서 성능 저하의 가장 일반적인 원인입니다.
# n_plus_one.py
# N+1 problem and solutions

# ❌ PROBLEM: N+1 queries
# 1 query for articles + 1 query PER article for the author
articles = Article.objects.all()
for article in articles:
    print(article.author.username)  # SQL query on every iteration!

# ✅ SOLUTION 1: select_related (ForeignKey, OneToOne)
# Joins tables in ONE SQL query (JOIN)
articles = Article.objects.select_related("author").all()
for article in articles:
    print(article.author.username)  # No additional query

# ✅ SOLUTION 2: prefetch_related (ManyToMany, reverse FK)
# Executes 2 separate queries + Python assembly
articles = Article.objects.prefetch_related("tags").all()
for article in articles:
    print(article.tags.all())  # Data already cached

# ✅ SOLUTION 3: Custom Prefetch with filtering
from django.db.models import Prefetch

articles = Article.objects.prefetch_related(
    Prefetch(
        "comments",
        queryset=Comment.objects.filter(approved=True).select_related("user"),
        to_attr="approved_comments"  # Custom attribute
    )
)
ForeignKey/OneToOne 관계에는 select_related(SQL JOIN)를, ManyToMany 또는 역방향 관계에는 prefetch_related(별도 쿼리)를 사용합니다.
질문 6: 커스텀 Manager의 생성 방법과 활용 시점에 대해 설명하십시오
커스텀 Manager는 모델 수준에서 빈출 쿼리를 캡슐화하여 코드의 가독성과 재사용성을 향상시킵니다.
# managers.py
# Custom Managers and QuerySets

class PublishedQuerySet(models.QuerySet):
    """Reusable QuerySet for published articles."""

    def published(self):
        return self.filter(status="published", published_at__lte=timezone.now())

    def by_author(self, user):
        return self.filter(author=user)

    def popular(self):
        return self.annotate(
            comment_count=models.Count("comments")
        ).order_by("-comment_count")


class PublishedManager(models.Manager):
    """Manager that exposes only published articles."""

    def get_queryset(self):
        return PublishedQuerySet(self.model, using=self._db).published()


class Article(models.Model):
    # ...
    objects = models.Manager()          # Default manager (all articles)
    published = PublishedManager()      # Custom manager (published only)

    # Usage:
    # Article.objects.all()             → All articles
    # Article.published.all()           → Published articles only
    # Article.published.popular()       → Published articles sorted by popularity
커스텀 Manager는 DRY 원칙을 따르며, 쿼리 로직을 한 곳에서 관리할 수 있게 합니다.
Django 면접 준비가 되셨나요?
인터랙티브 시뮬레이터, flashcards, 기술 테스트로 연습하세요.
뷰와 URL
질문 7: 클래스 기반 뷰와 함수 기반 뷰의 차이점과 사용 시점을 설명하십시오
함수 기반 뷰(FBV)는 단순성과 명시적인 제어를 제공합니다. 클래스 기반 뷰(CBV)는 상속을 통한 재사용성과 구조화를 제공합니다.
# views_comparison.py
# FBV: Explicit, simple, easy to understand
from django.http import JsonResponse
from django.views.decorators.http import require_http_methods

@require_http_methods(["GET", "POST"])
def article_list(request):
    if request.method == "GET":
        articles = Article.published.all()
        return render(request, "articles/list.html", {"articles": articles})

    # POST: article creation
    form = ArticleForm(request.POST)
    if form.is_valid():
        form.save()
        return redirect("article-list")
return render(request, "articles/list.html", {"form": form})# views_cbv.py
# CBV: Reusable, extensible via mixins
from django.views.generic import ListView, CreateView
from django.contrib.auth.mixins import LoginRequiredMixin
class ArticleListView(LoginRequiredMixin, ListView):
model = Article
template_name = "articles/list.html"
context_object_name = "articles" # Variable name in the template
paginate_by = 20 # Automatic pagination
def get_queryset(self):
# Override to filter published articles
return Article.published.all()
class ArticleCreateView(LoginRequiredMixin, CreateView):
model = Article
form_class = ArticleForm
success_url = reverse_lazy("article-list")
def form_valid(self, form):
form.instance.author = self.request.user # Assign the author
return super().form_valid(form)실용적 원칙: 단순하거나 비표준적인 로직에는 FBV를, 표준 CRUD 작업에는 CBV를 사용합니다.
질문 8: Django 미들웨어의 동작 원리를 설명하십시오
미들웨어는 모든 요청/응답을 처리하는 훅입니다. 각 미들웨어는 처리 사이클의 서로 다른 단계에서 개입할 수 있습니다.
# auth_middleware.py
# Custom authentication middleware
import jwt
from django.conf import settings
from django.http import JsonResponse

class JWTAuthenticationMiddleware:
    """Verifies JWT token on protected endpoints."""

    EXEMPT_PATHS = ["/api/auth/login", "/api/auth/register", "/health"]

    def __init__(self, get_response):
        self.get_response = get_response

    def __call__(self, request):
        # Skip exempt paths
        if any(request.path.startswith(p) for p in self.EXEMPT_PATHS):
            return self.get_response(request)

        # Extract and verify the token
        auth_header = request.headers.get("Authorization", "")
        if not auth_header.startswith("Bearer "):
            return JsonResponse({"error": "Missing token"}, status=401)

        try:
            token = auth_header.split(" ")[1]
            payload = jwt.decode(token, settings.SECRET_KEY, algorithms=["HS256"])
            request.user_id = payload["user_id"]  # Attach to request
        except jwt.ExpiredSignatureError:
            return JsonResponse({"error": "Token expired"}, status=401)
        except jwt.InvalidTokenError:
            return JsonResponse({"error": "Invalid token"}, status=401)

return self.get_response(request)MIDDLEWARE에서 미들웨어의 순서는 매우 중요합니다. 요청은 위에서 아래로, 응답은 아래에서 위로 실행됩니다.
Django REST Framework
질문 9: Serializer와 ModelSerializer의 차이점은 무엇입니까?
Serializer는 각 필드를 수동으로 정의하고, ModelSerializer는 모델에서 필드를 자동 생성합니다.
# serializers.py
from rest_framework import serializers

# Manual Serializer: full control over each field
class ArticleSerializer(serializers.Serializer):
    id = serializers.IntegerField(read_only=True)
    title = serializers.CharField(max_length=200)
    content = serializers.CharField()
    author_name = serializers.SerializerMethodField()

    def get_author_name(self, obj):
        return obj.author.get_full_name()

    def create(self, validated_data):
        return Article.objects.create(**validated_data)

    def update(self, instance, validated_data):
        instance.title = validated_data.get("title", instance.title)
        instance.content = validated_data.get("content", instance.content)
        instance.save()
        return instance


# ModelSerializer: automatic field generation
class ArticleModelSerializer(serializers.ModelSerializer):
    author_name = serializers.SerializerMethodField()
    comment_count = serializers.IntegerField(read_only=True)

    class Meta:
        model = Article
        fields = ["id", "title", "content", "author", "author_name",
                  "comment_count", "published_at"]
        read_only_fields = ["published_at"]

    def get_author_name(self, obj):
        return obj.author.get_full_name()
표준적인 경우에는 ModelSerializer를, 표현이 모델과 크게 다른 경우에는 Serializer를 사용합니다.
질문 10: DRF에서 페이지네이션을 구현하는 방법을 설명하십시오
DRF는 전역 또는 뷰별로 설정 가능한 여러 페이지네이션 전략을 제공합니다.
# settings.py
# Global pagination configuration
REST_FRAMEWORK = {
    "DEFAULT_PAGINATION_CLASS": "rest_framework.pagination.PageNumberPagination",
    "PAGE_SIZE": 20,
}

# pagination.py
# Custom pagination per view
from rest_framework.pagination import CursorPagination, LimitOffsetPagination

class ArticleCursorPagination(CursorPagination):
    """Cursor pagination: performant for large datasets."""
    page_size = 20
    ordering = "-published_at"  # Indexed field required
    cursor_query_param = "cursor"

class ArticleLimitOffsetPagination(LimitOffsetPagination):
    """Offset/limit pagination: flexible but less performant."""
    default_limit = 20
    max_limit = 100

# views.py
class ArticleViewSet(viewsets.ModelViewSet):
    queryset = Article.published.all()
    serializer_class = ArticleModelSerializer
    pagination_class = ArticleCursorPagination  # View-specific pagination
대규모 데이터셋에는 커서 페이지네이션이 권장됩니다. OFFSET/LIMIT와 달리 페이지 번호에 관계없이 일정한 성능을 유지합니다.
질문 11: DRF 퍼미션으로 API를 보호하는 방법을 설명하십시오
DRF는 인증과 세밀한 인가를 결합한 모듈식 퍼미션 시스템을 제공합니다.
# permissions.py
from rest_framework.permissions import BasePermission, IsAuthenticated

class IsAuthorOrReadOnly(BasePermission):
    """Only the author can modify, everyone can read."""

    def has_object_permission(self, request, view, obj):
        # GET, HEAD, OPTIONS are always allowed
        if request.method in ("GET", "HEAD", "OPTIONS"):
            return True
        # Only the author can modify or delete
        return obj.author == request.user


class IsAdminOrManager(BasePermission):
    """Access restricted to admins and managers."""

    def has_permission(self, request, view):
        return (
            request.user.is_authenticated
            and request.user.role in ("admin", "manager")
        )


# views.py
from rest_framework.viewsets import ModelViewSet
from rest_framework.throttling import UserRateThrottle

class ArticleViewSet(ModelViewSet):
    permission_classes = [IsAuthenticated, IsAuthorOrReadOnly]
    throttle_classes = [UserRateThrottle]  # Rate limiting

    def get_permissions(self):
        # Dynamic permissions based on action
        if self.action == "destroy":
            return [IsAdminOrManager()]
        return super().get_permissions()
뷰 수준의 permission_classes와 객체 수준의 has_object_permission을 결합하여 세밀한 접근 제어를 구현합니다.
시그널과 비동기 태스크
질문 12: Django 시그널의 동작 원리와 사용 시점에 대해 설명하십시오
시그널을 사용하면 프레임워크나 애플리케이션의 이벤트에 반응하여 컴포넌트 간 결합도를 낮출 수 있습니다.
# signals.py
from django.db.models.signals import post_save, pre_delete
from django.dispatch import receiver
from django.core.mail import send_mail

@receiver(post_save, sender=Article)
def notify_on_publish(sender, instance, created, **kwargs):
    """Sends a notification when an article is published."""
    if not created and instance.status == "published":
        # Triggered only on publication (not creation)
        subscribers = instance.author.subscribers.values_list("email", flat=True)
        send_mail(
            subject=f"New article: {instance.title}",
            message=f"Check out the latest article by {instance.author.username}",
            from_email="noreply@example.com",
            recipient_list=list(subscribers),
        )

@receiver(pre_delete, sender=Article)
def cleanup_article_files(sender, instance, **kwargs):
    """Deletes associated files before article deletion."""
    if instance.cover_image:
        instance.cover_image.delete(save=False)  # Deletes the physical file
시그널은 경량 부수 효과(로깅, 캐시 무효화)에 적합합니다. 무거운 처리에는 Celery를 사용해야 합니다.
질문 13: Django에 Celery를 통합하여 비동기 태스크를 실행하는 방법을 설명하십시오
Celery는 백그라운드 태스크 실행을 가능하게 하며, 이메일 발송이나 파일 처리 같은 장시간 실행 작업에 필수적입니다.
# celery_config.py
# Celery configuration in the Django project
import os
from celery import Celery

os.environ.setdefault("DJANGO_SETTINGS_MODULE", "myproject.settings")

app = Celery("myproject")
app.config_from_object("django.conf:settings", namespace="CELERY")
app.autodiscover_tasks()  # Discovers tasks.py in each app

# tasks.py
from celery import shared_task
from django.core.mail import send_mass_mail

@shared_task(bind=True, max_retries=3, default_retry_delay=60)
def send_newsletter(self, article_id):
    """Sends newsletter asynchronously."""
    try:
        article = Article.objects.get(id=article_id)
        subscribers = User.objects.filter(newsletter=True)

        messages = [
            (f"New: {article.title}", article.content[:200],
             "noreply@example.com", [sub.email])
            for sub in subscribers
        ]
        send_mass_mail(messages, fail_silently=False)
    except Article.DoesNotExist:
        pass  # Article was deleted in the meantime
    except Exception as exc:
        self.retry(exc=exc)  # Automatic retry on error

# Calling from a view
# send_newsletter.delay(article.id)  # Async execution
# send_newsletter.apply_async(args=[article.id], countdown=300)  # 5-min delay
Celery는 HTTP 응답을 블로킹해서는 안 되는 모든 작업에 대해 운영 환경에서 필수적입니다.
보안과 인증
질문 14: Django는 CSRF 공격을 어떻게 방어합니까?
Django에는 CSRF 보호 기능이 내장되어 있으며, 모든 POST 요청에서 고유 토큰을 검증하는 미들웨어를 통해 구현됩니다.
# CSRF protection in forms
# The {% csrf_token %} template tag generates a hidden field

# For APIs (DRF), CSRF is often disabled in favor of tokens
# settings.py
REST_FRAMEWORK = {
    "DEFAULT_AUTHENTICATION_CLASSES": [
        "rest_framework.authentication.SessionAuthentication",  # Includes CSRF
        "rest_framework.authentication.TokenAuthentication",     # No CSRF
    ],
}

# For AJAX views with session auth
# The csrftoken cookie must be sent in the X-CSRFToken header# csrf_exemption.py
# Exempting a specific view (use with caution)
from django.views.decorators.csrf import csrf_exempt, ensure_csrf_cookie
@ensure_csrf_cookie
def get_csrf_token(request):
"""Endpoint that forces sending the CSRF cookie to the client."""
return JsonResponse({"detail": "CSRF cookie set"})
@csrf_exempt # ⚠️ Use only for external webhooks
def stripe_webhook(request):
"""Stripe webhook - authenticated by signature, not CSRF."""
payload = request.body
sig_header = request.headers.get("Stripe-Signature")
# Verified by Stripe signature insteadCSRF를 전역적으로 비활성화해서는 안 됩니다. csrf_exempt는 다른 수단으로 인증되는 엔드포인트(웹훅, API 토큰)에만 사용합니다.
질문 15: Django에서 커스텀 인증을 구현하는 방법을 설명하십시오
Django에서는 기본 User 모델을 교체하고 인증 백엔드를 커스터마이즈할 수 있습니다.
# models.py
from django.contrib.auth.models import AbstractBaseUser, BaseUserManager, PermissionsMixin

class CustomUserManager(BaseUserManager):
    """Manager for the custom User model."""

    def create_user(self, email, password=None, **extra_fields):
        if not email:
            raise ValueError("Email is required")
        email = self.normalize_email(email)  # Normalizes the domain
        user = self.model(email=email, **extra_fields)
        user.set_password(password)  # Hashes the password
        user.save(using=self._db)
        return user

    def create_superuser(self, email, password=None, **extra_fields):
        extra_fields.setdefault("is_staff", True)
        extra_fields.setdefault("is_superuser", True)
        return self.create_user(email, password, **extra_fields)


class CustomUser(AbstractBaseUser, PermissionsMixin):
    email = models.EmailField(unique=True)          # Login by email
    username = models.CharField(max_length=30, blank=True)
    is_active = models.BooleanField(default=True)
    is_staff = models.BooleanField(default=False)
    date_joined = models.DateTimeField(auto_now_add=True)

    objects = CustomUserManager()

    USERNAME_FIELD = "email"      # Field used for login
    REQUIRED_FIELDS = []          # Fields required in addition to USERNAME_FIELD

# settings.py
AUTH_USER_MODEL = "users.CustomUser" # Before the first migration!AUTH_USER_MODEL은 프로젝트 시작 시점에 정의해야 합니다. 초기 마이그레이션 이후 변경하는 것은 복잡하고 위험합니다.
성능 최적화
질문 16: Django ORM 쿼리를 최적화하는 방법을 설명하십시오
쿼리 최적화는 성능에 매우 중요합니다. SQL 쿼리의 수와 비용을 줄이기 위한 여러 기법이 있습니다.
# query_optimization.py
from django.db.models import F, Q, Count, Avg, Prefetch

# 1. Only/Defer: load only needed fields
articles = Article.objects.only("title", "published_at")  # SELECT title, published_at
heavy_articles = Article.objects.defer("content")          # Everything EXCEPT content

# 2. SQL-level aggregations (not Python)
stats = Article.objects.aggregate(
    total=Count("id"),
    avg_views=Avg("view_count"),
)

# 3. F() expressions: SQL-level operations
Article.objects.filter(published=True).update(
    view_count=F("view_count") + 1  # Atomic SQL increment
)

# 4. Q() objects: complex queries
results = Article.objects.filter(
    Q(title__icontains="django") | Q(tags__name="python"),
    ~Q(status="draft"),  # NOT draft
    published_at__year=2026
)

# 5. Bulk operations: reduce INSERT/UPDATE queries
articles = [Article(title=f"Article {i}") for i in range(100)]
Article.objects.bulk_create(articles, batch_size=50)  # 2 queries instead of 100

Article.objects.filter(status="draft").update(status="archived")  # 1 query
개발 환경에서는 django-debug-toolbar를 사용하여 느린 쿼리와 N+1 문제를 식별해야 합니다.
질문 17: Django에서 캐싱을 구현하는 방법을 설명하십시오
Django는 뷰 단위, 템플릿 프래그먼트 단위, 또는 임의의 데이터에 대한 다중 레벨 캐싱 프레임워크를 제공합니다.
# settings.py
CACHES = {
    "default": {
        "BACKEND": "django.core.cache.backends.redis.RedisCache",
        "LOCATION": "redis://127.0.0.1:6379/1",
    }
}

# cache_strategies.py
from django.core.cache import cache
from django.views.decorators.cache import cache_page
from django.utils.decorators import method_decorator

# Per-view cache: caches the entire HTTP response
@cache_page(60 * 15)  # 15 minutes
def article_list(request):
    return render(request, "articles/list.html", {"articles": Article.published.all()})

# Data cache: granular control
def get_popular_articles():
    cache_key = "popular_articles_v1"
    articles = cache.get(cache_key)

    if articles is None:
        articles = list(
            Article.published.popular()[:10].values("id", "title", "view_count")
        )
        cache.set(cache_key, articles, timeout=60 * 30)  # 30 min

    return articles

# Cache invalidation
def invalidate_article_cache(article_id):
    cache.delete(f"article_{article_id}")
    cache.delete("popular_articles_v1")
    cache.delete_pattern("article_list_*")  # With django-redis
운영 환경의 캐시 백엔드로는 영속성과 고급 기능(패턴, TTL)을 갖춘 Redis가 권장됩니다.
Django 면접 준비가 되셨나요?
인터랙티브 시뮬레이터, flashcards, 기술 테스트로 연습하세요.
마이그레이션과 데이터베이스 관리
질문 18: Django에서 복잡한 마이그레이션을 처리하는 방법을 설명하십시오
Django 마이그레이션은 데이터베이스 스키마의 변경을 버전 관리 가능하고 재현 가능한 방식으로 관리합니다.
# 0005_migrate_data.py
# Custom data migration
from django.db import migrations

def migrate_user_roles(apps, schema_editor):
    """Converts is_admin booleans to text roles."""
    User = apps.get_model("users", "CustomUser")
    # Use apps.get_model() to access the historical model
    User.objects.filter(is_admin=True).update(role="admin")
    User.objects.filter(is_admin=False, is_staff=True).update(role="manager")
    User.objects.filter(is_admin=False, is_staff=False).update(role="user")

def reverse_migrate(apps, schema_editor):
    """Reverse migration for rollback."""
    User = apps.get_model("users", "CustomUser")
    User.objects.filter(role="admin").update(is_admin=True)

class Migration(migrations.Migration):
    dependencies = [
        ("users", "0004_add_role_field"),
    ]

    operations = [
        migrations.RunPython(migrate_user_roles, reverse_migrate),
    ]
롤백을 가능하게 하기 위해 항상 reverse 함수를 제공해야 합니다. 배포 전에 운영 데이터베이스의 복사본에서 마이그레이션을 테스트하는 것이 중요합니다.
질문 19: 성능 최적화를 위한 커스텀 인덱스 생성 방법을 설명하십시오
인덱스는 빈번한 쿼리를 가속화하지만, 쓰기 비용이 증가합니다. 신중한 선택이 필수적입니다.
# models.py
class Article(models.Model):
    title = models.CharField(max_length=200)
    slug = models.SlugField(unique=True)
    status = models.CharField(max_length=20, db_index=True)  # Simple index
    published_at = models.DateTimeField(null=True)
    author = models.ForeignKey("auth.User", on_delete=models.CASCADE)

    class Meta:
        indexes = [
            # Composite index for frequent queries
            models.Index(fields=["status", "-published_at"], name="idx_status_date"),
            # Partial index: only published articles
            models.Index(
                fields=["published_at"],
                condition=models.Q(status="published"),
                name="idx_published_articles"
            ),
            # GIN index for full-text search (PostgreSQL)
            GinIndex(fields=["search_vector"], name="idx_search"),
        ]
복합 인덱스는 컬럼 순서가 중요합니다. 선택성이 가장 높은 필드를 맨 앞에 배치합니다.
테스트와 품질
질문 20: Django 프로젝트에서 테스트를 구성하는 방법을 설명하십시오
Django는 unittest 기반의 견고한 테스트 프레임워크를 제공하며, pytest-django를 통해 유연성이 더욱 향상됩니다.
# tests/test_views.py
from django.test import TestCase, Client
from django.urls import reverse
from rest_framework.test import APITestCase, APIClient

class ArticleViewTests(TestCase):
    """View tests with Django's test client."""

    def setUp(self):
        self.client = Client()
        self.user = CustomUser.objects.create_user(
            email="test@example.com", password="testpass123"
        )
        self.article = Article.objects.create(
            title="Test Article",
            content="Content here",
            author=self.user,
            status="published"
        )

    def test_article_list_returns_200(self):
        response = self.client.get(reverse("article-list"))
        self.assertEqual(response.status_code, 200)
        self.assertContains(response, "Test Article")

    def test_create_article_requires_auth(self):
        response = self.client.post(reverse("article-create"), {"title": "New"})
        self.assertEqual(response.status_code, 302)  # Redirects to login


class ArticleAPITests(APITestCase):
    """REST API tests with DRF."""

    def setUp(self):
        self.user = CustomUser.objects.create_user(
            email="api@example.com", password="testpass123"
        )
        self.client = APIClient()
        self.client.force_authenticate(user=self.user)

    def test_create_article_via_api(self):
        data = {"title": "API Article", "content": "Created via API"}
        response = self.client.post("/api/articles/", data, format="json")
        self.assertEqual(response.status_code, 201)
        self.assertEqual(Article.objects.count(), 1)
테스트는 도메인별로 파일을 분리합니다: test_models.py, test_views.py, test_serializers.py, test_services.py.
질문 21: 테스트에서 픽스처와 팩토리의 사용법을 설명하십시오
팩토리(factory_boy 사용)는 테스트 데이터의 유연성과 유지보수성 면에서 JSON 픽스처보다 권장됩니다.
# factories.py
import factory
from factory.django import DjangoModelFactory

class UserFactory(DjangoModelFactory):
    class Meta:
        model = CustomUser

    email = factory.Sequence(lambda n: f"user{n}@example.com")
    username = factory.Faker("user_name")
    is_active = True

class ArticleFactory(DjangoModelFactory):
    class Meta:
        model = Article

    title = factory.Faker("sentence", nb_words=5)
    content = factory.Faker("paragraphs", nb=3)
    author = factory.SubFactory(UserFactory)  # Creates a user automatically
    status = "published"

    class Params:
        draft = factory.Trait(status="draft", published_at=None)

# tests.py
def test_published_articles_count(self):
    ArticleFactory.create_batch(5)              # 5 published articles
    ArticleFactory.create_batch(3, draft=True)  # 3 drafts
    self.assertEqual(Article.published.count(), 5)
팩토리는 일관된 테스트 데이터를 보장하고 테스트 간 의존성을 제거합니다.
고급 패턴
질문 22: Django Channels로 WebSocket을 구현하는 방법을 설명하십시오
Django Channels는 Django를 HTTP 이상으로 확장하여 WebSocket, 실시간 프로토콜, 백그라운드 태스크를 지원합니다.
# consumers.py
import json
from channels.generic.websocket import AsyncWebsocketConsumer

class ChatConsumer(AsyncWebsocketConsumer):
    """WebSocket consumer for real-time chat."""

    async def connect(self):
        self.room_name = self.scope["url_route"]["kwargs"]["room_name"]
        self.room_group = f"chat_{self.room_name}"

        # Join the room group
        await self.channel_layer.group_add(self.room_group, self.channel_name)
        await self.accept()

    async def disconnect(self, close_code):
        # Leave the group
        await self.channel_layer.group_discard(self.room_group, self.channel_name)

    async def receive(self, text_data):
        data = json.loads(text_data)
        # Broadcast message to the entire group
        await self.channel_layer.group_send(
            self.room_group,
            {"type": "chat.message", "message": data["message"],
             "username": self.scope["user"].username}
        )

    async def chat_message(self, event):
        # Send message to the WebSocket client
        await self.send(text_data=json.dumps({
            "message": event["message"],
            "username": event["username"],
        }))
Django Channels는 ASGI(WSGI 대신)를 사용하며, Daphne이나 Uvicorn 같은 호환 서버가 필요합니다.
질문 23: Django에서 리포지토리 패턴과 서비스 레이어 패턴을 설명하십시오
서비스 레이어 패턴은 비즈니스 로직을 뷰와 ORM으로부터 분리하여 테스트와 유지보수를 용이하게 합니다.
# services/article_service.py
from django.db import transaction

class ArticleService:
    """Service encapsulating article business logic."""

    @staticmethod
    def publish_article(article_id: int, user) -> Article:
        """Publishes an article with all validations."""
        article = Article.objects.select_for_update().get(id=article_id)

        if article.author != user:
            raise PermissionError("Only the author can publish this article")
        if article.status == "published":
            raise ValueError("Article is already published")

        article.status = "published"
        article.published_at = timezone.now()
        article.save(update_fields=["status", "published_at"])

        # Side effects: notification, cache, analytics
        send_newsletter.delay(article.id)
        cache.delete("popular_articles_v1")

        return article

    @staticmethod
    @transaction.atomic
    def bulk_archive(article_ids: list[int], user) -> int:
        """Archives multiple articles in a transaction."""
        updated = Article.objects.filter(
            id__in=article_ids,
            author=user,
            status="published"
        ).update(status="archived", archived_at=timezone.now())
        return updated
서비스 레이어는 모든 비즈니스 로직의 진입점입니다. 뷰와 시리얼라이저는 서비스에 위임하며, ORM에 직접 접근하지 않습니다.
질문 24: 환경 변수와 다중 환경 설정 관리 방법을 설명하십시오
설정 관리는 12-Factor App 원칙을 따릅니다. 설정과 코드의 엄격한 분리가 요구됩니다.
# settings/base.py
# Shared configuration across all environments
import os
from pathlib import Path
from dotenv import load_dotenv

load_dotenv()  # Loads the .env file

BASE_DIR = Path(__file__).resolve().parent.parent.parent

SECRET_KEY = os.environ["DJANGO_SECRET_KEY"]  # Required, no default value
DEBUG = os.environ.get("DEBUG", "False").lower() == "true"
ALLOWED_HOSTS = os.environ.get("ALLOWED_HOSTS", "").split(",")

DATABASES = {
    "default": {
        "ENGINE": "django.db.backends.postgresql",
        "NAME": os.environ.get("DB_NAME", "myapp"),
        "USER": os.environ.get("DB_USER", "postgres"),
        "HOST": os.environ.get("DB_HOST", "localhost"),
        "PORT": os.environ.get("DB_PORT", "5432"),
    }
}

# settings/production.py
from .base import *

DEBUG = False
SECURE_SSL_REDIRECT = True
SESSION_COOKIE_SECURE = True
CSRF_COOKIE_SECURE = True
SECURE_HSTS_SECONDS = 31536000  # 1 year
비밀 정보를 코드에 커밋해서는 안 됩니다. 환경 변수 또는 시크릿 매니저(Vault, AWS Secrets Manager)를 사용해야 합니다.
질문 25: Django 애플리케이션을 운영 환경에 배포하는 방법을 설명하십시오
운영 배포에는 보안, 성능, 안정성을 포괄하는 종합적인 체크리스트가 필요합니다.
# Django deployment checklist

# 1. Built-in verification command
# python manage.py check --deploy

# 2. WSGI/ASGI configuration for production
# gunicorn.conf.py
import multiprocessing

bind = "0.0.0.0:8000"
workers = multiprocessing.cpu_count() * 2 + 1  # Recommended formula
worker_class = "gthread"           # Threaded workers
threads = 4
max_requests = 1000                # Recycle workers to avoid memory leaks
max_requests_jitter = 50
timeout = 30
accesslog = "-"                    # Logs to stdout
errorlog = "-"# docker-compose.yml (typical configuration)
# Services: web (gunicorn), db (postgres), redis (cache/celery), worker (celery)
# 3. Static files
# python manage.py collectstatic --noinput
# Serve via nginx or CDN (WhiteNoise for simple cases)
# 4. Nginx configuration
# - Proxy to gunicorn on port 8000
# - Serve /static/ and /media/ directly
# - Enable gzip, HTTP/2, and security headers운영 릴리스 전에 반드시 python manage.py check --deploy를 실행해야 합니다. 이 명령은 필수 보안 설정을 검증합니다.
결론
이 25가지 질문은 MVT 아키텍처 기초부터 운영 배포 패턴까지, Django와 Python 면접에 필요한 핵심 내용을 포괄합니다.
면접 준비 체크리스트:
- MVT 아키텍처와 요청 라이프사이클
- ORM: QuerySet, N+1 문제, select_related, prefetch_related
- Django REST Framework: 시리얼라이저, 페이지네이션, 퍼미션
- 보안: CSRF, 인증, 퍼미션
- 성능: ORM 최적화, 캐싱, 인덱스
- 테스트: TestCase, APITestCase, 팩토리
- 고급 패턴: Channels, 서비스 레이어, 배포
각 질문은 Django 공식 문서를 통해 더 깊이 탐구할 가치가 있습니다. 면접관은 프레임워크의 세부 사항을 이해하고, 기술적 결정을 근거를 들어 설명할 수 있는 지원자를 높이 평가합니다.
연습을 시작하세요!
면접 시뮬레이터와 기술 테스트로 지식을 테스트하세요.
태그
공유
관련 기사
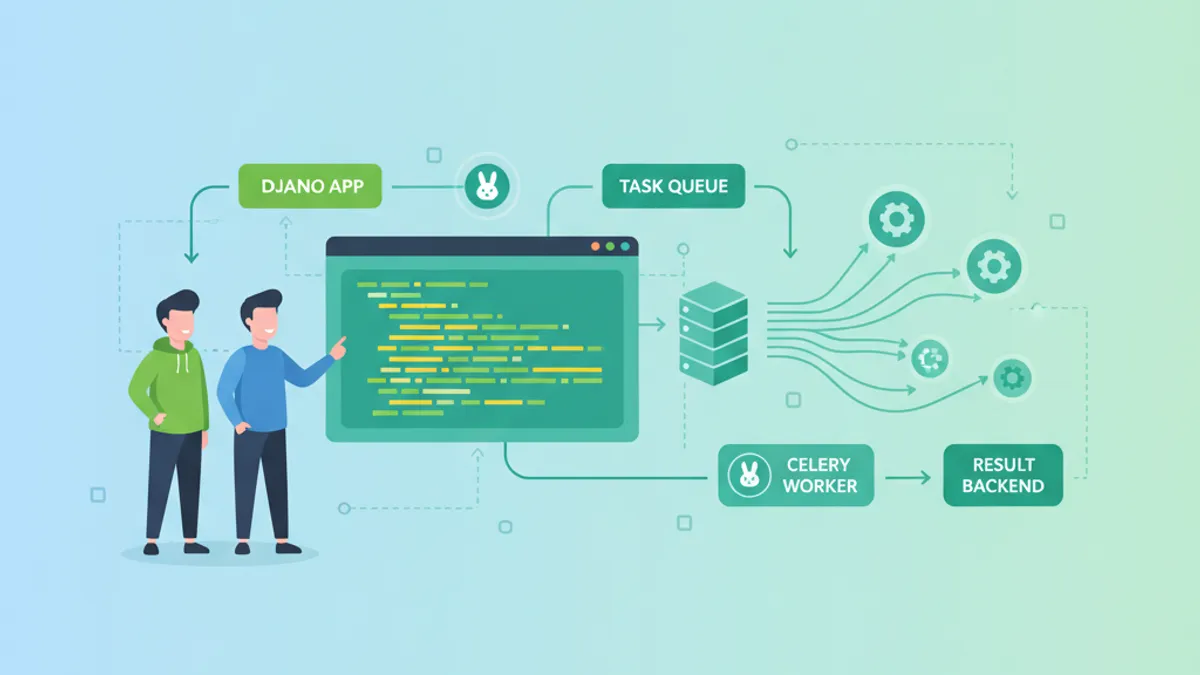
Django와 Celery: 비동기 태스크 처리 및 면접 질문 가이드 2026
Django와 Celery를 활용한 비동기 태스크 처리 구현 방법을 설명합니다. 태스크 라우팅, Celery Beat 스케줄링, 프로덕션 설정, 2026년 최신 기술 면접 질문을 다룹니다.
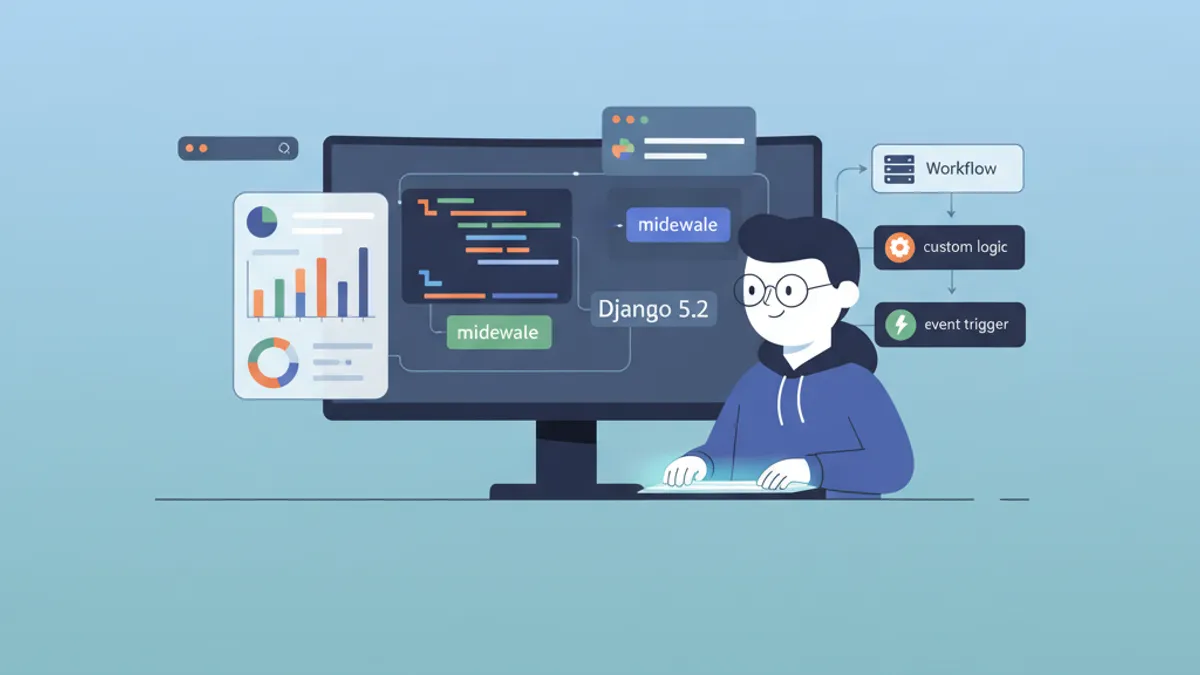
Django 5.2 커스텀 미들웨어와 시그널 핸들링: 기술 면접 완벽 가이드
Django 5.2 커스텀 미들웨어 작성법과 시그널 핸들링 패턴을 기술 면접 관점에서 심층 분석합니다. 비동기 미들웨어, 커스텀 시그널 등 실무 예제를 포함합니다.

Django 5: Django REST Framework로 REST API 구축하기
Django 5와 DRF를 활용한 본격적인 REST API 구축 가이드. 시리얼라이저, ViewSet, JWT 인증, 모범 사례를 실전 중심으로 설명합니다.