Flutter: Membangun Aplikasi Lintas Platform Pertama
Panduan lengkap untuk membangun aplikasi mobile lintas platform dengan Flutter dan Dart. Widget, manajemen state, navigasi, dan praktik terbaik untuk pemula.

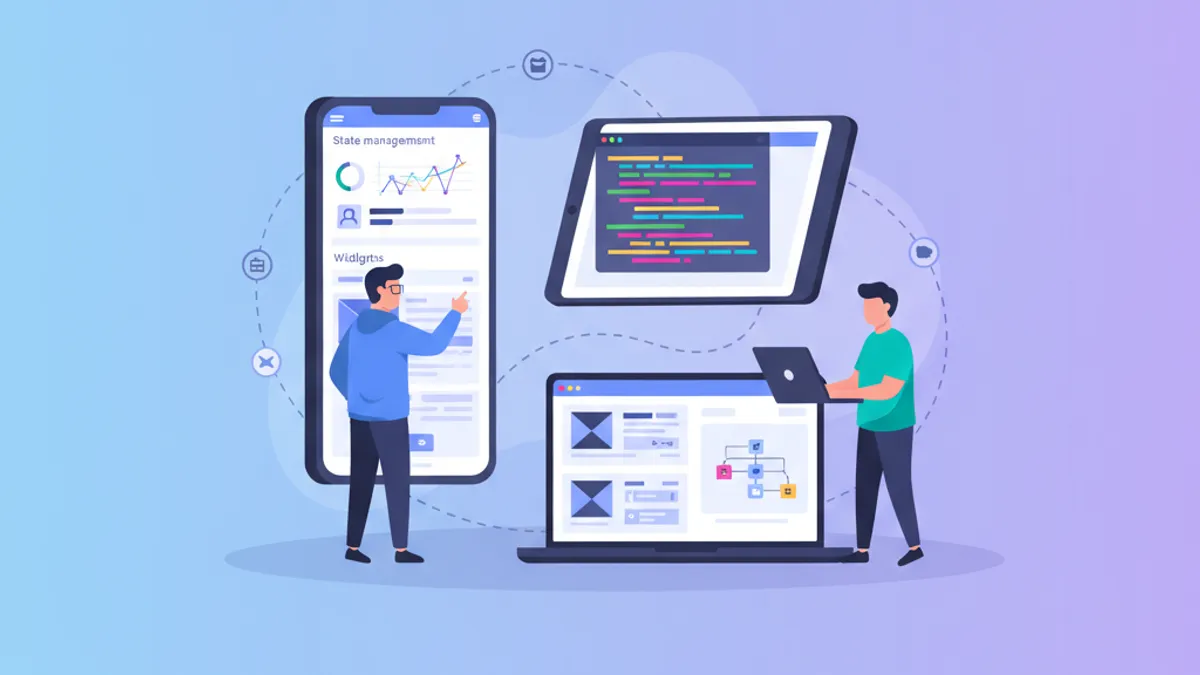
Flutter merevolusi pengembangan mobile dengan memungkinkan pembuatan aplikasi iOS dan Android dari satu basis kode. Framework yang dikembangkan oleh Google ini menggabungkan performa native dengan produktivitas luar biasa berkat mesin rendering Skia dan sistem widget deklaratifnya. Panduan ini mencakup pembangunan aplikasi lengkap, dari instalasi hingga praktik terbaik produksi.
Flutter 3.27 membawa peningkatan signifikan: dukungan native Material 3 secara default, animasi Impeller yang dioptimalkan, dan integrasi dengan Dart 3.6 beserta makro eksperimental. Framework ini kini dikompilasi ke ARM64 native untuk performa optimal.
Pengaturan Lingkungan dan Instalasi
Pengaturan Flutter memerlukan beberapa langkah konfigurasi. SDK Flutter mencakup semua yang diperlukan: framework, alat build, dan manajer paket Dart.
# terminal
# Download Flutter SDK (macOS/Linux)
git clone https://github.com/flutter/flutter.git -b stable
export PATH="$PATH:`pwd`/flutter/bin"

# Verify installation and dependencies
flutter doctor

# Create a new project
flutter create --org com.example my_app
cd my_app

# Run in development mode
flutter run
Perintah flutter doctor memverifikasi bahwa semua dependensi telah terinstal: Android Studio, Xcode (macOS), dan emulator yang dikonfigurasi.
# pubspec.yaml
name: my_app
description: Cross-platform Flutter application
publish_to: 'none'
version: 1.0.0+1

environment:
  sdk: '>=3.6.0 <4.0.0'

dependencies:
  flutter:
    sdk: flutter
  # UI and design
  cupertino_icons: ^1.0.8
  google_fonts: ^6.2.1
  # State management
  flutter_riverpod: ^2.6.1
  # Navigation
  go_router: ^14.6.2
  # HTTP and API
  dio: ^5.7.0
  # Local storage
  shared_preferences: ^2.3.4

dev_dependencies:
  flutter_test:
    sdk: flutter
  flutter_lints: ^5.0.0

flutter:
  uses-material-design: true
File pubspec.yaml ini mengonfigurasi dependensi esensial untuk aplikasi Flutter modern.
Arsitektur Proyek Flutter
Struktur proyek yang jelas memudahkan pemeliharaan dan pengembangan aplikasi. Organisasi ini memisahkan tanggung jawab dengan jelas.
lib/
├── main.dart                 # Entry point
├── app.dart                  # App configuration
├── core/
│   ├── constants/           # Colors, dimensions, strings
│   ├── theme/               # Material 3 theme
│   └── utils/               # Utility functions
├── features/
│   ├── auth/                # Authentication feature
│   │   ├── data/           # Repositories, data sources
│   │   ├── domain/         # Models, use cases
│   │   └── presentation/   # Screens, widgets, providers
│   └── home/               # Home feature
│       ├── data/
│       ├── domain/
│       └── presentation/
├── shared/
│   ├── widgets/            # Reusable widgets
│   └── providers/          # Shared providers
└── routing/
    └── app_router.dart     # Route configuration
Arsitektur "feature-first" ini mengelompokkan semua kode yang terkait dengan suatu fungsionalitas dalam folder yang sama, memudahkan navigasi dan refactoring.
Pendekatan feature-first mengorganisasi kode berdasarkan fungsionalitas bisnis, bukan berdasarkan tipe teknis. Setiap feature memiliki model, widget, dan logika tersendiri, menjadikan kode lebih modular dan mudah diuji.
Memahami Widget Flutter
Widget adalah blok pembangun fundamental Flutter. Semuanya adalah widget: tombol, teks, layout, bahkan aplikasi itu sendiri. Flutter menyediakan dua tipe widget: StatelessWidget (tanpa state) dan StatefulWidget (dengan state lokal).
import 'package:flutter/material.dart';
/// Custom reusable button widget throughout the application.
/// Automatically handles loading and disabled states.
class CustomButton extends StatelessWidget {
// Required and optional widget parameters
final String label;
final VoidCallback? onPressed;
final bool isLoading;
final bool isOutlined;
// Constructor with named parameters for clarity
const CustomButton({
super.key,
required this.label,
this.onPressed,
this.isLoading = false,
this.isOutlined = false,
});
Widget build(BuildContext context) {
// Access theme for consistent styles
final theme = Theme.of(context);
// Conditional build based on button type
if (isOutlined) {
return OutlinedButton(
// Disable button during loading
onPressed: isLoading ? null : onPressed,
style: OutlinedButton.styleFrom(
padding: const EdgeInsets.symmetric(
horizontal: 24,
vertical: 16,
),
shape: RoundedRectangleBorder(
borderRadius: BorderRadius.circular(12),
),
),
child: _buildChild(theme),
);
}
return FilledButton(
onPressed: isLoading ? null : onPressed,
style: FilledButton.styleFrom(
padding: const EdgeInsets.symmetric(
horizontal: 24,
vertical: 16,
),
shape: RoundedRectangleBorder(
borderRadius: BorderRadius.circular(12),
),
),
child: _buildChild(theme),
);
}
/// Builds button content with loading state handling.
Widget _buildChild(ThemeData theme) {
if (isLoading) {
return const SizedBox(
height: 20,
width: 20,
child: CircularProgressIndicator(
strokeWidth: 2,
color: Colors.white,
),
);
}
return Text(label);
}
}Widget ini mengenkapsulasi logika tampilan tombol dengan penanganan otomatis state loading.
import 'package:flutter/material.dart';
import '../../features/auth/domain/models/user.dart';
/// Card displaying user information.
/// Uses Material 3 with consistent elevation and shape.
class UserCard extends StatelessWidget {
final User user;
final VoidCallback? onTap;
const UserCard({
super.key,
required this.user,
this.onTap,
});
Widget build(BuildContext context) {
final theme = Theme.of(context);
// Material 3 Card with InkWell for ripple effect
return Card(
// Adaptive elevation based on theme
elevation: 2,
// Consistent rounded shape
shape: RoundedRectangleBorder(
borderRadius: BorderRadius.circular(16),
),
// Clipping so ripple respects borders
clipBehavior: Clip.antiAlias,
child: InkWell(
onTap: onTap,
child: Padding(
padding: const EdgeInsets.all(16),
child: Row(
children: [
// Avatar with image or initials
CircleAvatar(
radius: 28,
backgroundImage: user.avatarUrl != null
? NetworkImage(user.avatarUrl!)
: null,
child: user.avatarUrl == null
? Text(user.initials)
: null,
),
const SizedBox(width: 16),
// User information
Expanded(
child: Column(
crossAxisAlignment: CrossAxisAlignment.start,
children: [
Text(
user.displayName,
style: theme.textTheme.titleMedium?.copyWith(
fontWeight: FontWeight.w600,
),
),
const SizedBox(height: 4),
Text(
user.email,
style: theme.textTheme.bodyMedium?.copyWith(
color: theme.colorScheme.onSurfaceVariant,
),
),
],
),
),
// Navigation icon
Icon(
Icons.chevron_right,
color: theme.colorScheme.onSurfaceVariant,
),
],
),
),
),
);
}
}Komposisi widget memungkinkan pembangunan antarmuka kompleks dari blok-blok sederhana dan dapat digunakan kembali.
Manajemen State dengan Riverpod
Riverpod merupakan solusi modern untuk manajemen state di Flutter. Library ini menawarkan pendekatan deklaratif, bertipe, dan dapat diuji untuk berbagi state antar widget.
/// Immutable user model with fromJson factory.
class User {
  final String id;
  final String email;
  final String displayName;
  final String? avatarUrl;
  final DateTime createdAt;

  const User({
    required this.id,
    required this.email,
    required this.displayName,
    this.avatarUrl,
    required this.createdAt,
  });

  /// Generates initials from display name.
  String get initials {
    final parts = displayName.split(' ');
    if (parts.length >= 2) {
      return '${parts[0][0]}${parts[1][0]}'.toUpperCase();
    }
    return displayName.substring(0, 2).toUpperCase();
  }

  /// Creates instance from JSON (API response).
  factory User.fromJson(Map<String, dynamic> json) {
    return User(
      id: json['id'] as String,
      email: json['email'] as String,
      displayName: json['display_name'] as String,
      avatarUrl: json['avatar_url'] as String?,
      createdAt: DateTime.parse(json['created_at'] as String),
    );
  }

  /// Converts to JSON for API submission.
  Map<String, dynamic> toJson() {
    return {
      'id': id,
      'email': email,
      'display_name': displayName,
      'avatar_url': avatarUrl,
      'created_at': createdAt.toIso8601String(),
    };
  }
}import 'package:flutter_riverpod/flutter_riverpod.dart';
import '../../data/repositories/auth_repository.dart';
import '../../domain/models/user.dart';
/// Authentication state representing different possible cases.
sealed class AuthState {
const AuthState();
}
class AuthInitial extends AuthState {
const AuthInitial();
}
class AuthLoading extends AuthState {
const AuthLoading();
}
class AuthAuthenticated extends AuthState {
final User user;
const AuthAuthenticated(this.user);
}
class AuthUnauthenticated extends AuthState {
const AuthUnauthenticated();
}
class AuthError extends AuthState {
final String message;
const AuthError(this.message);
}
/// Provider for authentication repository.
final authRepositoryProvider = Provider<AuthRepository>((ref) {
return AuthRepository();
});
/// Main provider managing authentication state.
final authProvider = StateNotifierProvider<AuthNotifier, AuthState>((ref) {
final repository = ref.watch(authRepositoryProvider);
return AuthNotifier(repository);
});
/// Notifier handling authentication logic.
class AuthNotifier extends StateNotifier<AuthState> {
final AuthRepository _repository;
AuthNotifier(this._repository) : super(const AuthInitial()) {
// Check initial state on startup
checkAuthStatus();
}
/// Checks if a user is already logged in.
Future<void> checkAuthStatus() async {
state = const AuthLoading();
try {
final user = await _repository.getCurrentUser();
if (user != null) {
state = AuthAuthenticated(user);
} else {
state = const AuthUnauthenticated();
}
} catch (e) {
state = const AuthUnauthenticated();
}
}
/// Signs in user with email and password.
Future<void> signIn(String email, String password) async {
state = const AuthLoading();
try {
final user = await _repository.signIn(email, password);
state = AuthAuthenticated(user);
} catch (e) {
state = AuthError(e.toString());
}
}
/// Creates a new user account.
Future<void> signUp(String email, String password, String displayName) async {
state = const AuthLoading();
try {
final user = await _repository.signUp(email, password, displayName);
state = AuthAuthenticated(user);
} catch (e) {
state = AuthError(e.toString());
}
}
/// Signs out the user.
Future<void> signOut() async {
state = const AuthLoading();
await _repository.signOut();
state = const AuthUnauthenticated();
}
}Pola sealed class (Dart 3.0+) memastikan bahwa semua kasus state ditangani saat menggunakan ekspresi switch.
Siap menguasai wawancara Flutter Anda?
Berlatih dengan simulator interaktif, flashcards, dan tes teknis kami.
Navigasi dengan GoRouter
GoRouter menyederhanakan navigasi deklaratif di Flutter. Library ini mengelola rute, parameter, redirect, dan navigasi bersarang.
import 'package:flutter/material.dart';
import 'package:flutter_riverpod/flutter_riverpod.dart';
import 'package:go_router/go_router.dart';
import '../features/auth/presentation/providers/auth_provider.dart';
import '../features/auth/presentation/screens/login_screen.dart';
import '../features/auth/presentation/screens/register_screen.dart';
import '../features/home/presentation/screens/home_screen.dart';
import '../features/home/presentation/screens/profile_screen.dart';
import '../shared/widgets/shell_scaffold.dart';

/// Provider for router with authentication handling.
final routerProvider = Provider<GoRouter>((ref) {
  // Listen to authentication state changes
  final authState = ref.watch(authProvider);

  return GoRouter(
    // Initial route
    initialLocation: '/',
    // Refresh router when auth changes
    refreshListenable: GoRouterRefreshStream(ref, authProvider),
    // Handle redirects based on authentication
    redirect: (context, state) {
      final isAuthenticated = authState is AuthAuthenticated;
      final isAuthRoute = state.matchedLocation.startsWith('/auth');

      // Not authenticated on protected route → login
      if (!isAuthenticated && !isAuthRoute) {
        return '/auth/login';
      }

      // Authenticated on auth route → home
      if (isAuthenticated && isAuthRoute) {
        return '/';
      }

      return null; // No redirect
    },
    routes: [
      // Auth routes (without shell)
      GoRoute(
        path: '/auth/login',
        name: 'login',
        builder: (context, state) => const LoginScreen(),
      ),
      GoRoute(
        path: '/auth/register',
        name: 'register',
        builder: (context, state) => const RegisterScreen(),
      ),
      // Protected routes with shell (bottom navigation)
      ShellRoute(
        builder: (context, state, child) {
          return ShellScaffold(child: child);
        },
        routes: [
          GoRoute(
            path: '/',
            name: 'home',
            builder: (context, state) => const HomeScreen(),
          ),
          GoRoute(
            path: '/profile',
            name: 'profile',
            builder: (context, state) => const ProfileScreen(),
          ),
          GoRoute(
            path: '/profile/:userId',
            name: 'userProfile',
            builder: (context, state) {
              // Extract route parameter
              final userId = state.pathParameters['userId']!;
              return ProfileScreen(userId: userId);
            },
          ),
        ],
      ),
    ],
    // Custom error page
    errorBuilder: (context, state) => Scaffold(
      body: Center(
        child: Text('Page not found: ${state.error}'),
      ),
    ),
  );
});

/// Stream to trigger router refresh.
class GoRouterRefreshStream extends ChangeNotifier {
  GoRouterRefreshStream(Ref ref, StateNotifierProvider provider) {
    ref.listen(provider, (previous, next) {
      notifyListeners();
    });
  }
}
Redirect otomatis berdasarkan status autentikasi memastikan rute yang dilindungi tidak dapat diakses oleh pengguna yang belum terautentikasi.
import 'package:flutter/material.dart';
import 'package:go_router/go_router.dart';
/// Scaffold with bottom navigation bar for protected routes.
class ShellScaffold extends StatelessWidget {
final Widget child;
const ShellScaffold({
super.key,
required this.child,
});
Widget build(BuildContext context) {
return Scaffold(
body: child,
bottomNavigationBar: NavigationBar(
// Determine active index based on route
selectedIndex: _calculateSelectedIndex(context),
onDestinationSelected: (index) => _onItemTapped(index, context),
destinations: const [
NavigationDestination(
icon: Icon(Icons.home_outlined),
selectedIcon: Icon(Icons.home),
label: 'Home',
),
NavigationDestination(
icon: Icon(Icons.person_outline),
selectedIcon: Icon(Icons.person),
label: 'Profile',
),
],
),
);
}
/// Calculates navigation index based on current route.
int _calculateSelectedIndex(BuildContext context) {
final location = GoRouterState.of(context).matchedLocation;
if (location.startsWith('/profile')) return 1;
return 0;
}
/// Navigates to route corresponding to index.
void _onItemTapped(int index, BuildContext context) {
switch (index) {
case 0:
context.goNamed('home');
case 1:
context.goNamed('profile');
}
}
}NavigationBar Material 3 secara otomatis menyesuaikan diri dengan tema terang dan gelap.
Layar dan Formulir
Pembuatan layar interaktif menggabungkan widget, manajemen state, dan validasi formulir.
import 'package:flutter/material.dart';
import 'package:flutter_riverpod/flutter_riverpod.dart';
import 'package:go_router/go_router.dart';
import '../providers/auth_provider.dart';
import '../../../../shared/widgets/custom_button.dart';
/// Login screen with validated form.
class LoginScreen extends ConsumerStatefulWidget {
const LoginScreen({super.key});
ConsumerState<LoginScreen> createState() => _LoginScreenState();
}
class _LoginScreenState extends ConsumerState<LoginScreen> {
// Global key for the form
final _formKey = GlobalKey<FormState>();
// Controllers for text fields
final _emailController = TextEditingController();
final _passwordController = TextEditingController();
// Local state for password visibility
bool _obscurePassword = true;
void dispose() {
// Resource cleanup
_emailController.dispose();
_passwordController.dispose();
super.dispose();
}
/// Submits the login form.
Future<void> _submit() async {
// Validate all fields
if (_formKey.currentState!.validate()) {
await ref.read(authProvider.notifier).signIn(
_emailController.text.trim(),
_passwordController.text,
);
}
}
Widget build(BuildContext context) {
final theme = Theme.of(context);
final authState = ref.watch(authProvider);
final isLoading = authState is AuthLoading;
// Listen for errors to display snackbar
ref.listen<AuthState>(authProvider, (previous, next) {
if (next is AuthError) {
ScaffoldMessenger.of(context).showSnackBar(
SnackBar(
content: Text(next.message),
backgroundColor: theme.colorScheme.error,
),
);
}
});
return Scaffold(
body: SafeArea(
child: Center(
child: SingleChildScrollView(
padding: const EdgeInsets.all(24),
child: Form(
key: _formKey,
child: Column(
mainAxisAlignment: MainAxisAlignment.center,
crossAxisAlignment: CrossAxisAlignment.stretch,
children: [
// Logo or title
Icon(
Icons.flutter_dash,
size: 80,
color: theme.colorScheme.primary,
),
const SizedBox(height: 16),
Text(
'Sign In',
style: theme.textTheme.headlineMedium?.copyWith(
fontWeight: FontWeight.bold,
),
textAlign: TextAlign.center,
),
const SizedBox(height: 32),
// Email field with validation
TextFormField(
controller: _emailController,
keyboardType: TextInputType.emailAddress,
textInputAction: TextInputAction.next,
decoration: const InputDecoration(
labelText: 'Email',
hintText: 'example@email.com',
prefixIcon: Icon(Icons.email_outlined),
),
validator: (value) {
if (value == null || value.isEmpty) {
return 'Email is required';
}
// Basic email format validation
if (!RegExp(r'^[\w-\.]+@([\w-]+\.)+[\w-]{2,4}$')
.hasMatch(value)) {
return 'Invalid email format';
}
return null;
},
),
const SizedBox(height: 16),
// Password field with visibility toggle
TextFormField(
controller: _passwordController,
obscureText: _obscurePassword,
textInputAction: TextInputAction.done,
onFieldSubmitted: (_) => _submit(),
decoration: InputDecoration(
labelText: 'Password',
prefixIcon: const Icon(Icons.lock_outlined),
suffixIcon: IconButton(
icon: Icon(
_obscurePassword
? Icons.visibility_outlined
: Icons.visibility_off_outlined,
),
onPressed: () {
setState(() {
_obscurePassword = !_obscurePassword;
});
},
),
),
validator: (value) {
if (value == null || value.isEmpty) {
return 'Password is required';
}
if (value.length < 8) {
return 'Minimum 8 characters';
}
return null;
},
),
const SizedBox(height: 24),
// Sign in button
CustomButton(
label: 'Sign In',
isLoading: isLoading,
onPressed: _submit,
),
const SizedBox(height: 16),
// Link to registration
TextButton(
onPressed: () => context.goNamed('register'),
child: const Text('No account? Create one'),
),
],
),
),
),
),
),
);
}
}Penggunaan ConsumerStatefulWidget menggabungkan state lokal (controller formulir) dengan state global (Riverpod).
Instance TextEditingController harus dilepaskan dalam metode dispose() untuk mencegah kebocoran memori. Aturan ini berlaku untuk semua controller dan listener yang dibuat secara manual.
Komunikasi HTTP dengan Dio
Dio menyediakan API HTTP yang powerful dengan interceptor, penanganan error, dan transformasi respons otomatis.
import 'package:dio/dio.dart';
import 'package:flutter_riverpod/flutter_riverpod.dart';
import '../constants/api_constants.dart';
/// Provider for Dio HTTP client.
final apiClientProvider = Provider<ApiClient>((ref) {
return ApiClient();
});
/// HTTP client configured with interceptors.
class ApiClient {
late final Dio _dio;
ApiClient() {
_dio = Dio(
BaseOptions(
baseUrl: ApiConstants.baseUrl,
connectTimeout: const Duration(seconds: 10),
receiveTimeout: const Duration(seconds: 10),
headers: {
'Content-Type': 'application/json',
'Accept': 'application/json',
},
),
);
// Add interceptors
_dio.interceptors.addAll([
_AuthInterceptor(),
_LoggingInterceptor(),
]);
}
/// Generic GET request.
Future<T> get<T>(
String path, {
Map<String, dynamic>? queryParameters,
T Function(dynamic)? fromJson,
}) async {
try {
final response = await _dio.get(
path,
queryParameters: queryParameters,
);
if (fromJson != null) {
return fromJson(response.data);
}
return response.data as T;
} on DioException catch (e) {
throw _handleError(e);
}
}
/// Generic POST request.
Future<T> post<T>(
String path, {
dynamic data,
T Function(dynamic)? fromJson,
}) async {
try {
final response = await _dio.post(path, data: data);
if (fromJson != null) {
return fromJson(response.data);
}
return response.data as T;
} on DioException catch (e) {
throw _handleError(e);
}
}
/// Sets the authentication token.
void setAuthToken(String token) {
_dio.options.headers['Authorization'] = 'Bearer $token';
}
/// Clears the authentication token.
void clearAuthToken() {
_dio.options.headers.remove('Authorization');
}
/// Converts Dio errors to readable exceptions.
Exception _handleError(DioException error) {
switch (error.type) {
case DioExceptionType.connectionTimeout:
case DioExceptionType.sendTimeout:
case DioExceptionType.receiveTimeout:
return Exception('Connection timeout. Check your connection.');
case DioExceptionType.badResponse:
final statusCode = error.response?.statusCode;
final message = error.response?.data['message'] ?? 'Server error';
return Exception('Error $statusCode: $message');
case DioExceptionType.cancel:
return Exception('Request cancelled');
default:
return Exception('Network error: ${error.message}');
}
}
}
/// Interceptor to automatically add token.
class _AuthInterceptor extends Interceptor {
void onRequest(
RequestOptions options,
RequestInterceptorHandler handler,
) {
// Token is added via setAuthToken()
handler.next(options);
}
void onError(
DioException err,
ErrorInterceptorHandler handler,
) {
// Handle 401 for token refresh
if (err.response?.statusCode == 401) {
// TODO: Implement token refresh
}
handler.next(err);
}
}
/// Logging interceptor for development.
class _LoggingInterceptor extends Interceptor {
void onRequest(
RequestOptions options,
RequestInterceptorHandler handler,
) {
print('→ ${options.method} ${options.path}');
handler.next(options);
}
void onResponse(
Response response,
ResponseInterceptorHandler handler,
) {
print('← ${response.statusCode} ${response.requestOptions.path}');
handler.next(response);
}
void onError(
DioException err,
ErrorInterceptorHandler handler,
) {
print('✗ ${err.response?.statusCode} ${err.requestOptions.path}');
handler.next(err);
}
}Interceptor memusatkan logika autentikasi dan logging tanpa mencemari setiap request.
Tema Kustom dengan Material 3
Tema yang konsisten menjamin pengalaman pengguna yang seragam. Material 3 (Material You) menyesuaikan diri dengan preferensi sistem.
import 'package:flutter/material.dart';
import 'package:google_fonts/google_fonts.dart';

/// Application theme configuration.
class AppTheme {
  // Brand primary color
  static const _primaryColor = Color(0xFF6750A4);

  /// Material 3 light theme.
  static ThemeData get lightTheme {
    // Generate color scheme from primary color
    final colorScheme = ColorScheme.fromSeed(
      seedColor: _primaryColor,
      brightness: Brightness.light,
    );

    return ThemeData(
      useMaterial3: true,
      colorScheme: colorScheme,
      // Custom typography
      textTheme: GoogleFonts.interTextTheme(),
      // AppBar configuration
      appBarTheme: AppBarTheme(
        centerTitle: true,
        elevation: 0,
        backgroundColor: colorScheme.surface,
        foregroundColor: colorScheme.onSurface,
      ),
      // Form field configuration
      inputDecorationTheme: InputDecorationTheme(
        filled: true,
        fillColor: colorScheme.surfaceContainerHighest.withOpacity(0.5),
        border: OutlineInputBorder(
          borderRadius: BorderRadius.circular(12),
          borderSide: BorderSide.none,
        ),
        enabledBorder: OutlineInputBorder(
          borderRadius: BorderRadius.circular(12),
          borderSide: BorderSide.none,
        ),
        focusedBorder: OutlineInputBorder(
          borderRadius: BorderRadius.circular(12),
          borderSide: BorderSide(color: colorScheme.primary, width: 2),
        ),
        errorBorder: OutlineInputBorder(
          borderRadius: BorderRadius.circular(12),
          borderSide: BorderSide(color: colorScheme.error),
        ),
        contentPadding: const EdgeInsets.symmetric(
          horizontal: 16,
          vertical: 16,
        ),
      ),
      // Button configuration
      filledButtonTheme: FilledButtonThemeData(
        style: FilledButton.styleFrom(
          minimumSize: const Size(double.infinity, 52),
          shape: RoundedRectangleBorder(
            borderRadius: BorderRadius.circular(12),
          ),
        ),
      ),
      outlinedButtonTheme: OutlinedButtonThemeData(
        style: OutlinedButton.styleFrom(
          minimumSize: const Size(double.infinity, 52),
          shape: RoundedRectangleBorder(
            borderRadius: BorderRadius.circular(12),
          ),
        ),
      ),
      // Card configuration
      cardTheme: CardTheme(
        elevation: 2,
        shape: RoundedRectangleBorder(
          borderRadius: BorderRadius.circular(16),
        ),
      ),
    );
  }

  /// Material 3 dark theme.
  static ThemeData get darkTheme {
    final colorScheme = ColorScheme.fromSeed(
      seedColor: _primaryColor,
      brightness: Brightness.dark,
    );

    return ThemeData(
      useMaterial3: true,
      colorScheme: colorScheme,
      textTheme: GoogleFonts.interTextTheme(
        ThemeData.dark().textTheme,
      ),
      appBarTheme: AppBarTheme(
        centerTitle: true,
        elevation: 0,
        backgroundColor: colorScheme.surface,
        foregroundColor: colorScheme.onSurface,
      ),
      inputDecorationTheme: InputDecorationTheme(
        filled: true,
        fillColor: colorScheme.surfaceContainerHighest.withOpacity(0.5),
        border: OutlineInputBorder(
          borderRadius: BorderRadius.circular(12),
          borderSide: BorderSide.none,
        ),
        enabledBorder: OutlineInputBorder(
          borderRadius: BorderRadius.circular(12),
          borderSide: BorderSide.none,
        ),
        focusedBorder: OutlineInputBorder(
          borderRadius: BorderRadius.circular(12),
          borderSide: BorderSide(color: colorScheme.primary, width: 2),
        ),
        errorBorder: OutlineInputBorder(
          borderRadius: BorderRadius.circular(12),
          borderSide: BorderSide(color: colorScheme.error),
        ),
        contentPadding: const EdgeInsets.symmetric(
          horizontal: 16,
          vertical: 16,
        ),
      ),
      filledButtonTheme: FilledButtonThemeData(
        style: FilledButton.styleFrom(
          minimumSize: const Size(double.infinity, 52),
          shape: RoundedRectangleBorder(
            borderRadius: BorderRadius.circular(12),
          ),
        ),
      ),
      outlinedButtonTheme: OutlinedButtonThemeData(
        style: OutlinedButton.styleFrom(
          minimumSize: const Size(double.infinity, 52),
          shape: RoundedRectangleBorder(
            borderRadius: BorderRadius.circular(12),
          ),
        ),
      ),
      cardTheme: CardTheme(
        elevation: 2,
        shape: RoundedRectangleBorder(
          borderRadius: BorderRadius.circular(16),
        ),
      ),
    );
  }
}
ColorScheme.fromSeed secara otomatis menghasilkan palet lengkap dan aksesibel dari satu warna.
Konfigurasi Aplikasi
Titik masuk aplikasi menginisialisasi Riverpod dan mengonfigurasi tema.
import 'package:flutter/material.dart';
import 'package:flutter_riverpod/flutter_riverpod.dart';
import 'app.dart';

void main() {
  // Ensure Flutter bindings are initialized
  WidgetsFlutterBinding.ensureInitialized();

  // Launch application with Riverpod scope
  runApp(
    const ProviderScope(
      child: App(),
    ),
  );
}import 'package:flutter/material.dart';
import 'package:flutter_riverpod/flutter_riverpod.dart';
import 'core/theme/app_theme.dart';
import 'routing/app_router.dart';
/// Root application widget.
class App extends ConsumerWidget {
const App({super.key});
Widget build(BuildContext context, WidgetRef ref) {
// Get configured router
final router = ref.watch(routerProvider);
return MaterialApp.router(
title: 'My Flutter App',
debugShowCheckedModeBanner: false,
// Theme configuration
theme: AppTheme.lightTheme,
darkTheme: AppTheme.darkTheme,
themeMode: ThemeMode.system,
// Router configuration
routerConfig: router,
);
}
}ThemeMode.system secara otomatis menyesuaikan tema dengan preferensi pengguna.
Kesimpulan
Flutter menyediakan ekosistem lengkap untuk membangun aplikasi lintas platform berperforma tinggi. Kombinasi widget deklaratif, Riverpod untuk manajemen state, dan GoRouter untuk navigasi memungkinkan pembangunan aplikasi yang mudah dipelihara dan diskalakan.
Daftar Periksa untuk Memulai dengan Flutter
- ✅ Menginstal Flutter SDK dan mengonfigurasi lingkungan dengan
flutter doctor - ✅ Menyusun proyek berdasarkan feature untuk organisasi yang lebih baik
- ✅ Menggunakan Riverpod untuk manajemen state yang bertipe dan aman
- ✅ Mengonfigurasi GoRouter dengan redirect autentikasi
- ✅ Membuat widget yang dapat digunakan kembali dan dikomposisi
- ✅ Mengimplementasikan tema Material 3 yang konsisten
- ✅ Memusatkan panggilan HTTP dengan Dio dan interceptor
Mulai berlatih!
Uji pengetahuan Anda dengan simulator wawancara dan tes teknis kami.
Pendekatan deklaratif Flutter mendorong komposisi dan penggunaan kembali. Setiap widget dapat diuji secara independen, dan hot-reload secara signifikan mempercepat siklus pengembangan. Fondasi yang kokoh ini memungkinkan perluasan aplikasi ke fitur-fitur lanjutan seperti animasi kompleks, pengujian otomatis, dan deployment ke toko aplikasi.
Tag
Bagikan
Artikel terkait
20 Pertanyaan Wawancara Flutter Teratas untuk Developer Mobile
Persiapkan wawancara Flutter dengan 20 pertanyaan yang paling sering ditanyakan. Widget, state management, Dart, arsitektur, dan praktik terbaik dijelaskan secara detail dengan contoh kode.

Flutter dan Firebase di 2026: Autentikasi, Firestore, dan Pertanyaan Wawancara
Pembahasan mendalam Flutter Firebase: autentikasi dengan firebase_auth, CRUD Firestore dan stream real-time, aturan keamanan, serta pertanyaan wawancara umum dengan contoh kode.
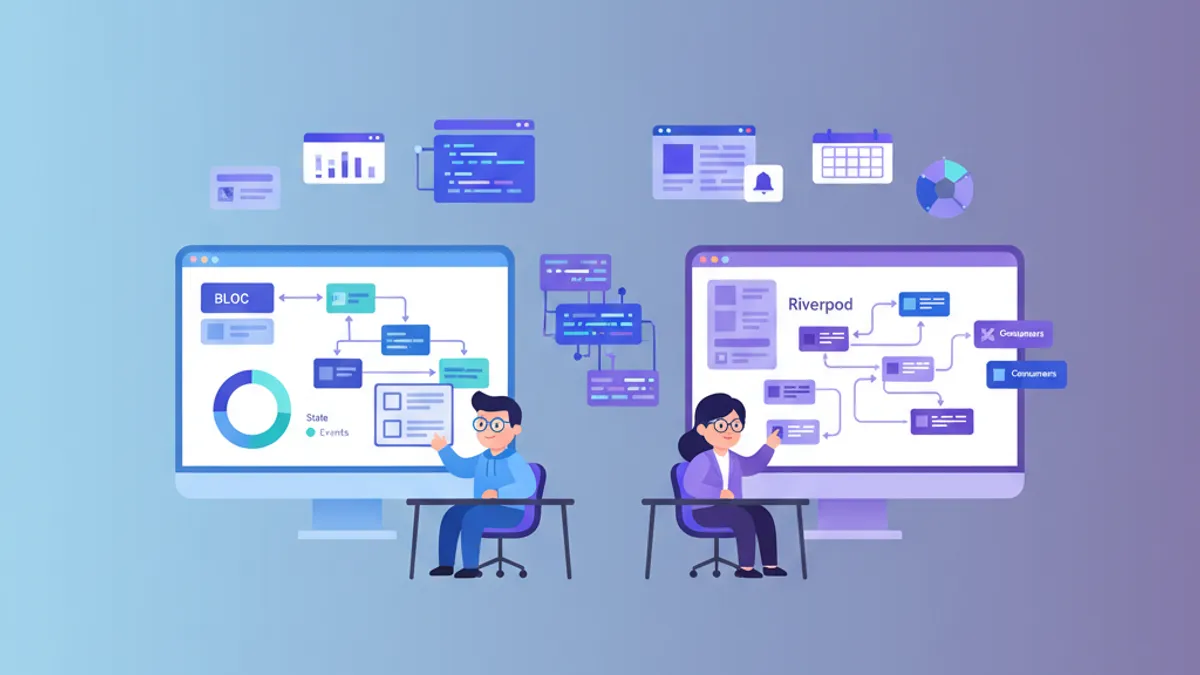
State Management Flutter: Riverpod vs BLoC - Panduan Perbandingan Lengkap
Perbandingan mendalam antara Riverpod dan BLoC untuk state management di Flutter. Arsitektur, performa, kemudahan pengujian, dan kasus penggunaan untuk memilih solusi terbaik.