Django and Python Interview Questions: Top 25 in 2026
The 25 most common Django and Python interview questions. ORM, views, middleware, DRF, signals and optimization with detailed answers and code examples.

Django interviews assess proficiency with Python's most popular web framework, understanding of the ORM, the MVT architecture, and the ability to build robust REST APIs. This guide covers the 25 most frequently asked questions, from Django fundamentals to advanced Django REST Framework patterns.
Interviewers appreciate candidates who explain Django's architectural choices. Understanding why the framework adopts certain conventions (convention over configuration) makes a real difference in interviews.
Django Fundamentals
Question 1: Describe Django's MVT Architecture
The Model-View-Template (MVT) architecture is Django's variation of the MVC pattern. The framework handles the controller part automatically, simplifying development.
# models.py
# The Model represents data structure and business logic
from django.db import models

class Article(models.Model):
    title = models.CharField(max_length=200)
    content = models.TextField()
    published_at = models.DateTimeField(auto_now_add=True)
    author = models.ForeignKey(
        "auth.User",
        on_delete=models.CASCADE,  # Deletes articles when author is deleted
        related_name="articles"     # Reverse access: user.articles.all()
    )

    class Meta:
        ordering = ["-published_at"]  # Default ordering

    def __str__(self):
return self.title# views.py
# The View contains request processing logic
from django.shortcuts import render, get_object_or_404
def article_detail(request, pk):
# get_object_or_404 raises Http404 if the object doesn't exist
article = get_object_or_404(Article, pk=pk)
return render(request, "blog/article_detail.html", {"article": article})In MVT, Django acts as the controller by routing URLs to the appropriate views via urls.py. The Template handles HTML presentation.
Question 2: What Is the Difference Between a Django Project and an App?
A project is the overall configuration (settings, root URLs, WSGI/ASGI). An app is a reusable module with a single responsibility. A project contains multiple apps.
# Creating a project and an app
# django-admin startproject myproject
# python manage.py startapp blog

# settings.py
# Registering apps in the project
INSTALLED_APPS = [
    "django.contrib.admin",       # Admin interface
    "django.contrib.auth",        # Authentication
    "django.contrib.contenttypes",
    "django.contrib.sessions",
    "django.contrib.messages",
    "django.contrib.staticfiles",
    # Custom apps
    "blog.apps.BlogConfig",       # Blog app
    "users.apps.UsersConfig",     # Users app
]
Each app follows the single responsibility principle and can be reused across different projects.
Question 3: Explain the Django Request Lifecycle
The request passes through several layers before reaching the view. Understanding this cycle is essential for debugging and optimization.
# middleware.py
# Middlewares intercept every request/response
class RequestTimingMiddleware:
    """Middleware that measures processing time."""

    def __init__(self, get_response):
        self.get_response = get_response  # Reference to the next middleware

    def __call__(self, request):
        import time
        start = time.time()

        # Request phase: before the view
        response = self.get_response(request)

        # Response phase: after the view
        duration = time.time() - start
        response["X-Request-Duration"] = f"{duration:.3f}s"
        return response
The complete cycle: HTTP request → WSGI/ASGI → middlewares (process_request) → URL resolver → view → middlewares (process_response) → HTTP response.
ORM and Database
Question 4: How Does Django's QuerySet Work and What Is Lazy Loading?
QuerySets are lazily evaluated: no SQL query is executed until the data is actually used.
# queryset_lazy.py
# Demonstrating QuerySet lazy loading

# No SQL query executed here
qs = Article.objects.filter(published=True)  # No query
qs = qs.exclude(title="Draft")               # Still none
qs = qs.order_by("-created_at")              # Still none

# The SQL query runs ONLY here
for article in qs:  # ONE combined SQL query
    print(article.title)

# Other evaluation triggers
list(qs)        # Converting to list
qs[0]           # Index access
len(qs)         # Counting (prefer qs.count())
bool(qs)        # Existence check (prefer qs.exists())
This lazy evaluation allows chaining filters with no overhead, executing only one optimized query.
Question 5: What Is the N+1 Problem and How to Solve It?
The N+1 problem occurs when a main query generates N additional queries to load relationships. It is the most common cause of slowness in Django applications.
# n_plus_one.py
# N+1 problem and solutions

# ❌ PROBLEM: N+1 queries
# 1 query for articles + 1 query PER article for the author
articles = Article.objects.all()
for article in articles:
    print(article.author.username)  # SQL query on every iteration!

# ✅ SOLUTION 1: select_related (ForeignKey, OneToOne)
# Joins tables in ONE SQL query (JOIN)
articles = Article.objects.select_related("author").all()
for article in articles:
    print(article.author.username)  # No additional query

# ✅ SOLUTION 2: prefetch_related (ManyToMany, reverse FK)
# Executes 2 separate queries + Python assembly
articles = Article.objects.prefetch_related("tags").all()
for article in articles:
    print(article.tags.all())  # Data already cached

# ✅ SOLUTION 3: Custom Prefetch with filtering
from django.db.models import Prefetch

articles = Article.objects.prefetch_related(
    Prefetch(
        "comments",
        queryset=Comment.objects.filter(approved=True).select_related("user"),
        to_attr="approved_comments"  # Custom attribute
    )
)
Use select_related for ForeignKey/OneToOne relations (SQL JOIN) and prefetch_related for ManyToMany or reverse relations (separate queries).
Question 6: How to Create a Custom Manager and When to Use It?
Custom Managers encapsulate frequent queries at the model level, making code more readable and reusable.
# managers.py
# Custom Managers and QuerySets

class PublishedQuerySet(models.QuerySet):
    """Reusable QuerySet for published articles."""

    def published(self):
        return self.filter(status="published", published_at__lte=timezone.now())

    def by_author(self, user):
        return self.filter(author=user)

    def popular(self):
        return self.annotate(
            comment_count=models.Count("comments")
        ).order_by("-comment_count")


class PublishedManager(models.Manager):
    """Manager that exposes only published articles."""

    def get_queryset(self):
        return PublishedQuerySet(self.model, using=self._db).published()


class Article(models.Model):
    # ...
    objects = models.Manager()          # Default manager (all articles)
    published = PublishedManager()      # Custom manager (published only)

    # Usage:
    # Article.objects.all()             → All articles
    # Article.published.all()           → Published articles only
    # Article.published.popular()       → Published articles sorted by popularity
Custom Managers follow the DRY principle and centralize query logic.
Ready to ace your Django interviews?
Practice with our interactive simulators, flashcards, and technical tests.
Views and URLs
Question 7: When to Use Class-Based Views vs Function-Based Views?
Function-Based Views (FBVs) offer simplicity and explicit control. Class-Based Views (CBVs) bring reusability and structure through inheritance.
# views_comparison.py
# FBV: Explicit, simple, easy to understand
from django.http import JsonResponse
from django.views.decorators.http import require_http_methods

@require_http_methods(["GET", "POST"])
def article_list(request):
    if request.method == "GET":
        articles = Article.published.all()
        return render(request, "articles/list.html", {"articles": articles})

    # POST: article creation
    form = ArticleForm(request.POST)
    if form.is_valid():
        form.save()
        return redirect("article-list")
return render(request, "articles/list.html", {"form": form})# views_cbv.py
# CBV: Reusable, extensible via mixins
from django.views.generic import ListView, CreateView
from django.contrib.auth.mixins import LoginRequiredMixin
class ArticleListView(LoginRequiredMixin, ListView):
model = Article
template_name = "articles/list.html"
context_object_name = "articles" # Variable name in the template
paginate_by = 20 # Automatic pagination
def get_queryset(self):
# Override to filter published articles
return Article.published.all()
class ArticleCreateView(LoginRequiredMixin, CreateView):
model = Article
form_class = ArticleForm
success_url = reverse_lazy("article-list")
def form_valid(self, form):
form.instance.author = self.request.user # Assign the author
return super().form_valid(form)Practical rule: use FBVs for simple or non-standard logic, CBVs for standard CRUD operations.
Question 8: How Do Middlewares Work in Django?
Middlewares are hooks that process every request/response. Each middleware can intervene at different phases of the processing cycle.
# auth_middleware.py
# Custom authentication middleware
import jwt
from django.conf import settings
from django.http import JsonResponse

class JWTAuthenticationMiddleware:
    """Verifies JWT token on protected endpoints."""

    EXEMPT_PATHS = ["/api/auth/login", "/api/auth/register", "/health"]

    def __init__(self, get_response):
        self.get_response = get_response

    def __call__(self, request):
        # Skip exempt paths
        if any(request.path.startswith(p) for p in self.EXEMPT_PATHS):
            return self.get_response(request)

        # Extract and verify the token
        auth_header = request.headers.get("Authorization", "")
        if not auth_header.startswith("Bearer "):
            return JsonResponse({"error": "Missing token"}, status=401)

        try:
            token = auth_header.split(" ")[1]
            payload = jwt.decode(token, settings.SECRET_KEY, algorithms=["HS256"])
            request.user_id = payload["user_id"]  # Attach to request
        except jwt.ExpiredSignatureError:
            return JsonResponse({"error": "Token expired"}, status=401)
        except jwt.InvalidTokenError:
            return JsonResponse({"error": "Invalid token"}, status=401)

        return self.get_response(request)
The order of middlewares in MIDDLEWARE is crucial: they execute top-to-bottom for requests and bottom-to-top for responses.
Django REST Framework
Question 9: What Is the Difference Between Serializer and ModelSerializer?
Serializer manually defines each field, while ModelSerializer automatically generates fields from the model.
# serializers.py
from rest_framework import serializers

# Manual Serializer: full control over each field
class ArticleSerializer(serializers.Serializer):
    id = serializers.IntegerField(read_only=True)
    title = serializers.CharField(max_length=200)
    content = serializers.CharField()
    author_name = serializers.SerializerMethodField()

    def get_author_name(self, obj):
        return obj.author.get_full_name()

    def create(self, validated_data):
        return Article.objects.create(**validated_data)

    def update(self, instance, validated_data):
        instance.title = validated_data.get("title", instance.title)
        instance.content = validated_data.get("content", instance.content)
        instance.save()
        return instance


# ModelSerializer: automatic field generation
class ArticleModelSerializer(serializers.ModelSerializer):
    author_name = serializers.SerializerMethodField()
    comment_count = serializers.IntegerField(read_only=True)

    class Meta:
        model = Article
        fields = ["id", "title", "content", "author", "author_name",
                  "comment_count", "published_at"]
        read_only_fields = ["published_at"]

    def get_author_name(self, obj):
        return obj.author.get_full_name()
Prefer ModelSerializer for standard cases and Serializer when the representation differs significantly from the model.
Question 10: How to Implement Pagination in DRF?
DRF offers several pagination strategies configurable globally or per view.
# settings.py
# Global pagination configuration
REST_FRAMEWORK = {
    "DEFAULT_PAGINATION_CLASS": "rest_framework.pagination.PageNumberPagination",
    "PAGE_SIZE": 20,
}

# pagination.py
# Custom pagination per view
from rest_framework.pagination import CursorPagination, LimitOffsetPagination

class ArticleCursorPagination(CursorPagination):
    """Cursor pagination: performant for large datasets."""
    page_size = 20
    ordering = "-published_at"  # Indexed field required
    cursor_query_param = "cursor"

class ArticleLimitOffsetPagination(LimitOffsetPagination):
    """Offset/limit pagination: flexible but less performant."""
    default_limit = 20
    max_limit = 100

# views.py
class ArticleViewSet(viewsets.ModelViewSet):
    queryset = Article.published.all()
    serializer_class = ArticleModelSerializer
    pagination_class = ArticleCursorPagination  # View-specific pagination
Cursor pagination is recommended for large datasets as it remains performant regardless of page number, unlike OFFSET/LIMIT.
Question 11: How to Secure an API with DRF Permissions?
DRF provides a modular permission system combining authentication and granular authorization.
# permissions.py
from rest_framework.permissions import BasePermission, IsAuthenticated

class IsAuthorOrReadOnly(BasePermission):
    """Only the author can modify, everyone can read."""

    def has_object_permission(self, request, view, obj):
        # GET, HEAD, OPTIONS are always allowed
        if request.method in ("GET", "HEAD", "OPTIONS"):
            return True
        # Only the author can modify or delete
        return obj.author == request.user


class IsAdminOrManager(BasePermission):
    """Access restricted to admins and managers."""

    def has_permission(self, request, view):
        return (
            request.user.is_authenticated
            and request.user.role in ("admin", "manager")
        )


# views.py
from rest_framework.viewsets import ModelViewSet
from rest_framework.throttling import UserRateThrottle

class ArticleViewSet(ModelViewSet):
    permission_classes = [IsAuthenticated, IsAuthorOrReadOnly]
    throttle_classes = [UserRateThrottle]  # Rate limiting

    def get_permissions(self):
        # Dynamic permissions based on action
        if self.action == "destroy":
            return [IsAdminOrManager()]
        return super().get_permissions()
Combine permission_classes at the view level and has_object_permission for fine-grained per-object control.
Signals and Async Tasks
Question 12: How Do Django Signals Work and When to Use Them?
Signals allow decoupling components by reacting to events from the framework or application.
# signals.py
from django.db.models.signals import post_save, pre_delete
from django.dispatch import receiver
from django.core.mail import send_mail

@receiver(post_save, sender=Article)
def notify_on_publish(sender, instance, created, **kwargs):
    """Sends a notification when an article is published."""
    if not created and instance.status == "published":
        # Triggered only on publication (not creation)
        subscribers = instance.author.subscribers.values_list("email", flat=True)
        send_mail(
            subject=f"New article: {instance.title}",
            message=f"Check out the latest article by {instance.author.username}",
            from_email="noreply@example.com",
            recipient_list=list(subscribers),
        )

@receiver(pre_delete, sender=Article)
def cleanup_article_files(sender, instance, **kwargs):
    """Deletes associated files before article deletion."""
    if instance.cover_image:
        instance.cover_image.delete(save=False)  # Deletes the physical file
Signals are suitable for lightweight side effects (logging, cache invalidation). For heavy tasks, prefer Celery.
Question 13: How to Integrate Celery with Django for Async Tasks?
Celery enables background task execution, essential for long-running operations like sending emails or processing files.
# celery_config.py
# Celery configuration in the Django project
import os
from celery import Celery

os.environ.setdefault("DJANGO_SETTINGS_MODULE", "myproject.settings")

app = Celery("myproject")
app.config_from_object("django.conf:settings", namespace="CELERY")
app.autodiscover_tasks()  # Discovers tasks.py in each app

# tasks.py
from celery import shared_task
from django.core.mail import send_mass_mail

@shared_task(bind=True, max_retries=3, default_retry_delay=60)
def send_newsletter(self, article_id):
    """Sends newsletter asynchronously."""
    try:
        article = Article.objects.get(id=article_id)
        subscribers = User.objects.filter(newsletter=True)

        messages = [
            (f"New: {article.title}", article.content[:200],
             "noreply@example.com", [sub.email])
            for sub in subscribers
        ]
        send_mass_mail(messages, fail_silently=False)
    except Article.DoesNotExist:
        pass  # Article was deleted in the meantime
    except Exception as exc:
        self.retry(exc=exc)  # Automatic retry on error

# Calling from a view
# send_newsletter.delay(article.id)  # Async execution
# send_newsletter.apply_async(args=[article.id], countdown=300)  # 5-min delay
Celery is essential in production for any operation that should not block the HTTP response.
Security and Authentication
Question 14: How Does Django Protect Against CSRF Attacks?
Django includes built-in CSRF protection via a middleware that verifies a unique token on every POST request.
# CSRF protection in forms
# The {% csrf_token %} template tag generates a hidden field

# For APIs (DRF), CSRF is often disabled in favor of tokens
# settings.py
REST_FRAMEWORK = {
    "DEFAULT_AUTHENTICATION_CLASSES": [
        "rest_framework.authentication.SessionAuthentication",  # Includes CSRF
        "rest_framework.authentication.TokenAuthentication",     # No CSRF
    ],
}

# For AJAX views with session auth
# The csrftoken cookie must be sent in the X-CSRFToken header# csrf_exemption.py
# Exempting a specific view (use with caution)
from django.views.decorators.csrf import csrf_exempt, ensure_csrf_cookie
@ensure_csrf_cookie
def get_csrf_token(request):
"""Endpoint that forces sending the CSRF cookie to the client."""
return JsonResponse({"detail": "CSRF cookie set"})
@csrf_exempt # ⚠️ Use only for external webhooks
def stripe_webhook(request):
"""Stripe webhook - authenticated by signature, not CSRF."""
payload = request.body
sig_header = request.headers.get("Stripe-Signature")
# Verified by Stripe signature insteadNever disable CSRF globally. Use csrf_exempt only on endpoints authenticated through other means (webhooks, API tokens).
Question 15: How to Implement Custom Authentication in Django?
Django allows replacing the default User model and customizing the authentication backend.
# models.py
from django.contrib.auth.models import AbstractBaseUser, BaseUserManager, PermissionsMixin

class CustomUserManager(BaseUserManager):
    """Manager for the custom User model."""

    def create_user(self, email, password=None, **extra_fields):
        if not email:
            raise ValueError("Email is required")
        email = self.normalize_email(email)  # Normalizes the domain
        user = self.model(email=email, **extra_fields)
        user.set_password(password)  # Hashes the password
        user.save(using=self._db)
        return user

    def create_superuser(self, email, password=None, **extra_fields):
        extra_fields.setdefault("is_staff", True)
        extra_fields.setdefault("is_superuser", True)
        return self.create_user(email, password, **extra_fields)


class CustomUser(AbstractBaseUser, PermissionsMixin):
    email = models.EmailField(unique=True)          # Login by email
    username = models.CharField(max_length=30, blank=True)
    is_active = models.BooleanField(default=True)
    is_staff = models.BooleanField(default=False)
    date_joined = models.DateTimeField(auto_now_add=True)

    objects = CustomUserManager()

    USERNAME_FIELD = "email"      # Field used for login
    REQUIRED_FIELDS = []          # Fields required in addition to USERNAME_FIELD

# settings.py
AUTH_USER_MODEL = "users.CustomUser"  # Before the first migration!
Define AUTH_USER_MODEL at the very start of the project. Changing it after initial migrations is complex and risky.
Optimization and Performance
Question 16: How to Optimize Django ORM Queries?
Query optimization is critical for performance. Several techniques reduce the number and cost of SQL queries.
# query_optimization.py
from django.db.models import F, Q, Count, Avg, Prefetch

# 1. Only/Defer: load only needed fields
articles = Article.objects.only("title", "published_at")  # SELECT title, published_at
heavy_articles = Article.objects.defer("content")          # Everything EXCEPT content

# 2. SQL-level aggregations (not Python)
stats = Article.objects.aggregate(
    total=Count("id"),
    avg_views=Avg("view_count"),
)

# 3. F() expressions: SQL-level operations
Article.objects.filter(published=True).update(
    view_count=F("view_count") + 1  # Atomic SQL increment
)

# 4. Q() objects: complex queries
results = Article.objects.filter(
    Q(title__icontains="django") | Q(tags__name="python"),
    ~Q(status="draft"),  # NOT draft
    published_at__year=2026
)

# 5. Bulk operations: reduce INSERT/UPDATE queries
articles = [Article(title=f"Article {i}") for i in range(100)]
Article.objects.bulk_create(articles, batch_size=50)  # 2 queries instead of 100

Article.objects.filter(status="draft").update(status="archived")  # 1 query
Use django-debug-toolbar in development to identify slow queries and N+1 problems.
Question 17: How to Implement Caching in Django?
Django provides a multi-level caching framework: per view, per template fragment, or for arbitrary data.
# settings.py
CACHES = {
    "default": {
        "BACKEND": "django.core.cache.backends.redis.RedisCache",
        "LOCATION": "redis://127.0.0.1:6379/1",
    }
}

# cache_strategies.py
from django.core.cache import cache
from django.views.decorators.cache import cache_page
from django.utils.decorators import method_decorator

# Per-view cache: caches the entire HTTP response
@cache_page(60 * 15)  # 15 minutes
def article_list(request):
    return render(request, "articles/list.html", {"articles": Article.published.all()})

# Data cache: granular control
def get_popular_articles():
    cache_key = "popular_articles_v1"
    articles = cache.get(cache_key)

    if articles is None:
        articles = list(
            Article.published.popular()[:10].values("id", "title", "view_count")
        )
        cache.set(cache_key, articles, timeout=60 * 30)  # 30 min

    return articles

# Cache invalidation
def invalidate_article_cache(article_id):
    cache.delete(f"article_{article_id}")
    cache.delete("popular_articles_v1")
    cache.delete_pattern("article_list_*")  # With django-redis
Prefer Redis as the production cache backend for persistence and advanced features (patterns, TTL).
Ready to ace your Django interviews?
Practice with our interactive simulators, flashcards, and technical tests.
Migrations and Database Management
Question 18: How to Handle Complex Migrations in Django?
Django migrations manage database schema evolution in a versioned and reproducible way.
# 0005_migrate_data.py
# Custom data migration
from django.db import migrations

def migrate_user_roles(apps, schema_editor):
    """Converts is_admin booleans to text roles."""
    User = apps.get_model("users", "CustomUser")
    # Use apps.get_model() to access the historical model
    User.objects.filter(is_admin=True).update(role="admin")
    User.objects.filter(is_admin=False, is_staff=True).update(role="manager")
    User.objects.filter(is_admin=False, is_staff=False).update(role="user")

def reverse_migrate(apps, schema_editor):
    """Reverse migration for rollback."""
    User = apps.get_model("users", "CustomUser")
    User.objects.filter(role="admin").update(is_admin=True)

class Migration(migrations.Migration):
    dependencies = [
        ("users", "0004_add_role_field"),
    ]

    operations = [
        migrations.RunPython(migrate_user_roles, reverse_migrate),
    ]
Always provide a reverse function to enable rollback. Test migrations on a copy of the production database before deployment.
Question 19: How to Create Custom Indexes for Optimization?
Indexes speed up frequent queries but increase write costs. Careful selection is essential.
# models.py
class Article(models.Model):
    title = models.CharField(max_length=200)
    slug = models.SlugField(unique=True)
    status = models.CharField(max_length=20, db_index=True)  # Simple index
    published_at = models.DateTimeField(null=True)
    author = models.ForeignKey("auth.User", on_delete=models.CASCADE)

    class Meta:
        indexes = [
            # Composite index for frequent queries
            models.Index(fields=["status", "-published_at"], name="idx_status_date"),
            # Partial index: only published articles
            models.Index(
                fields=["published_at"],
                condition=models.Q(status="published"),
                name="idx_published_articles"
            ),
            # GIN index for full-text search (PostgreSQL)
            GinIndex(fields=["search_vector"], name="idx_search"),
        ]
Composite indexes follow column order: the most selective field should come first.
Testing and Quality
Question 20: How to Structure Tests in a Django Project?
Django provides a robust testing framework based on unittest, enhanced by pytest-django for more flexibility.
# tests/test_views.py
from django.test import TestCase, Client
from django.urls import reverse
from rest_framework.test import APITestCase, APIClient

class ArticleViewTests(TestCase):
    """View tests with Django's test client."""

    def setUp(self):
        self.client = Client()
        self.user = CustomUser.objects.create_user(
            email="test@example.com", password="testpass123"
        )
        self.article = Article.objects.create(
            title="Test Article",
            content="Content here",
            author=self.user,
            status="published"
        )

    def test_article_list_returns_200(self):
        response = self.client.get(reverse("article-list"))
        self.assertEqual(response.status_code, 200)
        self.assertContains(response, "Test Article")

    def test_create_article_requires_auth(self):
        response = self.client.post(reverse("article-create"), {"title": "New"})
        self.assertEqual(response.status_code, 302)  # Redirects to login


class ArticleAPITests(APITestCase):
    """REST API tests with DRF."""

    def setUp(self):
        self.user = CustomUser.objects.create_user(
            email="api@example.com", password="testpass123"
        )
        self.client = APIClient()
        self.client.force_authenticate(user=self.user)

    def test_create_article_via_api(self):
        data = {"title": "API Article", "content": "Created via API"}
        response = self.client.post("/api/articles/", data, format="json")
        self.assertEqual(response.status_code, 201)
        self.assertEqual(Article.objects.count(), 1)
Separate tests into files by domain: test_models.py, test_views.py, test_serializers.py, test_services.py.
Question 21: How to Use Fixtures and Factories for Tests?
Factories (with factory_boy) are preferred over JSON fixtures for flexibility and maintainability of test data.
# factories.py
import factory
from factory.django import DjangoModelFactory

class UserFactory(DjangoModelFactory):
    class Meta:
        model = CustomUser

    email = factory.Sequence(lambda n: f"user{n}@example.com")
    username = factory.Faker("user_name")
    is_active = True

class ArticleFactory(DjangoModelFactory):
    class Meta:
        model = Article

    title = factory.Faker("sentence", nb_words=5)
    content = factory.Faker("paragraphs", nb=3)
    author = factory.SubFactory(UserFactory)  # Creates a user automatically
    status = "published"

    class Params:
        draft = factory.Trait(status="draft", published_at=None)

# tests.py
def test_published_articles_count(self):
    ArticleFactory.create_batch(5)              # 5 published articles
    ArticleFactory.create_batch(3, draft=True)  # 3 drafts
    self.assertEqual(Article.published.count(), 5)
Factories ensure consistent test data and avoid dependencies between tests.
Advanced Patterns
Question 22: How to Implement WebSockets with Django Channels?
Django Channels extends Django beyond HTTP to support WebSockets, real-time protocols, and background tasks.
# consumers.py
import json
from channels.generic.websocket import AsyncWebsocketConsumer

class ChatConsumer(AsyncWebsocketConsumer):
    """WebSocket consumer for real-time chat."""

    async def connect(self):
        self.room_name = self.scope["url_route"]["kwargs"]["room_name"]
        self.room_group = f"chat_{self.room_name}"

        # Join the room group
        await self.channel_layer.group_add(self.room_group, self.channel_name)
        await self.accept()

    async def disconnect(self, close_code):
        # Leave the group
        await self.channel_layer.group_discard(self.room_group, self.channel_name)

    async def receive(self, text_data):
        data = json.loads(text_data)
        # Broadcast message to the entire group
        await self.channel_layer.group_send(
            self.room_group,
            {"type": "chat.message", "message": data["message"],
             "username": self.scope["user"].username}
        )

    async def chat_message(self, event):
        # Send message to the WebSocket client
        await self.send(text_data=json.dumps({
            "message": event["message"],
            "username": event["username"],
        }))
Django Channels uses ASGI (instead of WSGI) and requires a compatible server like Daphne or Uvicorn.
Question 23: Explain the Repository and Service Layer Pattern in Django
The Service Layer pattern separates business logic from views and the ORM, making testing and maintenance easier.
# services/article_service.py
from django.db import transaction

class ArticleService:
    """Service encapsulating article business logic."""

    @staticmethod
    def publish_article(article_id: int, user) -> Article:
        """Publishes an article with all validations."""
        article = Article.objects.select_for_update().get(id=article_id)

        if article.author != user:
            raise PermissionError("Only the author can publish this article")
        if article.status == "published":
            raise ValueError("Article is already published")

        article.status = "published"
        article.published_at = timezone.now()
        article.save(update_fields=["status", "published_at"])

        # Side effects: notification, cache, analytics
        send_newsletter.delay(article.id)
        cache.delete("popular_articles_v1")

        return article

    @staticmethod
    @transaction.atomic
    def bulk_archive(article_ids: list[int], user) -> int:
        """Archives multiple articles in a transaction."""
        updated = Article.objects.filter(
            id__in=article_ids,
            author=user,
            status="published"
        ).update(status="archived", archived_at=timezone.now())
        return updated
The Service Layer is the entry point for all business logic. Views and serializers delegate to the service, never directly to the ORM.
Question 24: How to Manage Environment Variables and Multi-Environment Configuration?
Configuration management follows the 12-Factor App principles: strict separation between configuration and code.
# settings/base.py
# Shared configuration across all environments
import os
from pathlib import Path
from dotenv import load_dotenv

load_dotenv()  # Loads the .env file

BASE_DIR = Path(__file__).resolve().parent.parent.parent

SECRET_KEY = os.environ["DJANGO_SECRET_KEY"]  # Required, no default value
DEBUG = os.environ.get("DEBUG", "False").lower() == "true"
ALLOWED_HOSTS = os.environ.get("ALLOWED_HOSTS", "").split(",")

DATABASES = {
    "default": {
        "ENGINE": "django.db.backends.postgresql",
        "NAME": os.environ.get("DB_NAME", "myapp"),
        "USER": os.environ.get("DB_USER", "postgres"),
        "HOST": os.environ.get("DB_HOST", "localhost"),
        "PORT": os.environ.get("DB_PORT", "5432"),
    }
}

# settings/production.py
from .base import *

DEBUG = False
SECURE_SSL_REDIRECT = True
SESSION_COOKIE_SECURE = True
CSRF_COOKIE_SECURE = True
SECURE_HSTS_SECONDS = 31536000  # 1 year
Never commit secrets to code. Use environment variables or a secrets manager (Vault, AWS Secrets Manager).
Question 25: How to Deploy a Django Application in Production?
Production deployment requires a comprehensive checklist covering security, performance, and reliability.
# Django deployment checklist

# 1. Built-in verification command
# python manage.py check --deploy

# 2. WSGI/ASGI configuration for production
# gunicorn.conf.py
import multiprocessing

bind = "0.0.0.0:8000"
workers = multiprocessing.cpu_count() * 2 + 1  # Recommended formula
worker_class = "gthread"           # Threaded workers
threads = 4
max_requests = 1000                # Recycle workers to avoid memory leaks
max_requests_jitter = 50
timeout = 30
accesslog = "-"                    # Logs to stdout
errorlog = "-"# docker-compose.yml (typical configuration)
# Services: web (gunicorn), db (postgres), redis (cache/celery), worker (celery)
# 3. Static files
# python manage.py collectstatic --noinput
# Serve via nginx or CDN (WhiteNoise for simple cases)
# 4. Nginx configuration
# - Proxy to gunicorn on port 8000
# - Serve /static/ and /media/ directly
# - Enable gzip, HTTP/2, and security headersRun python manage.py check --deploy before every production release. This command verifies essential security settings.
Conclusion
These 25 questions cover the essentials of Django and Python interviews, from MVT architecture fundamentals to production deployment patterns.
Preparation checklist:
- ✅ MVT architecture and request lifecycle
- ✅ ORM: QuerySets, N+1, select_related, prefetch_related
- ✅ Django REST Framework: serializers, pagination, permissions
- ✅ Security: CSRF, authentication, permissions
- ✅ Performance: ORM optimization, caching, indexes
- ✅ Testing: TestCase, APITestCase, factories
- ✅ Advanced patterns: Channels, Service Layer, deployment
Each question deserves deeper exploration with Django's official documentation. Interviewers value candidates who understand the framework's subtleties and can justify their technical decisions.
Start practicing!
Test your knowledge with our interview simulators and technical tests.
Tags
Share
Related articles
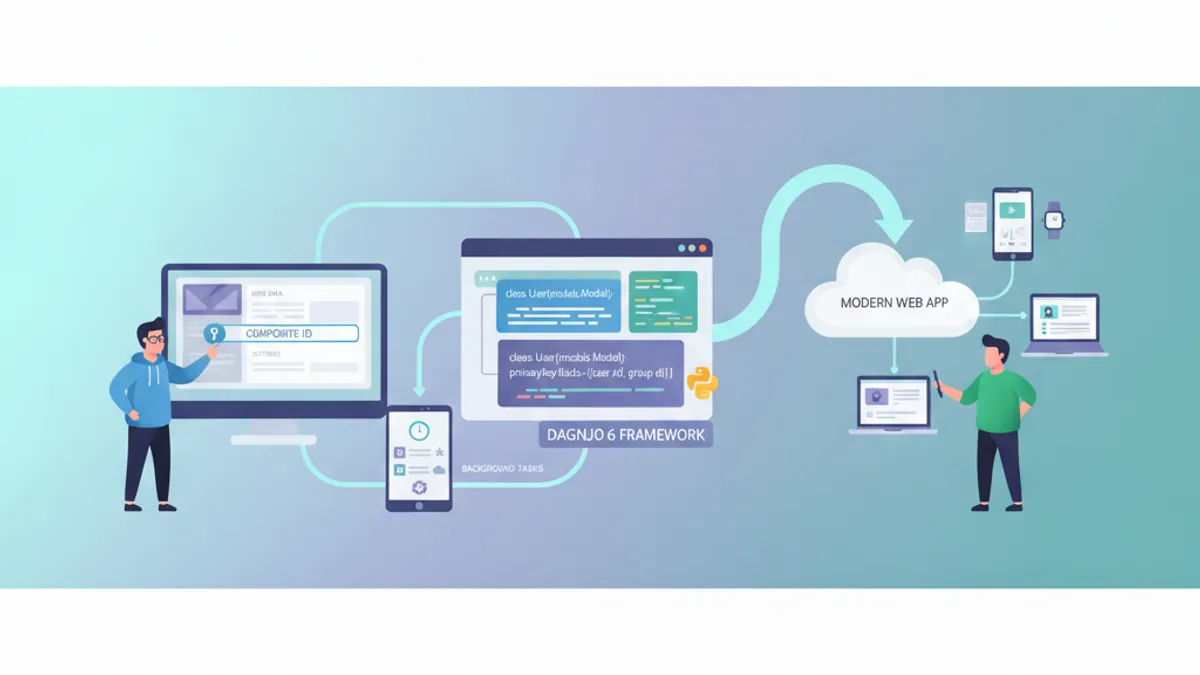
Django 6.0 in 2026: Composite Primary Keys, Background Tasks and Interview Questions
Complete guide to Django's latest features: composite primary keys from Django 5.2, the built-in background tasks framework in Django 6.0, template partials, CSP middleware, and common interview questions.
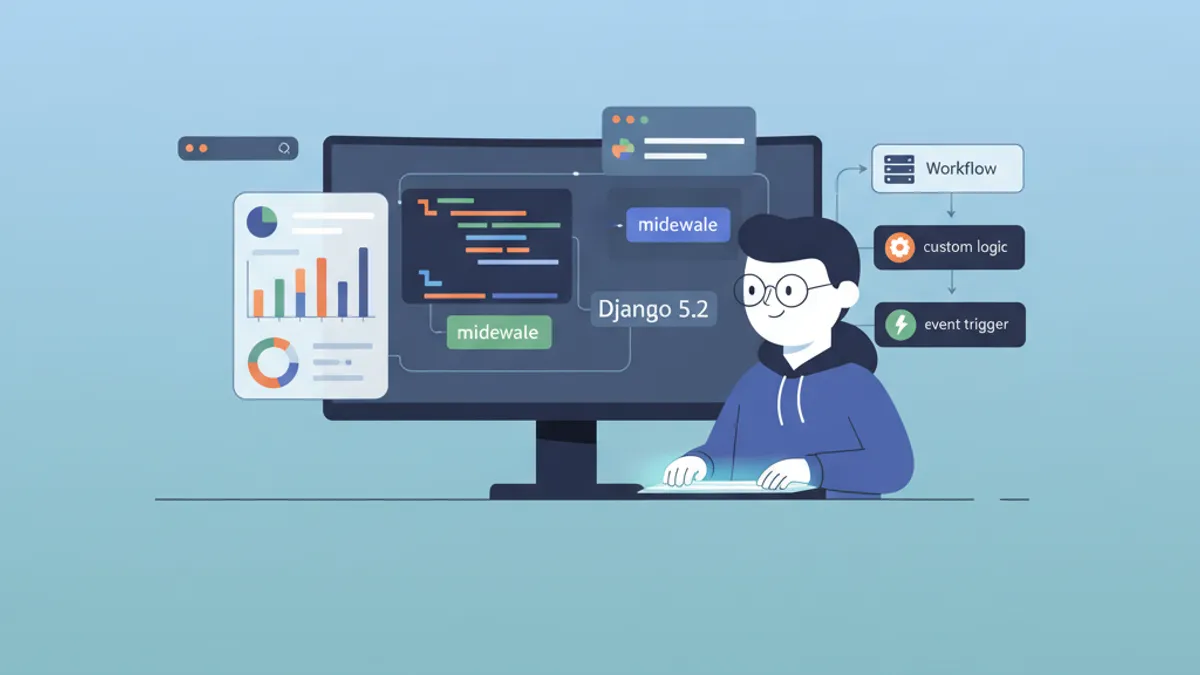
Django 5.2: Custom Middleware and Signal Handling for Technical Interviews
Master Django 5.2 custom middleware and signal handling with practical examples. Covers middleware lifecycle, async middleware, pre_save/post_save signals, and common interview patterns.

Django 5: Building a REST API with Django REST Framework
Complete guide to building a professional REST API with Django 5 and DRF. Serializers, ViewSets, JWT authentication and best practices explained.