Spring Security 6: Konfiguracja OAuth2 Resource Server
Praktyczny przewodnik konfiguracji serwera zasobów OAuth2 ze Spring Security 6. Walidacja JWT, konfiguracja wystawcy, zarządzanie scope i integracja z Keycloak.
Serwer zasobów OAuth2 chroni API poprzez walidację tokenów JWT wystawianych przez zewnętrzny serwer autoryzacji, taki jak Keycloak, Auth0 czy Okta. W przeciwieństwie do niestandardowej autentykacji JWT, gdzie aplikacja generuje własne tokeny, Resource Server całkowicie deleguje zarządzanie tożsamością do dedykowanego dostawcy tożsamości (IdP).
Resource Server nigdy nie generuje tokenów. Wyłącznie je waliduje. Taki rozdział odpowiedzialności wzmacnia bezpieczeństwo i upraszcza architekturę poprzez centralizację zarządzania tożsamością.
Architektura OAuth2 Resource Server
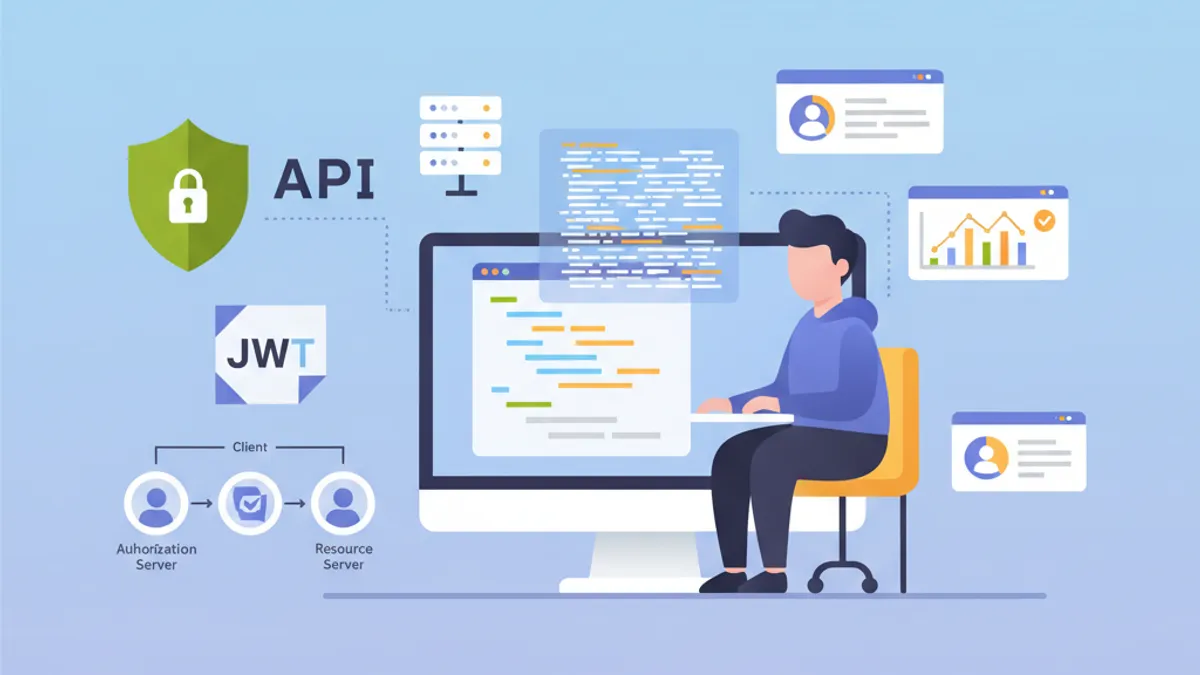
Przepływ OAuth2 obejmuje trzech głównych aktorów. Klient (aplikacja frontendowa lub mobilna) uzyskuje token dostępu z serwera autoryzacji. Następnie dołącza ten token do każdego żądania kierowanego do Resource Server. Resource Server waliduje token, weryfikując jego podpis za pomocą klucza publicznego serwera autoryzacji.
Taka architektura oferuje wiele zalet. Resource Server pozostaje bezstanowy, ponieważ wszystkie potrzebne informacje znajdują się w tokenie JWT. Walidacja odbywa się bez wywołań sieciowych do IdP dzięki weryfikacji podpisu asymetrycznego. Wiele API może współdzielić ten sam serwer autoryzacji, co upraszcza zarządzanie użytkownikami.
┌──────────────┐     1. Login      ┌─────────────────────┐
│   Client     │ ───────────────►  │  Authorization      │
│   (SPA/App)  │                   │  Server (Keycloak)  │
│              │ ◄─────────────────│                     │
└──────────────┘   2. JWT Token    └─────────────────────┘
       │                                    │
       │ 3. Request + Bearer Token          │
       ▼                                    ▼
┌──────────────────────┐           ┌─────────────────────┐
│   Resource Server    │ ◄─────── │   JWKS Endpoint     │
│   (Spring Boot API)  │  4. Public Keys (cached)       │
└──────────────────────┘           └─────────────────────┘
Resource Server pobiera klucze publiczne podczas uruchamiania i zapisuje je w pamięci podręcznej, unikając wywołań sieciowych dla każdego żądania.
Zależności Maven dla OAuth2 Resource Server
Konfiguracja Resource Server wymaga dwóch konkretnych zależności. Starter oauth2-resource-server zapewnia podstawową infrastrukturę, podczas gdy oauth2-jose zawiera klasy do dekodowania i walidacji tokenów JWT.
<!-- pom.xml -->
<dependencies>
    <!-- OAuth2 Resource Server support -->
    <dependency>
        <groupId>org.springframework.boot</groupId>
        <artifactId>spring-boot-starter-oauth2-resource-server</artifactId>
    </dependency>

    <!-- Spring Web for REST endpoints -->
    <dependency>
        <groupId>org.springframework.boot</groupId>
        <artifactId>spring-boot-starter-web</artifactId>
    </dependency>

    <!-- DTO validation -->
    <dependency>
        <groupId>org.springframework.boot</groupId>
        <artifactId>spring-boot-starter-validation</artifactId>
    </dependency>
</dependencies>
Dodatkowe zależności, takie jak JJWT, nie są wymagane. Spring Security wykorzystuje bibliotekę Nimbus JOSE+JWT zawartą w spring-security-oauth2-jose do obsługi tokenów.
Podstawowa konfiguracja z issuer-uri
Minimalna konfiguracja Resource Server wymaga zaledwie dwóch linii. Spring Security automatycznie wykrywa endpointy IdP poprzez protokół OpenID Connect Discovery.
# application.yml
spring:
  security:
    oauth2:
      resourceserver:
        jwt:
          # URI serwera autoryzacji
          # Spring automatycznie pobiera klucze publiczne przez /.well-known/openid-configuration
          issuer-uri: https://keycloak.example.com/realms/myrealm
Na podstawie issuer-uri, Spring Security wysyła żądanie do {issuer-uri}/.well-known/openid-configuration, aby uzyskać metadane serwera autoryzacji. Następnie wyodrębnia URL JWKS (JSON Web Key Set) zawierający klucze publiczne wykorzystywane do walidacji podpisów tokenów.
@Configuration
@EnableWebSecurity
@EnableMethodSecurity
public class SecurityConfig {

    @Bean
    public SecurityFilterChain securityFilterChain(HttpSecurity http) throws Exception {
        return http
            // Disable CSRF for stateless APIs
            .csrf(csrf -> csrf.disable())

            // Authorization rules
            .authorizeHttpRequests(auth -> auth
                // Public endpoints
                .requestMatchers("/api/public/**").permitAll()
                .requestMatchers("/actuator/health").permitAll()
                // All other requests require a valid token
                .anyRequest().authenticated()
            )

            // Enable OAuth2 JWT validation
            .oauth2ResourceServer(oauth2 -> oauth2
                .jwt(Customizer.withDefaults())
            )

            // Stateless mode required for Resource Servers
            .sessionManagement(session -> session
                .sessionCreationPolicy(SessionCreationPolicy.STATELESS)
            )

            .build();
    }
}
Taka konfiguracja wystarcza do ochrony API. Spring Security automatycznie waliduje podpis tokena, weryfikuje sygnatury czasowe (exp, nbf, iat) i zapewnia, że claim iss odpowiada skonfigurowanemu issuer-uri.
Domyślnie aplikacja nie uruchamia się, jeśli serwer autoryzacji jest niedostępny. Aby umożliwić niezależny start, należy skonfigurować jawnie jwk-set-uri zamiast issuer-uri.
Zaawansowana konfiguracja z jwk-set-uri
Gdy serwer autoryzacji nie obsługuje OpenID Connect Discovery lub gdy aplikacja musi uruchamiać się bez zależności sieciowej od IdP, jawna konfiguracja JWKS jest bardziej odpowiednia.
# application.yml
spring:
  security:
    oauth2:
      resourceserver:
        jwt:
          # Direct URL to JWKS (public keys)
          jwk-set-uri: https://keycloak.example.com/realms/myrealm/protocol/openid-connect/certs
          # Expected value of the "iss" claim in tokens
          issuer-uri: https://keycloak.example.com/realms/myrealm
          # Allowed audiences ("aud" claim)
          audiences:
            - my-api
            - account
Takie podejście zapewnia większą kontrolę. Walidacja audience zapobiega użyciu tokenów przeznaczonych dla innych usług. Token wystawiony dla aplikacji frontend-app zostanie odrzucony, jeśli API akceptuje wyłącznie audiences my-api i account.
@Configuration
@EnableWebSecurity
public class SecurityConfig {

    @Value("${spring.security.oauth2.resourceserver.jwt.issuer-uri}")
    private String issuerUri;

    @Bean
    public SecurityFilterChain securityFilterChain(HttpSecurity http) throws Exception {
        return http
            .csrf(csrf -> csrf.disable())

            .authorizeHttpRequests(auth -> auth
                .requestMatchers("/api/public/**").permitAll()
                .anyRequest().authenticated()
            )

            // Custom JWT configuration
            .oauth2ResourceServer(oauth2 -> oauth2
                .jwt(jwt -> jwt
                    .jwtAuthenticationConverter(jwtAuthenticationConverter())
                )
            )

            .sessionManagement(session -> session
                .sessionCreationPolicy(SessionCreationPolicy.STATELESS)
            )

            .build();
    }

    // Custom converter to extract authorities from the token
    @Bean
    public JwtAuthenticationConverter jwtAuthenticationConverter() {
        JwtGrantedAuthoritiesConverter grantedAuthoritiesConverter =
            new JwtGrantedAuthoritiesConverter();
        // SCOPE_ prefix for authorities (e.g., SCOPE_read, SCOPE_write)
        grantedAuthoritiesConverter.setAuthorityPrefix("SCOPE_");
        // Claim containing scopes (OAuth2 standard)
        grantedAuthoritiesConverter.setAuthoritiesClaimName("scope");

        JwtAuthenticationConverter jwtAuthenticationConverter =
            new JwtAuthenticationConverter();
        jwtAuthenticationConverter.setJwtGrantedAuthoritiesConverter(
            grantedAuthoritiesConverter
        );

        return jwtAuthenticationConverter;
    }
}
JwtAuthenticationConverter przekształca claimy tokena w obiekty GrantedAuthority, które mogą być używane w wyrażeniach bezpieczeństwa.
Gotowy na rozmowy o Spring Boot?
Ćwicz z naszymi interaktywnymi symulatorami, flashcards i testami technicznymi.
Wyodrębnianie ról Keycloak
Keycloak strukturyzuje role inaczej niż standard OAuth2. Role znajdują się w realm_access.roles (role realm) lub resource_access.{client}.roles (role specyficzne dla klienta). Niestandardowy konwerter wyodrębnia te informacje.
@Component
public class KeycloakJwtAuthenticationConverter
    implements Converter<Jwt, AbstractAuthenticationToken> {

    private static final String REALM_ACCESS_CLAIM = "realm_access";
    private static final String RESOURCE_ACCESS_CLAIM = "resource_access";
    private static final String ROLES_CLAIM = "roles";

    @Value("${keycloak.client-id}")
    private String clientId;

    @Override
    public AbstractAuthenticationToken convert(Jwt jwt) {
        // Combine realm and client roles
        Collection<GrantedAuthority> authorities = Stream.concat(
            extractRealmRoles(jwt).stream(),
            extractClientRoles(jwt).stream()
        ).collect(Collectors.toSet());

        // Return authentication token with extracted authorities
        return new JwtAuthenticationToken(jwt, authorities, extractUsername(jwt));
    }

    // Extract realm-level roles
    private Collection<GrantedAuthority> extractRealmRoles(Jwt jwt) {
        Map<String, Object> realmAccess = jwt.getClaim(REALM_ACCESS_CLAIM);
        if (realmAccess == null) {
            return Collections.emptyList();
        }

        @SuppressWarnings("unchecked")
        List<String> roles = (List<String>) realmAccess.get(ROLES_CLAIM);
        if (roles == null) {
            return Collections.emptyList();
        }

        // ROLE_ prefix for compatibility with hasRole()
        return roles.stream()
            .map(role -> new SimpleGrantedAuthority("ROLE_" + role.toUpperCase()))
            .collect(Collectors.toList());
    }

    // Extract client-specific roles
    private Collection<GrantedAuthority> extractClientRoles(Jwt jwt) {
        Map<String, Object> resourceAccess = jwt.getClaim(RESOURCE_ACCESS_CLAIM);
        if (resourceAccess == null) {
            return Collections.emptyList();
        }

        @SuppressWarnings("unchecked")
        Map<String, Object> clientAccess =
            (Map<String, Object>) resourceAccess.get(clientId);
        if (clientAccess == null) {
            return Collections.emptyList();
        }

        @SuppressWarnings("unchecked")
        List<String> roles = (List<String>) clientAccess.get(ROLES_CLAIM);
        if (roles == null) {
            return Collections.emptyList();
        }

        return roles.stream()
            .map(role -> new SimpleGrantedAuthority("ROLE_" + role.toUpperCase()))
            .collect(Collectors.toList());
    }

    // Extract username from token
    private String extractUsername(Jwt jwt) {
        // Keycloak uses "preferred_username" by default
        String username = jwt.getClaimAsString("preferred_username");
        if (username != null) {
            return username;
        }
        // Fallback to subject (usually the user UUID)
        return jwt.getSubject();
    }
}
Integracja z konfiguracją bezpieczeństwa odbywa się poprzez parametr jwtAuthenticationConverter.
@Configuration
@EnableWebSecurity
@EnableMethodSecurity
@RequiredArgsConstructor
public class SecurityConfig {

    private final KeycloakJwtAuthenticationConverter keycloakConverter;

    @Bean
    public SecurityFilterChain securityFilterChain(HttpSecurity http) throws Exception {
        return http
            .csrf(csrf -> csrf.disable())

            .authorizeHttpRequests(auth -> auth
                .requestMatchers("/api/public/**").permitAll()
                // Protection by Keycloak role
                .requestMatchers("/api/admin/**").hasRole("ADMIN")
                .anyRequest().authenticated()
            )

            .oauth2ResourceServer(oauth2 -> oauth2
                .jwt(jwt -> jwt
                    // Use Keycloak converter
                    .jwtAuthenticationConverter(keycloakConverter)
                )
            )

            .sessionManagement(session -> session
                .sessionCreationPolicy(SessionCreationPolicy.STATELESS)
            )

            .build();
    }
}
Wyodrębnione role są teraz gotowe do użycia z adnotacjami @PreAuthorize("hasRole('ADMIN')") lub w wyrażeniach requestMatchers().hasRole().
Niestandardowa walidacja tokenów
W zależności od potrzeb biznesowych mogą być wymagane dodatkowe walidacje: weryfikacja niestandardowych claimów, walidacja audience czy kontrola maksymalnego czasu życia.
@Component
public class CustomJwtValidator implements OAuth2TokenValidator<Jwt> {

    private static final OAuth2Error AUDIENCE_ERROR =
        new OAuth2Error("invalid_token", "Token audience is not valid", null);

    private static final OAuth2Error CUSTOM_CLAIM_ERROR =
        new OAuth2Error("invalid_token", "Required custom claim missing", null);

    @Value("${app.jwt.required-audience}")
    private String requiredAudience;

    @Value("${app.jwt.required-tenant-claim:tenant_id}")
    private String tenantClaimName;

    @Override
    public OAuth2TokenValidatorResult validate(Jwt jwt) {
        List<OAuth2Error> errors = new ArrayList<>();

        // Audience validation
        if (!validateAudience(jwt)) {
            errors.add(AUDIENCE_ERROR);
        }

        // Custom business claim validation
        if (!validateTenantClaim(jwt)) {
            errors.add(CUSTOM_CLAIM_ERROR);
        }

        if (!errors.isEmpty()) {
            return OAuth2TokenValidatorResult.failure(errors);
        }

        return OAuth2TokenValidatorResult.success();
    }

    private boolean validateAudience(Jwt jwt) {
        List<String> audiences = jwt.getAudience();
        return audiences != null && audiences.contains(requiredAudience);
    }

    private boolean validateTenantClaim(Jwt jwt) {
        // Check for required business claim
        String tenantId = jwt.getClaimAsString(tenantClaimName);
        return tenantId != null && !tenantId.isBlank();
    }
}
Niestandardowy walidator integruje się z konfiguracją JwtDecoder.
@Configuration
@RequiredArgsConstructor
public class JwtConfig {

    private final CustomJwtValidator customValidator;

    @Value("${spring.security.oauth2.resourceserver.jwt.issuer-uri}")
    private String issuerUri;

    @Value("${spring.security.oauth2.resourceserver.jwt.jwk-set-uri}")
    private String jwkSetUri;

    @Bean
    public JwtDecoder jwtDecoder() {
        // Create decoder with JWKS URL
        NimbusJwtDecoder jwtDecoder = NimbusJwtDecoder
            .withJwkSetUri(jwkSetUri)
            .build();

        // Combine default validators with custom validator
        OAuth2TokenValidator<Jwt> defaultValidators =
            JwtValidators.createDefaultWithIssuer(issuerUri);

        OAuth2TokenValidator<Jwt> combinedValidator =
            new DelegatingOAuth2TokenValidator<>(defaultValidators, customValidator);

        jwtDecoder.setJwtValidator(combinedValidator);

        return jwtDecoder;
    }
}Walidacje synchroniczne blokują wątek przetwarzania. Dla walidacji wymagających zewnętrznych wywołań (baza danych, usługi zewnętrzne), bardziej odpowiedni jest filtr asynchroniczny lub weryfikacja podrzędna.
Dostęp do informacji o tokenie w kontrolerach
Spring Security oferuje kilka metod dostępu do informacji o tokenie JWT w kontrolerach.
@RestController
@RequestMapping("/api/users")
public class UserController {

    // Direct JWT injection via @AuthenticationPrincipal
    @GetMapping("/me")
    public ResponseEntity<UserInfoResponse> getCurrentUser(
        @AuthenticationPrincipal Jwt jwt
    ) {
        String userId = jwt.getSubject();
        String email = jwt.getClaimAsString("email");
        String username = jwt.getClaimAsString("preferred_username");
        List<String> roles = extractRoles(jwt);

        return ResponseEntity.ok(new UserInfoResponse(
            userId, email, username, roles
        ));
    }

    // Alternative with JwtAuthenticationToken to access authorities
    @GetMapping("/profile")
    public ResponseEntity<ProfileResponse> getProfile(
        JwtAuthenticationToken authentication
    ) {
        Jwt jwt = authentication.getToken();
        Collection<String> authorities = authentication.getAuthorities()
            .stream()
            .map(GrantedAuthority::getAuthority)
            .toList();

        return ResponseEntity.ok(new ProfileResponse(
            jwt.getSubject(),
            jwt.getClaimAsString("name"),
            authorities
        ));
    }

    // Access scopes for conditional business logic
    @GetMapping("/data")
    @PreAuthorize("hasAuthority('SCOPE_read')")
    public ResponseEntity<DataResponse> getData(
        @AuthenticationPrincipal Jwt jwt
    ) {
        boolean canWrite = hasScope(jwt, "write");

        // Business logic adapted according to permissions
        DataResponse response = buildDataResponse(jwt.getSubject(), canWrite);
        return ResponseEntity.ok(response);
    }

    private List<String> extractRoles(Jwt jwt) {
        Map<String, Object> realmAccess = jwt.getClaim("realm_access");
        if (realmAccess == null) {
            return Collections.emptyList();
        }
        @SuppressWarnings("unchecked")
        List<String> roles = (List<String>) realmAccess.get("roles");
        return roles != null ? roles : Collections.emptyList();
    }

    private boolean hasScope(Jwt jwt, String scope) {
        String scopes = jwt.getClaimAsString("scope");
        return scopes != null && scopes.contains(scope);
    }
}public record UserInfoResponse(
String userId,
String email,
String username,
List<String> roles
) {}
// ProfileResponse.java
public record ProfileResponse(
String userId,
String name,
Collection<String> authorities
) {}Adnotacja @AuthenticationPrincipal eliminuje konieczność ręcznego pobierania uwierzytelnienia z SecurityContextHolder.
Obsługa błędów uwierzytelniania OAuth2
Dedykowana obsługa błędów poprawia doświadczenie programisty dla konsumentów API.
@RestControllerAdvice
public class OAuth2SecurityExceptionHandler {

    private static final Logger log =
        LoggerFactory.getLogger(OAuth2SecurityExceptionHandler.class);

    // Missing token or invalid format
    @ExceptionHandler(AuthenticationException.class)
    @ResponseStatus(HttpStatus.UNAUTHORIZED)
    public ErrorResponse handleAuthenticationException(AuthenticationException ex) {
        log.warn("Authentication failed: {}", ex.getMessage());

        return new ErrorResponse(
            "UNAUTHORIZED",
            "Authentication required. Provide a valid Bearer token.",
            Map.of("error", ex.getMessage())
        );
    }

    // Access denied despite valid token
    @ExceptionHandler(AccessDeniedException.class)
    @ResponseStatus(HttpStatus.FORBIDDEN)
    public ErrorResponse handleAccessDeniedException(AccessDeniedException ex) {
        log.warn("Access denied: {}", ex.getMessage());

        return new ErrorResponse(
            "FORBIDDEN",
            "Insufficient permissions for this resource",
            null
        );
    }

    // OAuth2-specific error (expired token, invalid signature, etc.)
    @ExceptionHandler(OAuth2AuthenticationException.class)
    @ResponseStatus(HttpStatus.UNAUTHORIZED)
    public ErrorResponse handleOAuth2Exception(OAuth2AuthenticationException ex) {
        OAuth2Error error = ex.getError();
        log.warn("OAuth2 authentication error: {} - {}",
            error.getErrorCode(), error.getDescription());

        String message = switch (error.getErrorCode()) {
            case "invalid_token" -> "Token is invalid or expired";
            case "insufficient_scope" -> "Token does not have required scopes";
            default -> "Authentication failed";
        };

        return new ErrorResponse(
            error.getErrorCode().toUpperCase(),
            message,
            Map.of("details", error.getDescription())
        );
    }
}

// ErrorResponse.java
public record ErrorResponse(
    String code,
    String message,
    Map<String, String> details
) {}
Standaryzowane kody błędów OAuth2 (invalid_token, insufficient_scope) ułatwiają obsługę po stronie klienta.
Konfiguracja wieloproblema
Konfiguracja różni się w zależności od środowiska. W developmencie można użyć lokalnego serwera Keycloak, podczas gdy w produkcji rolę przejmuje zarządzany IdP, taki jak Auth0.
# application.yml (common configuration)
app:
  jwt:
    required-audience: my-api

---
# application-dev.yml
spring:
  config:
    activate:
      on-profile: dev
  security:
    oauth2:
      resourceserver:
        jwt:
          issuer-uri: http://localhost:8180/realms/dev-realm

keycloak:
  client-id: my-api-dev

logging:
  level:
    org.springframework.security: DEBUG

---
# application-prod.yml
spring:
  config:
    activate:
      on-profile: prod
  security:
    oauth2:
      resourceserver:
        jwt:
          issuer-uri: ${OAUTH2_ISSUER_URI}
          audiences: ${OAUTH2_AUDIENCES:my-api}

keycloak:
  client-id: ${KEYCLOAK_CLIENT_ID}

logging:
  level:
    org.springframework.security: WARN
W produkcji wrażliwe wartości pochodzą ze zmiennych środowiskowych lub menedżera sekretów.
Testy integracyjne z mockowanymi tokenami JWT
Testy integracyjne wykorzystują narzędzia Spring Security Test do symulowania prawidłowych tokenów JWT.
@SpringBootTest(webEnvironment = WebEnvironment.RANDOM_PORT)
@AutoConfigureMockMvc
class ResourceServerIntegrationTest {

    @Autowired
    private MockMvc mockMvc;

    @Test
    void shouldRejectRequestWithoutToken() throws Exception {
        mockMvc.perform(get("/api/users/me"))
            .andExpect(status().isUnauthorized());
    }

    @Test
    @WithMockJwtAuth(
        claims = @OpenIdClaims(sub = "user-123", preferredUsername = "john.doe"),
        authorities = {"ROLE_USER"}
    )
    void shouldAllowAuthenticatedUser() throws Exception {
        mockMvc.perform(get("/api/users/me"))
            .andExpect(status().isOk())
            .andExpect(jsonPath("$.userId").value("user-123"))
            .andExpect(jsonPath("$.username").value("john.doe"));
    }

    @Test
    void shouldAllowAccessWithValidJwt() throws Exception {
        mockMvc.perform(get("/api/users/me")
                .with(jwt()
                    .jwt(jwt -> jwt
                        .subject("user-456")
                        .claim("preferred_username", "jane.doe")
                        .claim("email", "jane@example.com")
                    )
                    .authorities(new SimpleGrantedAuthority("ROLE_USER"))
                ))
            .andExpect(status().isOk())
            .andExpect(jsonPath("$.email").value("jane@example.com"));
    }

    @Test
    void shouldDenyAccessWithoutAdminRole() throws Exception {
        mockMvc.perform(get("/api/admin/users")
                .with(jwt()
                    .authorities(new SimpleGrantedAuthority("ROLE_USER"))
                ))
            .andExpect(status().isForbidden());
    }

    @Test
    void shouldAllowAdminAccess() throws Exception {
        mockMvc.perform(get("/api/admin/users")
                .with(jwt()
                    .authorities(new SimpleGrantedAuthority("ROLE_ADMIN"))
                ))
            .andExpect(status().isOk());
    }
}
Narzędzie jwt() z spring-security-test tworzy mockowane tokeny bez konieczności uruchamiania serwera autoryzacji.
@TestConfiguration
public class SecurityTestConfig {

    // Mocked JwtDecoder for tests
    @Bean
    @Primary
    public JwtDecoder jwtDecoder() {
        return token -> {
            // Return a mocked JWT for tests
            return Jwt.withTokenValue(token)
                .header("alg", "RS256")
                .subject("test-user")
                .claim("scope", "read write")
                .build();
        };
    }
}
Zacznij ćwiczyć!
Sprawdź swoją wiedzę z naszymi symulatorami rozmów i testami technicznymi.
Podsumowanie
Konfiguracja serwera zasobów OAuth2 ze Spring Security 6 centralizuje walidację tokenów i upraszcza zabezpieczanie API. Serwer autoryzacji zarządza uwierzytelnianiem i wydawaniem tokenów, podczas gdy API koncentruje się na walidacji i wyodrębnianiu informacji o tożsamości.
Lista kontrolna wdrożenia:
- ✅ Skonfigurowanie
issuer-urilubjwk-set-urizgodnie z potrzebami - ✅ Walidacja audience w celu zapobiegania niewłaściwemu użyciu tokenów z innych usług
- ✅ Niestandardowy konwerter do wyodrębniania ról Keycloak
- ✅ Obsługa błędów OAuth2 z standaryzowanymi kodami
- ✅ Testy integracyjne z mockowanymi tokenami
- ✅ Obowiązkowy HTTPS pomiędzy klientem a Resource Server
- ✅ Konfiguracja specyficzna dla środowiska
- ✅ Logowanie nieudanych prób uwierzytelnienia
Taka architektura naturalnie integruje się z ekosystemem mikrousług, w którym wiele API współdzieli tego samego dostawcę tożsamości.
Tagi
Udostępnij
Powiązane artykuły

Spring Security 6: Pełne uwierzytelnianie JWT
Praktyczny przewodnik wdrażania uwierzytelniania JWT w Spring Security 6: konfiguracja, generowanie tokenów, walidacja i najlepsze praktyki bezpieczeństwa.

Spring Modulith: Architektura Modularnego Monolitu Wyjaśniona
Naucz się Spring Modulith do budowy modularnych monolitów w Javie. Architektura, moduły, eventy asynchroniczne i testy z przykładami Spring Boot 3.

Rozmowa Spring Batch 5: Partycjonowanie, Chunki i Tolerancja Błędów
Opanuj rozmowy o pracę ze Spring Batch 5: 15 kluczowych pytań o partycjonowanie, przetwarzanie chunkowe i tolerancję błędów z przykładami w Java 21.