Pytania rekrutacyjne Django i Python: Top 25 w 2026
25 najczesciej zadawanych pytan rekrutacyjnych z Django i Pythona. ORM, widoki, middleware, DRF, sygnaly i optymalizacja z szczegolowymi odpowiedziami i przykladami kodu.

Rozmowy kwalifikacyjne z Django sprawdzają biegłość w najpopularniejszym frameworku webowym Pythona, znajomość ORM, architektury MVT oraz umiejętność budowania solidnych API REST. Poniższy przewodnik obejmuje 25 najczęściej zadawanych pytań, od podstaw Django po zaawansowane wzorce Django REST Framework.
Rekruterzy cenią kandydatów, którzy potrafią wyjaśnić decyzje architektoniczne Django. Zrozumienie, dlaczego framework przyjmuje określone konwencje (konwencja ponad konfiguracją), robi prawdziwą różnicę na rozmowie.
Podstawy Django
Pytanie 1: Opisz architekturę MVT w Django
Architektura Model-View-Template (MVT) to wariant wzorca MVC w Django. Framework automatycznie obsługuje część kontrolera, co upraszcza proces tworzenia aplikacji.
# models.py
# The Model represents data structure and business logic
from django.db import models

class Article(models.Model):
    title = models.CharField(max_length=200)
    content = models.TextField()
    published_at = models.DateTimeField(auto_now_add=True)
    author = models.ForeignKey(
        "auth.User",
        on_delete=models.CASCADE,  # Deletes articles when author is deleted
        related_name="articles"     # Reverse access: user.articles.all()
    )

    class Meta:
        ordering = ["-published_at"]  # Default ordering

    def __str__(self):
return self.title# views.py
# The View contains request processing logic
from django.shortcuts import render, get_object_or_404
def article_detail(request, pk):
# get_object_or_404 raises Http404 if the object doesn't exist
article = get_object_or_404(Article, pk=pk)
return render(request, "blog/article_detail.html", {"article": article})W architekturze MVT Django pełni rolę kontrolera, kierując adresy URL do odpowiednich widoków za pośrednictwem urls.py. Szablon (Template) odpowiada za prezentację HTML.
Pytanie 2: Jaka jest różnica między projektem Django a aplikacją?
Projekt to ogólna konfiguracja (ustawienia, główne adresy URL, WSGI/ASGI). Aplikacja to moduł wielokrotnego użytku o jednej odpowiedzialności. Projekt zawiera wiele aplikacji.
# Creating a project and an app
# django-admin startproject myproject
# python manage.py startapp blog

# settings.py
# Registering apps in the project
INSTALLED_APPS = [
    "django.contrib.admin",       # Admin interface
    "django.contrib.auth",        # Authentication
    "django.contrib.contenttypes",
    "django.contrib.sessions",
    "django.contrib.messages",
    "django.contrib.staticfiles",
    # Custom apps
    "blog.apps.BlogConfig",       # Blog app
    "users.apps.UsersConfig",     # Users app
]
Każda aplikacja stosuje zasadę pojedynczej odpowiedzialności i może być ponownie wykorzystana w różnych projektach.
Pytanie 3: Wyjaśnij cykl życia żądania w Django
Żądanie przechodzi przez kilka warstw, zanim dotrze do widoku. Zrozumienie tego cyklu jest kluczowe dla debugowania i optymalizacji.
# middleware.py
# Middlewares intercept every request/response
class RequestTimingMiddleware:
    """Middleware that measures processing time."""

    def __init__(self, get_response):
        self.get_response = get_response  # Reference to the next middleware

    def __call__(self, request):
        import time
        start = time.time()

        # Request phase: before the view
        response = self.get_response(request)

        # Response phase: after the view
        duration = time.time() - start
        response["X-Request-Duration"] = f"{duration:.3f}s"
        return response
Pełny cykl: żądanie HTTP → WSGI/ASGI → middleware (process_request) → resolver URL → widok → middleware (process_response) → odpowiedź HTTP.
ORM i baza danych
Pytanie 4: Jak działa QuerySet w Django i czym jest leniwe ładowanie?
QuerySety są obliczane leniwie: żadne zapytanie SQL nie jest wykonywane, dopóki dane nie zostaną faktycznie użyte.
# queryset_lazy.py
# Demonstrating QuerySet lazy loading

# No SQL query executed here
qs = Article.objects.filter(published=True)  # No query
qs = qs.exclude(title="Draft")               # Still none
qs = qs.order_by("-created_at")              # Still none

# The SQL query runs ONLY here
for article in qs:  # ONE combined SQL query
    print(article.title)

# Other evaluation triggers
list(qs)        # Converting to list
qs[0]           # Index access
len(qs)         # Counting (prefer qs.count())
bool(qs)        # Existence check (prefer qs.exists())
Leniwe obliczanie pozwala łączyć filtry bez narzutu, wykonując tylko jedno zoptymalizowane zapytanie.
Pytanie 5: Czym jest problem N+1 i jak go rozwiązać?
Problem N+1 występuje, gdy jedno główne zapytanie generuje N dodatkowych zapytań do załadowania relacji. To najczęstsza przyczyna spowolnień w aplikacjach Django.
# n_plus_one.py
# N+1 problem and solutions

# ❌ PROBLEM: N+1 queries
# 1 query for articles + 1 query PER article for the author
articles = Article.objects.all()
for article in articles:
    print(article.author.username)  # SQL query on every iteration!

# ✅ SOLUTION 1: select_related (ForeignKey, OneToOne)
# Joins tables in ONE SQL query (JOIN)
articles = Article.objects.select_related("author").all()
for article in articles:
    print(article.author.username)  # No additional query

# ✅ SOLUTION 2: prefetch_related (ManyToMany, reverse FK)
# Executes 2 separate queries + Python assembly
articles = Article.objects.prefetch_related("tags").all()
for article in articles:
    print(article.tags.all())  # Data already cached

# ✅ SOLUTION 3: Custom Prefetch with filtering
from django.db.models import Prefetch

articles = Article.objects.prefetch_related(
    Prefetch(
        "comments",
        queryset=Comment.objects.filter(approved=True).select_related("user"),
        to_attr="approved_comments"  # Custom attribute
    )
)
Należy używać select_related dla relacji ForeignKey/OneToOne (SQL JOIN), a prefetch_related dla relacji ManyToMany lub odwrotnych (osobne zapytania).
Pytanie 6: Jak stworzyć niestandardowy Manager i kiedy go używać?
Niestandardowe Managery enkapsulują częste zapytania na poziomie modelu, czyniąc kod bardziej czytelnym i wielokrotnego użytku.
# managers.py
# Custom Managers and QuerySets

class PublishedQuerySet(models.QuerySet):
    """Reusable QuerySet for published articles."""

    def published(self):
        return self.filter(status="published", published_at__lte=timezone.now())

    def by_author(self, user):
        return self.filter(author=user)

    def popular(self):
        return self.annotate(
            comment_count=models.Count("comments")
        ).order_by("-comment_count")


class PublishedManager(models.Manager):
    """Manager that exposes only published articles."""

    def get_queryset(self):
        return PublishedQuerySet(self.model, using=self._db).published()


class Article(models.Model):
    # ...
    objects = models.Manager()          # Default manager (all articles)
    published = PublishedManager()      # Custom manager (published only)

    # Usage:
    # Article.objects.all()             → All articles
    # Article.published.all()           → Published articles only
    # Article.published.popular()       → Published articles sorted by popularity
Niestandardowe Managery stosują zasadę DRY i centralizują logikę zapytań.
Gotowy na rozmowy o Django?
Ćwicz z naszymi interaktywnymi symulatorami, flashcards i testami technicznymi.
Widoki i adresy URL
Pytanie 7: Kiedy używać widoków opartych na klasach, a kiedy na funkcjach?
Widoki oparte na funkcjach (FBV) oferują prostotę i jawną kontrolę. Widoki oparte na klasach (CBV) zapewniają wielokrotne użycie i strukturę dzięki dziedziczeniu.
# views_comparison.py
# FBV: Explicit, simple, easy to understand
from django.http import JsonResponse
from django.views.decorators.http import require_http_methods

@require_http_methods(["GET", "POST"])
def article_list(request):
    if request.method == "GET":
        articles = Article.published.all()
        return render(request, "articles/list.html", {"articles": articles})

    # POST: article creation
    form = ArticleForm(request.POST)
    if form.is_valid():
        form.save()
        return redirect("article-list")
return render(request, "articles/list.html", {"form": form})# views_cbv.py
# CBV: Reusable, extensible via mixins
from django.views.generic import ListView, CreateView
from django.contrib.auth.mixins import LoginRequiredMixin
class ArticleListView(LoginRequiredMixin, ListView):
model = Article
template_name = "articles/list.html"
context_object_name = "articles" # Variable name in the template
paginate_by = 20 # Automatic pagination
def get_queryset(self):
# Override to filter published articles
return Article.published.all()
class ArticleCreateView(LoginRequiredMixin, CreateView):
model = Article
form_class = ArticleForm
success_url = reverse_lazy("article-list")
def form_valid(self, form):
form.instance.author = self.request.user # Assign the author
return super().form_valid(form)Praktyczna zasada: FBV dla prostej lub niestandardowej logiki, CBV dla standardowych operacji CRUD.
Pytanie 8: Jak działają middleware w Django?
Middleware to haki przetwarzające każde żądanie i odpowiedź. Każdy middleware może interweniować na różnych etapach cyklu przetwarzania.
# auth_middleware.py
# Custom authentication middleware
import jwt
from django.conf import settings
from django.http import JsonResponse

class JWTAuthenticationMiddleware:
    """Verifies JWT token on protected endpoints."""

    EXEMPT_PATHS = ["/api/auth/login", "/api/auth/register", "/health"]

    def __init__(self, get_response):
        self.get_response = get_response

    def __call__(self, request):
        # Skip exempt paths
        if any(request.path.startswith(p) for p in self.EXEMPT_PATHS):
            return self.get_response(request)

        # Extract and verify the token
        auth_header = request.headers.get("Authorization", "")
        if not auth_header.startswith("Bearer "):
            return JsonResponse({"error": "Missing token"}, status=401)

        try:
            token = auth_header.split(" ")[1]
            payload = jwt.decode(token, settings.SECRET_KEY, algorithms=["HS256"])
            request.user_id = payload["user_id"]  # Attach to request
        except jwt.ExpiredSignatureError:
            return JsonResponse({"error": "Token expired"}, status=401)
        except jwt.InvalidTokenError:
            return JsonResponse({"error": "Invalid token"}, status=401)

        return self.get_response(request)
Kolejność middleware w MIDDLEWARE jest kluczowa: wykonują się od góry do dołu dla żądań i od dołu do góry dla odpowiedzi.
Django REST Framework
Pytanie 9: Jaka jest różnica między Serializer a ModelSerializer?
Serializer ręcznie definiuje każde pole, podczas gdy ModelSerializer automatycznie generuje pola na podstawie modelu.
# serializers.py
from rest_framework import serializers

# Manual Serializer: full control over each field
class ArticleSerializer(serializers.Serializer):
    id = serializers.IntegerField(read_only=True)
    title = serializers.CharField(max_length=200)
    content = serializers.CharField()
    author_name = serializers.SerializerMethodField()

    def get_author_name(self, obj):
        return obj.author.get_full_name()

    def create(self, validated_data):
        return Article.objects.create(**validated_data)

    def update(self, instance, validated_data):
        instance.title = validated_data.get("title", instance.title)
        instance.content = validated_data.get("content", instance.content)
        instance.save()
        return instance


# ModelSerializer: automatic field generation
class ArticleModelSerializer(serializers.ModelSerializer):
    author_name = serializers.SerializerMethodField()
    comment_count = serializers.IntegerField(read_only=True)

    class Meta:
        model = Article
        fields = ["id", "title", "content", "author", "author_name",
                  "comment_count", "published_at"]
        read_only_fields = ["published_at"]

    def get_author_name(self, obj):
        return obj.author.get_full_name()
Należy preferować ModelSerializer w standardowych przypadkach i Serializer, gdy reprezentacja znacząco różni się od modelu.
Pytanie 10: Jak zaimplementować paginację w DRF?
DRF oferuje kilka strategii paginacji, konfigurowalnych globalnie lub na poziomie widoku.
# settings.py
# Global pagination configuration
REST_FRAMEWORK = {
    "DEFAULT_PAGINATION_CLASS": "rest_framework.pagination.PageNumberPagination",
    "PAGE_SIZE": 20,
}

# pagination.py
# Custom pagination per view
from rest_framework.pagination import CursorPagination, LimitOffsetPagination

class ArticleCursorPagination(CursorPagination):
    """Cursor pagination: performant for large datasets."""
    page_size = 20
    ordering = "-published_at"  # Indexed field required
    cursor_query_param = "cursor"

class ArticleLimitOffsetPagination(LimitOffsetPagination):
    """Offset/limit pagination: flexible but less performant."""
    default_limit = 20
    max_limit = 100

# views.py
class ArticleViewSet(viewsets.ModelViewSet):
    queryset = Article.published.all()
    serializer_class = ArticleModelSerializer
    pagination_class = ArticleCursorPagination  # View-specific pagination
Paginacja kursorowa jest zalecana dla dużych zbiorów danych, ponieważ pozostaje wydajna niezależnie od numeru strony, w przeciwieństwie do OFFSET/LIMIT.
Pytanie 11: Jak zabezpieczyć API uprawnieniami DRF?
DRF zapewnia modularny system uprawnień łączący uwierzytelnianie z granularną autoryzacją.
# permissions.py
from rest_framework.permissions import BasePermission, IsAuthenticated

class IsAuthorOrReadOnly(BasePermission):
    """Only the author can modify, everyone can read."""

    def has_object_permission(self, request, view, obj):
        # GET, HEAD, OPTIONS are always allowed
        if request.method in ("GET", "HEAD", "OPTIONS"):
            return True
        # Only the author can modify or delete
        return obj.author == request.user


class IsAdminOrManager(BasePermission):
    """Access restricted to admins and managers."""

    def has_permission(self, request, view):
        return (
            request.user.is_authenticated
            and request.user.role in ("admin", "manager")
        )


# views.py
from rest_framework.viewsets import ModelViewSet
from rest_framework.throttling import UserRateThrottle

class ArticleViewSet(ModelViewSet):
    permission_classes = [IsAuthenticated, IsAuthorOrReadOnly]
    throttle_classes = [UserRateThrottle]  # Rate limiting

    def get_permissions(self):
        # Dynamic permissions based on action
        if self.action == "destroy":
            return [IsAdminOrManager()]
        return super().get_permissions()
Należy łączyć permission_classes na poziomie widoku i has_object_permission do precyzyjnej kontroli na poziomie obiektu.
Sygnały i zadania asynchroniczne
Pytanie 12: Jak działają sygnały Django i kiedy ich używać?
Sygnały pozwalają na oddzielenie komponentów poprzez reagowanie na zdarzenia z frameworka lub aplikacji.
# signals.py
from django.db.models.signals import post_save, pre_delete
from django.dispatch import receiver
from django.core.mail import send_mail

@receiver(post_save, sender=Article)
def notify_on_publish(sender, instance, created, **kwargs):
    """Sends a notification when an article is published."""
    if not created and instance.status == "published":
        # Triggered only on publication (not creation)
        subscribers = instance.author.subscribers.values_list("email", flat=True)
        send_mail(
            subject=f"New article: {instance.title}",
            message=f"Check out the latest article by {instance.author.username}",
            from_email="noreply@example.com",
            recipient_list=list(subscribers),
        )

@receiver(pre_delete, sender=Article)
def cleanup_article_files(sender, instance, **kwargs):
    """Deletes associated files before article deletion."""
    if instance.cover_image:
        instance.cover_image.delete(save=False)  # Deletes the physical file
Sygnały nadają się do lekkich efektów ubocznych (logowanie, unieważnianie cache). Dla ciężkich zadań lepiej używać Celery.
Pytanie 13: Jak zintegrować Celery z Django do zadań asynchronicznych?
Celery umożliwia wykonywanie zadań w tle, co jest niezbędne przy długotrwałych operacjach, takich jak wysyłanie e-maili czy przetwarzanie plików.
# celery_config.py
# Celery configuration in the Django project
import os
from celery import Celery

os.environ.setdefault("DJANGO_SETTINGS_MODULE", "myproject.settings")

app = Celery("myproject")
app.config_from_object("django.conf:settings", namespace="CELERY")
app.autodiscover_tasks()  # Discovers tasks.py in each app

# tasks.py
from celery import shared_task
from django.core.mail import send_mass_mail

@shared_task(bind=True, max_retries=3, default_retry_delay=60)
def send_newsletter(self, article_id):
    """Sends newsletter asynchronously."""
    try:
        article = Article.objects.get(id=article_id)
        subscribers = User.objects.filter(newsletter=True)

        messages = [
            (f"New: {article.title}", article.content[:200],
             "noreply@example.com", [sub.email])
            for sub in subscribers
        ]
        send_mass_mail(messages, fail_silently=False)
    except Article.DoesNotExist:
        pass  # Article was deleted in the meantime
    except Exception as exc:
        self.retry(exc=exc)  # Automatic retry on error

# Calling from a view
# send_newsletter.delay(article.id)  # Async execution
# send_newsletter.apply_async(args=[article.id], countdown=300)  # 5-min delay
Celery jest niezbędny w środowisku produkcyjnym dla każdej operacji, która nie powinna blokować odpowiedzi HTTP.
Bezpieczeństwo i uwierzytelnianie
Pytanie 14: Jak Django chroni przed atakami CSRF?
Django zawiera wbudowaną ochronę CSRF poprzez middleware, który weryfikuje unikalny token przy każdym żądaniu POST.
# CSRF protection in forms
# The {% csrf_token %} template tag generates a hidden field

# For APIs (DRF), CSRF is often disabled in favor of tokens
# settings.py
REST_FRAMEWORK = {
    "DEFAULT_AUTHENTICATION_CLASSES": [
        "rest_framework.authentication.SessionAuthentication",  # Includes CSRF
        "rest_framework.authentication.TokenAuthentication",     # No CSRF
    ],
}

# For AJAX views with session auth
# The csrftoken cookie must be sent in the X-CSRFToken header# csrf_exemption.py
# Exempting a specific view (use with caution)
from django.views.decorators.csrf import csrf_exempt, ensure_csrf_cookie
@ensure_csrf_cookie
def get_csrf_token(request):
"""Endpoint that forces sending the CSRF cookie to the client."""
return JsonResponse({"detail": "CSRF cookie set"})
@csrf_exempt # ⚠️ Use only for external webhooks
def stripe_webhook(request):
"""Stripe webhook - authenticated by signature, not CSRF."""
payload = request.body
sig_header = request.headers.get("Stripe-Signature")
# Verified by Stripe signature insteadNigdy nie należy wyłączać CSRF globalnie. csrf_exempt stosuje się wyłącznie na endpointach uwierzytelnianych innymi metodami (webhooki, tokeny API).
Pytanie 15: Jak zaimplementować niestandardowe uwierzytelnianie w Django?
Django pozwala na zastąpienie domyślnego modelu User i dostosowanie backendu uwierzytelniania.
# models.py
from django.contrib.auth.models import AbstractBaseUser, BaseUserManager, PermissionsMixin

class CustomUserManager(BaseUserManager):
    """Manager for the custom User model."""

    def create_user(self, email, password=None, **extra_fields):
        if not email:
            raise ValueError("Email is required")
        email = self.normalize_email(email)  # Normalizes the domain
        user = self.model(email=email, **extra_fields)
        user.set_password(password)  # Hashes the password
        user.save(using=self._db)
        return user

    def create_superuser(self, email, password=None, **extra_fields):
        extra_fields.setdefault("is_staff", True)
        extra_fields.setdefault("is_superuser", True)
        return self.create_user(email, password, **extra_fields)


class CustomUser(AbstractBaseUser, PermissionsMixin):
    email = models.EmailField(unique=True)          # Login by email
    username = models.CharField(max_length=30, blank=True)
    is_active = models.BooleanField(default=True)
    is_staff = models.BooleanField(default=False)
    date_joined = models.DateTimeField(auto_now_add=True)

    objects = CustomUserManager()

    USERNAME_FIELD = "email"      # Field used for login
    REQUIRED_FIELDS = []          # Fields required in addition to USERNAME_FIELD

# settings.py
AUTH_USER_MODEL = "users.CustomUser"  # Before the first migration!
AUTH_USER_MODEL należy zdefiniować na samym początku projektu. Zmiana po początkowych migracjach jest złożona i ryzykowna.
Optymalizacja i wydajność
Pytanie 16: Jak optymalizować zapytania Django ORM?
Optymalizacja zapytań ma kluczowe znaczenie dla wydajności. Kilka technik pozwala zmniejszyć liczbę i koszt zapytań SQL.
# query_optimization.py
from django.db.models import F, Q, Count, Avg, Prefetch

# 1. Only/Defer: load only needed fields
articles = Article.objects.only("title", "published_at")  # SELECT title, published_at
heavy_articles = Article.objects.defer("content")          # Everything EXCEPT content

# 2. SQL-level aggregations (not Python)
stats = Article.objects.aggregate(
    total=Count("id"),
    avg_views=Avg("view_count"),
)

# 3. F() expressions: SQL-level operations
Article.objects.filter(published=True).update(
    view_count=F("view_count") + 1  # Atomic SQL increment
)

# 4. Q() objects: complex queries
results = Article.objects.filter(
    Q(title__icontains="django") | Q(tags__name="python"),
    ~Q(status="draft"),  # NOT draft
    published_at__year=2026
)

# 5. Bulk operations: reduce INSERT/UPDATE queries
articles = [Article(title=f"Article {i}") for i in range(100)]
Article.objects.bulk_create(articles, batch_size=50)  # 2 queries instead of 100

Article.objects.filter(status="draft").update(status="archived")  # 1 query
Warto używać django-debug-toolbar w środowisku deweloperskim, aby identyfikować wolne zapytania i problemy N+1.
Pytanie 17: Jak zaimplementować cache w Django?
Django zapewnia wielopoziomowy framework do cachowania: na poziomie widoku, fragmentu szablonu lub dowolnych danych.
# settings.py
CACHES = {
    "default": {
        "BACKEND": "django.core.cache.backends.redis.RedisCache",
        "LOCATION": "redis://127.0.0.1:6379/1",
    }
}

# cache_strategies.py
from django.core.cache import cache
from django.views.decorators.cache import cache_page
from django.utils.decorators import method_decorator

# Per-view cache: caches the entire HTTP response
@cache_page(60 * 15)  # 15 minutes
def article_list(request):
    return render(request, "articles/list.html", {"articles": Article.published.all()})

# Data cache: granular control
def get_popular_articles():
    cache_key = "popular_articles_v1"
    articles = cache.get(cache_key)

    if articles is None:
        articles = list(
            Article.published.popular()[:10].values("id", "title", "view_count")
        )
        cache.set(cache_key, articles, timeout=60 * 30)  # 30 min

    return articles

# Cache invalidation
def invalidate_article_cache(article_id):
    cache.delete(f"article_{article_id}")
    cache.delete("popular_articles_v1")
    cache.delete_pattern("article_list_*")  # With django-redis
Redis jest zalecany jako backend cache w środowisku produkcyjnym ze względu na trwałość i zaawansowane funkcje (wzorce, TTL).
Gotowy na rozmowy o Django?
Ćwicz z naszymi interaktywnymi symulatorami, flashcards i testami technicznymi.
Migracje i zarządzanie bazą danych
Pytanie 18: Jak obsługiwać złożone migracje w Django?
Migracje Django zarządzają ewolucją schematu bazy danych w sposób wersjonowany i odtwarzalny.
# 0005_migrate_data.py
# Custom data migration
from django.db import migrations

def migrate_user_roles(apps, schema_editor):
    """Converts is_admin booleans to text roles."""
    User = apps.get_model("users", "CustomUser")
    # Use apps.get_model() to access the historical model
    User.objects.filter(is_admin=True).update(role="admin")
    User.objects.filter(is_admin=False, is_staff=True).update(role="manager")
    User.objects.filter(is_admin=False, is_staff=False).update(role="user")

def reverse_migrate(apps, schema_editor):
    """Reverse migration for rollback."""
    User = apps.get_model("users", "CustomUser")
    User.objects.filter(role="admin").update(is_admin=True)

class Migration(migrations.Migration):
    dependencies = [
        ("users", "0004_add_role_field"),
    ]

    operations = [
        migrations.RunPython(migrate_user_roles, reverse_migrate),
    ]
Zawsze należy dostarczać funkcję reverse umożliwiającą rollback. Migracje warto testować na kopii produkcyjnej bazy danych przed wdrożeniem.
Pytanie 19: Jak tworzyć niestandardowe indeksy w celu optymalizacji?
Indeksy przyspieszają częste zapytania, ale zwiększają koszt zapisu. Ich staranny dobór jest niezbędny.
# models.py
class Article(models.Model):
    title = models.CharField(max_length=200)
    slug = models.SlugField(unique=True)
    status = models.CharField(max_length=20, db_index=True)  # Simple index
    published_at = models.DateTimeField(null=True)
    author = models.ForeignKey("auth.User", on_delete=models.CASCADE)

    class Meta:
        indexes = [
            # Composite index for frequent queries
            models.Index(fields=["status", "-published_at"], name="idx_status_date"),
            # Partial index: only published articles
            models.Index(
                fields=["published_at"],
                condition=models.Q(status="published"),
                name="idx_published_articles"
            ),
            # GIN index for full-text search (PostgreSQL)
            GinIndex(fields=["search_vector"], name="idx_search"),
        ]
Indeksy złożone uwzględniają kolejność kolumn: najbardziej selektywne pole powinno znajdować się na pierwszym miejscu.
Testowanie i jakość
Pytanie 20: Jak strukturyzować testy w projekcie Django?
Django dostarcza solidny framework testowy oparty na unittest, wzbogacony o pytest-django dla większej elastyczności.
# tests/test_views.py
from django.test import TestCase, Client
from django.urls import reverse
from rest_framework.test import APITestCase, APIClient

class ArticleViewTests(TestCase):
    """View tests with Django's test client."""

    def setUp(self):
        self.client = Client()
        self.user = CustomUser.objects.create_user(
            email="test@example.com", password="testpass123"
        )
        self.article = Article.objects.create(
            title="Test Article",
            content="Content here",
            author=self.user,
            status="published"
        )

    def test_article_list_returns_200(self):
        response = self.client.get(reverse("article-list"))
        self.assertEqual(response.status_code, 200)
        self.assertContains(response, "Test Article")

    def test_create_article_requires_auth(self):
        response = self.client.post(reverse("article-create"), {"title": "New"})
        self.assertEqual(response.status_code, 302)  # Redirects to login


class ArticleAPITests(APITestCase):
    """REST API tests with DRF."""

    def setUp(self):
        self.user = CustomUser.objects.create_user(
            email="api@example.com", password="testpass123"
        )
        self.client = APIClient()
        self.client.force_authenticate(user=self.user)

    def test_create_article_via_api(self):
        data = {"title": "API Article", "content": "Created via API"}
        response = self.client.post("/api/articles/", data, format="json")
        self.assertEqual(response.status_code, 201)
        self.assertEqual(Article.objects.count(), 1)
Testy należy rozdzielać na pliki według domeny: test_models.py, test_views.py, test_serializers.py, test_services.py.
Pytanie 21: Jak używać fixtures i fabryk do testów?
Fabryki (z factory_boy) są preferowane nad fiksturami JSON ze względu na elastyczność i łatwość utrzymania danych testowych.
# factories.py
import factory
from factory.django import DjangoModelFactory

class UserFactory(DjangoModelFactory):
    class Meta:
        model = CustomUser

    email = factory.Sequence(lambda n: f"user{n}@example.com")
    username = factory.Faker("user_name")
    is_active = True

class ArticleFactory(DjangoModelFactory):
    class Meta:
        model = Article

    title = factory.Faker("sentence", nb_words=5)
    content = factory.Faker("paragraphs", nb=3)
    author = factory.SubFactory(UserFactory)  # Creates a user automatically
    status = "published"

    class Params:
        draft = factory.Trait(status="draft", published_at=None)

# tests.py
def test_published_articles_count(self):
    ArticleFactory.create_batch(5)              # 5 published articles
    ArticleFactory.create_batch(3, draft=True)  # 3 drafts
    self.assertEqual(Article.published.count(), 5)
Fabryki zapewniają spójne dane testowe i eliminują zależności między testami.
Zaawansowane wzorce
Pytanie 22: Jak zaimplementować WebSockety z Django Channels?
Django Channels rozszerza Django poza HTTP, aby obsługiwać WebSockety, protokoły czasu rzeczywistego i zadania w tle.
# consumers.py
import json
from channels.generic.websocket import AsyncWebsocketConsumer

class ChatConsumer(AsyncWebsocketConsumer):
    """WebSocket consumer for real-time chat."""

    async def connect(self):
        self.room_name = self.scope["url_route"]["kwargs"]["room_name"]
        self.room_group = f"chat_{self.room_name}"

        # Join the room group
        await self.channel_layer.group_add(self.room_group, self.channel_name)
        await self.accept()

    async def disconnect(self, close_code):
        # Leave the group
        await self.channel_layer.group_discard(self.room_group, self.channel_name)

    async def receive(self, text_data):
        data = json.loads(text_data)
        # Broadcast message to the entire group
        await self.channel_layer.group_send(
            self.room_group,
            {"type": "chat.message", "message": data["message"],
             "username": self.scope["user"].username}
        )

    async def chat_message(self, event):
        # Send message to the WebSocket client
        await self.send(text_data=json.dumps({
            "message": event["message"],
            "username": event["username"],
        }))
Django Channels używa ASGI (zamiast WSGI) i wymaga kompatybilnego serwera, takiego jak Daphne lub Uvicorn.
Pytanie 23: Wyjaśnij wzorzec Repository i Service Layer w Django
Wzorzec Service Layer oddziela logikę biznesową od widoków i ORM, ułatwiając testowanie i utrzymanie.
# services/article_service.py
from django.db import transaction

class ArticleService:
    """Service encapsulating article business logic."""

    @staticmethod
    def publish_article(article_id: int, user) -> Article:
        """Publishes an article with all validations."""
        article = Article.objects.select_for_update().get(id=article_id)

        if article.author != user:
            raise PermissionError("Only the author can publish this article")
        if article.status == "published":
            raise ValueError("Article is already published")

        article.status = "published"
        article.published_at = timezone.now()
        article.save(update_fields=["status", "published_at"])

        # Side effects: notification, cache, analytics
        send_newsletter.delay(article.id)
        cache.delete("popular_articles_v1")

        return article

    @staticmethod
    @transaction.atomic
    def bulk_archive(article_ids: list[int], user) -> int:
        """Archives multiple articles in a transaction."""
        updated = Article.objects.filter(
            id__in=article_ids,
            author=user,
            status="published"
        ).update(status="archived", archived_at=timezone.now())
        return updated
Warstwa Service Layer stanowi punkt wejścia dla całej logiki biznesowej. Widoki i serializery delegują do serwisu, nigdy bezpośrednio do ORM.
Pytanie 24: Jak zarządzać zmiennymi środowiskowymi i konfiguracją wielośrodowiskową?
Zarządzanie konfiguracją stosuje zasady 12-Factor App: ścisłe oddzielenie konfiguracji od kodu.
# settings/base.py
# Shared configuration across all environments
import os
from pathlib import Path
from dotenv import load_dotenv

load_dotenv()  # Loads the .env file

BASE_DIR = Path(__file__).resolve().parent.parent.parent

SECRET_KEY = os.environ["DJANGO_SECRET_KEY"]  # Required, no default value
DEBUG = os.environ.get("DEBUG", "False").lower() == "true"
ALLOWED_HOSTS = os.environ.get("ALLOWED_HOSTS", "").split(",")

DATABASES = {
    "default": {
        "ENGINE": "django.db.backends.postgresql",
        "NAME": os.environ.get("DB_NAME", "myapp"),
        "USER": os.environ.get("DB_USER", "postgres"),
        "HOST": os.environ.get("DB_HOST", "localhost"),
        "PORT": os.environ.get("DB_PORT", "5432"),
    }
}

# settings/production.py
from .base import *

DEBUG = False
SECURE_SSL_REDIRECT = True
SESSION_COOKIE_SECURE = True
CSRF_COOKIE_SECURE = True
SECURE_HSTS_SECONDS = 31536000  # 1 year
Nigdy nie należy commitować sekretów do kodu. Należy używać zmiennych środowiskowych lub menedżera sekretów (Vault, AWS Secrets Manager).
Pytanie 25: Jak wdrożyć aplikację Django w środowisku produkcyjnym?
Wdrożenie produkcyjne wymaga kompleksowej listy kontrolnej obejmującej bezpieczeństwo, wydajność i niezawodność.
# Django deployment checklist

# 1. Built-in verification command
# python manage.py check --deploy

# 2. WSGI/ASGI configuration for production
# gunicorn.conf.py
import multiprocessing

bind = "0.0.0.0:8000"
workers = multiprocessing.cpu_count() * 2 + 1  # Recommended formula
worker_class = "gthread"           # Threaded workers
threads = 4
max_requests = 1000                # Recycle workers to avoid memory leaks
max_requests_jitter = 50
timeout = 30
accesslog = "-"                    # Logs to stdout
errorlog = "-"# docker-compose.yml (typical configuration)
# Services: web (gunicorn), db (postgres), redis (cache/celery), worker (celery)
# 3. Static files
# python manage.py collectstatic --noinput
# Serve via nginx or CDN (WhiteNoise for simple cases)
# 4. Nginx configuration
# - Proxy to gunicorn on port 8000
# - Serve /static/ and /media/ directly
# - Enable gzip, HTTP/2, and security headersPrzed każdym wdrożeniem produkcyjnym należy uruchomić python manage.py check --deploy. To polecenie weryfikuje kluczowe ustawienia bezpieczeństwa.
Podsumowanie
Tych 25 pytań obejmuje podstawy rozmów kwalifikacyjnych z Django i Pythona, od fundamentów architektury MVT po wzorce wdrożeń produkcyjnych.
Lista kontrolna przygotowań:
- Architektura MVT i cykl życia żądania
- ORM: QuerySety, N+1, select_related, prefetch_related
- Django REST Framework: serializery, paginacja, uprawnienia
- Bezpieczeństwo: CSRF, uwierzytelnianie, uprawnienia
- Wydajność: optymalizacja ORM, cache, indeksy
- Testowanie: TestCase, APITestCase, fabryki
- Zaawansowane wzorce: Channels, Service Layer, wdrożenie
Każde pytanie zasługuje na głębsze zgłębienie z oficjalną dokumentacją Django. Rekruterzy cenią kandydatów, którzy rozumieją niuanse frameworka i potrafią uzasadnić swoje decyzje techniczne.
Zacznij ćwiczyć!
Sprawdź swoją wiedzę z naszymi symulatorami rozmów i testami technicznymi.
Tagi
Udostępnij
Powiązane artykuły
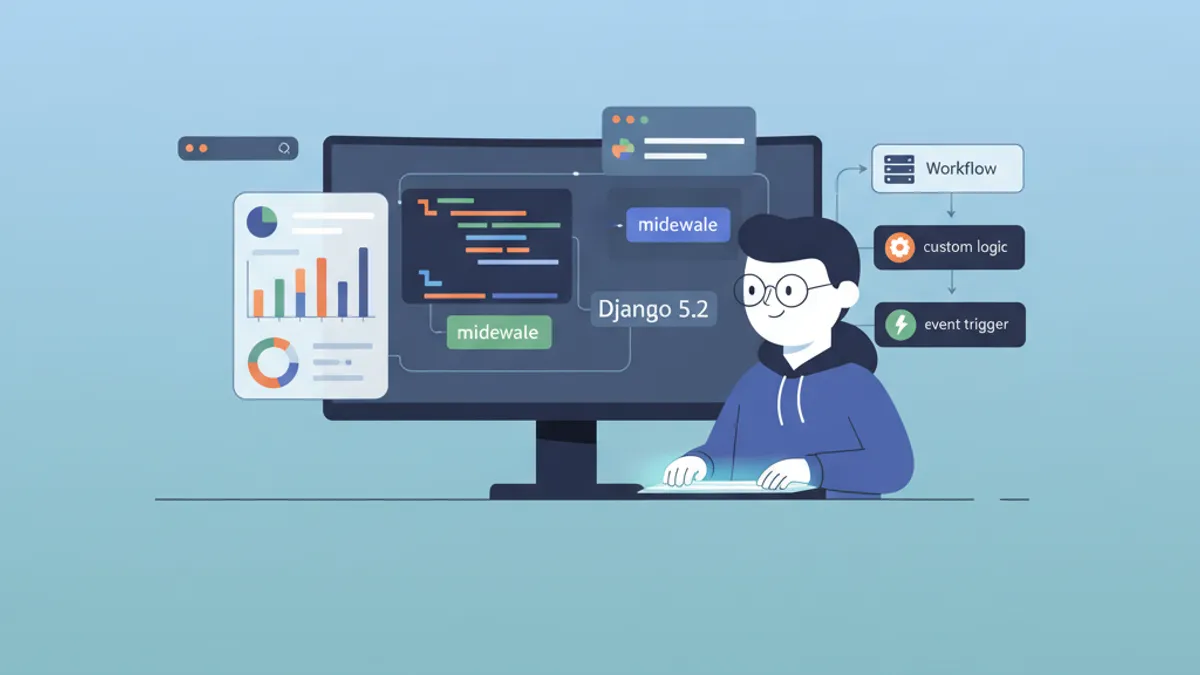
Django 5.2: Wlasne Middleware i Obsluga Sygnalow -- Przygotowanie do Rozmow Rekrutacyjnych
Praktyczny przewodnik po tworzeniu wlasnych middleware i obsludze sygnalow w Django 5.2. Struktura middleware, asynchroniczne middleware, sygnaly post_save i pre_save, wlasne sygnaly domenowe oraz najczesciej zadawane pytania rekrutacyjne.

Django 5: Budowanie REST API z Django REST Framework
Kompletny przewodnik po tworzeniu profesjonalnego REST API z Django 5 i DRF. Serializery, ViewSety, uwierzytelnianie JWT i sprawdzone praktyki.
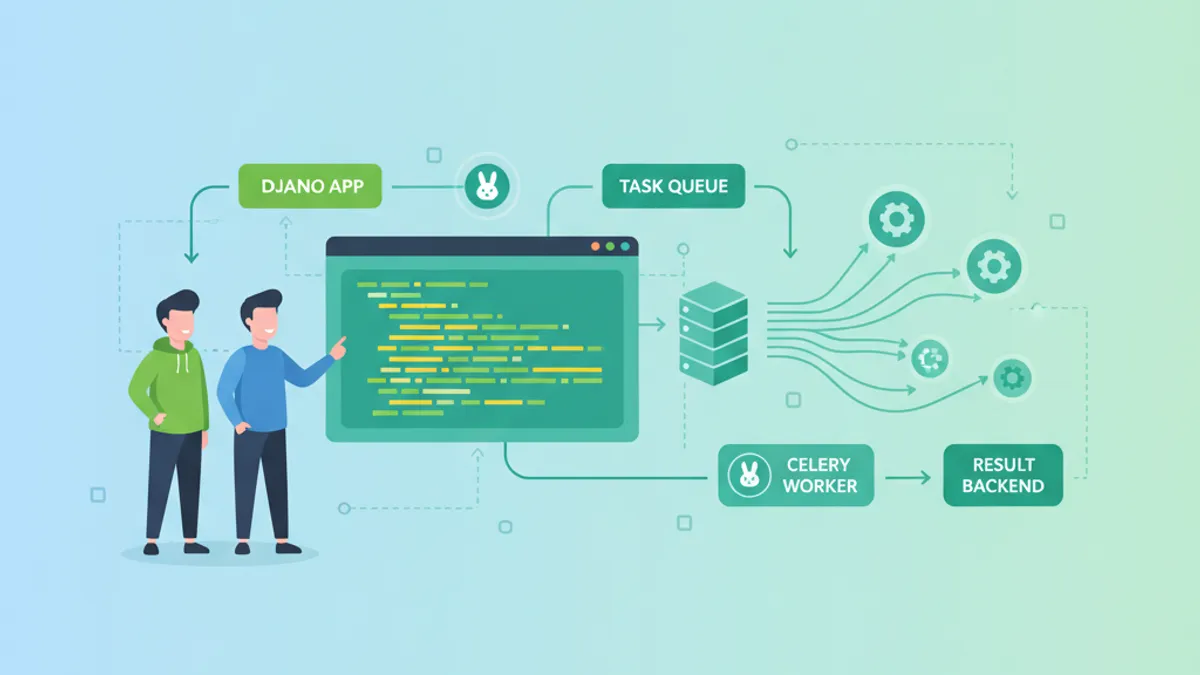
Django i Celery: Asynchroniczne Przetwarzanie Zadań oraz Pytania Rekrutacyjne 2026
Kompletny przewodnik po integracji Django z Celery: konfiguracja, routing zadań, Celery Beat, monitoring Flower, wdrożenie produkcyjne i pytania rekrutacyjne 2026.