Domande per colloqui Django e Python: Le Top 25 nel 2026
Le 25 domande piu comuni nei colloqui su Django e Python. ORM, view, middleware, DRF, signal e ottimizzazione con risposte dettagliate ed esempi di codice.

I colloqui tecnici su Django valutano la competenza con il framework web piu popolare di Python, la comprensione dell'ORM, dell'architettura MVT e la capacita di costruire API REST robuste. Questa guida copre le 25 domande piu frequenti, dai fondamentali di Django ai pattern avanzati del Django REST Framework.
Gli intervistatori apprezzano i candidati che sanno spiegare le scelte architetturali di Django. Comprendere perche il framework adotta determinate convenzioni (convention over configuration) fa una differenza reale durante i colloqui.
Fondamentali di Django
Domanda 1: Descrivere l'architettura MVT di Django
L'architettura Model-View-Template (MVT) e la variante Django del pattern MVC. Il framework gestisce automaticamente la parte del controller, semplificando lo sviluppo.
# models.py
# The Model represents data structure and business logic
from django.db import models

class Article(models.Model):
    title = models.CharField(max_length=200)
    content = models.TextField()
    published_at = models.DateTimeField(auto_now_add=True)
    author = models.ForeignKey(
        "auth.User",
        on_delete=models.CASCADE,  # Deletes articles when author is deleted
        related_name="articles"     # Reverse access: user.articles.all()
    )

    class Meta:
        ordering = ["-published_at"]  # Default ordering

    def __str__(self):
return self.title# views.py
# The View contains request processing logic
from django.shortcuts import render, get_object_or_404
def article_detail(request, pk):
# get_object_or_404 raises Http404 if the object doesn't exist
article = get_object_or_404(Article, pk=pk)
return render(request, "blog/article_detail.html", {"article": article})In MVT, Django funge da controller instradando gli URL alle view appropriate tramite urls.py. Il Template gestisce la presentazione HTML.
Domanda 2: Qual e la differenza tra un progetto Django e un'app?
Un progetto e la configurazione complessiva (impostazioni, URL root, WSGI/ASGI). Un'app e un modulo riutilizzabile con una singola responsabilita. Un progetto contiene piu app.
# Creating a project and an app
# django-admin startproject myproject
# python manage.py startapp blog

# settings.py
# Registering apps in the project
INSTALLED_APPS = [
    "django.contrib.admin",       # Admin interface
    "django.contrib.auth",        # Authentication
    "django.contrib.contenttypes",
    "django.contrib.sessions",
    "django.contrib.messages",
    "django.contrib.staticfiles",
    # Custom apps
    "blog.apps.BlogConfig",       # Blog app
    "users.apps.UsersConfig",     # Users app
]
Ogni app segue il principio di responsabilita unica e puo essere riutilizzata in diversi progetti.
Domanda 3: Spiegare il ciclo di vita delle richieste in Django
La richiesta attraversa diversi livelli prima di raggiungere la view. La comprensione di questo ciclo e essenziale per il debug e l'ottimizzazione.
# middleware.py
# Middlewares intercept every request/response
class RequestTimingMiddleware:
    """Middleware that measures processing time."""

    def __init__(self, get_response):
        self.get_response = get_response  # Reference to the next middleware

    def __call__(self, request):
        import time
        start = time.time()

        # Request phase: before the view
        response = self.get_response(request)

        # Response phase: after the view
        duration = time.time() - start
        response["X-Request-Duration"] = f"{duration:.3f}s"
        return response
Il ciclo completo: richiesta HTTP → WSGI/ASGI → middleware (process_request) → URL resolver → view → middleware (process_response) → risposta HTTP.
ORM e Database
Domanda 4: Come funzionano i QuerySet di Django e cos'e il Lazy Loading?
I QuerySet vengono valutati in modo lazy: nessuna query SQL viene eseguita fino a quando i dati non vengono effettivamente utilizzati.
# queryset_lazy.py
# Demonstrating QuerySet lazy loading

# No SQL query executed here
qs = Article.objects.filter(published=True)  # No query
qs = qs.exclude(title="Draft")               # Still none
qs = qs.order_by("-created_at")              # Still none

# The SQL query runs ONLY here
for article in qs:  # ONE combined SQL query
    print(article.title)

# Other evaluation triggers
list(qs)        # Converting to list
qs[0]           # Index access
len(qs)         # Counting (prefer qs.count())
bool(qs)        # Existence check (prefer qs.exists())
Questa valutazione lazy consente di concatenare filtri senza overhead, eseguendo una sola query ottimizzata.
Domanda 5: Cos'e il problema N+1 e come risolverlo?
Il problema N+1 si verifica quando una query principale genera N query aggiuntive per caricare le relazioni. E la causa piu comune di lentezza nelle applicazioni Django.
# n_plus_one.py
# N+1 problem and solutions

# ❌ PROBLEM: N+1 queries
# 1 query for articles + 1 query PER article for the author
articles = Article.objects.all()
for article in articles:
    print(article.author.username)  # SQL query on every iteration!

# ✅ SOLUTION 1: select_related (ForeignKey, OneToOne)
# Joins tables in ONE SQL query (JOIN)
articles = Article.objects.select_related("author").all()
for article in articles:
    print(article.author.username)  # No additional query

# ✅ SOLUTION 2: prefetch_related (ManyToMany, reverse FK)
# Executes 2 separate queries + Python assembly
articles = Article.objects.prefetch_related("tags").all()
for article in articles:
    print(article.tags.all())  # Data already cached

# ✅ SOLUTION 3: Custom Prefetch with filtering
from django.db.models import Prefetch

articles = Article.objects.prefetch_related(
    Prefetch(
        "comments",
        queryset=Comment.objects.filter(approved=True).select_related("user"),
        to_attr="approved_comments"  # Custom attribute
    )
)
Si utilizza select_related per le relazioni ForeignKey/OneToOne (SQL JOIN) e prefetch_related per le relazioni ManyToMany o inverse (query separate).
Domanda 6: Come creare un Custom Manager e quando utilizzarlo?
I Custom Manager incapsulano le query frequenti a livello di modello, rendendo il codice piu leggibile e riutilizzabile.
# managers.py
# Custom Managers and QuerySets

class PublishedQuerySet(models.QuerySet):
    """Reusable QuerySet for published articles."""

    def published(self):
        return self.filter(status="published", published_at__lte=timezone.now())

    def by_author(self, user):
        return self.filter(author=user)

    def popular(self):
        return self.annotate(
            comment_count=models.Count("comments")
        ).order_by("-comment_count")


class PublishedManager(models.Manager):
    """Manager that exposes only published articles."""

    def get_queryset(self):
        return PublishedQuerySet(self.model, using=self._db).published()


class Article(models.Model):
    # ...
    objects = models.Manager()          # Default manager (all articles)
    published = PublishedManager()      # Custom manager (published only)

    # Usage:
    # Article.objects.all()             → All articles
    # Article.published.all()           → Published articles only
    # Article.published.popular()       → Published articles sorted by popularity
I Custom Manager seguono il principio DRY e centralizzano la logica delle query.
Pronto a superare i tuoi colloqui su Django?
Pratica con i nostri simulatori interattivi, flashcards e test tecnici.
View e URL
Domanda 7: Quando utilizzare Class-Based Views rispetto alle Function-Based Views?
Le Function-Based Views (FBV) offrono semplicita e controllo esplicito. Le Class-Based Views (CBV) apportano riutilizzabilita e struttura attraverso l'ereditarieta.
# views_comparison.py
# FBV: Explicit, simple, easy to understand
from django.http import JsonResponse
from django.views.decorators.http import require_http_methods

@require_http_methods(["GET", "POST"])
def article_list(request):
    if request.method == "GET":
        articles = Article.published.all()
        return render(request, "articles/list.html", {"articles": articles})

    # POST: article creation
    form = ArticleForm(request.POST)
    if form.is_valid():
        form.save()
        return redirect("article-list")
return render(request, "articles/list.html", {"form": form})# views_cbv.py
# CBV: Reusable, extensible via mixins
from django.views.generic import ListView, CreateView
from django.contrib.auth.mixins import LoginRequiredMixin
class ArticleListView(LoginRequiredMixin, ListView):
model = Article
template_name = "articles/list.html"
context_object_name = "articles" # Variable name in the template
paginate_by = 20 # Automatic pagination
def get_queryset(self):
# Override to filter published articles
return Article.published.all()
class ArticleCreateView(LoginRequiredMixin, CreateView):
model = Article
form_class = ArticleForm
success_url = reverse_lazy("article-list")
def form_valid(self, form):
form.instance.author = self.request.user # Assign the author
return super().form_valid(form)Regola pratica: utilizzare le FBV per logica semplice o non standard, le CBV per operazioni CRUD standard.
Domanda 8: Come funzionano i middleware in Django?
I middleware sono hook che elaborano ogni richiesta/risposta. Ogni middleware puo intervenire in diverse fasi del ciclo di elaborazione.
# auth_middleware.py
# Custom authentication middleware
import jwt
from django.conf import settings
from django.http import JsonResponse

class JWTAuthenticationMiddleware:
    """Verifies JWT token on protected endpoints."""

    EXEMPT_PATHS = ["/api/auth/login", "/api/auth/register", "/health"]

    def __init__(self, get_response):
        self.get_response = get_response

    def __call__(self, request):
        # Skip exempt paths
        if any(request.path.startswith(p) for p in self.EXEMPT_PATHS):
            return self.get_response(request)

        # Extract and verify the token
        auth_header = request.headers.get("Authorization", "")
        if not auth_header.startswith("Bearer "):
            return JsonResponse({"error": "Missing token"}, status=401)

        try:
            token = auth_header.split(" ")[1]
            payload = jwt.decode(token, settings.SECRET_KEY, algorithms=["HS256"])
            request.user_id = payload["user_id"]  # Attach to request
        except jwt.ExpiredSignatureError:
            return JsonResponse({"error": "Token expired"}, status=401)
        except jwt.InvalidTokenError:
            return JsonResponse({"error": "Invalid token"}, status=401)

        return self.get_response(request)
L'ordine dei middleware in MIDDLEWARE e cruciale: vengono eseguiti dall'alto verso il basso per le richieste e dal basso verso l'alto per le risposte.
Django REST Framework
Domanda 9: Qual e la differenza tra Serializer e ModelSerializer?
Serializer definisce manualmente ogni campo, mentre ModelSerializer genera automaticamente i campi dal modello.
# serializers.py
from rest_framework import serializers

# Manual Serializer: full control over each field
class ArticleSerializer(serializers.Serializer):
    id = serializers.IntegerField(read_only=True)
    title = serializers.CharField(max_length=200)
    content = serializers.CharField()
    author_name = serializers.SerializerMethodField()

    def get_author_name(self, obj):
        return obj.author.get_full_name()

    def create(self, validated_data):
        return Article.objects.create(**validated_data)

    def update(self, instance, validated_data):
        instance.title = validated_data.get("title", instance.title)
        instance.content = validated_data.get("content", instance.content)
        instance.save()
        return instance


# ModelSerializer: automatic field generation
class ArticleModelSerializer(serializers.ModelSerializer):
    author_name = serializers.SerializerMethodField()
    comment_count = serializers.IntegerField(read_only=True)

    class Meta:
        model = Article
        fields = ["id", "title", "content", "author", "author_name",
                  "comment_count", "published_at"]
        read_only_fields = ["published_at"]

    def get_author_name(self, obj):
        return obj.author.get_full_name()
Si preferisce ModelSerializer per i casi standard e Serializer quando la rappresentazione differisce significativamente dal modello.
Domanda 10: Come implementare la paginazione in DRF?
DRF offre diverse strategie di paginazione configurabili globalmente o per singola view.
# settings.py
# Global pagination configuration
REST_FRAMEWORK = {
    "DEFAULT_PAGINATION_CLASS": "rest_framework.pagination.PageNumberPagination",
    "PAGE_SIZE": 20,
}

# pagination.py
# Custom pagination per view
from rest_framework.pagination import CursorPagination, LimitOffsetPagination

class ArticleCursorPagination(CursorPagination):
    """Cursor pagination: performant for large datasets."""
    page_size = 20
    ordering = "-published_at"  # Indexed field required
    cursor_query_param = "cursor"

class ArticleLimitOffsetPagination(LimitOffsetPagination):
    """Offset/limit pagination: flexible but less performant."""
    default_limit = 20
    max_limit = 100

# views.py
class ArticleViewSet(viewsets.ModelViewSet):
    queryset = Article.published.all()
    serializer_class = ArticleModelSerializer
    pagination_class = ArticleCursorPagination  # View-specific pagination
La paginazione basata su cursore e raccomandata per dataset di grandi dimensioni, poiche rimane performante indipendentemente dal numero di pagina, a differenza di OFFSET/LIMIT.
Domanda 11: Come proteggere un'API con i permessi DRF?
DRF fornisce un sistema di permessi modulare che combina autenticazione e autorizzazione granulare.
# permissions.py
from rest_framework.permissions import BasePermission, IsAuthenticated

class IsAuthorOrReadOnly(BasePermission):
    """Only the author can modify, everyone can read."""

    def has_object_permission(self, request, view, obj):
        # GET, HEAD, OPTIONS are always allowed
        if request.method in ("GET", "HEAD", "OPTIONS"):
            return True
        # Only the author can modify or delete
        return obj.author == request.user


class IsAdminOrManager(BasePermission):
    """Access restricted to admins and managers."""

    def has_permission(self, request, view):
        return (
            request.user.is_authenticated
            and request.user.role in ("admin", "manager")
        )


# views.py
from rest_framework.viewsets import ModelViewSet
from rest_framework.throttling import UserRateThrottle

class ArticleViewSet(ModelViewSet):
    permission_classes = [IsAuthenticated, IsAuthorOrReadOnly]
    throttle_classes = [UserRateThrottle]  # Rate limiting

    def get_permissions(self):
        # Dynamic permissions based on action
        if self.action == "destroy":
            return [IsAdminOrManager()]
        return super().get_permissions()
Si combinano permission_classes a livello di view e has_object_permission per il controllo fine per oggetto.
Signal e task asincroni
Domanda 12: Come funzionano i Django Signal e quando utilizzarli?
I Signal consentono di disaccoppiare i componenti reagendo a eventi del framework o dell'applicazione.
# signals.py
from django.db.models.signals import post_save, pre_delete
from django.dispatch import receiver
from django.core.mail import send_mail

@receiver(post_save, sender=Article)
def notify_on_publish(sender, instance, created, **kwargs):
    """Sends a notification when an article is published."""
    if not created and instance.status == "published":
        # Triggered only on publication (not creation)
        subscribers = instance.author.subscribers.values_list("email", flat=True)
        send_mail(
            subject=f"New article: {instance.title}",
            message=f"Check out the latest article by {instance.author.username}",
            from_email="noreply@example.com",
            recipient_list=list(subscribers),
        )

@receiver(pre_delete, sender=Article)
def cleanup_article_files(sender, instance, **kwargs):
    """Deletes associated files before article deletion."""
    if instance.cover_image:
        instance.cover_image.delete(save=False)  # Deletes the physical file
I Signal sono adatti per effetti collaterali leggeri (logging, invalidazione della cache). Per task pesanti, si preferisce Celery.
Domanda 13: Come integrare Celery con Django per i task asincroni?
Celery consente l'esecuzione di task in background, essenziale per operazioni di lunga durata come l'invio di email o l'elaborazione di file.
# celery_config.py
# Celery configuration in the Django project
import os
from celery import Celery

os.environ.setdefault("DJANGO_SETTINGS_MODULE", "myproject.settings")

app = Celery("myproject")
app.config_from_object("django.conf:settings", namespace="CELERY")
app.autodiscover_tasks()  # Discovers tasks.py in each app

# tasks.py
from celery import shared_task
from django.core.mail import send_mass_mail

@shared_task(bind=True, max_retries=3, default_retry_delay=60)
def send_newsletter(self, article_id):
    """Sends newsletter asynchronously."""
    try:
        article = Article.objects.get(id=article_id)
        subscribers = User.objects.filter(newsletter=True)

        messages = [
            (f"New: {article.title}", article.content[:200],
             "noreply@example.com", [sub.email])
            for sub in subscribers
        ]
        send_mass_mail(messages, fail_silently=False)
    except Article.DoesNotExist:
        pass  # Article was deleted in the meantime
    except Exception as exc:
        self.retry(exc=exc)  # Automatic retry on error

# Calling from a view
# send_newsletter.delay(article.id)  # Async execution
# send_newsletter.apply_async(args=[article.id], countdown=300)  # 5-min delay
Celery e indispensabile in produzione per qualsiasi operazione che non deve bloccare la risposta HTTP.
Sicurezza e autenticazione
Domanda 14: Come protegge Django dagli attacchi CSRF?
Django include una protezione CSRF integrata tramite un middleware che verifica un token univoco ad ogni richiesta POST.
# CSRF protection in forms
# The {% csrf_token %} template tag generates a hidden field

# For APIs (DRF), CSRF is often disabled in favor of tokens
# settings.py
REST_FRAMEWORK = {
    "DEFAULT_AUTHENTICATION_CLASSES": [
        "rest_framework.authentication.SessionAuthentication",  # Includes CSRF
        "rest_framework.authentication.TokenAuthentication",     # No CSRF
    ],
}

# For AJAX views with session auth
# The csrftoken cookie must be sent in the X-CSRFToken header# csrf_exemption.py
# Exempting a specific view (use with caution)
from django.views.decorators.csrf import csrf_exempt, ensure_csrf_cookie
@ensure_csrf_cookie
def get_csrf_token(request):
"""Endpoint that forces sending the CSRF cookie to the client."""
return JsonResponse({"detail": "CSRF cookie set"})
@csrf_exempt # ⚠️ Use only for external webhooks
def stripe_webhook(request):
"""Stripe webhook - authenticated by signature, not CSRF."""
payload = request.body
sig_header = request.headers.get("Stripe-Signature")
# Verified by Stripe signature insteadIl CSRF non deve mai essere disabilitato globalmente. csrf_exempt va utilizzato solo su endpoint autenticati con altri mezzi (webhook, token API).
Domanda 15: Come implementare l'autenticazione personalizzata in Django?
Django consente di sostituire il modello User predefinito e di personalizzare il backend di autenticazione.
# models.py
from django.contrib.auth.models import AbstractBaseUser, BaseUserManager, PermissionsMixin

class CustomUserManager(BaseUserManager):
    """Manager for the custom User model."""

    def create_user(self, email, password=None, **extra_fields):
        if not email:
            raise ValueError("Email is required")
        email = self.normalize_email(email)  # Normalizes the domain
        user = self.model(email=email, **extra_fields)
        user.set_password(password)  # Hashes the password
        user.save(using=self._db)
        return user

    def create_superuser(self, email, password=None, **extra_fields):
        extra_fields.setdefault("is_staff", True)
        extra_fields.setdefault("is_superuser", True)
        return self.create_user(email, password, **extra_fields)


class CustomUser(AbstractBaseUser, PermissionsMixin):
    email = models.EmailField(unique=True)          # Login by email
    username = models.CharField(max_length=30, blank=True)
    is_active = models.BooleanField(default=True)
    is_staff = models.BooleanField(default=False)
    date_joined = models.DateTimeField(auto_now_add=True)

    objects = CustomUserManager()

    USERNAME_FIELD = "email"      # Field used for login
    REQUIRED_FIELDS = []          # Fields required in addition to USERNAME_FIELD

# settings.py
AUTH_USER_MODEL = "users.CustomUser"  # Before the first migration!
AUTH_USER_MODEL deve essere definito all'inizio del progetto. Modificarlo dopo le prime migrazioni e complesso e rischioso.
Ottimizzazione e performance
Domanda 16: Come ottimizzare le query dell'ORM Django?
L'ottimizzazione delle query e fondamentale per le performance. Diverse tecniche riducono il numero e il costo delle query SQL.
# query_optimization.py
from django.db.models import F, Q, Count, Avg, Prefetch

# 1. Only/Defer: load only needed fields
articles = Article.objects.only("title", "published_at")  # SELECT title, published_at
heavy_articles = Article.objects.defer("content")          # Everything EXCEPT content

# 2. SQL-level aggregations (not Python)
stats = Article.objects.aggregate(
    total=Count("id"),
    avg_views=Avg("view_count"),
)

# 3. F() expressions: SQL-level operations
Article.objects.filter(published=True).update(
    view_count=F("view_count") + 1  # Atomic SQL increment
)

# 4. Q() objects: complex queries
results = Article.objects.filter(
    Q(title__icontains="django") | Q(tags__name="python"),
    ~Q(status="draft"),  # NOT draft
    published_at__year=2026
)

# 5. Bulk operations: reduce INSERT/UPDATE queries
articles = [Article(title=f"Article {i}") for i in range(100)]
Article.objects.bulk_create(articles, batch_size=50)  # 2 queries instead of 100

Article.objects.filter(status="draft").update(status="archived")  # 1 query
Si consiglia di utilizzare django-debug-toolbar in sviluppo per identificare query lente e problemi N+1.
Domanda 17: Come implementare il caching in Django?
Django fornisce un framework di caching multilivello: per view, per frammento di template o per dati arbitrari.
# settings.py
CACHES = {
    "default": {
        "BACKEND": "django.core.cache.backends.redis.RedisCache",
        "LOCATION": "redis://127.0.0.1:6379/1",
    }
}

# cache_strategies.py
from django.core.cache import cache
from django.views.decorators.cache import cache_page
from django.utils.decorators import method_decorator

# Per-view cache: caches the entire HTTP response
@cache_page(60 * 15)  # 15 minutes
def article_list(request):
    return render(request, "articles/list.html", {"articles": Article.published.all()})

# Data cache: granular control
def get_popular_articles():
    cache_key = "popular_articles_v1"
    articles = cache.get(cache_key)

    if articles is None:
        articles = list(
            Article.published.popular()[:10].values("id", "title", "view_count")
        )
        cache.set(cache_key, articles, timeout=60 * 30)  # 30 min

    return articles

# Cache invalidation
def invalidate_article_cache(article_id):
    cache.delete(f"article_{article_id}")
    cache.delete("popular_articles_v1")
    cache.delete_pattern("article_list_*")  # With django-redis
Redis e raccomandato come backend di cache in produzione per la persistenza e le funzionalita avanzate (pattern, TTL).
Pronto a superare i tuoi colloqui su Django?
Pratica con i nostri simulatori interattivi, flashcards e test tecnici.
Migrazioni e gestione del database
Domanda 18: Come gestire migrazioni complesse in Django?
Le migrazioni Django gestiscono l'evoluzione dello schema del database in modo versionato e riproducibile.
# 0005_migrate_data.py
# Custom data migration
from django.db import migrations

def migrate_user_roles(apps, schema_editor):
    """Converts is_admin booleans to text roles."""
    User = apps.get_model("users", "CustomUser")
    # Use apps.get_model() to access the historical model
    User.objects.filter(is_admin=True).update(role="admin")
    User.objects.filter(is_admin=False, is_staff=True).update(role="manager")
    User.objects.filter(is_admin=False, is_staff=False).update(role="user")

def reverse_migrate(apps, schema_editor):
    """Reverse migration for rollback."""
    User = apps.get_model("users", "CustomUser")
    User.objects.filter(role="admin").update(is_admin=True)

class Migration(migrations.Migration):
    dependencies = [
        ("users", "0004_add_role_field"),
    ]

    operations = [
        migrations.RunPython(migrate_user_roles, reverse_migrate),
    ]
Una funzione reverse deve sempre essere fornita per consentire il rollback. Le migrazioni vanno testate su una copia del database di produzione prima del deployment.
Domanda 19: Come creare indici personalizzati per l'ottimizzazione?
Gli indici accelerano le query frequenti ma aumentano i costi di scrittura. Una selezione accurata e essenziale.
# models.py
class Article(models.Model):
    title = models.CharField(max_length=200)
    slug = models.SlugField(unique=True)
    status = models.CharField(max_length=20, db_index=True)  # Simple index
    published_at = models.DateTimeField(null=True)
    author = models.ForeignKey("auth.User", on_delete=models.CASCADE)

    class Meta:
        indexes = [
            # Composite index for frequent queries
            models.Index(fields=["status", "-published_at"], name="idx_status_date"),
            # Partial index: only published articles
            models.Index(
                fields=["published_at"],
                condition=models.Q(status="published"),
                name="idx_published_articles"
            ),
            # GIN index for full-text search (PostgreSQL)
            GinIndex(fields=["search_vector"], name="idx_search"),
        ]
Gli indici composti seguono l'ordine delle colonne: il campo piu selettivo deve essere posizionato per primo.
Testing e qualita
Domanda 20: Come strutturare i test in un progetto Django?
Django fornisce un framework di test robusto basato su unittest, potenziato da pytest-django per maggiore flessibilita.
# tests/test_views.py
from django.test import TestCase, Client
from django.urls import reverse
from rest_framework.test import APITestCase, APIClient

class ArticleViewTests(TestCase):
    """View tests with Django's test client."""

    def setUp(self):
        self.client = Client()
        self.user = CustomUser.objects.create_user(
            email="test@example.com", password="testpass123"
        )
        self.article = Article.objects.create(
            title="Test Article",
            content="Content here",
            author=self.user,
            status="published"
        )

    def test_article_list_returns_200(self):
        response = self.client.get(reverse("article-list"))
        self.assertEqual(response.status_code, 200)
        self.assertContains(response, "Test Article")

    def test_create_article_requires_auth(self):
        response = self.client.post(reverse("article-create"), {"title": "New"})
        self.assertEqual(response.status_code, 302)  # Redirects to login


class ArticleAPITests(APITestCase):
    """REST API tests with DRF."""

    def setUp(self):
        self.user = CustomUser.objects.create_user(
            email="api@example.com", password="testpass123"
        )
        self.client = APIClient()
        self.client.force_authenticate(user=self.user)

    def test_create_article_via_api(self):
        data = {"title": "API Article", "content": "Created via API"}
        response = self.client.post("/api/articles/", data, format="json")
        self.assertEqual(response.status_code, 201)
        self.assertEqual(Article.objects.count(), 1)
I test vanno separati in file per dominio: test_models.py, test_views.py, test_serializers.py, test_services.py.
Domanda 21: Come utilizzare fixture e factory per i test?
Le factory (con factory_boy) sono preferite rispetto alle fixture JSON per flessibilita e manutenibilita dei dati di test.
# factories.py
import factory
from factory.django import DjangoModelFactory

class UserFactory(DjangoModelFactory):
    class Meta:
        model = CustomUser

    email = factory.Sequence(lambda n: f"user{n}@example.com")
    username = factory.Faker("user_name")
    is_active = True

class ArticleFactory(DjangoModelFactory):
    class Meta:
        model = Article

    title = factory.Faker("sentence", nb_words=5)
    content = factory.Faker("paragraphs", nb=3)
    author = factory.SubFactory(UserFactory)  # Creates a user automatically
    status = "published"

    class Params:
        draft = factory.Trait(status="draft", published_at=None)

# tests.py
def test_published_articles_count(self):
    ArticleFactory.create_batch(5)              # 5 published articles
    ArticleFactory.create_batch(3, draft=True)  # 3 drafts
    self.assertEqual(Article.published.count(), 5)
Le factory garantiscono dati di test consistenti ed evitano dipendenze tra i test.
Pattern avanzati
Domanda 22: Come implementare i WebSocket con Django Channels?
Django Channels estende Django oltre l'HTTP per supportare WebSocket, protocolli in tempo reale e task in background.
# consumers.py
import json
from channels.generic.websocket import AsyncWebsocketConsumer

class ChatConsumer(AsyncWebsocketConsumer):
    """WebSocket consumer for real-time chat."""

    async def connect(self):
        self.room_name = self.scope["url_route"]["kwargs"]["room_name"]
        self.room_group = f"chat_{self.room_name}"

        # Join the room group
        await self.channel_layer.group_add(self.room_group, self.channel_name)
        await self.accept()

    async def disconnect(self, close_code):
        # Leave the group
        await self.channel_layer.group_discard(self.room_group, self.channel_name)

    async def receive(self, text_data):
        data = json.loads(text_data)
        # Broadcast message to the entire group
        await self.channel_layer.group_send(
            self.room_group,
            {"type": "chat.message", "message": data["message"],
             "username": self.scope["user"].username}
        )

    async def chat_message(self, event):
        # Send message to the WebSocket client
        await self.send(text_data=json.dumps({
            "message": event["message"],
            "username": event["username"],
        }))
Django Channels utilizza ASGI (invece di WSGI) e richiede un server compatibile come Daphne o Uvicorn.
Domanda 23: Spiegare il pattern Repository e Service Layer in Django
Il pattern Service Layer separa la logica di business dalle view e dall'ORM, facilitando il testing e la manutenzione.
# services/article_service.py
from django.db import transaction

class ArticleService:
    """Service encapsulating article business logic."""

    @staticmethod
    def publish_article(article_id: int, user) -> Article:
        """Publishes an article with all validations."""
        article = Article.objects.select_for_update().get(id=article_id)

        if article.author != user:
            raise PermissionError("Only the author can publish this article")
        if article.status == "published":
            raise ValueError("Article is already published")

        article.status = "published"
        article.published_at = timezone.now()
        article.save(update_fields=["status", "published_at"])

        # Side effects: notification, cache, analytics
        send_newsletter.delay(article.id)
        cache.delete("popular_articles_v1")

        return article

    @staticmethod
    @transaction.atomic
    def bulk_archive(article_ids: list[int], user) -> int:
        """Archives multiple articles in a transaction."""
        updated = Article.objects.filter(
            id__in=article_ids,
            author=user,
            status="published"
        ).update(status="archived", archived_at=timezone.now())
        return updated
Il Service Layer e il punto di ingresso per tutta la logica di business. Le view e i serializer delegano al service, mai direttamente all'ORM.
Domanda 24: Come gestire le variabili d'ambiente e la configurazione multi-ambiente?
La gestione della configurazione segue i principi della 12-Factor App: separazione rigorosa tra configurazione e codice.
# settings/base.py
# Shared configuration across all environments
import os
from pathlib import Path
from dotenv import load_dotenv

load_dotenv()  # Loads the .env file

BASE_DIR = Path(__file__).resolve().parent.parent.parent

SECRET_KEY = os.environ["DJANGO_SECRET_KEY"]  # Required, no default value
DEBUG = os.environ.get("DEBUG", "False").lower() == "true"
ALLOWED_HOSTS = os.environ.get("ALLOWED_HOSTS", "").split(",")

DATABASES = {
    "default": {
        "ENGINE": "django.db.backends.postgresql",
        "NAME": os.environ.get("DB_NAME", "myapp"),
        "USER": os.environ.get("DB_USER", "postgres"),
        "HOST": os.environ.get("DB_HOST", "localhost"),
        "PORT": os.environ.get("DB_PORT", "5432"),
    }
}

# settings/production.py
from .base import *

DEBUG = False
SECURE_SSL_REDIRECT = True
SESSION_COOKIE_SECURE = True
CSRF_COOKIE_SECURE = True
SECURE_HSTS_SECONDS = 31536000  # 1 year
I segreti non devono mai essere committati nel codice. Vanno utilizzate variabili d'ambiente o un secrets manager (Vault, AWS Secrets Manager).
Domanda 25: Come deployare un'applicazione Django in produzione?
Il deployment in produzione richiede una checklist completa che copre sicurezza, performance e affidabilita.
# Django deployment checklist

# 1. Built-in verification command
# python manage.py check --deploy

# 2. WSGI/ASGI configuration for production
# gunicorn.conf.py
import multiprocessing

bind = "0.0.0.0:8000"
workers = multiprocessing.cpu_count() * 2 + 1  # Recommended formula
worker_class = "gthread"           # Threaded workers
threads = 4
max_requests = 1000                # Recycle workers to avoid memory leaks
max_requests_jitter = 50
timeout = 30
accesslog = "-"                    # Logs to stdout
errorlog = "-"# docker-compose.yml (typical configuration)
# Services: web (gunicorn), db (postgres), redis (cache/celery), worker (celery)
# 3. Static files
# python manage.py collectstatic --noinput
# Serve via nginx or CDN (WhiteNoise for simple cases)
# 4. Nginx configuration
# - Proxy to gunicorn on port 8000
# - Serve /static/ and /media/ directly
# - Enable gzip, HTTP/2, and security headersEseguire python manage.py check --deploy prima di ogni rilascio in produzione. Questo comando verifica le impostazioni di sicurezza essenziali.
Conclusione
Queste 25 domande coprono gli aspetti essenziali dei colloqui su Django e Python, dai fondamentali dell'architettura MVT ai pattern di deployment in produzione.
Checklist di preparazione:
- ✅ Architettura MVT e ciclo di vita delle richieste
- ✅ ORM: QuerySet, N+1, select_related, prefetch_related
- ✅ Django REST Framework: serializer, paginazione, permessi
- ✅ Sicurezza: CSRF, autenticazione, permessi
- ✅ Performance: ottimizzazione ORM, caching, indici
- ✅ Testing: TestCase, APITestCase, factory
- ✅ Pattern avanzati: Channels, Service Layer, deployment
Ogni domanda merita un approfondimento con la documentazione ufficiale di Django. Gli intervistatori apprezzano i candidati che comprendono le sfumature del framework e sanno giustificare le proprie decisioni tecniche.
Inizia a praticare!
Metti alla prova le tue conoscenze con i nostri simulatori di colloquio e test tecnici.
Tag
Condividi
Articoli correlati
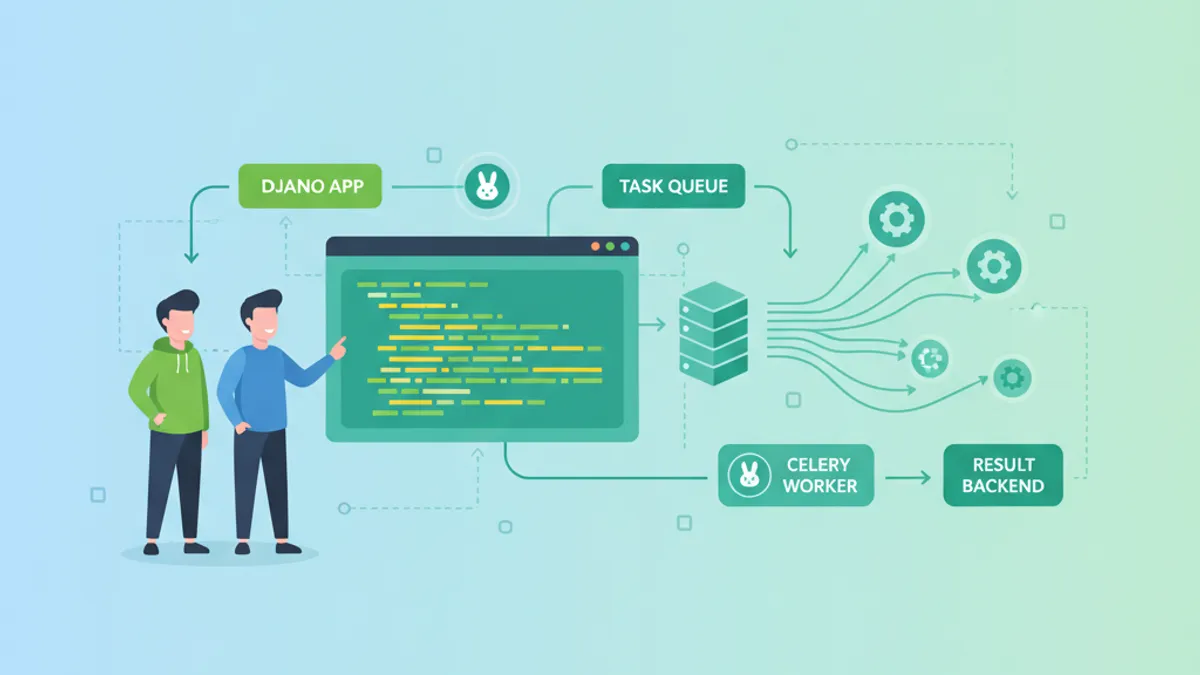
Django e Celery: Elaborazione Asincrona dei Task e Domande da Colloquio 2026
Guida completa a Django e Celery: configurazione, task asincroni, code, Celery Beat, monitoraggio e domande frequenti nei colloqui tecnici 2026.
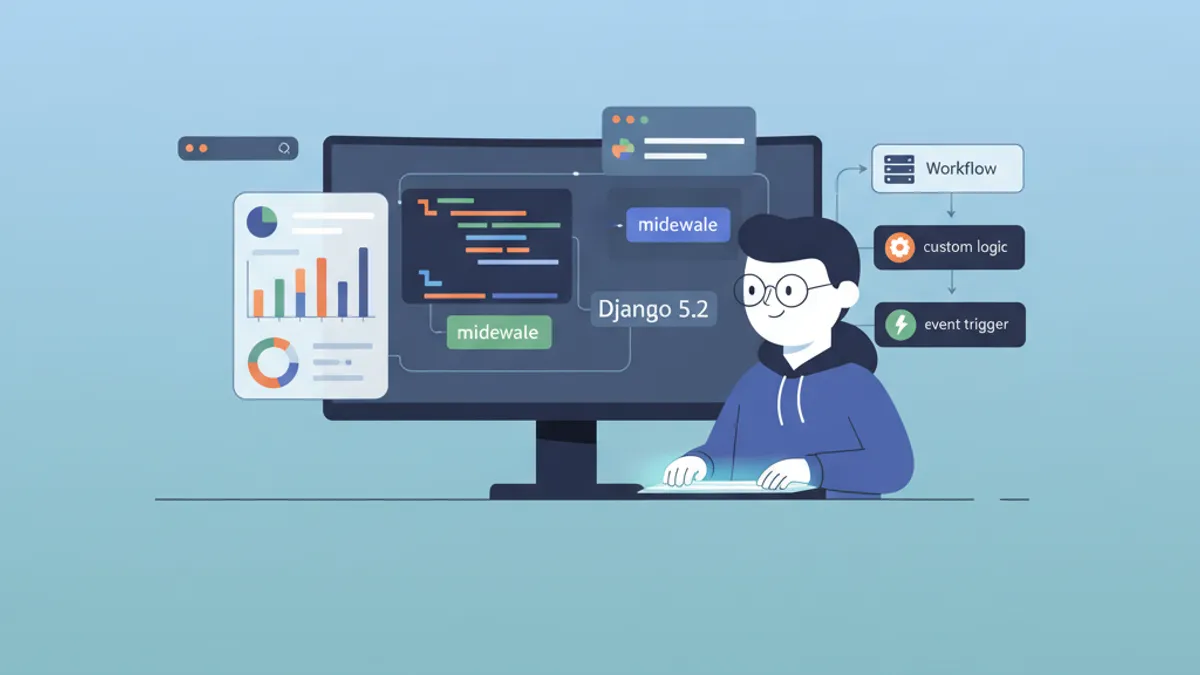
Django 5.2: Custom Middleware e Gestione dei Segnali per Colloqui Tecnici
Padroneggiare middleware e segnali in Django 5.2: pipeline middleware, middleware asincrono, pre_save/post_save signals e pattern comuni nei colloqui tecnici.

Django 5: Creare una REST API con Django REST Framework
Guida completa alla creazione di una REST API professionale con Django 5 e DRF. Serializer, ViewSet, autenticazione JWT e best practice spiegate nel dettaglio.