Kubernetes: Die erste Anwendung deployen
Praktische Anleitung zum Deployen einer Anwendung auf Kubernetes. Von der minikube-Installation bis zu Deployments, Services und ConfigMaps mit konkreten Beispielen.
Kubernetes (K8s) hat sich zum De-facto-Standard für die Container-Orchestrierung entwickelt. Ursprünglich von Google entwickelt und heute von der CNCF betreut, automatisiert Kubernetes das Deployment, die Skalierung und die Verwaltung von containerisierten Anwendungen. Diese Anleitung führt durch die Einrichtung eines lokalen Clusters und das Deployment einer ersten Anwendung.
Grundkenntnisse in Docker werden empfohlen, bevor Kubernetes vertieft wird. Container sind die fundamentalen Bausteine, die Kubernetes orchestriert. Die vorherige Lektüre des Docker-Leitfadens erleichtert das Verständnis der hier vorgestellten Konzepte erheblich.
Die Kubernetes-Architektur verstehen
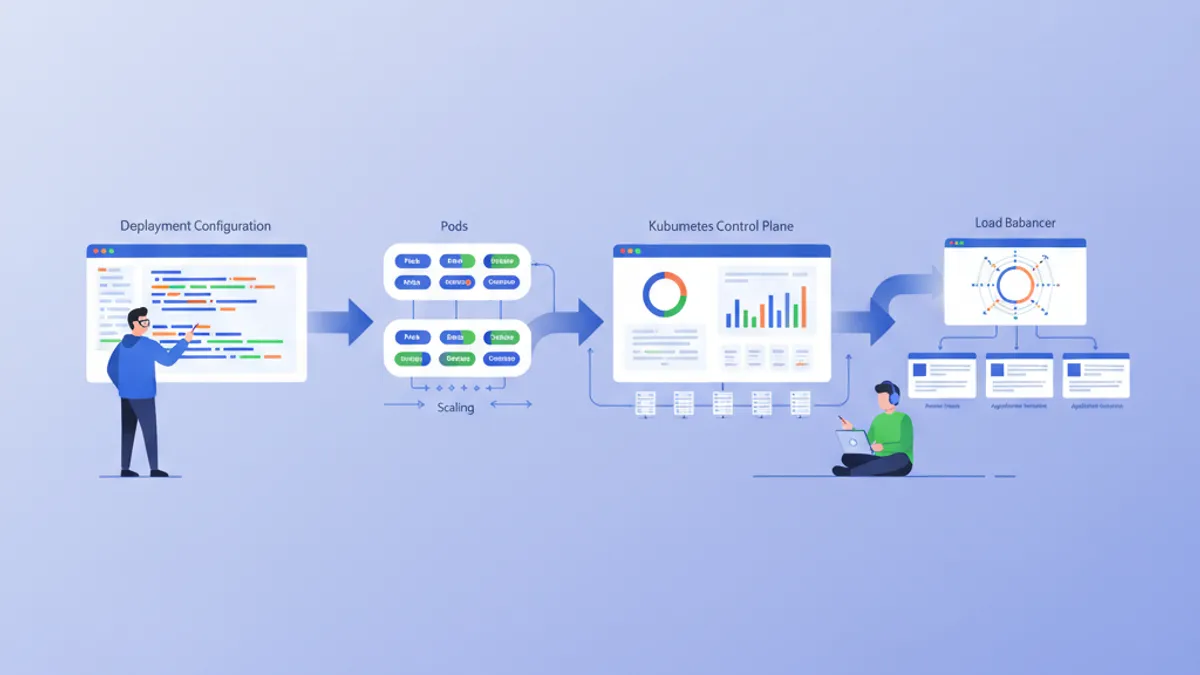
Kubernetes basiert auf einer Master-Worker-Architektur. Die Control Plane trifft die globalen Entscheidungen über das Cluster, während die Nodes die Workloads ausführen.
# Simplified Kubernetes Architecture

┌─────────────────────────────────────────────────────────────┐
│                      CONTROL PLANE                          │
│  ┌─────────────┐  ┌─────────────┐  ┌─────────────────────┐ │
│  │ API Server  │  │ Scheduler   │  │ Controller Manager  │ │
│  └─────────────┘  └─────────────┘  └─────────────────────┘ │
│  ┌─────────────────────────────────────────────────────────┐│
│  │                        etcd                             ││
│  └─────────────────────────────────────────────────────────┘│
└─────────────────────────────────────────────────────────────┘
                              │
         ┌────────────────────┼────────────────────┐
         ▼                    ▼                    ▼
┌─────────────────┐  ┌─────────────────┐  ┌─────────────────┐
│     NODE 1      │  │     NODE 2      │  │     NODE 3      │
│  ┌───────────┐  │  │  ┌───────────┐  │  │  ┌───────────┐  │
│  │  kubelet  │  │  │  │  kubelet  │  │  │  │  kubelet  │  │
│  ├───────────┤  │  │  ├───────────┤  │  │  ├───────────┤  │
│  │ kube-proxy│  │  │  │ kube-proxy│  │  │  │ kube-proxy│  │
│  ├───────────┤  │  │  ├───────────┤  │  │  ├───────────┤  │
│  │   Pods    │  │  │  │   Pods    │  │  │  │   Pods    │  │
│  └───────────┘  │  │  └───────────┘  │  │  └───────────┘  │
└─────────────────┘  └─────────────────┘  └─────────────────┘
Der API Server ist der Eintrittspunkt für alle Befehle. etcd speichert den Cluster-Zustand. Der Scheduler weist Pods den Nodes zu. Die Controllers halten den gewünschten Systemzustand aufrecht.
Die lokale Umgebung einrichten
Für Experimente mit Kubernetes auf dem lokalen Rechner stehen mehrere Optionen zur Verfügung: minikube, kind, k3d oder Docker Desktop. Minikube bleibt die populärste Lösung zum Lernen.
# terminal
# Install kubectl (Kubernetes client)
curl -LO "https://dl.k8s.io/release/$(curl -L -s https://dl.k8s.io/release/stable.txt)/bin/linux/amd64/kubectl"
chmod +x kubectl
sudo mv kubectl /usr/local/bin/

# Verify installation
kubectl version --client
# Client Version: v1.31.0

# Install minikube
curl -LO https://storage.googleapis.com/minikube/releases/latest/minikube-linux-amd64
sudo install minikube-linux-amd64 /usr/local/bin/minikube

# Start the local cluster
minikube start --driver=docker --cpus=2 --memory=4096

# Check status
minikube status
# minikube: Running
# cluster: Running
# kubectl: Configured
Minikube erstellt ein Kubernetes-Cluster mit einem einzigen Node innerhalb einer virtuellen Maschine oder eines Docker-Containers. Die zugewiesenen Ressourcen (CPU, Arbeitsspeicher) lassen sich je nach Bedarf anpassen.
# terminal
# Access the Kubernetes dashboard (web interface)
minikube dashboard

# Check cluster nodes
kubectl get nodes
# NAME       STATUS   ROLES           AGE   VERSION
# minikube   Ready    control-plane   5m    v1.31.0

# Detailed cluster information
kubectl cluster-infoKind (Kubernetes in Docker) startet schneller und eignet sich besser für CI/CD-Tests. K3d nutzt k3s, eine schlanke Kubernetes-Distribution. Docker Desktop integriert Kubernetes direkt, verbraucht jedoch mehr Ressourcen.
Pods: die grundlegende Einheit
Ein Pod ist die kleinste deploybare Einheit in Kubernetes. Ein Pod kapselt einen oder mehrere Container, die sich dasselbe Netzwerk und denselben Speicher teilen.
# pod-simple.yaml
apiVersion: v1
kind: Pod
metadata:
  # Unique Pod name within the namespace
  name: nginx-pod
  # Labels for organization and selection
  labels:
    app: nginx
    environment: development
spec:
  containers:
    # Main container definition
    - name: nginx
      # Docker image to use
      image: nginx:1.25-alpine
      # Ports exposed by the container
      ports:
        - containerPort: 80
      # Container resource allocation
      resources:
        requests:
          memory: "64Mi"
          cpu: "100m"
        limits:
          memory: "128Mi"
          cpu: "200m"
Dieses YAML-Manifest deklariert einen Pod mit einem einzigen nginx-Container. Labels ermöglichen die Identifizierung und Auswahl von Pods. Ressourcen definieren Mindestgarantien (requests) und Maximalgrenzen (limits).
# terminal
# Create the Pod
kubectl apply -f pod-simple.yaml
# pod/nginx-pod created

# List Pods
kubectl get pods
# NAME        READY   STATUS    RESTARTS   AGE
# nginx-pod   1/1     Running   0          30s

# Full Pod details
kubectl describe pod nginx-pod

# Container logs
kubectl logs nginx-pod

# Execute a command inside the Pod
kubectl exec -it nginx-pod -- /bin/sh

# Delete the Pod
kubectl delete pod nginx-pod
Pods sind von Natur aus flüchtig. Bei einem Absturz oder einer Löschung erstellt Kubernetes sie nicht automatisch neu. Deployments lösen diese Einschränkung.
Deployments: deklarative Verwaltung
Ein Deployment definiert den gewünschten Zustand für eine Gruppe identischer Pods. Kubernetes hält diesen Zustand automatisch aufrecht, indem es Pods nach Bedarf erstellt, aktualisiert oder löscht.
# deployment.yaml
apiVersion: apps/v1
kind: Deployment
metadata:
  # Deployment name
  name: webapp-deployment
  labels:
    app: webapp
spec:
  # Desired number of replicas
  replicas: 3
  # Selector to identify managed Pods
  selector:
    matchLabels:
      app: webapp
  # Template for Pod creation
  template:
    metadata:
      labels:
        app: webapp
    spec:
      containers:
        - name: webapp
          image: nginx:1.25-alpine
          ports:
            - containerPort: 80
          resources:
            requests:
              memory: "64Mi"
              cpu: "100m"
            limits:
              memory: "128Mi"
              cpu: "200m"
          # Liveness probe: restarts container on failure
          livenessProbe:
            httpGet:
              path: /
              port: 80
            initialDelaySeconds: 10
            periodSeconds: 10
          # Readiness probe: removes Pod from Service on failure
          readinessProbe:
            httpGet:
              path: /
              port: 80
            initialDelaySeconds: 5
            periodSeconds: 5
Das Deployment erstellt ein ReplicaSet, das 3 identische Pods aufrechterhält. Die Probes prüfen den Zustand der Container und ermöglichen es Kubernetes, automatisch auf Probleme zu reagieren.
# terminal
# Create the Deployment
kubectl apply -f deployment.yaml
# deployment.apps/webapp-deployment created

# Verify the Deployment
kubectl get deployments
# NAME                READY   UP-TO-DATE   AVAILABLE   AGE
# webapp-deployment   3/3     3            3           1m

# List Pods created by the Deployment
kubectl get pods -l app=webapp
# NAME                                READY   STATUS    RESTARTS   AGE
# webapp-deployment-7d9f8b6c4-abc12   1/1     Running   0          1m
# webapp-deployment-7d9f8b6c4-def34   1/1     Running   0          1m
# webapp-deployment-7d9f8b6c4-ghi56   1/1     Running   0          1m

# Manual scaling
kubectl scale deployment webapp-deployment --replicas=5

# Deployment history
kubectl rollout history deployment webapp-deployment
Das Löschen eines Pods löst automatisch die Erstellung eines neuen Pods aus, um die gewünschte Anzahl an Replicas aufrechtzuerhalten.
Bereit für deine DevOps-Interviews?
Übe mit unseren interaktiven Simulatoren, Flashcards und technischen Tests.
Services: Netzwerk-Exposition
Pods besitzen flüchtige IP-Adressen. Services bieten eine stabile Adresse, um auf eine Gruppe von Pods zuzugreifen, mit integriertem Load Balancing.
# service.yaml
apiVersion: v1
kind: Service
metadata:
  name: webapp-service
spec:
  # Service type: ClusterIP (internal), NodePort, LoadBalancer
  type: ClusterIP
  # Selector to identify target Pods
  selector:
    app: webapp
  ports:
    # Port exposed by the Service
    - port: 80
      # Target container port
      targetPort: 80
      # Protocol (TCP by default)
      protocol: TCP
Dieser ClusterIP-Service ist nur innerhalb des Clusters erreichbar. Anfragen an webapp-service:80 werden auf die Pods mit dem Label app: webapp verteilt.
# terminal
# Create the Service
kubectl apply -f service.yaml
# service/webapp-service created

# List Services
kubectl get services
# NAME             TYPE        CLUSTER-IP      EXTERNAL-IP   PORT(S)   AGE
# webapp-service   ClusterIP   10.96.123.456   <none>        80/TCP    30s

# Test from a temporary Pod
kubectl run curl-test --rm -it --image=curlimages/curl -- curl webapp-service

# Detailed Service description
kubectl describe service webapp-service
Um die Anwendung außerhalb des Clusters bereitzustellen, ist ein NodePort- oder LoadBalancer-Typ erforderlich.
# service-nodeport.yaml
apiVersion: v1
kind: Service
metadata:
  name: webapp-nodeport
spec:
  type: NodePort
  selector:
    app: webapp
  ports:
    - port: 80
      targetPort: 80
      # Port on each Node (30000-32767)
      nodePort: 30080
Mit minikube öffnet der Befehl minikube service webapp-nodeport automatisch den Browser auf die richtige URL.
ConfigMaps: ausgelagerte Konfiguration
ConfigMaps trennen die Konfiguration vom Code. Werte werden als Umgebungsvariablen injiziert oder als Dateien eingehängt.
# configmap.yaml
apiVersion: v1
kind: ConfigMap
metadata:
  name: webapp-config
data:
  # Simple key-value pairs
  APP_ENV: "production"
  LOG_LEVEL: "info"
  MAX_CONNECTIONS: "100"
  # Multiline configuration (complete file)
  nginx.conf: |
    server {
        listen 80;
        server_name localhost;

        location / {
            root /usr/share/nginx/html;
            index index.html;
        }

        location /health {
            return 200 'OK';
            add_header Content-Type text/plain;
        }
    }
ConfigMaps speichern nicht sensible Daten. Für Geheimnisse (Passwörter, Tokens) sind Kubernetes Secrets besser geeignet.
# deployment-with-config.yaml
apiVersion: apps/v1
kind: Deployment
metadata:
  name: webapp-configured
spec:
  replicas: 2
  selector:
    matchLabels:
      app: webapp-configured
  template:
    metadata:
      labels:
        app: webapp-configured
    spec:
      containers:
        - name: webapp
          image: nginx:1.25-alpine
          ports:
            - containerPort: 80
          # Inject environment variables
          envFrom:
            - configMapRef:
                name: webapp-config
          # Or individual variables
          env:
            - name: SPECIFIC_VAR
              valueFrom:
                configMapKeyRef:
                  name: webapp-config
                  key: LOG_LEVEL
          # Mount configuration file
          volumeMounts:
            - name: nginx-config
              mountPath: /etc/nginx/conf.d/default.conf
              subPath: nginx.conf
      volumes:
        - name: nginx-config
          configMap:
            name: webapp-config
Diese Konfiguration injiziert Umgebungsvariablen und hängt die Datei nginx.conf in den Container ein.
# terminal
# Apply resources
kubectl apply -f configmap.yaml
kubectl apply -f deployment-with-config.yaml

# Verify environment variables
kubectl exec deployment/webapp-configured -- printenv | grep APP_ENV
# APP_ENV=production

# Verify mounted file
kubectl exec deployment/webapp-configured -- cat /etc/nginx/conf.d/default.confDas Ändern einer ConfigMap startet die Pods nicht automatisch neu. Um die Änderungen zu übernehmen, ist ein manueller Neustart erforderlich: kubectl rollout restart deployment webapp-configured. Tools wie Reloader automatisieren diesen Prozess.
Secrets: sensible Daten
Secrets speichern sensible Informationen wie Passwörter, Tokens oder SSH-Schlüssel. Obwohl base64-codiert, sind sie standardmäßig nicht im Ruhezustand verschlüsselt.
# secret.yaml
apiVersion: v1
kind: Secret
metadata:
  name: webapp-secrets
type: Opaque
# Values must be base64-encoded
data:
  # echo -n 'admin' | base64
  username: YWRtaW4=
  # echo -n 'supersecretpassword' | base64
  password: c3VwZXJzZWNyZXRwYXNzd29yZA==
---
# Alternative: stringData accepts plain text values
apiVersion: v1
kind: Secret
metadata:
  name: webapp-secrets-plain
type: Opaque
stringData:
  username: admin
  password: supersecretpassword
Secrets werden auf dieselbe Weise wie ConfigMaps injiziert.
# deployment-with-secrets.yaml
apiVersion: apps/v1
kind: Deployment
metadata:
  name: webapp-secure
spec:
  replicas: 1
  selector:
    matchLabels:
      app: webapp-secure
  template:
    metadata:
      labels:
        app: webapp-secure
    spec:
      containers:
        - name: webapp
          image: nginx:1.25-alpine
          env:
            - name: DB_USERNAME
              valueFrom:
                secretKeyRef:
                  name: webapp-secrets
                  key: username
            - name: DB_PASSWORD
              valueFrom:
                secretKeyRef:
                  name: webapp-secrets
key: password# terminal
# Create the Secret
kubectl apply -f secret.yaml
# List Secrets (values are not displayed)
kubectl get secrets
# NAME TYPE DATA AGE
# webapp-secrets Opaque 2 10s
# Decode a value
kubectl get secret webapp-secrets -o jsonpath='{.data.password}' | base64 -d
# supersecretpasswordNamespaces: logische Isolation
Namespaces unterteilen ein Cluster in isolierte virtuelle Umgebungen. Diese Trennung ermöglicht es, mehrere Teams oder Umgebungen auf demselben Cluster zu verwalten.
# namespace.yaml
apiVersion: v1
kind: Namespace
metadata:
  name: development
  labels:
    environment: development
---
apiVersion: v1
kind: Namespace
metadata:
  name: staging
  labels:
    environment: staging
Jede Ressource kann in einem bestimmten Namespace erstellt werden.
# terminal
# Create namespaces
kubectl apply -f namespace.yaml

# List namespaces
kubectl get namespaces
# NAME          STATUS   AGE
# default       Active   1d
# development   Active   10s
# staging       Active   10s

# Create a resource in a specific namespace
kubectl apply -f deployment.yaml -n development

# List Pods in a namespace
kubectl get pods -n development

# Change default namespace
kubectl config set-context --current --namespace=development
Ressourcen aus verschiedenen Namespaces sind standardmäßig voneinander isoliert. Die Kommunikation zwischen Namespaces erfolgt über das interne DNS: service-name.namespace.svc.cluster.local.
Vollständige Anwendung: die Ressourcen zusammenfügen
Nachfolgend eine vollständige Anwendung, die alle vorgestellten Konzepte kombiniert.
# complete-app.yaml
---
# Dedicated Namespace
apiVersion: v1
kind: Namespace
metadata:
  name: myapp
---
# ConfigMap for configuration
apiVersion: v1
kind: ConfigMap
metadata:
  name: myapp-config
  namespace: myapp
data:
  APP_NAME: "MyApp"
  LOG_LEVEL: "info"
---
# Secret for sensitive data
apiVersion: v1
kind: Secret
metadata:
  name: myapp-secrets
  namespace: myapp
type: Opaque
stringData:
  api-key: "sk-1234567890abcdef"
---
# Deployment with 3 replicas
apiVersion: apps/v1
kind: Deployment
metadata:
  name: myapp
  namespace: myapp
spec:
  replicas: 3
  selector:
    matchLabels:
      app: myapp
  template:
    metadata:
      labels:
        app: myapp
    spec:
      containers:
        - name: myapp
          image: nginx:1.25-alpine
          ports:
            - containerPort: 80
          envFrom:
            - configMapRef:
                name: myapp-config
          env:
            - name: API_KEY
              valueFrom:
                secretKeyRef:
                  name: myapp-secrets
                  key: api-key
          resources:
            requests:
              memory: "64Mi"
              cpu: "100m"
            limits:
              memory: "128Mi"
              cpu: "200m"
          livenessProbe:
            httpGet:
              path: /
              port: 80
            initialDelaySeconds: 10
            periodSeconds: 10
          readinessProbe:
            httpGet:
              path: /
              port: 80
            initialDelaySeconds: 5
            periodSeconds: 5
---
# Service for internal exposure
apiVersion: v1
kind: Service
metadata:
  name: myapp-service
  namespace: myapp
spec:
  type: ClusterIP
  selector:
    app: myapp
  ports:
    - port: 80
      targetPort: 80
---
# NodePort Service for external access (development)
apiVersion: v1
kind: Service
metadata:
  name: myapp-nodeport
  namespace: myapp
spec:
  type: NodePort
  selector:
    app: myapp
  ports:
    - port: 80
      targetPort: 80
      nodePort: 30100
Diese einzelne Datei deployt eine vollständige Anwendung mit ausgelagerter Konfiguration, Secrets, Hochverfügbarkeit und Netzwerk-Exposition.
# terminal
# Deploy the complete application
kubectl apply -f complete-app.yaml

# Verify all resources
kubectl get all -n myapp
# NAME                         READY   STATUS    RESTARTS   AGE
# pod/myapp-7d9f8b6c4-abc12    1/1     Running   0          30s
# pod/myapp-7d9f8b6c4-def34    1/1     Running   0          30s
# pod/myapp-7d9f8b6c4-ghi56    1/1     Running   0          30s
#
# NAME                    TYPE        CLUSTER-IP      PORT(S)        AGE
# service/myapp-service   ClusterIP   10.96.123.456   80/TCP         30s
# service/myapp-nodeport  NodePort    10.96.123.789   80:30100/TCP   30s
#
# NAME                    READY   UP-TO-DATE   AVAILABLE   AGE
# deployment.apps/myapp   3/3     3            3           30s

# Access the application with minikube
minikube service myapp-nodeport -n myapp
Updates und Rollbacks
Kubernetes erleichtert progressive Updates und Rollbacks.
# terminal
# Update the Deployment image
kubectl set image deployment/myapp myapp=nginx:1.26-alpine -n myapp

# Track deployment in real-time
kubectl rollout status deployment/myapp -n myapp
# Waiting for deployment "myapp" rollout to finish: 1 out of 3 new replicas updated
# Waiting for deployment "myapp" rollout to finish: 2 out of 3 new replicas updated
# deployment "myapp" successfully rolled out

# Revision history
kubectl rollout history deployment/myapp -n myapp
# REVISION  CHANGE-CAUSE
# 1         <none>
# 2         <none>

# Rollback to previous revision
kubectl rollout undo deployment/myapp -n myapp

# Rollback to a specific revision
kubectl rollout undo deployment/myapp --to-revision=1 -n myapp
Die Standard-Update-Strategie (RollingUpdate) ersetzt die alten Pods schrittweise durch neue und stellt so eine kontinuierliche Verfügbarkeit sicher.
Wesentliche kubectl-Befehle
# terminal
# ========================================
# General Information
# ========================================
kubectl cluster-info                    # Cluster info
kubectl get nodes -o wide               # Nodes with details
kubectl api-resources                   # List resource types

# ========================================
# Resource Management
# ========================================
kubectl get all                         # All namespace resources
kubectl get pods -A                     # Pods from all namespaces
kubectl get pods -o wide                # Pods with IP and Node
kubectl get pods -w                     # Watch mode (real-time)

# ========================================
# Inspection and Debugging
# ========================================
kubectl describe pod <name>             # Full details
kubectl logs <pod> -f                   # Streaming logs
kubectl logs <pod> -c <container>       # Specific container logs
kubectl exec -it <pod> -- /bin/sh       # Interactive shell
kubectl port-forward <pod> 8080:80      # Local tunnel to Pod

# ========================================
# Editing and Deletion
# ========================================
kubectl edit deployment <name>          # Live editing (vi)
kubectl delete -f manifest.yaml         # Delete via file
kubectl delete pod <name> --force       # Force deletion
Fazit
Kubernetes verändert die Verwaltung containerisierter Anwendungen, indem es ein deklaratives, widerstandsfähiges und erweiterbares Framework bereitstellt. Die hier vorgestellten grundlegenden Konzepte bilden die Basis für produktionsreife Deployments.
Checkliste für ein erstes Kubernetes-Deployment
- ✅ Funktionsfähiges lokales Cluster (minikube, kind oder k3d)
- ✅ kubectl installiert und konfiguriert
- ✅ Deployment mit Replicas und Health Probes
- ✅ Service für die Netzwerk-Exposition
- ✅ ConfigMap für die ausgelagerte Konfiguration
- ✅ Secret für sensible Daten
- ✅ Namespace für die Isolation
- ✅ Definierte Ressourcenlimits (requests/limits)
- ✅ Update-Strategie und Rollback beherrscht
Fang an zu üben!
Teste dein Wissen mit unseren Interview-Simulatoren und technischen Tests.
Die Beherrschung von Kubernetes öffnet die Tür zu skalierbaren Cloud-Native-Architekturen. Die nächsten Schritte umfassen die Auseinandersetzung mit Ingress Controllers für HTTP-Routing, PersistentVolumes für die Speicherung und Helm für die Paketverwaltung. Kubernetes wird zu einem wichtigen Asset bei DevOps- und SRE-Vorstellungsgesprächen.
Tags
Teilen
Verwandte Artikel

Kubernetes Interview: Pods, Services und Deployments im Detail erklärt
Die drei zentralen Kubernetes-Bausteine — Pods, Services und Deployments — mit produktionsreifen YAML-Manifesten, Networking-Internals und typischen Interviewfragen.
Die wichtigsten DevOps-Interviewfragen: Vollständiger Leitfaden 2026
Vorbereitung auf DevOps-Interviews mit den entscheidenden Fragen zu CI/CD, Kubernetes, Docker, Terraform und SRE-Praktiken. Mit ausführlichen Antworten.
Docker: Von der Entwicklung zur Produktion
Vollständige Docker-Anleitung zur Containerisierung von Anwendungen. Dockerfile, Docker Compose, Multi-Stage-Builds und Produktions-Deployment mit praktischen Beispielen.