SwiftUI @Observable vs @State: Quando Usar Cada Um em 2026
Domine as diferenças entre @Observable e @State no SwiftUI para escolher a ferramenta certa de gerenciamento de estado em aplicações iOS.
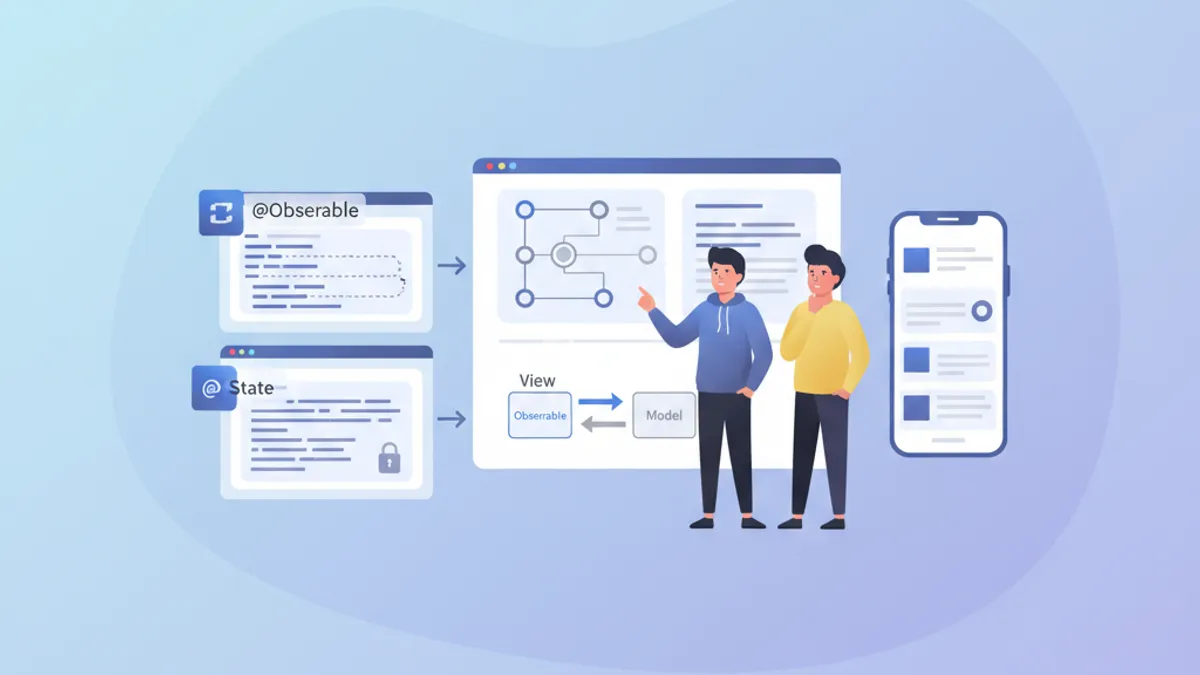
O gerenciamento de estado é o pilar de qualquer aplicação SwiftUI performática. Desde o iOS 17, o macro @Observable revolucionou a criação de modelos reativos, enquanto @State continua essencial para o estado local das views. Compreender quando usar cada ferramenta evita re-renderizações desnecessárias e permite construir aplicações fluidas e responsivas.
Este artigo explora os mecanismos internos de @Observable e @State, suas diferenças fundamentais e fornece diretrizes claras para escolher a ferramenta certa conforme o contexto.
Fundamentos do @State
@State representa a forma mais simples de gerenciamento de estado no SwiftUI. Esse property wrapper cria um armazenamento persistente para um valor que pertence exclusivamente à view que o declara.
struct CounterView: View {
    // @State creates storage managed by SwiftUI
    @State private var count = 0

    var body: some View {
        VStack(spacing: 20) {
            // The view updates when count changes
            Text("Counter: \(count)")
                .font(.largeTitle)

            HStack(spacing: 16) {
                Button("- 1") {
                    count -= 1
                }

                Button("+ 1") {
                    count += 1
                }
            }
            .buttonStyle(.borderedProminent)
        }
    }
}
Cada modificação em count dispara uma re-renderização da view. O SwiftUI gerencia automaticamente o ciclo de vida desse valor, preservando-o entre as reconstruções do body.
Características principais do @State
@State possui várias propriedades distintivas que definem seu uso ideal:
struct FormView: View {
    // ✅ Simple local state - value types
    @State private var username = ""
    @State private var isEnabled = true
    @State private var selectedIndex = 0

    // ✅ Complex value types supported
    @State private var configuration = FormConfiguration()

    var body: some View {
        Form {
            TextField("Username", text: $username)

            Toggle("Enabled", isOn: $isEnabled)

            Picker("Option", selection: $selectedIndex) {
                Text("Option A").tag(0)
                Text("Option B").tag(1)
                Text("Option C").tag(2)
            }
        }
    }
}

// Structs work perfectly with @State
struct FormConfiguration: Equatable {
    var theme: Theme = .light
    var fontSize: CGFloat = 16
    var showNotifications: Bool = true
}

enum Theme {
    case light, dark, system
}
O ponto crucial: @State funciona com tipos por valor (structs, enums, tipos primitivos). Para tipos por referência (classes), outras ferramentas são necessárias.
O macro @Observable explicado
Introduzido com o iOS 17, @Observable transforma qualquer classe em uma fonte de dados reativa. Diferente do antigo protocolo ObservableObject, esse macro oferece observação granular: somente as propriedades efetivamente lidas por uma view disparam sua re-renderização.
import Observation

// @Observable transforms the class into a reactive source
@Observable
class UserModel {
    var name: String = ""
    var email: String = ""
    var avatarURL: URL?
    var preferences = UserPreferences()

    // Computed properties work too
    var isValid: Bool {
        !name.isEmpty && email.contains("@")
    }
}

struct UserPreferences {
    var newsletter: Bool = false
    var notifications: Bool = true
    var theme: Theme = .system
}
A mágica acontece em tempo de compilação: o macro gera automaticamente o código de rastreamento necessário para cada propriedade.
Observação granular em ação
A principal diferença em relação ao antigo ObservableObject está na granularidade do rastreamento:
@Observable
class ProfileModel {
    var name: String = ""
    var bio: String = ""
    var followerCount: Int = 0
    var posts: [Post] = []
}

struct ProfileHeaderView: View {
    let model: ProfileModel

    var body: some View {
        VStack {
            // This view only re-renders if name or bio change
            Text(model.name)
                .font(.title)
            Text(model.bio)
                .foregroundStyle(.secondary)
        }
    }
}

struct FollowerCountView: View {
    let model: ProfileModel

    var body: some View {
        // This view only re-renders if followerCount changes
        HStack {
            Image(systemName: "person.2")
            Text("\(model.followerCount) followers")
        }
    }
}

struct ProfileScreen: View {
    @State private var model = ProfileModel()

    var body: some View {
        VStack {
            // Each subview tracks only its dependencies
            ProfileHeaderView(model: model)
            FollowerCountView(model: model)

            Button("Simulate new follower") {
                // Only re-renders FollowerCountView
                model.followerCount += 1
            }
        }
    }
}O SwiftUI analisa o body de cada view para determinar quais propriedades são lidas. Apenas essas propriedades disparam uma re-renderização ao serem modificadas.
Comparação direta: @Observable vs @State
A escolha entre essas ferramentas depende de vários fatores. Veja uma comparação estruturada:
// Scenario 1: Temporary UI state → @State
struct ToggleExample: View {
    @State private var isExpanded = false  // ✅ @State appropriate

    var body: some View {
        VStack {
            Button(isExpanded ? "Collapse" : "Expand") {
                withAnimation {
                    isExpanded.toggle()
                }
            }

            if isExpanded {
                Text("Detailed content...")
            }
        }
    }
}

// Scenario 2: Shared business data → @Observable
@Observable
class CartModel {  // ✅ @Observable appropriate
    var items: [CartItem] = []
    var promoCode: String?

    var total: Decimal {
        items.reduce(0) { $0 + $1.price * Decimal($1.quantity) }
    }

    var itemCount: Int {
        items.reduce(0) { $0 + $1.quantity }
    }

    func addItem(_ item: CartItem) {
        if let index = items.firstIndex(where: { $0.id == item.id }) {
            items[index].quantity += 1
        } else {
            items.append(item)
        }
    }

    func removeItem(_ item: CartItem) {
        items.removeAll { $0.id == item.id }
    }
}

struct CartItem: Identifiable, Equatable {
    let id: UUID
    let name: String
    let price: Decimal
    var quantity: Int
}
Tabela resumo de casos de uso
| Critério | @State | @Observable | |----------|--------|-------------| | Tipo de dado | Tipos por valor (struct, enum) | Classes | | Escopo | Local a uma view | Compartilhável entre views | | Complexidade | Estado simples | Lógica de negócio complexa | | Ciclo de vida | Gerenciado pelo SwiftUI | Gerenciado explicitamente | | Re-renderização | View inteira | Granular por propriedade |
Pronto para mandar bem nas entrevistas de iOS?
Pratique com nossos simuladores interativos, flashcards e testes tecnicos.
Padrões de uso avançados
Combinando @State e @Observable
Em aplicações reais, essas ferramentas coexistem harmoniosamente. @State cuida do estado local de UI enquanto @Observable encapsula os dados de negócio.
@Observable
class TodoListModel {
    var todos: [Todo] = []
    var filter: TodoFilter = .all

    var filteredTodos: [Todo] {
        switch filter {
        case .all:
            return todos
        case .active:
            return todos.filter { !$0.isCompleted }
        case .completed:
            return todos.filter { $0.isCompleted }
        }
    }

    func addTodo(title: String) {
        let todo = Todo(id: UUID(), title: title, isCompleted: false)
        todos.append(todo)
    }

    func toggleTodo(_ todo: Todo) {
        guard let index = todos.firstIndex(where: { $0.id == todo.id }) else { return }
        todos[index].isCompleted.toggle()
    }
}

struct Todo: Identifiable, Equatable {
    let id: UUID
    var title: String
    var isCompleted: Bool
}

enum TodoFilter: CaseIterable {
    case all, active, completed
}

struct TodoListView: View {
    // Business data via @Observable
    @State private var model = TodoListModel()

    // Local UI state via @State
    @State private var newTodoTitle = ""
    @State private var isAddingTodo = false
    @State private var selectedTodo: Todo?

    var body: some View {
        NavigationStack {
            VStack {
                // Filter with Picker
                Picker("Filter", selection: $model.filter) {
                    ForEach(TodoFilter.allCases, id: \.self) { filter in
                        Text(filter.label).tag(filter)
                    }
                }
                .pickerStyle(.segmented)
                .padding()

                // Todo list
                List(model.filteredTodos, selection: $selectedTodo) { todo in
                    TodoRowView(todo: todo) {
                        model.toggleTodo(todo)
                    }
                }
            }
            .navigationTitle("Tasks")
            .toolbar {
                Button {
                    isAddingTodo = true
                } label: {
                    Image(systemName: "plus")
                }
            }
            .sheet(isPresented: $isAddingTodo) {
                AddTodoSheet(model: model)
            }
        }
    }
}

struct TodoRowView: View {
    let todo: Todo
    let onToggle: () -> Void

    var body: some View {
        HStack {
            Image(systemName: todo.isCompleted ? "checkmark.circle.fill" : "circle")
                .foregroundStyle(todo.isCompleted ? .green : .secondary)
                .onTapGesture(perform: onToggle)

            Text(todo.title)
                .strikethrough(todo.isCompleted)
        }
    }
}

extension TodoFilter {
    var label: String {
        switch self {
        case .all: return "All"
        case .active: return "Active"
        case .completed: return "Completed"
        }
    }
}
@Observable com injeção de dependência
Para aplicações mais complexas, a injeção via environment do SwiftUI permite um desacoplamento eficaz:
@Observable
class AuthenticationService {
    var currentUser: User?
    var isAuthenticated: Bool { currentUser != nil }

    func login(email: String, password: String) async throws {
        // Authentication logic
        currentUser = User(id: UUID(), email: email, name: "User")
    }

    func logout() {
        currentUser = nil
    }
}

struct User: Identifiable, Equatable {
    let id: UUID
    let email: String
    let name: String
}

// Extension to create an environment key
extension EnvironmentValues {
    @Entry var authService: AuthenticationService = AuthenticationService()
}

// Configuration in the App
@main
struct MyApp: App {
    @State private var authService = AuthenticationService()

    var body: some Scene {
        WindowGroup {
            ContentView()
                .environment(\.authService, authService)
        }
    }
}

// Usage in views
struct ProfileView: View {
    @Environment(\.authService) private var authService

    var body: some View {
        if let user = authService.currentUser {
            VStack {
                Text("Hello, \(user.name)")
                Button("Sign Out") {
                    authService.logout()
                }
            }
        } else {
            Text("Not signed in")
        }
    }
}
Performance e otimização
Evitando re-renderizações desnecessárias
Mesmo com a granularidade do @Observable, certos padrões podem degradar a performance:
// ❌ Bad pattern: reading the entire object
struct BadPatternView: View {
    let model: ProfileModel

    var body: some View {
        // Reads model.name AND model.posts even if only name is displayed
        let _ = model.posts.count  // Creates unnecessary dependency
        Text(model.name)
    }
}

// ✅ Good pattern: targeted reading
struct GoodPatternView: View {
    let model: ProfileModel

    var body: some View {
        // Tracks only name
        Text(model.name)
    }
}

// ✅ Extract into subviews to isolate dependencies
struct OptimizedProfileView: View {
    let model: ProfileModel

    var body: some View {
        VStack {
            // Each subview has its own dependencies
            ProfileNameView(model: model)
            ProfilePostsView(model: model)
            ProfileStatsView(model: model)
        }
    }
}

struct ProfileNameView: View {
    let model: ProfileModel

    var body: some View {
        Text(model.name)
            .font(.title)
    }
}

struct ProfilePostsView: View {
    let model: ProfileModel

    var body: some View {
        ForEach(model.posts) { post in
            PostRow(post: post)
        }
    }
}

struct ProfileStatsView: View {
    let model: ProfileModel

    var body: some View {
        HStack {
            StatBadge(value: model.followerCount, label: "Followers")
            StatBadge(value: model.posts.count, label: "Posts")
        }
    }
}
Propriedades computadas em @Observable são reavaliadas a cada acesso. Para cálculos complexos, vale a pena cachear o resultado em uma propriedade armazenada.
Atualizações em lote com withObservationTracking
Para cenários avançados, withObservationTracking permite detectar mudanças sem criar um binding:
import Observation

@Observable
class DataSyncModel {
    var lastSyncDate: Date?
    var pendingChanges: Int = 0
    var isSyncing: Bool = false
}

class SyncCoordinator {
    let model: DataSyncModel

    init(model: DataSyncModel) {
        self.model = model
        startObserving()
    }

    private func startObserving() {
        // Observe changes without UI
        withObservationTracking {
            // Access that creates dependencies
            _ = model.pendingChanges
            _ = model.isSyncing
        } onChange: {
            // Called when an observed property changes
            Task { @MainActor in
                self.handleModelChange()
            }
        }
    }

    private func handleModelChange() {
        if model.pendingChanges > 0 && !model.isSyncing {
            // Trigger synchronization
            Task {
                await syncChanges()
            }
        }
        // Re-establish observation
        startObserving()
    }

    private func syncChanges() async {
        model.isSyncing = true
        // Sync logic...
        model.isSyncing = false
        model.pendingChanges = 0
        model.lastSyncDate = Date()
    }
}
Migrando do ObservableObject
Para projetos existentes que usam ObservableObject, migrar para @Observable simplifica o código:
// ❌ Old pattern with ObservableObject
class OldSettingsModel: ObservableObject {
    @Published var darkMode: Bool = false
    @Published var fontSize: CGFloat = 16
    @Published var notifications: Bool = true
}

struct OldSettingsView: View {
    @StateObject private var settings = OldSettingsModel()
    // or @ObservedObject if injected

    var body: some View {
        Form {
            Toggle("Dark Mode", isOn: $settings.darkMode)
            Slider(value: $settings.fontSize, in: 12...24)
            Toggle("Notifications", isOn: $settings.notifications)
        }
    }
}

// ✅ New pattern with @Observable
@Observable
class NewSettingsModel {
    var darkMode: Bool = false
    var fontSize: CGFloat = 16
    var notifications: Bool = true
}

struct NewSettingsView: View {
    @State private var settings = NewSettingsModel()

    var body: some View {
        Form {
            Toggle("Dark Mode", isOn: $settings.darkMode)
            Slider(value: $settings.fontSize, in: 12...24)
            Toggle("Notifications", isOn: $settings.notifications)
        }
    }
}
Vantagens da migração:
- Não é mais preciso usar
@Publishedem cada propriedade @Statesubstitui@StateObjectpara a criação- Observação granular automática
- Código mais legível e fácil de manter
Regras práticas de decisão
Veja um guia de decisão para escolher a ferramenta certa:
/*
 RULE 1: Ephemeral UI state → @State
 - Animations, transitions
 - Local form states
 - Temporary selections
 - Section expand/collapse
*/
struct AnimatedCard: View {
    @State private var isFlipped = false  // ✅ Local UI state
    // ...
}

/*
 RULE 2: Shared data across views → @Observable
 - Business data models
 - Authentication state
 - Shopping cart
 - User preferences
*/
@Observable
class UserSession {  // ✅ Shared across app
    var user: User?
    var preferences: Preferences
    // ...
}

/*
 RULE 3: Simple struct with binding → @State
 - Local configuration
 - Isolated forms
*/
struct FormData {
    var name: String = ""
    var email: String = ""
}

struct FormView: View {
    @State private var formData = FormData()  // ✅ Struct with @State
    // ...
}

/*
 RULE 4: Complex business logic → @Observable
 - Validations
 - Network calls
 - Data transformations
*/
@Observable
class OrderProcessor {  // ✅ Complex logic
    var items: [OrderItem] = []
    var status: OrderStatus = .draft

    func validate() -> [ValidationError] { /* ... */ }
    func submit() async throws { /* ... */ }
}
Conclusão
A escolha entre @Observable e @State se resume a duas questões fundamentais: o tipo do dado (valor ou referência) e o escopo do estado (local ou compartilhado). @State se destaca para estados de UI simples e locais, enquanto @Observable brilha em modelos de dados complexos que exigem observação granular.
Checklist de decisão
- ✅ Use
@Statepara tipos por valor e estado de UI efêmero - ✅ Use
@Observablepara classes com dados de negócio - ✅ Prefira
@Observablequando o estado abrange várias views - ✅ Extraia em subviews para otimizar as re-renderizações
- ✅ Evite ler propriedades desnecessárias no body
- ✅ Migre progressivamente do
ObservableObject - ✅ Use o environment para injeção de dependência
- ✅ Teste a performance com Instruments em casos complexos
Comece a praticar!
Teste seus conhecimentos com nossos simuladores de entrevista e testes tecnicos.
Tags
Compartilhar
Artigos relacionados
Performance SwiftUI: Otimização de LazyVStack e Listas Complexas
Técnicas de otimização para LazyVStack e listas SwiftUI. Reduzir o consumo de memória, melhorar a performance de scroll e evitar armadilhas comuns.

ViewModifiers customizados em SwiftUI: padrões reutilizáveis para Design Systems
Construa ViewModifiers customizados em SwiftUI para um design system consistente. Padrões, melhores práticas e exemplos práticos para estilizar views iOS de forma eficiente.

SwiftUI: Construindo Interfaces Modernas para iOS
Guia completo para criar interfaces modernas com SwiftUI: sintaxe declarativa, componentes, animacoes e boas praticas para iOS 18.