Flutter: Creare la prima applicazione multipiattaforma
Guida completa per creare un'applicazione mobile multipiattaforma con Flutter e Dart. Widget, gestione dello stato, navigazione e best practice per principianti.

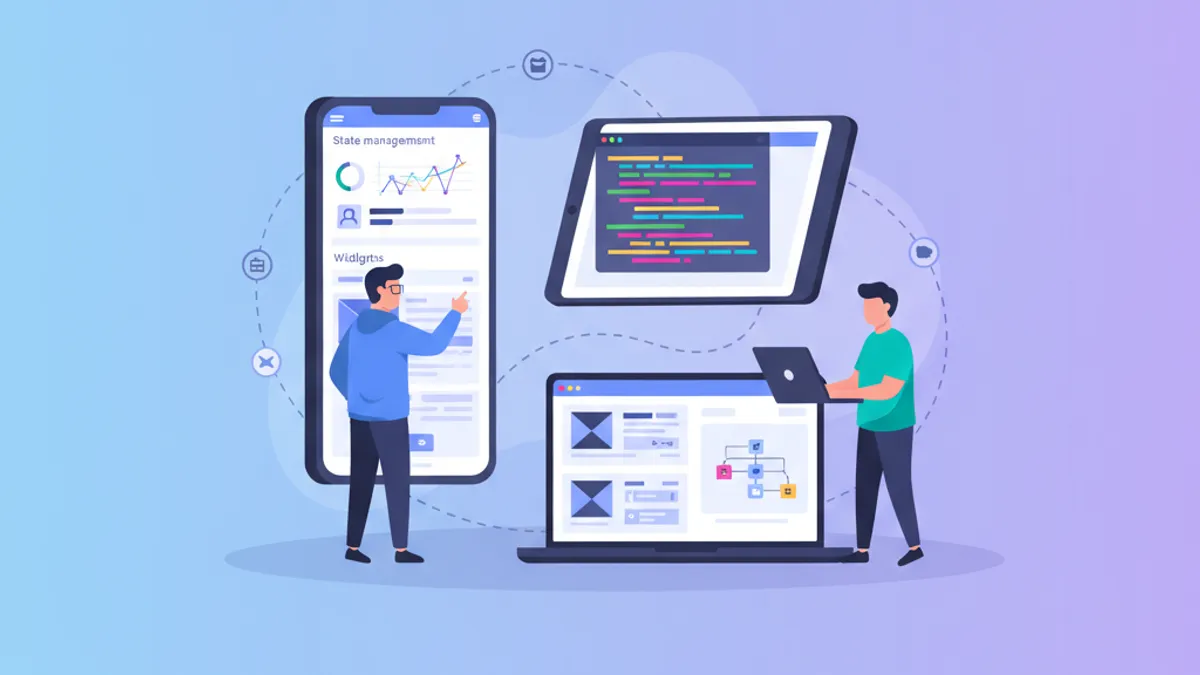
Flutter sta rivoluzionando lo sviluppo mobile permettendo di creare applicazioni iOS e Android da un'unica base di codice. Questo framework sviluppato da Google combina prestazioni native con una produttivita eccezionale grazie al suo motore di rendering Skia e al suo sistema dichiarativo di widget. Questa guida copre la costruzione di un'applicazione completa, dall'installazione alle best practice di produzione.
Flutter 3.27 porta miglioramenti significativi: supporto nativo a Material 3 per impostazione predefinita, nuove animazioni Impeller ottimizzate e integrazione con Dart 3.6 con macro sperimentali. Il framework ora compila nativamente per ARM64 per prestazioni ottimali.
Configurazione dell'ambiente e installazione
La configurazione di Flutter richiede alcuni passaggi. L'SDK di Flutter include tutto il necessario: il framework, gli strumenti di compilazione e il gestore di pacchetti Dart.
# terminal
# Download Flutter SDK (macOS/Linux)
git clone https://github.com/flutter/flutter.git -b stable
export PATH="$PATH:`pwd`/flutter/bin"

# Verify installation and dependencies
flutter doctor

# Create a new project
flutter create --org com.example my_app
cd my_app

# Run in development mode
flutter run
Il comando flutter doctor verifica che tutte le dipendenze siano installate: Android Studio, Xcode (macOS) e gli emulatori configurati.
# pubspec.yaml
name: my_app
description: Cross-platform Flutter application
publish_to: 'none'
version: 1.0.0+1

environment:
  sdk: '>=3.6.0 <4.0.0'

dependencies:
  flutter:
    sdk: flutter
  # UI and design
  cupertino_icons: ^1.0.8
  google_fonts: ^6.2.1
  # State management
  flutter_riverpod: ^2.6.1
  # Navigation
  go_router: ^14.6.2
  # HTTP and API
  dio: ^5.7.0
  # Local storage
  shared_preferences: ^2.3.4

dev_dependencies:
  flutter_test:
    sdk: flutter
  flutter_lints: ^5.0.0

flutter:
  uses-material-design: true
Questo file pubspec.yaml configura le dipendenze essenziali per un'applicazione Flutter moderna.
Architettura del progetto Flutter
Una struttura chiara del progetto facilita la manutenzione e l'evoluzione dell'applicazione. Questa organizzazione separa chiaramente le responsabilita.
lib/
├── main.dart                 # Entry point
├── app.dart                  # App configuration
├── core/
│   ├── constants/           # Colors, dimensions, strings
│   ├── theme/               # Material 3 theme
│   └── utils/               # Utility functions
├── features/
│   ├── auth/                # Authentication feature
│   │   ├── data/           # Repositories, data sources
│   │   ├── domain/         # Models, use cases
│   │   └── presentation/   # Screens, widgets, providers
│   └── home/               # Home feature
│       ├── data/
│       ├── domain/
│       └── presentation/
├── shared/
│   ├── widgets/            # Reusable widgets
│   └── providers/          # Shared providers
└── routing/
    └── app_router.dart     # Route configuration
Questa architettura "feature-first" raggruppa tutto il codice relativo a una funzionalita nella stessa cartella, facilitando la navigazione e il refactoring.
L'approccio feature-first organizza il codice per funzionalita di business invece che per tipo tecnico. Ogni feature contiene i propri modelli, widget e logica, rendendo il codice piu modulare e testabile.
Comprendere i widget di Flutter
I widget sono i blocchi di costruzione fondamentali di Flutter. Tutto e un widget: pulsanti, testo, layout, persino l'applicazione stessa. Flutter fornisce due tipi di widget: StatelessWidget (senza stato) e StatefulWidget (con stato locale).
import 'package:flutter/material.dart';
/// Custom reusable button widget throughout the application.
/// Automatically handles loading and disabled states.
class CustomButton extends StatelessWidget {
// Required and optional widget parameters
final String label;
final VoidCallback? onPressed;
final bool isLoading;
final bool isOutlined;
// Constructor with named parameters for clarity
const CustomButton({
super.key,
required this.label,
this.onPressed,
this.isLoading = false,
this.isOutlined = false,
});
Widget build(BuildContext context) {
// Access theme for consistent styles
final theme = Theme.of(context);
// Conditional build based on button type
if (isOutlined) {
return OutlinedButton(
// Disable button during loading
onPressed: isLoading ? null : onPressed,
style: OutlinedButton.styleFrom(
padding: const EdgeInsets.symmetric(
horizontal: 24,
vertical: 16,
),
shape: RoundedRectangleBorder(
borderRadius: BorderRadius.circular(12),
),
),
child: _buildChild(theme),
);
}
return FilledButton(
onPressed: isLoading ? null : onPressed,
style: FilledButton.styleFrom(
padding: const EdgeInsets.symmetric(
horizontal: 24,
vertical: 16,
),
shape: RoundedRectangleBorder(
borderRadius: BorderRadius.circular(12),
),
),
child: _buildChild(theme),
);
}
/// Builds button content with loading state handling.
Widget _buildChild(ThemeData theme) {
if (isLoading) {
return const SizedBox(
height: 20,
width: 20,
child: CircularProgressIndicator(
strokeWidth: 2,
color: Colors.white,
),
);
}
return Text(label);
}
}Questo widget incapsula la logica di visualizzazione dei pulsanti con gestione automatica dello stato di caricamento.
import 'package:flutter/material.dart';
import '../../features/auth/domain/models/user.dart';
/// Card displaying user information.
/// Uses Material 3 with consistent elevation and shape.
class UserCard extends StatelessWidget {
final User user;
final VoidCallback? onTap;
const UserCard({
super.key,
required this.user,
this.onTap,
});
Widget build(BuildContext context) {
final theme = Theme.of(context);
// Material 3 Card with InkWell for ripple effect
return Card(
// Adaptive elevation based on theme
elevation: 2,
// Consistent rounded shape
shape: RoundedRectangleBorder(
borderRadius: BorderRadius.circular(16),
),
// Clipping so ripple respects borders
clipBehavior: Clip.antiAlias,
child: InkWell(
onTap: onTap,
child: Padding(
padding: const EdgeInsets.all(16),
child: Row(
children: [
// Avatar with image or initials
CircleAvatar(
radius: 28,
backgroundImage: user.avatarUrl != null
? NetworkImage(user.avatarUrl!)
: null,
child: user.avatarUrl == null
? Text(user.initials)
: null,
),
const SizedBox(width: 16),
// User information
Expanded(
child: Column(
crossAxisAlignment: CrossAxisAlignment.start,
children: [
Text(
user.displayName,
style: theme.textTheme.titleMedium?.copyWith(
fontWeight: FontWeight.w600,
),
),
const SizedBox(height: 4),
Text(
user.email,
style: theme.textTheme.bodyMedium?.copyWith(
color: theme.colorScheme.onSurfaceVariant,
),
),
],
),
),
// Navigation icon
Icon(
Icons.chevron_right,
color: theme.colorScheme.onSurfaceVariant,
),
],
),
),
),
);
}
}La composizione dei widget permette di costruire interfacce complesse a partire da blocchi semplici e riutilizzabili.
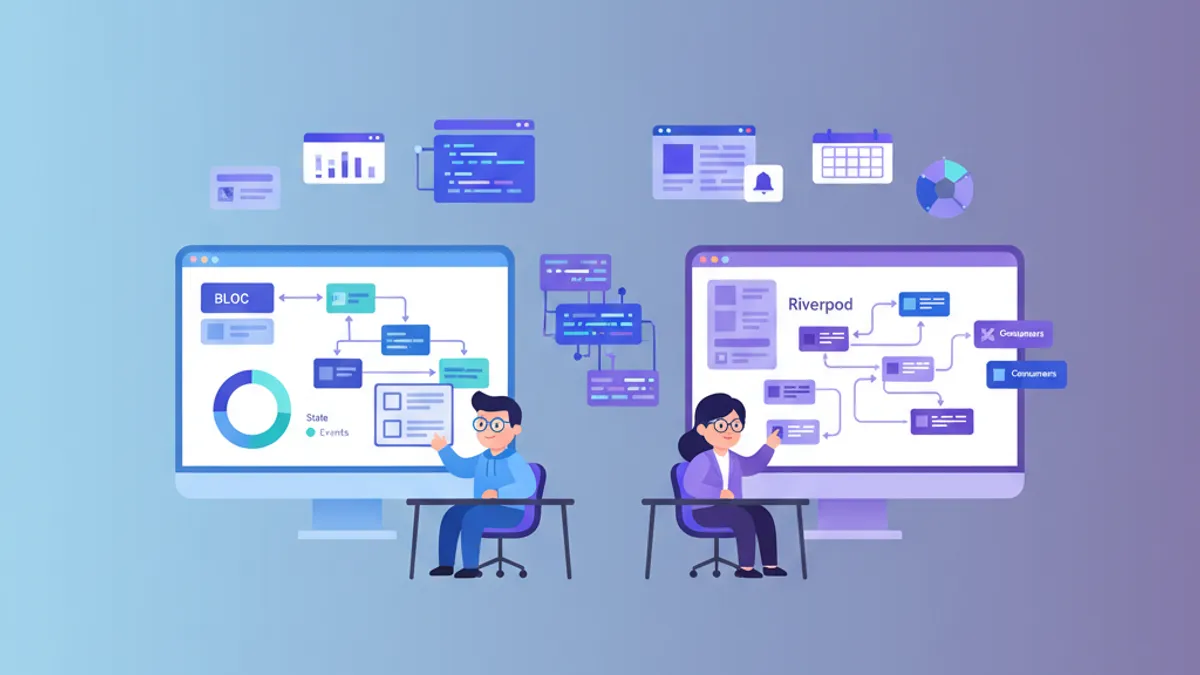
Gestione dello stato con Riverpod
Riverpod rappresenta la soluzione moderna per la gestione dello stato in Flutter. Questa libreria offre un approccio dichiarativo, tipizzato e testabile per condividere lo stato tra i widget.
/// Immutable user model with fromJson factory.
class User {
  final String id;
  final String email;
  final String displayName;
  final String? avatarUrl;
  final DateTime createdAt;

  const User({
    required this.id,
    required this.email,
    required this.displayName,
    this.avatarUrl,
    required this.createdAt,
  });

  /// Generates initials from display name.
  String get initials {
    final parts = displayName.split(' ');
    if (parts.length >= 2) {
      return '${parts[0][0]}${parts[1][0]}'.toUpperCase();
    }
    return displayName.substring(0, 2).toUpperCase();
  }

  /// Creates instance from JSON (API response).
  factory User.fromJson(Map<String, dynamic> json) {
    return User(
      id: json['id'] as String,
      email: json['email'] as String,
      displayName: json['display_name'] as String,
      avatarUrl: json['avatar_url'] as String?,
      createdAt: DateTime.parse(json['created_at'] as String),
    );
  }

  /// Converts to JSON for API submission.
  Map<String, dynamic> toJson() {
    return {
      'id': id,
      'email': email,
      'display_name': displayName,
      'avatar_url': avatarUrl,
      'created_at': createdAt.toIso8601String(),
    };
  }
}import 'package:flutter_riverpod/flutter_riverpod.dart';
import '../../data/repositories/auth_repository.dart';
import '../../domain/models/user.dart';
/// Authentication state representing different possible cases.
sealed class AuthState {
const AuthState();
}
class AuthInitial extends AuthState {
const AuthInitial();
}
class AuthLoading extends AuthState {
const AuthLoading();
}
class AuthAuthenticated extends AuthState {
final User user;
const AuthAuthenticated(this.user);
}
class AuthUnauthenticated extends AuthState {
const AuthUnauthenticated();
}
class AuthError extends AuthState {
final String message;
const AuthError(this.message);
}
/// Provider for authentication repository.
final authRepositoryProvider = Provider<AuthRepository>((ref) {
return AuthRepository();
});
/// Main provider managing authentication state.
final authProvider = StateNotifierProvider<AuthNotifier, AuthState>((ref) {
final repository = ref.watch(authRepositoryProvider);
return AuthNotifier(repository);
});
/// Notifier handling authentication logic.
class AuthNotifier extends StateNotifier<AuthState> {
final AuthRepository _repository;
AuthNotifier(this._repository) : super(const AuthInitial()) {
// Check initial state on startup
checkAuthStatus();
}
/// Checks if a user is already logged in.
Future<void> checkAuthStatus() async {
state = const AuthLoading();
try {
final user = await _repository.getCurrentUser();
if (user != null) {
state = AuthAuthenticated(user);
} else {
state = const AuthUnauthenticated();
}
} catch (e) {
state = const AuthUnauthenticated();
}
}
/// Signs in user with email and password.
Future<void> signIn(String email, String password) async {
state = const AuthLoading();
try {
final user = await _repository.signIn(email, password);
state = AuthAuthenticated(user);
} catch (e) {
state = AuthError(e.toString());
}
}
/// Creates a new user account.
Future<void> signUp(String email, String password, String displayName) async {
state = const AuthLoading();
try {
final user = await _repository.signUp(email, password, displayName);
state = AuthAuthenticated(user);
} catch (e) {
state = AuthError(e.toString());
}
}
/// Signs out the user.
Future<void> signOut() async {
state = const AuthLoading();
await _repository.signOut();
state = const AuthUnauthenticated();
}
}Il pattern delle classi sealed (Dart 3.0+) garantisce che tutti i casi di stato vengano gestiti quando si utilizzano le espressioni switch.
Pronto a superare i tuoi colloqui su Flutter?
Pratica con i nostri simulatori interattivi, flashcards e test tecnici.
Navigazione con GoRouter
GoRouter semplifica la navigazione dichiarativa in Flutter. Questa libreria gestisce rotte, parametri, reindirizzamenti e navigazione annidata.
import 'package:flutter/material.dart';
import 'package:flutter_riverpod/flutter_riverpod.dart';
import 'package:go_router/go_router.dart';
import '../features/auth/presentation/providers/auth_provider.dart';
import '../features/auth/presentation/screens/login_screen.dart';
import '../features/auth/presentation/screens/register_screen.dart';
import '../features/home/presentation/screens/home_screen.dart';
import '../features/home/presentation/screens/profile_screen.dart';
import '../shared/widgets/shell_scaffold.dart';

/// Provider for router with authentication handling.
final routerProvider = Provider<GoRouter>((ref) {
  // Listen to authentication state changes
  final authState = ref.watch(authProvider);

  return GoRouter(
    // Initial route
    initialLocation: '/',
    // Refresh router when auth changes
    refreshListenable: GoRouterRefreshStream(ref, authProvider),
    // Handle redirects based on authentication
    redirect: (context, state) {
      final isAuthenticated = authState is AuthAuthenticated;
      final isAuthRoute = state.matchedLocation.startsWith('/auth');

      // Not authenticated on protected route → login
      if (!isAuthenticated && !isAuthRoute) {
        return '/auth/login';
      }

      // Authenticated on auth route → home
      if (isAuthenticated && isAuthRoute) {
        return '/';
      }

      return null; // No redirect
    },
    routes: [
      // Auth routes (without shell)
      GoRoute(
        path: '/auth/login',
        name: 'login',
        builder: (context, state) => const LoginScreen(),
      ),
      GoRoute(
        path: '/auth/register',
        name: 'register',
        builder: (context, state) => const RegisterScreen(),
      ),
      // Protected routes with shell (bottom navigation)
      ShellRoute(
        builder: (context, state, child) {
          return ShellScaffold(child: child);
        },
        routes: [
          GoRoute(
            path: '/',
            name: 'home',
            builder: (context, state) => const HomeScreen(),
          ),
          GoRoute(
            path: '/profile',
            name: 'profile',
            builder: (context, state) => const ProfileScreen(),
          ),
          GoRoute(
            path: '/profile/:userId',
            name: 'userProfile',
            builder: (context, state) {
              // Extract route parameter
              final userId = state.pathParameters['userId']!;
              return ProfileScreen(userId: userId);
            },
          ),
        ],
      ),
    ],
    // Custom error page
    errorBuilder: (context, state) => Scaffold(
      body: Center(
        child: Text('Page not found: ${state.error}'),
      ),
    ),
  );
});

/// Stream to trigger router refresh.
class GoRouterRefreshStream extends ChangeNotifier {
  GoRouterRefreshStream(Ref ref, StateNotifierProvider provider) {
    ref.listen(provider, (previous, next) {
      notifyListeners();
    });
  }
}
Il reindirizzamento automatico basato sullo stato di autenticazione garantisce che le rotte protette rimangano inaccessibili per gli utenti non autenticati.
import 'package:flutter/material.dart';
import 'package:go_router/go_router.dart';
/// Scaffold with bottom navigation bar for protected routes.
class ShellScaffold extends StatelessWidget {
final Widget child;
const ShellScaffold({
super.key,
required this.child,
});
Widget build(BuildContext context) {
return Scaffold(
body: child,
bottomNavigationBar: NavigationBar(
// Determine active index based on route
selectedIndex: _calculateSelectedIndex(context),
onDestinationSelected: (index) => _onItemTapped(index, context),
destinations: const [
NavigationDestination(
icon: Icon(Icons.home_outlined),
selectedIcon: Icon(Icons.home),
label: 'Home',
),
NavigationDestination(
icon: Icon(Icons.person_outline),
selectedIcon: Icon(Icons.person),
label: 'Profile',
),
],
),
);
}
/// Calculates navigation index based on current route.
int _calculateSelectedIndex(BuildContext context) {
final location = GoRouterState.of(context).matchedLocation;
if (location.startsWith('/profile')) return 1;
return 0;
}
/// Navigates to route corresponding to index.
void _onItemTapped(int index, BuildContext context) {
switch (index) {
case 0:
context.goNamed('home');
case 1:
context.goNamed('profile');
}
}
}La NavigationBar di Material 3 si adatta automaticamente ai temi chiaro e scuro.
Schermate e moduli
La creazione di schermate interattive combina widget, gestione dello stato e validazione dei moduli.
import 'package:flutter/material.dart';
import 'package:flutter_riverpod/flutter_riverpod.dart';
import 'package:go_router/go_router.dart';
import '../providers/auth_provider.dart';
import '../../../../shared/widgets/custom_button.dart';
/// Login screen with validated form.
class LoginScreen extends ConsumerStatefulWidget {
const LoginScreen({super.key});
ConsumerState<LoginScreen> createState() => _LoginScreenState();
}
class _LoginScreenState extends ConsumerState<LoginScreen> {
// Global key for the form
final _formKey = GlobalKey<FormState>();
// Controllers for text fields
final _emailController = TextEditingController();
final _passwordController = TextEditingController();
// Local state for password visibility
bool _obscurePassword = true;
void dispose() {
// Resource cleanup
_emailController.dispose();
_passwordController.dispose();
super.dispose();
}
/// Submits the login form.
Future<void> _submit() async {
// Validate all fields
if (_formKey.currentState!.validate()) {
await ref.read(authProvider.notifier).signIn(
_emailController.text.trim(),
_passwordController.text,
);
}
}
Widget build(BuildContext context) {
final theme = Theme.of(context);
final authState = ref.watch(authProvider);
final isLoading = authState is AuthLoading;
// Listen for errors to display snackbar
ref.listen<AuthState>(authProvider, (previous, next) {
if (next is AuthError) {
ScaffoldMessenger.of(context).showSnackBar(
SnackBar(
content: Text(next.message),
backgroundColor: theme.colorScheme.error,
),
);
}
});
return Scaffold(
body: SafeArea(
child: Center(
child: SingleChildScrollView(
padding: const EdgeInsets.all(24),
child: Form(
key: _formKey,
child: Column(
mainAxisAlignment: MainAxisAlignment.center,
crossAxisAlignment: CrossAxisAlignment.stretch,
children: [
// Logo or title
Icon(
Icons.flutter_dash,
size: 80,
color: theme.colorScheme.primary,
),
const SizedBox(height: 16),
Text(
'Sign In',
style: theme.textTheme.headlineMedium?.copyWith(
fontWeight: FontWeight.bold,
),
textAlign: TextAlign.center,
),
const SizedBox(height: 32),
// Email field with validation
TextFormField(
controller: _emailController,
keyboardType: TextInputType.emailAddress,
textInputAction: TextInputAction.next,
decoration: const InputDecoration(
labelText: 'Email',
hintText: 'example@email.com',
prefixIcon: Icon(Icons.email_outlined),
),
validator: (value) {
if (value == null || value.isEmpty) {
return 'Email is required';
}
// Basic email format validation
if (!RegExp(r'^[\w-\.]+@([\w-]+\.)+[\w-]{2,4}$')
.hasMatch(value)) {
return 'Invalid email format';
}
return null;
},
),
const SizedBox(height: 16),
// Password field with visibility toggle
TextFormField(
controller: _passwordController,
obscureText: _obscurePassword,
textInputAction: TextInputAction.done,
onFieldSubmitted: (_) => _submit(),
decoration: InputDecoration(
labelText: 'Password',
prefixIcon: const Icon(Icons.lock_outlined),
suffixIcon: IconButton(
icon: Icon(
_obscurePassword
? Icons.visibility_outlined
: Icons.visibility_off_outlined,
),
onPressed: () {
setState(() {
_obscurePassword = !_obscurePassword;
});
},
),
),
validator: (value) {
if (value == null || value.isEmpty) {
return 'Password is required';
}
if (value.length < 8) {
return 'Minimum 8 characters';
}
return null;
},
),
const SizedBox(height: 24),
// Sign in button
CustomButton(
label: 'Sign In',
isLoading: isLoading,
onPressed: _submit,
),
const SizedBox(height: 16),
// Link to registration
TextButton(
onPressed: () => context.goNamed('register'),
child: const Text('No account? Create one'),
),
],
),
),
),
),
),
);
}
}L'uso di ConsumerStatefulWidget combina lo stato locale (controller dei moduli) con lo stato globale (Riverpod).
Le istanze di TextEditingController devono essere rilasciate nel metodo dispose() per evitare perdite di memoria. Questa regola si applica a tutti i controller e i listener creati manualmente.
Comunicazione HTTP con Dio
Dio fornisce una potente API HTTP con interceptor, gestione degli errori e trasformazione automatica delle risposte.
import 'package:dio/dio.dart';
import 'package:flutter_riverpod/flutter_riverpod.dart';
import '../constants/api_constants.dart';
/// Provider for Dio HTTP client.
final apiClientProvider = Provider<ApiClient>((ref) {
return ApiClient();
});
/// HTTP client configured with interceptors.
class ApiClient {
late final Dio _dio;
ApiClient() {
_dio = Dio(
BaseOptions(
baseUrl: ApiConstants.baseUrl,
connectTimeout: const Duration(seconds: 10),
receiveTimeout: const Duration(seconds: 10),
headers: {
'Content-Type': 'application/json',
'Accept': 'application/json',
},
),
);
// Add interceptors
_dio.interceptors.addAll([
_AuthInterceptor(),
_LoggingInterceptor(),
]);
}
/// Generic GET request.
Future<T> get<T>(
String path, {
Map<String, dynamic>? queryParameters,
T Function(dynamic)? fromJson,
}) async {
try {
final response = await _dio.get(
path,
queryParameters: queryParameters,
);
if (fromJson != null) {
return fromJson(response.data);
}
return response.data as T;
} on DioException catch (e) {
throw _handleError(e);
}
}
/// Generic POST request.
Future<T> post<T>(
String path, {
dynamic data,
T Function(dynamic)? fromJson,
}) async {
try {
final response = await _dio.post(path, data: data);
if (fromJson != null) {
return fromJson(response.data);
}
return response.data as T;
} on DioException catch (e) {
throw _handleError(e);
}
}
/// Sets the authentication token.
void setAuthToken(String token) {
_dio.options.headers['Authorization'] = 'Bearer $token';
}
/// Clears the authentication token.
void clearAuthToken() {
_dio.options.headers.remove('Authorization');
}
/// Converts Dio errors to readable exceptions.
Exception _handleError(DioException error) {
switch (error.type) {
case DioExceptionType.connectionTimeout:
case DioExceptionType.sendTimeout:
case DioExceptionType.receiveTimeout:
return Exception('Connection timeout. Check your connection.');
case DioExceptionType.badResponse:
final statusCode = error.response?.statusCode;
final message = error.response?.data['message'] ?? 'Server error';
return Exception('Error $statusCode: $message');
case DioExceptionType.cancel:
return Exception('Request cancelled');
default:
return Exception('Network error: ${error.message}');
}
}
}
/// Interceptor to automatically add token.
class _AuthInterceptor extends Interceptor {
void onRequest(
RequestOptions options,
RequestInterceptorHandler handler,
) {
// Token is added via setAuthToken()
handler.next(options);
}
void onError(
DioException err,
ErrorInterceptorHandler handler,
) {
// Handle 401 for token refresh
if (err.response?.statusCode == 401) {
// TODO: Implement token refresh
}
handler.next(err);
}
}
/// Logging interceptor for development.
class _LoggingInterceptor extends Interceptor {
void onRequest(
RequestOptions options,
RequestInterceptorHandler handler,
) {
print('→ ${options.method} ${options.path}');
handler.next(options);
}
void onResponse(
Response response,
ResponseInterceptorHandler handler,
) {
print('← ${response.statusCode} ${response.requestOptions.path}');
handler.next(response);
}
void onError(
DioException err,
ErrorInterceptorHandler handler,
) {
print('✗ ${err.response?.statusCode} ${err.requestOptions.path}');
handler.next(err);
}
}Gli interceptor centralizzano la logica di autenticazione e logging senza contaminare ogni singola richiesta.
Tema personalizzato con Material 3
Un tema coerente garantisce un'esperienza utente uniforme. Material 3 (Material You) si adatta alle preferenze di sistema.
import 'package:flutter/material.dart';
import 'package:google_fonts/google_fonts.dart';

/// Application theme configuration.
class AppTheme {
  // Brand primary color
  static const _primaryColor = Color(0xFF6750A4);

  /// Material 3 light theme.
  static ThemeData get lightTheme {
    // Generate color scheme from primary color
    final colorScheme = ColorScheme.fromSeed(
      seedColor: _primaryColor,
      brightness: Brightness.light,
    );

    return ThemeData(
      useMaterial3: true,
      colorScheme: colorScheme,
      // Custom typography
      textTheme: GoogleFonts.interTextTheme(),
      // AppBar configuration
      appBarTheme: AppBarTheme(
        centerTitle: true,
        elevation: 0,
        backgroundColor: colorScheme.surface,
        foregroundColor: colorScheme.onSurface,
      ),
      // Form field configuration
      inputDecorationTheme: InputDecorationTheme(
        filled: true,
        fillColor: colorScheme.surfaceContainerHighest.withOpacity(0.5),
        border: OutlineInputBorder(
          borderRadius: BorderRadius.circular(12),
          borderSide: BorderSide.none,
        ),
        enabledBorder: OutlineInputBorder(
          borderRadius: BorderRadius.circular(12),
          borderSide: BorderSide.none,
        ),
        focusedBorder: OutlineInputBorder(
          borderRadius: BorderRadius.circular(12),
          borderSide: BorderSide(color: colorScheme.primary, width: 2),
        ),
        errorBorder: OutlineInputBorder(
          borderRadius: BorderRadius.circular(12),
          borderSide: BorderSide(color: colorScheme.error),
        ),
        contentPadding: const EdgeInsets.symmetric(
          horizontal: 16,
          vertical: 16,
        ),
      ),
      // Button configuration
      filledButtonTheme: FilledButtonThemeData(
        style: FilledButton.styleFrom(
          minimumSize: const Size(double.infinity, 52),
          shape: RoundedRectangleBorder(
            borderRadius: BorderRadius.circular(12),
          ),
        ),
      ),
      outlinedButtonTheme: OutlinedButtonThemeData(
        style: OutlinedButton.styleFrom(
          minimumSize: const Size(double.infinity, 52),
          shape: RoundedRectangleBorder(
            borderRadius: BorderRadius.circular(12),
          ),
        ),
      ),
      // Card configuration
      cardTheme: CardTheme(
        elevation: 2,
        shape: RoundedRectangleBorder(
          borderRadius: BorderRadius.circular(16),
        ),
      ),
    );
  }

  /// Material 3 dark theme.
  static ThemeData get darkTheme {
    final colorScheme = ColorScheme.fromSeed(
      seedColor: _primaryColor,
      brightness: Brightness.dark,
    );

    return ThemeData(
      useMaterial3: true,
      colorScheme: colorScheme,
      textTheme: GoogleFonts.interTextTheme(
        ThemeData.dark().textTheme,
      ),
      appBarTheme: AppBarTheme(
        centerTitle: true,
        elevation: 0,
        backgroundColor: colorScheme.surface,
        foregroundColor: colorScheme.onSurface,
      ),
      inputDecorationTheme: InputDecorationTheme(
        filled: true,
        fillColor: colorScheme.surfaceContainerHighest.withOpacity(0.5),
        border: OutlineInputBorder(
          borderRadius: BorderRadius.circular(12),
          borderSide: BorderSide.none,
        ),
        enabledBorder: OutlineInputBorder(
          borderRadius: BorderRadius.circular(12),
          borderSide: BorderSide.none,
        ),
        focusedBorder: OutlineInputBorder(
          borderRadius: BorderRadius.circular(12),
          borderSide: BorderSide(color: colorScheme.primary, width: 2),
        ),
        errorBorder: OutlineInputBorder(
          borderRadius: BorderRadius.circular(12),
          borderSide: BorderSide(color: colorScheme.error),
        ),
        contentPadding: const EdgeInsets.symmetric(
          horizontal: 16,
          vertical: 16,
        ),
      ),
      filledButtonTheme: FilledButtonThemeData(
        style: FilledButton.styleFrom(
          minimumSize: const Size(double.infinity, 52),
          shape: RoundedRectangleBorder(
            borderRadius: BorderRadius.circular(12),
          ),
        ),
      ),
      outlinedButtonTheme: OutlinedButtonThemeData(
        style: OutlinedButton.styleFrom(
          minimumSize: const Size(double.infinity, 52),
          shape: RoundedRectangleBorder(
            borderRadius: BorderRadius.circular(12),
          ),
        ),
      ),
      cardTheme: CardTheme(
        elevation: 2,
        shape: RoundedRectangleBorder(
          borderRadius: BorderRadius.circular(16),
        ),
      ),
    );
  }
}
ColorScheme.fromSeed genera automaticamente una palette completa e accessibile a partire da un singolo colore.
Configurazione dell'applicazione
Il punto di ingresso dell'applicazione inizializza Riverpod e configura i temi.
import 'package:flutter/material.dart';
import 'package:flutter_riverpod/flutter_riverpod.dart';
import 'app.dart';

void main() {
  // Ensure Flutter bindings are initialized
  WidgetsFlutterBinding.ensureInitialized();

  // Launch application with Riverpod scope
  runApp(
    const ProviderScope(
      child: App(),
    ),
  );
}import 'package:flutter/material.dart';
import 'package:flutter_riverpod/flutter_riverpod.dart';
import 'core/theme/app_theme.dart';
import 'routing/app_router.dart';
/// Root application widget.
class App extends ConsumerWidget {
const App({super.key});
Widget build(BuildContext context, WidgetRef ref) {
// Get configured router
final router = ref.watch(routerProvider);
return MaterialApp.router(
title: 'My Flutter App',
debugShowCheckedModeBanner: false,
// Theme configuration
theme: AppTheme.lightTheme,
darkTheme: AppTheme.darkTheme,
themeMode: ThemeMode.system,
// Router configuration
routerConfig: router,
);
}
}ThemeMode.system adatta automaticamente il tema alle preferenze dell'utente.
Conclusione
Flutter fornisce un ecosistema completo per costruire applicazioni multipiattaforma ad alte prestazioni. La combinazione di widget dichiarativi, Riverpod per la gestione dello stato e GoRouter per la navigazione permette di costruire applicazioni manutenibili e scalabili.
Checklist per iniziare con Flutter
- ✅ Installare l'SDK Flutter e configurare l'ambiente con
flutter doctor - ✅ Strutturare il progetto per feature per una migliore organizzazione
- ✅ Usare Riverpod per una gestione dello stato tipizzata e sicura
- ✅ Configurare GoRouter con reindirizzamenti di autenticazione
- ✅ Creare widget riutilizzabili e componibili
- ✅ Implementare un tema Material 3 coerente
- ✅ Centralizzare le chiamate HTTP con Dio e interceptor
Inizia a praticare!
Metti alla prova le tue conoscenze con i nostri simulatori di colloquio e test tecnici.
L'approccio dichiarativo di Flutter favorisce la composizione e il riutilizzo. Ogni widget puo essere testato in modo indipendente, e l'hot-reload accelera significativamente il ciclo di sviluppo. Questa solida base permette di estendere l'applicazione verso funzionalita avanzate come animazioni complesse, testing automatizzato e pubblicazione sugli store.
Tag
Condividi
Articoli correlati
Le 20 Domande più Frequenti nei Colloqui Flutter per Sviluppatori Mobile
Preparazione ai colloqui Flutter con le 20 domande più frequenti. Widget, gestione dello stato, Dart, architettura e best practice spiegate nel dettaglio con esempi di codice.

Flutter e Firebase nel 2026: Autenticazione, Firestore e Domande da Colloquio
Guida completa all'integrazione di Firebase in Flutter: autenticazione email/Google, operazioni CRUD su Firestore, real-time streams, sicurezza e pattern architetturali per il 2026.
Gestione dello Stato in Flutter: Riverpod vs BLoC - Guida Comparativa Completa
Confronto dettagliato tra Riverpod e BLoC per la gestione dello stato in Flutter. Architettura, prestazioni, testabilità e casi d'uso per scegliere la soluzione migliore.