DjangoとPythonの面接質問:2026年版トップ25
DjangoとPythonの面接で最も頻出する25の質問を解説します。ORM、ビュー、ミドルウェア、Django REST Framework、シグナル、パフォーマンス最適化について、詳細な回答とコード例を掲載しています。

Djangoの面接では、PythonのWebフレームワークとしての習熟度、ORMの理解、MVTアーキテクチャの知識、そして堅牢なREST APIを構築する能力が問われます。本記事では、Djangoの基礎からDjango REST Frameworkの高度なパターンまで、最も頻出する25の質問を取り上げます。
Djangoのアーキテクチャ上の設計判断を説明できる候補者は、面接官から高い評価を受けます。フレームワークが特定の規約を採用している理由(設定より規約)を理解することが、面接での大きな差別化要因となります。
Djangoの基礎
質問1:DjangoのMVTアーキテクチャについて説明してください
Model-View-Template(MVT)アーキテクチャは、DjangoにおけるMVCパターンの変形です。フレームワークがコントローラー部分を自動的に処理するため、開発が簡素化されます。
# models.py
# The Model represents data structure and business logic
from django.db import models

class Article(models.Model):
    title = models.CharField(max_length=200)
    content = models.TextField()
    published_at = models.DateTimeField(auto_now_add=True)
    author = models.ForeignKey(
        "auth.User",
        on_delete=models.CASCADE,  # Deletes articles when author is deleted
        related_name="articles"     # Reverse access: user.articles.all()
    )

    class Meta:
        ordering = ["-published_at"]  # Default ordering

    def __str__(self):
return self.title# views.py
# The View contains request processing logic
from django.shortcuts import render, get_object_or_404
def article_detail(request, pk):
# get_object_or_404 raises Http404 if the object doesn't exist
article = get_object_or_404(Article, pk=pk)
return render(request, "blog/article_detail.html", {"article": article})MVTでは、Djangoがurls.pyを介してURLを適切なビューにルーティングすることで、コントローラーの役割を果たします。TemplateはHTMLのプレゼンテーションを担当します。
質問2:DjangoのプロジェクトとAppの違いは何ですか?
プロジェクトは全体の設定(settings、ルートURL、WSGI/ASGI)を指します。Appは単一の責務を持つ再利用可能なモジュールです。プロジェクトは複数のAppを含みます。
# Creating a project and an app
# django-admin startproject myproject
# python manage.py startapp blog

# settings.py
# Registering apps in the project
INSTALLED_APPS = [
    "django.contrib.admin",       # Admin interface
    "django.contrib.auth",        # Authentication
    "django.contrib.contenttypes",
    "django.contrib.sessions",
    "django.contrib.messages",
    "django.contrib.staticfiles",
    # Custom apps
    "blog.apps.BlogConfig",       # Blog app
    "users.apps.UsersConfig",     # Users app
]
各Appは単一責任の原則に従い、異なるプロジェクト間で再利用できます。
質問3:Djangoのリクエストライフサイクルを説明してください
リクエストはビューに到達する前に複数のレイヤーを通過します。このサイクルを理解することは、デバッグと最適化に不可欠です。
# middleware.py
# Middlewares intercept every request/response
class RequestTimingMiddleware:
    """Middleware that measures processing time."""

    def __init__(self, get_response):
        self.get_response = get_response  # Reference to the next middleware

    def __call__(self, request):
        import time
        start = time.time()

        # Request phase: before the view
        response = self.get_response(request)

        # Response phase: after the view
        duration = time.time() - start
        response["X-Request-Duration"] = f"{duration:.3f}s"
        return response
完全なサイクルは次の通りです:HTTPリクエスト → WSGI/ASGI → ミドルウェア(process_request) → URLリゾルバー → ビュー → ミドルウェア(process_response) → HTTPレスポンス。
ORMとデータベース
質問4:DjangoのQuerySetの仕組みと遅延評価について説明してください
QuerySetは遅延評価されます。データが実際に使用されるまで、SQLクエリは実行されません。
# queryset_lazy.py
# Demonstrating QuerySet lazy loading

# No SQL query executed here
qs = Article.objects.filter(published=True)  # No query
qs = qs.exclude(title="Draft")               # Still none
qs = qs.order_by("-created_at")              # Still none

# The SQL query runs ONLY here
for article in qs:  # ONE combined SQL query
    print(article.title)

# Other evaluation triggers
list(qs)        # Converting to list
qs[0]           # Index access
len(qs)         # Counting (prefer qs.count())
bool(qs)        # Existence check (prefer qs.exists())
この遅延評価により、オーバーヘッドなしにフィルターをチェーンでき、最終的に1つの最適化されたクエリのみが実行されます。
質問5:N+1問題とその解決方法について説明してください
N+1問題は、メインクエリがリレーションの読み込みのためにN個の追加クエリを生成する場合に発生します。Djangoアプリケーションにおける速度低下の最も一般的な原因です。
# n_plus_one.py
# N+1 problem and solutions

# ❌ PROBLEM: N+1 queries
# 1 query for articles + 1 query PER article for the author
articles = Article.objects.all()
for article in articles:
    print(article.author.username)  # SQL query on every iteration!

# ✅ SOLUTION 1: select_related (ForeignKey, OneToOne)
# Joins tables in ONE SQL query (JOIN)
articles = Article.objects.select_related("author").all()
for article in articles:
    print(article.author.username)  # No additional query

# ✅ SOLUTION 2: prefetch_related (ManyToMany, reverse FK)
# Executes 2 separate queries + Python assembly
articles = Article.objects.prefetch_related("tags").all()
for article in articles:
    print(article.tags.all())  # Data already cached

# ✅ SOLUTION 3: Custom Prefetch with filtering
from django.db.models import Prefetch

articles = Article.objects.prefetch_related(
    Prefetch(
        "comments",
        queryset=Comment.objects.filter(approved=True).select_related("user"),
        to_attr="approved_comments"  # Custom attribute
    )
)ForeignKey/OneToOneリレーションにはselect_related(SQL JOIN)を、ManyToManyやリバースリレーションにはprefetch_related(別々のクエリ)を使用します。
質問6:カスタムManagerの作成方法と使い分けについて説明してください
カスタムManagerは、モデルレベルで頻出クエリをカプセル化し、コードの可読性と再利用性を向上させます。
# managers.py
# Custom Managers and QuerySets

class PublishedQuerySet(models.QuerySet):
    """Reusable QuerySet for published articles."""

    def published(self):
        return self.filter(status="published", published_at__lte=timezone.now())

    def by_author(self, user):
        return self.filter(author=user)

    def popular(self):
        return self.annotate(
            comment_count=models.Count("comments")
        ).order_by("-comment_count")


class PublishedManager(models.Manager):
    """Manager that exposes only published articles."""

    def get_queryset(self):
        return PublishedQuerySet(self.model, using=self._db).published()


class Article(models.Model):
    # ...
    objects = models.Manager()          # Default manager (all articles)
    published = PublishedManager()      # Custom manager (published only)

    # Usage:
    # Article.objects.all()             → All articles
    # Article.published.all()           → Published articles only
    # Article.published.popular()       → Published articles sorted by popularity
カスタムManagerはDRY原則に従い、クエリロジックを一元化します。
Djangoの面接対策はできていますか?
インタラクティブなシミュレーター、flashcards、技術テストで練習しましょう。
ビューとURL
質問7:クラスベースビューと関数ベースビューの使い分けについて説明してください
関数ベースビュー(FBV)はシンプルさと明示的な制御を提供します。クラスベースビュー(CBV)は継承による再利用性と構造化をもたらします。
# views_comparison.py
# FBV: Explicit, simple, easy to understand
from django.http import JsonResponse
from django.views.decorators.http import require_http_methods

@require_http_methods(["GET", "POST"])
def article_list(request):
    if request.method == "GET":
        articles = Article.published.all()
        return render(request, "articles/list.html", {"articles": articles})

    # POST: article creation
    form = ArticleForm(request.POST)
    if form.is_valid():
        form.save()
        return redirect("article-list")
return render(request, "articles/list.html", {"form": form})# views_cbv.py
# CBV: Reusable, extensible via mixins
from django.views.generic import ListView, CreateView
from django.contrib.auth.mixins import LoginRequiredMixin
class ArticleListView(LoginRequiredMixin, ListView):
model = Article
template_name = "articles/list.html"
context_object_name = "articles" # Variable name in the template
paginate_by = 20 # Automatic pagination
def get_queryset(self):
# Override to filter published articles
return Article.published.all()
class ArticleCreateView(LoginRequiredMixin, CreateView):
model = Article
form_class = ArticleForm
success_url = reverse_lazy("article-list")
def form_valid(self, form):
form.instance.author = self.request.user # Assign the author
return super().form_valid(form)実用的なルール:シンプルまたは非標準的なロジックにはFBVを、標準的なCRUD操作にはCBVを使用します。
質問8:Djangoのミドルウェアの仕組みについて説明してください
ミドルウェアは、すべてのリクエスト/レスポンスを処理するフックです。各ミドルウェアは処理サイクルの異なるフェーズで介入できます。
# auth_middleware.py
# Custom authentication middleware
import jwt
from django.conf import settings
from django.http import JsonResponse

class JWTAuthenticationMiddleware:
    """Verifies JWT token on protected endpoints."""

    EXEMPT_PATHS = ["/api/auth/login", "/api/auth/register", "/health"]

    def __init__(self, get_response):
        self.get_response = get_response

    def __call__(self, request):
        # Skip exempt paths
        if any(request.path.startswith(p) for p in self.EXEMPT_PATHS):
            return self.get_response(request)

        # Extract and verify the token
        auth_header = request.headers.get("Authorization", "")
        if not auth_header.startswith("Bearer "):
            return JsonResponse({"error": "Missing token"}, status=401)

        try:
            token = auth_header.split(" ")[1]
            payload = jwt.decode(token, settings.SECRET_KEY, algorithms=["HS256"])
            request.user_id = payload["user_id"]  # Attach to request
        except jwt.ExpiredSignatureError:
            return JsonResponse({"error": "Token expired"}, status=401)
        except jwt.InvalidTokenError:
            return JsonResponse({"error": "Invalid token"}, status=401)

return self.get_response(request)MIDDLEWAREでのミドルウェアの順序は極めて重要です。リクエストは上から下へ、レスポンスは下から上へ実行されます。
Django REST Framework
質問9:SerializerとModelSerializerの違いは何ですか?
Serializerは各フィールドを手動で定義しますが、ModelSerializerはモデルからフィールドを自動生成します。
# serializers.py
from rest_framework import serializers

# Manual Serializer: full control over each field
class ArticleSerializer(serializers.Serializer):
    id = serializers.IntegerField(read_only=True)
    title = serializers.CharField(max_length=200)
    content = serializers.CharField()
    author_name = serializers.SerializerMethodField()

    def get_author_name(self, obj):
        return obj.author.get_full_name()

    def create(self, validated_data):
        return Article.objects.create(**validated_data)

    def update(self, instance, validated_data):
        instance.title = validated_data.get("title", instance.title)
        instance.content = validated_data.get("content", instance.content)
        instance.save()
        return instance


# ModelSerializer: automatic field generation
class ArticleModelSerializer(serializers.ModelSerializer):
    author_name = serializers.SerializerMethodField()
    comment_count = serializers.IntegerField(read_only=True)

    class Meta:
        model = Article
        fields = ["id", "title", "content", "author", "author_name",
                  "comment_count", "published_at"]
        read_only_fields = ["published_at"]

    def get_author_name(self, obj):
return obj.author.get_full_name()標準的なケースではModelSerializerを、表現がモデルと大きく異なる場合はSerializerを使用します。
質問10:DRFでページネーションを実装する方法を説明してください
DRFは、グローバルまたはビューごとに設定可能な複数のページネーション戦略を提供しています。
# settings.py
# Global pagination configuration
REST_FRAMEWORK = {
    "DEFAULT_PAGINATION_CLASS": "rest_framework.pagination.PageNumberPagination",
    "PAGE_SIZE": 20,
}

# pagination.py
# Custom pagination per view
from rest_framework.pagination import CursorPagination, LimitOffsetPagination

class ArticleCursorPagination(CursorPagination):
    """Cursor pagination: performant for large datasets."""
    page_size = 20
    ordering = "-published_at"  # Indexed field required
    cursor_query_param = "cursor"

class ArticleLimitOffsetPagination(LimitOffsetPagination):
    """Offset/limit pagination: flexible but less performant."""
    default_limit = 20
    max_limit = 100

# views.py
class ArticleViewSet(viewsets.ModelViewSet):
    queryset = Article.published.all()
    serializer_class = ArticleModelSerializer
    pagination_class = ArticleCursorPagination  # View-specific pagination
大規模データセットにはカーソルページネーションが推奨されます。OFFSET/LIMITとは異なり、ページ番号に関係なく一定のパフォーマンスを維持します。
質問11:DRFのパーミッションでAPIを保護する方法を説明してください
DRFは、認証ときめ細かな認可を組み合わせたモジュラーなパーミッションシステムを提供しています。
# permissions.py
from rest_framework.permissions import BasePermission, IsAuthenticated

class IsAuthorOrReadOnly(BasePermission):
    """Only the author can modify, everyone can read."""

    def has_object_permission(self, request, view, obj):
        # GET, HEAD, OPTIONS are always allowed
        if request.method in ("GET", "HEAD", "OPTIONS"):
            return True
        # Only the author can modify or delete
        return obj.author == request.user


class IsAdminOrManager(BasePermission):
    """Access restricted to admins and managers."""

    def has_permission(self, request, view):
        return (
            request.user.is_authenticated
            and request.user.role in ("admin", "manager")
        )


# views.py
from rest_framework.viewsets import ModelViewSet
from rest_framework.throttling import UserRateThrottle

class ArticleViewSet(ModelViewSet):
    permission_classes = [IsAuthenticated, IsAuthorOrReadOnly]
    throttle_classes = [UserRateThrottle]  # Rate limiting

    def get_permissions(self):
        # Dynamic permissions based on action
        if self.action == "destroy":
            return [IsAdminOrManager()]
return super().get_permissions()ビューレベルのpermission_classesとオブジェクトレベルのhas_object_permissionを組み合わせて、きめ細かなアクセス制御を実現します。
シグナルと非同期タスク
質問12:Djangoシグナルの仕組みと使用場面について説明してください
シグナルにより、フレームワークやアプリケーションのイベントに反応してコンポーネントを疎結合にできます。
# signals.py
from django.db.models.signals import post_save, pre_delete
from django.dispatch import receiver
from django.core.mail import send_mail

@receiver(post_save, sender=Article)
def notify_on_publish(sender, instance, created, **kwargs):
    """Sends a notification when an article is published."""
    if not created and instance.status == "published":
        # Triggered only on publication (not creation)
        subscribers = instance.author.subscribers.values_list("email", flat=True)
        send_mail(
            subject=f"New article: {instance.title}",
            message=f"Check out the latest article by {instance.author.username}",
            from_email="noreply@example.com",
            recipient_list=list(subscribers),
        )

@receiver(pre_delete, sender=Article)
def cleanup_article_files(sender, instance, **kwargs):
    """Deletes associated files before article deletion."""
    if instance.cover_image:
        instance.cover_image.delete(save=False)  # Deletes the physical file
シグナルは軽量な副作用(ログ記録、キャッシュ無効化)に適しています。重い処理にはCeleryを使用してください。
質問13:DjangoにCeleryを統合して非同期タスクを実行する方法を説明してください
Celeryはバックグラウンドタスクの実行を可能にし、メール送信やファイル処理などの長時間実行される操作に不可欠です。
# celery_config.py
# Celery configuration in the Django project
import os
from celery import Celery

os.environ.setdefault("DJANGO_SETTINGS_MODULE", "myproject.settings")

app = Celery("myproject")
app.config_from_object("django.conf:settings", namespace="CELERY")
app.autodiscover_tasks()  # Discovers tasks.py in each app

# tasks.py
from celery import shared_task
from django.core.mail import send_mass_mail

@shared_task(bind=True, max_retries=3, default_retry_delay=60)
def send_newsletter(self, article_id):
    """Sends newsletter asynchronously."""
    try:
        article = Article.objects.get(id=article_id)
        subscribers = User.objects.filter(newsletter=True)

        messages = [
            (f"New: {article.title}", article.content[:200],
             "noreply@example.com", [sub.email])
            for sub in subscribers
        ]
        send_mass_mail(messages, fail_silently=False)
    except Article.DoesNotExist:
        pass  # Article was deleted in the meantime
    except Exception as exc:
        self.retry(exc=exc)  # Automatic retry on error

# Calling from a view
# send_newsletter.delay(article.id)  # Async execution
# send_newsletter.apply_async(args=[article.id], countdown=300)  # 5-min delay
Celeryは、HTTPレスポンスをブロックすべきでないあらゆる操作に対して、本番環境で不可欠です。
セキュリティと認証
質問14:DjangoはCSRF攻撃からどのように保護しますか?
DjangoにはCSRF保護機能が組み込まれており、すべてのPOSTリクエストで一意のトークンを検証するミドルウェアによって実現されています。
# CSRF protection in forms
# The {% csrf_token %} template tag generates a hidden field

# For APIs (DRF), CSRF is often disabled in favor of tokens
# settings.py
REST_FRAMEWORK = {
    "DEFAULT_AUTHENTICATION_CLASSES": [
        "rest_framework.authentication.SessionAuthentication",  # Includes CSRF
        "rest_framework.authentication.TokenAuthentication",     # No CSRF
    ],
}

# For AJAX views with session auth
# The csrftoken cookie must be sent in the X-CSRFToken header# csrf_exemption.py
# Exempting a specific view (use with caution)
from django.views.decorators.csrf import csrf_exempt, ensure_csrf_cookie
@ensure_csrf_cookie
def get_csrf_token(request):
"""Endpoint that forces sending the CSRF cookie to the client."""
return JsonResponse({"detail": "CSRF cookie set"})
@csrf_exempt # ⚠️ Use only for external webhooks
def stripe_webhook(request):
"""Stripe webhook - authenticated by signature, not CSRF."""
payload = request.body
sig_header = request.headers.get("Stripe-Signature")
# Verified by Stripe signature insteadCSRFをグローバルに無効化してはなりません。csrf_exemptは、他の手段で認証されるエンドポイント(Webhook、APIトークン)にのみ使用します。
質問15:Djangoでカスタム認証を実装する方法を説明してください
Djangoでは、デフォルトのUserモデルを置き換え、認証バックエンドをカスタマイズできます。
# models.py
from django.contrib.auth.models import AbstractBaseUser, BaseUserManager, PermissionsMixin

class CustomUserManager(BaseUserManager):
    """Manager for the custom User model."""

    def create_user(self, email, password=None, **extra_fields):
        if not email:
            raise ValueError("Email is required")
        email = self.normalize_email(email)  # Normalizes the domain
        user = self.model(email=email, **extra_fields)
        user.set_password(password)  # Hashes the password
        user.save(using=self._db)
        return user

    def create_superuser(self, email, password=None, **extra_fields):
        extra_fields.setdefault("is_staff", True)
        extra_fields.setdefault("is_superuser", True)
        return self.create_user(email, password, **extra_fields)


class CustomUser(AbstractBaseUser, PermissionsMixin):
    email = models.EmailField(unique=True)          # Login by email
    username = models.CharField(max_length=30, blank=True)
    is_active = models.BooleanField(default=True)
    is_staff = models.BooleanField(default=False)
    date_joined = models.DateTimeField(auto_now_add=True)

    objects = CustomUserManager()

    USERNAME_FIELD = "email"      # Field used for login
    REQUIRED_FIELDS = []          # Fields required in addition to USERNAME_FIELD

# settings.py
AUTH_USER_MODEL = "users.CustomUser" # Before the first migration!AUTH_USER_MODELはプロジェクトの最初に定義する必要があります。初回マイグレーション後の変更は複雑でリスクが伴います。
パフォーマンスの最適化
質問16:Django ORMクエリを最適化する方法を説明してください
クエリの最適化はパフォーマンスにとって極めて重要です。SQLクエリの数とコストを削減するための複数のテクニックがあります。
# query_optimization.py
from django.db.models import F, Q, Count, Avg, Prefetch

# 1. Only/Defer: load only needed fields
articles = Article.objects.only("title", "published_at")  # SELECT title, published_at
heavy_articles = Article.objects.defer("content")          # Everything EXCEPT content

# 2. SQL-level aggregations (not Python)
stats = Article.objects.aggregate(
    total=Count("id"),
    avg_views=Avg("view_count"),
)

# 3. F() expressions: SQL-level operations
Article.objects.filter(published=True).update(
    view_count=F("view_count") + 1  # Atomic SQL increment
)

# 4. Q() objects: complex queries
results = Article.objects.filter(
    Q(title__icontains="django") | Q(tags__name="python"),
    ~Q(status="draft"),  # NOT draft
    published_at__year=2026
)

# 5. Bulk operations: reduce INSERT/UPDATE queries
articles = [Article(title=f"Article {i}") for i in range(100)]
Article.objects.bulk_create(articles, batch_size=50)  # 2 queries instead of 100

Article.objects.filter(status="draft").update(status="archived") # 1 query開発環境ではdjango-debug-toolbarを使用して、遅いクエリやN+1問題を特定してください。
質問17:Djangoでキャッシュを実装する方法を説明してください
Djangoは、ビュー単位、テンプレートフラグメント単位、または任意のデータに対するマルチレベルのキャッシュフレームワークを提供しています。
# settings.py
CACHES = {
    "default": {
        "BACKEND": "django.core.cache.backends.redis.RedisCache",
        "LOCATION": "redis://127.0.0.1:6379/1",
    }
}

# cache_strategies.py
from django.core.cache import cache
from django.views.decorators.cache import cache_page
from django.utils.decorators import method_decorator

# Per-view cache: caches the entire HTTP response
@cache_page(60 * 15)  # 15 minutes
def article_list(request):
    return render(request, "articles/list.html", {"articles": Article.published.all()})

# Data cache: granular control
def get_popular_articles():
    cache_key = "popular_articles_v1"
    articles = cache.get(cache_key)

    if articles is None:
        articles = list(
            Article.published.popular()[:10].values("id", "title", "view_count")
        )
        cache.set(cache_key, articles, timeout=60 * 30)  # 30 min

    return articles

# Cache invalidation
def invalidate_article_cache(article_id):
    cache.delete(f"article_{article_id}")
    cache.delete("popular_articles_v1")
    cache.delete_pattern("article_list_*")  # With django-redis
本番環境のキャッシュバックエンドとしては、永続性と高度な機能(パターン、TTL)を備えたRedisが推奨されます。
Djangoの面接対策はできていますか?
インタラクティブなシミュレーター、flashcards、技術テストで練習しましょう。
マイグレーションとデータベース管理
質問18:Djangoで複雑なマイグレーションを扱う方法を説明してください
Djangoのマイグレーションは、データベーススキーマの変更をバージョン管理可能で再現可能な方法で管理します。
# 0005_migrate_data.py
# Custom data migration
from django.db import migrations

def migrate_user_roles(apps, schema_editor):
    """Converts is_admin booleans to text roles."""
    User = apps.get_model("users", "CustomUser")
    # Use apps.get_model() to access the historical model
    User.objects.filter(is_admin=True).update(role="admin")
    User.objects.filter(is_admin=False, is_staff=True).update(role="manager")
    User.objects.filter(is_admin=False, is_staff=False).update(role="user")

def reverse_migrate(apps, schema_editor):
    """Reverse migration for rollback."""
    User = apps.get_model("users", "CustomUser")
    User.objects.filter(role="admin").update(is_admin=True)

class Migration(migrations.Migration):
    dependencies = [
        ("users", "0004_add_role_field"),
    ]

    operations = [
        migrations.RunPython(migrate_user_roles, reverse_migrate),
]ロールバックを可能にするため、常にreverse関数を提供してください。デプロイ前に本番データベースのコピーでマイグレーションをテストすることが重要です。
質問19:パフォーマンス最適化のためのカスタムインデックスの作成方法を説明してください
インデックスは頻繁なクエリを高速化しますが、書き込みコストが増加します。慎重な選択が不可欠です。
# models.py
class Article(models.Model):
    title = models.CharField(max_length=200)
    slug = models.SlugField(unique=True)
    status = models.CharField(max_length=20, db_index=True)  # Simple index
    published_at = models.DateTimeField(null=True)
    author = models.ForeignKey("auth.User", on_delete=models.CASCADE)

    class Meta:
        indexes = [
            # Composite index for frequent queries
            models.Index(fields=["status", "-published_at"], name="idx_status_date"),
            # Partial index: only published articles
            models.Index(
                fields=["published_at"],
                condition=models.Q(status="published"),
                name="idx_published_articles"
            ),
            # GIN index for full-text search (PostgreSQL)
            GinIndex(fields=["search_vector"], name="idx_search"),
        ]
複合インデックスはカラムの順序が重要です。最も選択性の高いフィールドを先頭に配置します。
テストと品質
質問20:Djangoプロジェクトでテストを構成する方法を説明してください
Djangoはunittestベースの堅牢なテストフレームワークを提供しており、pytest-djangoによってさらに柔軟性が向上します。
# tests/test_views.py
from django.test import TestCase, Client
from django.urls import reverse
from rest_framework.test import APITestCase, APIClient

class ArticleViewTests(TestCase):
    """View tests with Django's test client."""

    def setUp(self):
        self.client = Client()
        self.user = CustomUser.objects.create_user(
            email="test@example.com", password="testpass123"
        )
        self.article = Article.objects.create(
            title="Test Article",
            content="Content here",
            author=self.user,
            status="published"
        )

    def test_article_list_returns_200(self):
        response = self.client.get(reverse("article-list"))
        self.assertEqual(response.status_code, 200)
        self.assertContains(response, "Test Article")

    def test_create_article_requires_auth(self):
        response = self.client.post(reverse("article-create"), {"title": "New"})
        self.assertEqual(response.status_code, 302)  # Redirects to login


class ArticleAPITests(APITestCase):
    """REST API tests with DRF."""

    def setUp(self):
        self.user = CustomUser.objects.create_user(
            email="api@example.com", password="testpass123"
        )
        self.client = APIClient()
        self.client.force_authenticate(user=self.user)

    def test_create_article_via_api(self):
        data = {"title": "API Article", "content": "Created via API"}
        response = self.client.post("/api/articles/", data, format="json")
        self.assertEqual(response.status_code, 201)
self.assertEqual(Article.objects.count(), 1)テストはドメインごとにファイルを分割します:test_models.py、test_views.py、test_serializers.py、test_services.py。
質問21:テストにおけるフィクスチャとファクトリーの使い方を説明してください
ファクトリー(factory_boy使用)は、テストデータの柔軟性と保守性の観点からJSONフィクスチャよりも推奨されます。
# factories.py
import factory
from factory.django import DjangoModelFactory

class UserFactory(DjangoModelFactory):
    class Meta:
        model = CustomUser

    email = factory.Sequence(lambda n: f"user{n}@example.com")
    username = factory.Faker("user_name")
    is_active = True

class ArticleFactory(DjangoModelFactory):
    class Meta:
        model = Article

    title = factory.Faker("sentence", nb_words=5)
    content = factory.Faker("paragraphs", nb=3)
    author = factory.SubFactory(UserFactory)  # Creates a user automatically
    status = "published"

    class Params:
        draft = factory.Trait(status="draft", published_at=None)

# tests.py
def test_published_articles_count(self):
    ArticleFactory.create_batch(5)              # 5 published articles
    ArticleFactory.create_batch(3, draft=True)  # 3 drafts
    self.assertEqual(Article.published.count(), 5)
ファクトリーは一貫したテストデータを保証し、テスト間の依存関係を排除します。
高度なパターン
質問22:Django ChannelsでWebSocketを実装する方法を説明してください
Django Channelsは、DjangoをHTTPを超えて拡張し、WebSocket、リアルタイムプロトコル、バックグラウンドタスクをサポートします。
# consumers.py
import json
from channels.generic.websocket import AsyncWebsocketConsumer

class ChatConsumer(AsyncWebsocketConsumer):
    """WebSocket consumer for real-time chat."""

    async def connect(self):
        self.room_name = self.scope["url_route"]["kwargs"]["room_name"]
        self.room_group = f"chat_{self.room_name}"

        # Join the room group
        await self.channel_layer.group_add(self.room_group, self.channel_name)
        await self.accept()

    async def disconnect(self, close_code):
        # Leave the group
        await self.channel_layer.group_discard(self.room_group, self.channel_name)

    async def receive(self, text_data):
        data = json.loads(text_data)
        # Broadcast message to the entire group
        await self.channel_layer.group_send(
            self.room_group,
            {"type": "chat.message", "message": data["message"],
             "username": self.scope["user"].username}
        )

    async def chat_message(self, event):
        # Send message to the WebSocket client
        await self.send(text_data=json.dumps({
            "message": event["message"],
            "username": event["username"],
        }))
Django ChannelsはASGI(WSGIの代わり)を使用し、DaphneやUvicornなどの互換サーバーが必要です。
質問23:Djangoにおけるリポジトリパターンとサービスレイヤーパターンについて説明してください
サービスレイヤーパターンは、ビジネスロジックをビューやORMから分離し、テストと保守を容易にします。
# services/article_service.py
from django.db import transaction

class ArticleService:
    """Service encapsulating article business logic."""

    @staticmethod
    def publish_article(article_id: int, user) -> Article:
        """Publishes an article with all validations."""
        article = Article.objects.select_for_update().get(id=article_id)

        if article.author != user:
            raise PermissionError("Only the author can publish this article")
        if article.status == "published":
            raise ValueError("Article is already published")

        article.status = "published"
        article.published_at = timezone.now()
        article.save(update_fields=["status", "published_at"])

        # Side effects: notification, cache, analytics
        send_newsletter.delay(article.id)
        cache.delete("popular_articles_v1")

        return article

    @staticmethod
    @transaction.atomic
    def bulk_archive(article_ids: list[int], user) -> int:
        """Archives multiple articles in a transaction."""
        updated = Article.objects.filter(
            id__in=article_ids,
            author=user,
            status="published"
        ).update(status="archived", archived_at=timezone.now())
        return updated
サービスレイヤーはすべてのビジネスロジックのエントリーポイントです。ビューやシリアライザーはサービスに委譲し、ORMに直接アクセスしません。
質問24:環境変数とマルチ環境設定の管理方法を説明してください
設定管理は12-Factor Appの原則に従います。設定とコードの厳密な分離が求められます。
# settings/base.py
# Shared configuration across all environments
import os
from pathlib import Path
from dotenv import load_dotenv

load_dotenv()  # Loads the .env file

BASE_DIR = Path(__file__).resolve().parent.parent.parent

SECRET_KEY = os.environ["DJANGO_SECRET_KEY"]  # Required, no default value
DEBUG = os.environ.get("DEBUG", "False").lower() == "true"
ALLOWED_HOSTS = os.environ.get("ALLOWED_HOSTS", "").split(",")

DATABASES = {
    "default": {
        "ENGINE": "django.db.backends.postgresql",
        "NAME": os.environ.get("DB_NAME", "myapp"),
        "USER": os.environ.get("DB_USER", "postgres"),
        "HOST": os.environ.get("DB_HOST", "localhost"),
        "PORT": os.environ.get("DB_PORT", "5432"),
    }
}

# settings/production.py
from .base import *

DEBUG = False
SECURE_SSL_REDIRECT = True
SESSION_COOKIE_SECURE = True
CSRF_COOKIE_SECURE = True
SECURE_HSTS_SECONDS = 31536000  # 1 year
シークレットをコードにコミットしてはなりません。環境変数またはシークレットマネージャー(Vault、AWS Secrets Manager)を使用してください。
質問25:Djangoアプリケーションを本番環境にデプロイする方法を説明してください
本番デプロイには、セキュリティ、パフォーマンス、信頼性を網羅する包括的なチェックリストが必要です。
# Django deployment checklist

# 1. Built-in verification command
# python manage.py check --deploy

# 2. WSGI/ASGI configuration for production
# gunicorn.conf.py
import multiprocessing

bind = "0.0.0.0:8000"
workers = multiprocessing.cpu_count() * 2 + 1  # Recommended formula
worker_class = "gthread"           # Threaded workers
threads = 4
max_requests = 1000                # Recycle workers to avoid memory leaks
max_requests_jitter = 50
timeout = 30
accesslog = "-"                    # Logs to stdout
errorlog = "-"# docker-compose.yml (typical configuration)
# Services: web (gunicorn), db (postgres), redis (cache/celery), worker (celery)
# 3. Static files
# python manage.py collectstatic --noinput
# Serve via nginx or CDN (WhiteNoise for simple cases)
# 4. Nginx configuration
# - Proxy to gunicorn on port 8000
# - Serve /static/ and /media/ directly
# - Enable gzip, HTTP/2, and security headers本番リリースの前に必ずpython manage.py check --deployを実行してください。このコマンドは、セキュリティに関する重要な設定を検証します。
まとめ
これらの25の質問は、MVTアーキテクチャの基礎から本番デプロイのパターンまで、DjangoとPythonの面接に必要な知識を網羅しています。
面接準備チェックリスト:
- MVTアーキテクチャとリクエストライフサイクル
- ORM:QuerySet、N+1問題、select_related、prefetch_related
- Django REST Framework:シリアライザー、ページネーション、パーミッション
- セキュリティ:CSRF、認証、パーミッション
- パフォーマンス:ORM最適化、キャッシュ、インデックス
- テスト:TestCase、APITestCase、ファクトリー
- 高度なパターン:Channels、サービスレイヤー、デプロイ
それぞれの質問は、Djangoの公式ドキュメントでさらに深く掘り下げる価値があります。面接官は、フレームワークの細部を理解し、技術的な判断を根拠をもって説明できる候補者を高く評価します。
今すぐ練習を始めましょう!
面接シミュレーターと技術テストで知識をテストしましょう。
タグ
共有
関連記事
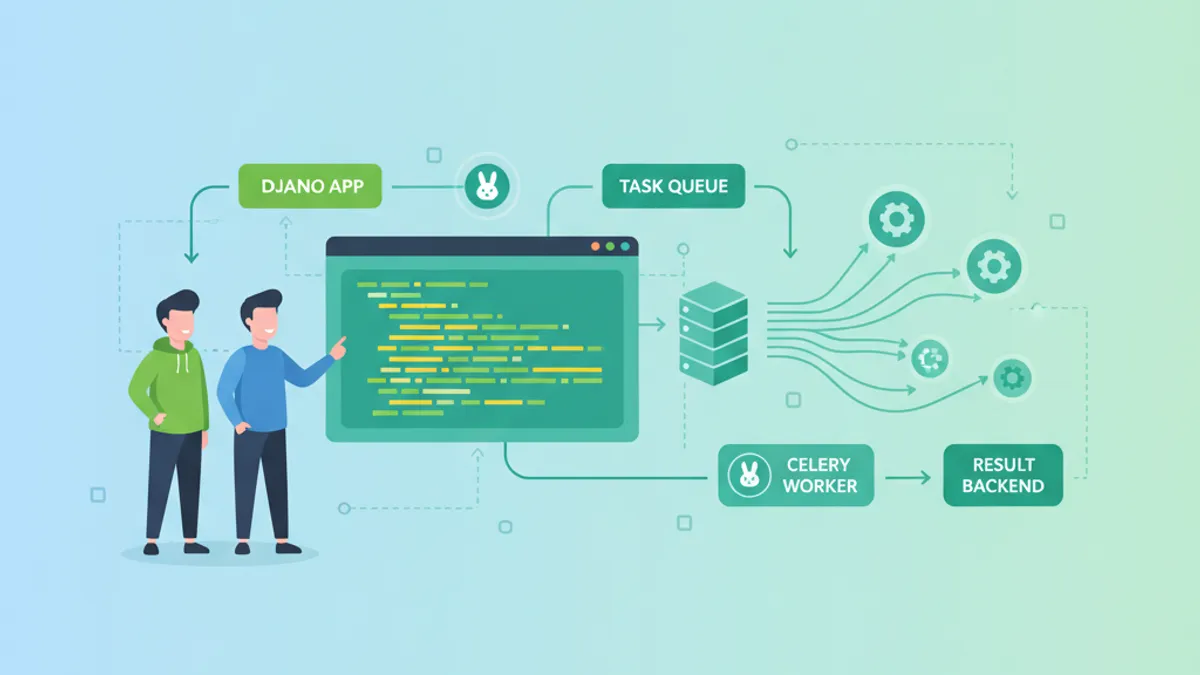
DjangoとCelery:非同期タスク処理と面接対策ガイド 2026
DjangoとCeleryを使った非同期タスク処理の実装方法を解説。タスクルーティング、Celery Beatによるスケジューリング、本番環境設定、2026年最新の技術面接質問も網羅。
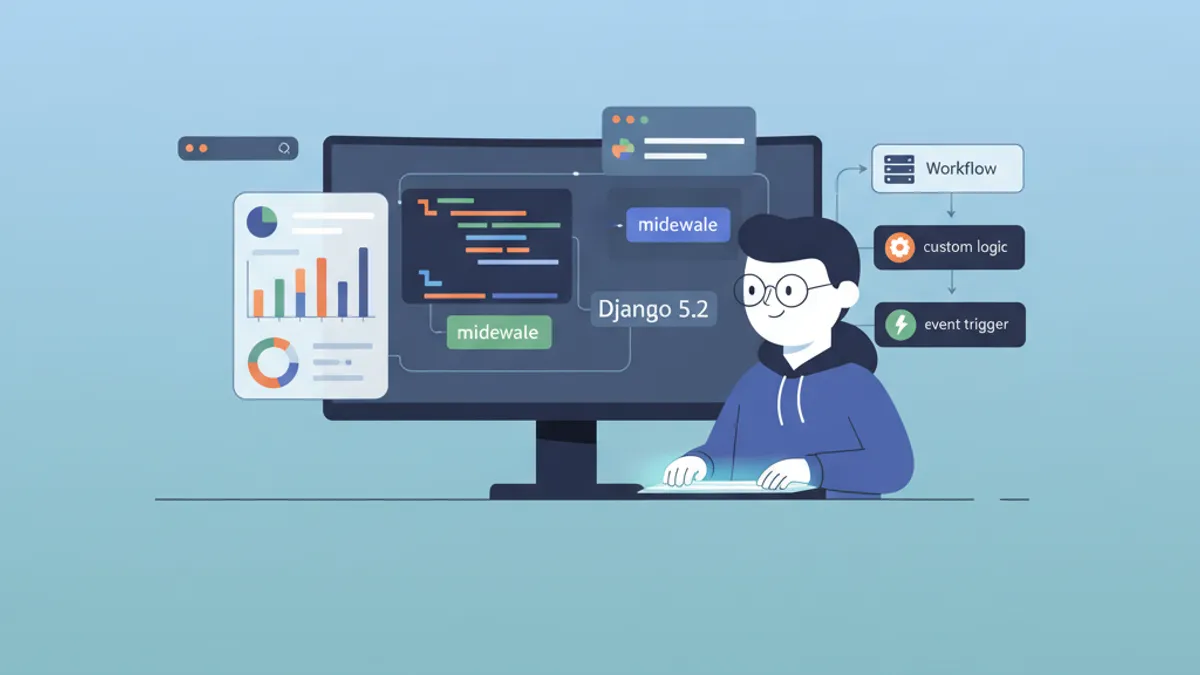
Django 5.2 カスタムミドルウェアとシグナル処理:技術面接で差をつける実践ガイド
Django 5.2のカスタムミドルウェアとシグナル処理を技術面接の観点から徹底解説。非同期ミドルウェア、カスタムシグナル、実装パターンを網羅した実践ガイドです。

Django 5: Django REST Frameworkで本格的なREST APIを構築する
Django 5とDRFを使用した本格的なREST APIの構築ガイド。シリアライザー、ViewSet、JWT認証、ベストプラクティスを実践的に解説します。